
XTAR Batteries Review: Reliable Rechargeable Batteries for Video and Audio Gear
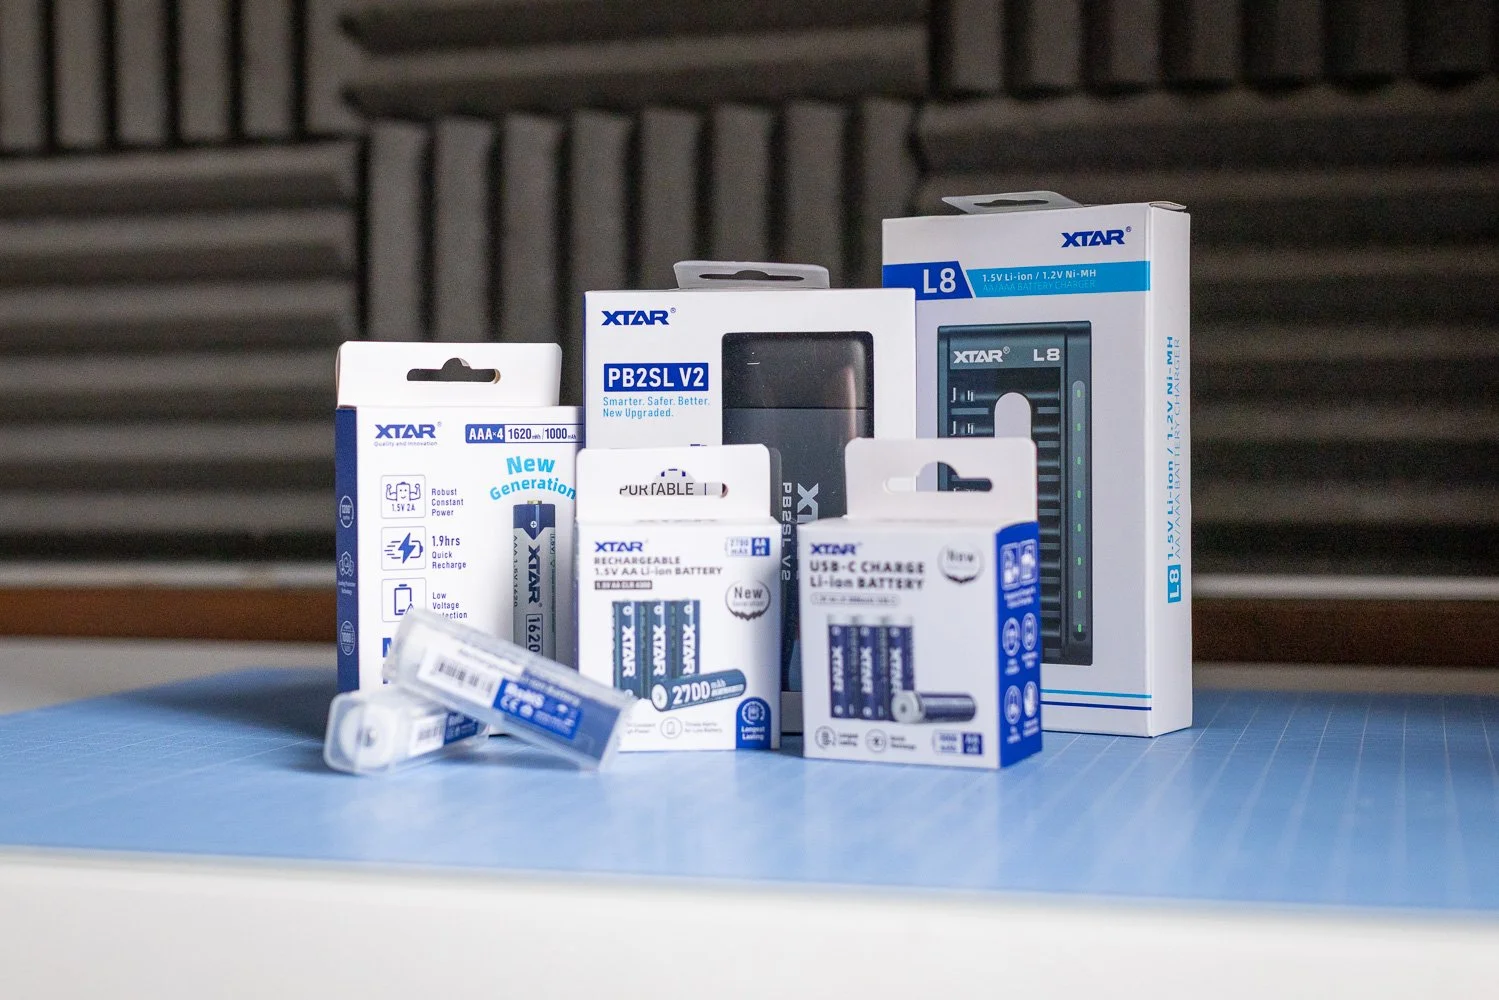
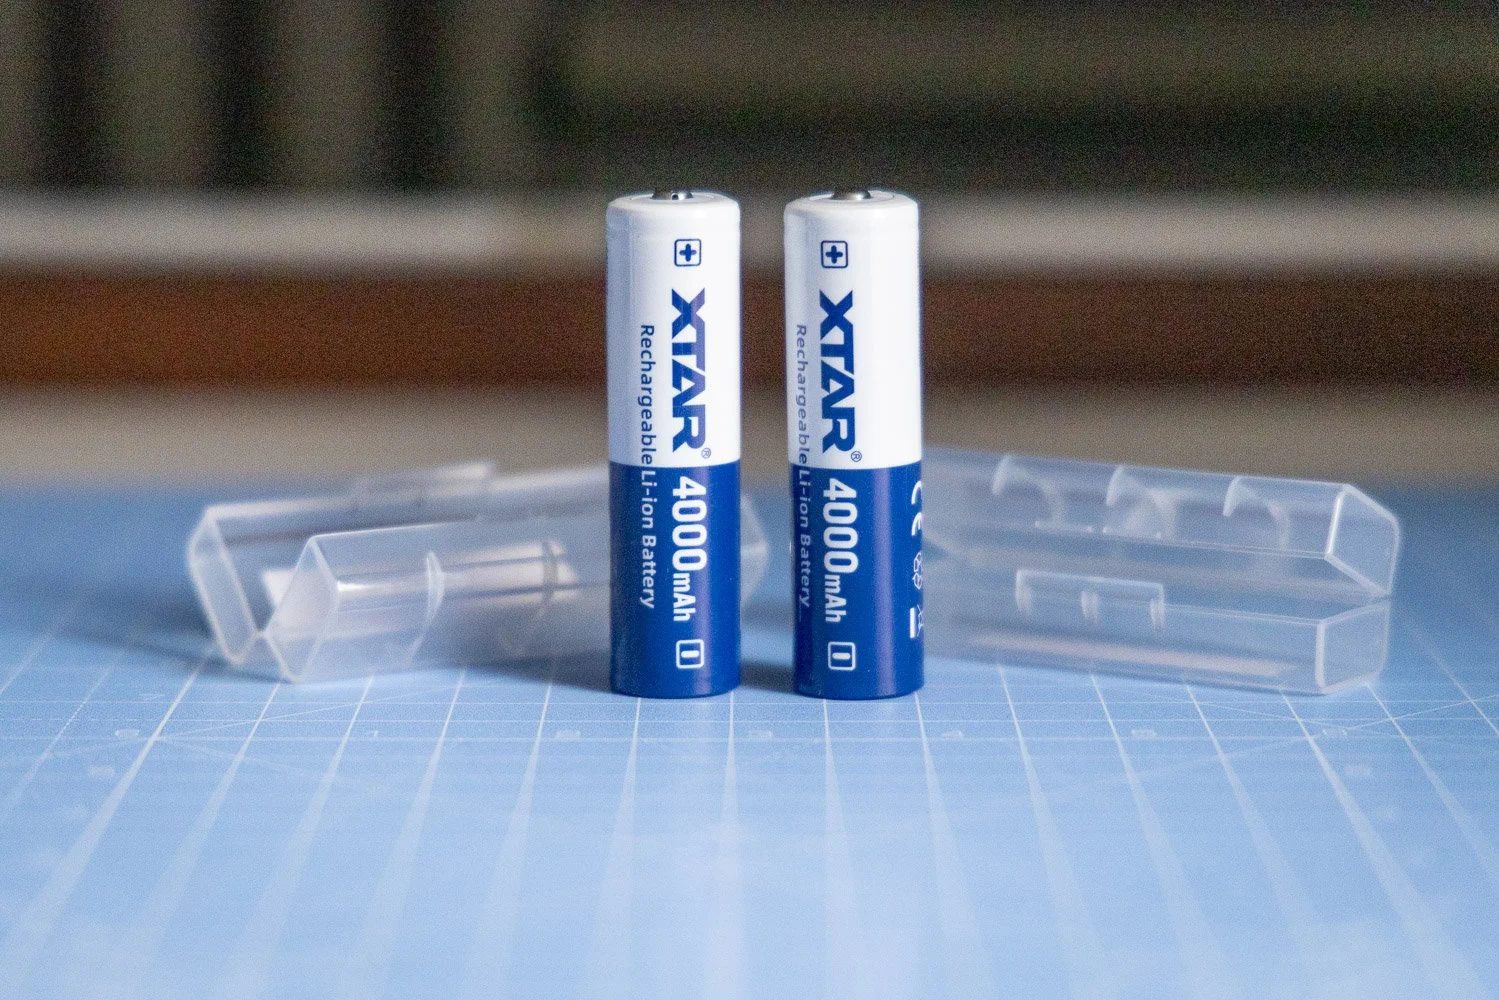
In this XTAR Batteries review, I take a closer look at the AA CLR 4300, AA LR 3000 USB-C and AAA 1620 batteries. For videographers, photographers and content creators who rely on dependable power, these are well worth considering if quality and longevity matter more than simply buying the cheapest option.
When you work in photography and videography, reliable batteries are one of those things you stop taking for granted very quickly. It does not matter how good your camera, lights or audio kit are if the batteries powering your accessories let you down halfway through a shoot.


That is where XTAR comes in. In this XTAR Batteries review, I have been looking at a selection of their rechargeable options, including the AA CLR 4300, AA LR 3000 USB-C and AAA 1620. On paper, these are clearly aimed at users who want more than a cheap off-the-shelf battery, and after spending time with them, that is exactly how they come across.
❤️ PLEASE NOTE - No AI was used to make this article. It is my own work based on my experiences and created in my own time. These items were sent to me to test by XTAR in collaboration. No further money/control was exchanged. If you would like to support the blog, consider making a small donation.
They are not the cheapest option out there, but for anyone shooting regularly and depending on consistent performance, I think that extra cost makes sense.
👀 First impressions of XTAR batteries
The first thing that stood out to me with XTAR is that these feel like products designed for people who actually rely on their kit. That sounds simple, but it matters. When you are working with wireless mics, audio recorders, LED lights or other battery-powered accessories, you want something dependable and easy to live with.
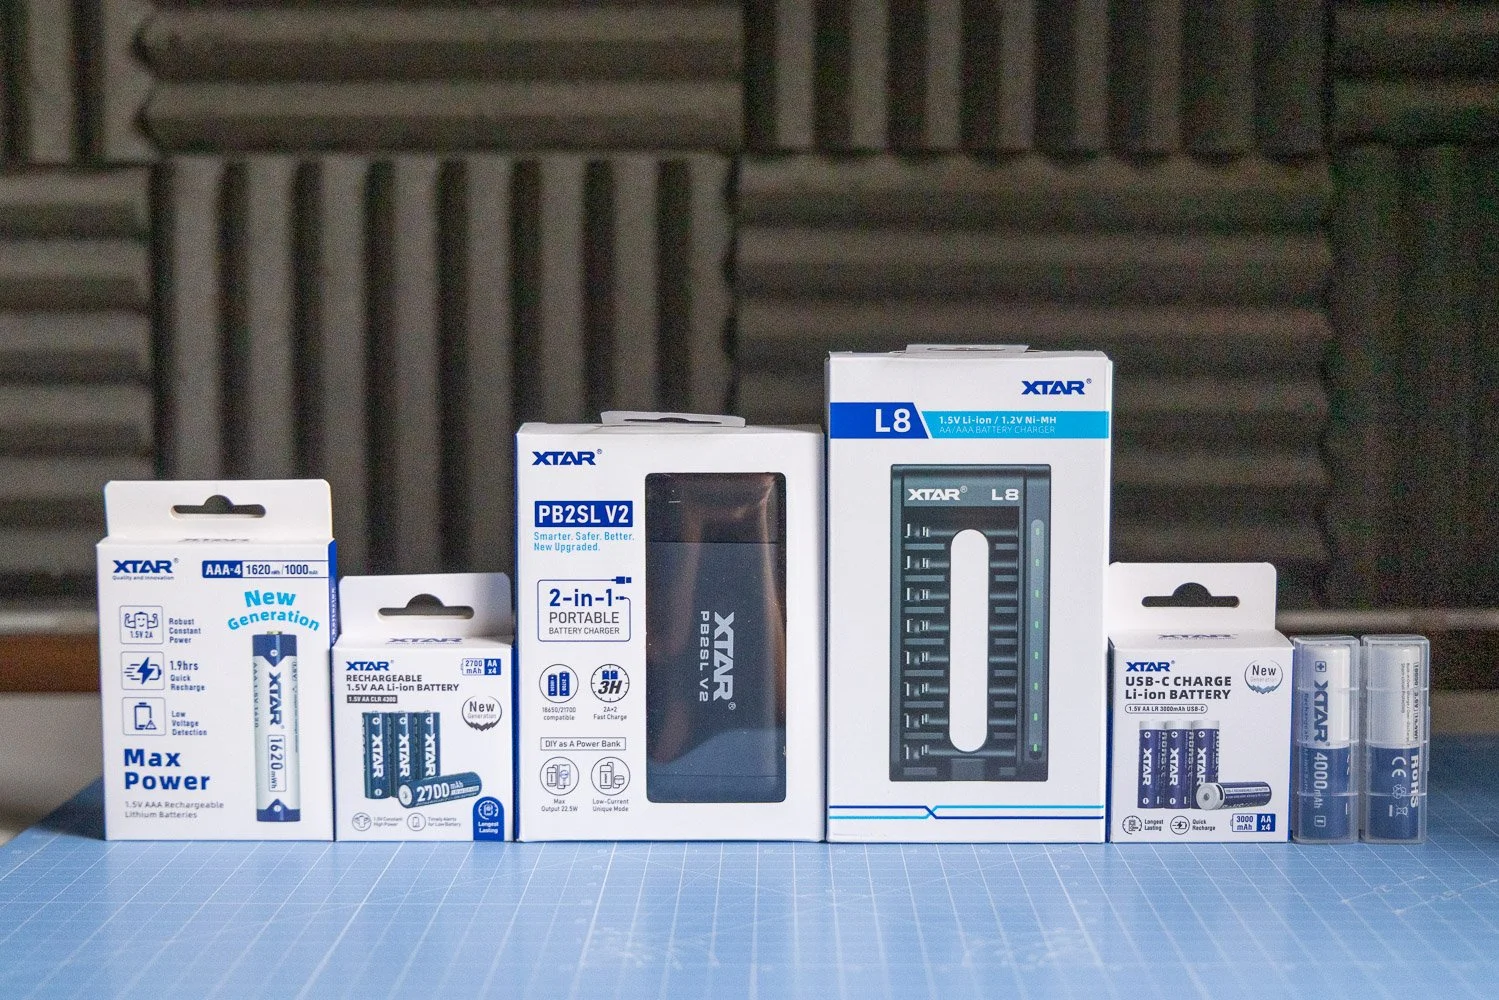
The range I looked at included the AA CLR 4300, AA LR 3000 USB-C and AAA 1620 batteries. Each one is aimed at slightly different use cases, which is useful because not every device behaves the same way in real-world shooting conditions.
What I like here is that XTAR has not gone down the route of making everything feel overly technical or complicated. The batteries are clearly designed with performance in mind, but they still feel practical and accessible for everyday use.
🎥 Why battery quality matters for videographers
As videographers, we often focus on cameras, lenses and lighting, but power is just as important. A poor battery can create all sorts of avoidable problems, from shorter runtimes to unreliable performance and the hassle of constantly swapping cells during a job.
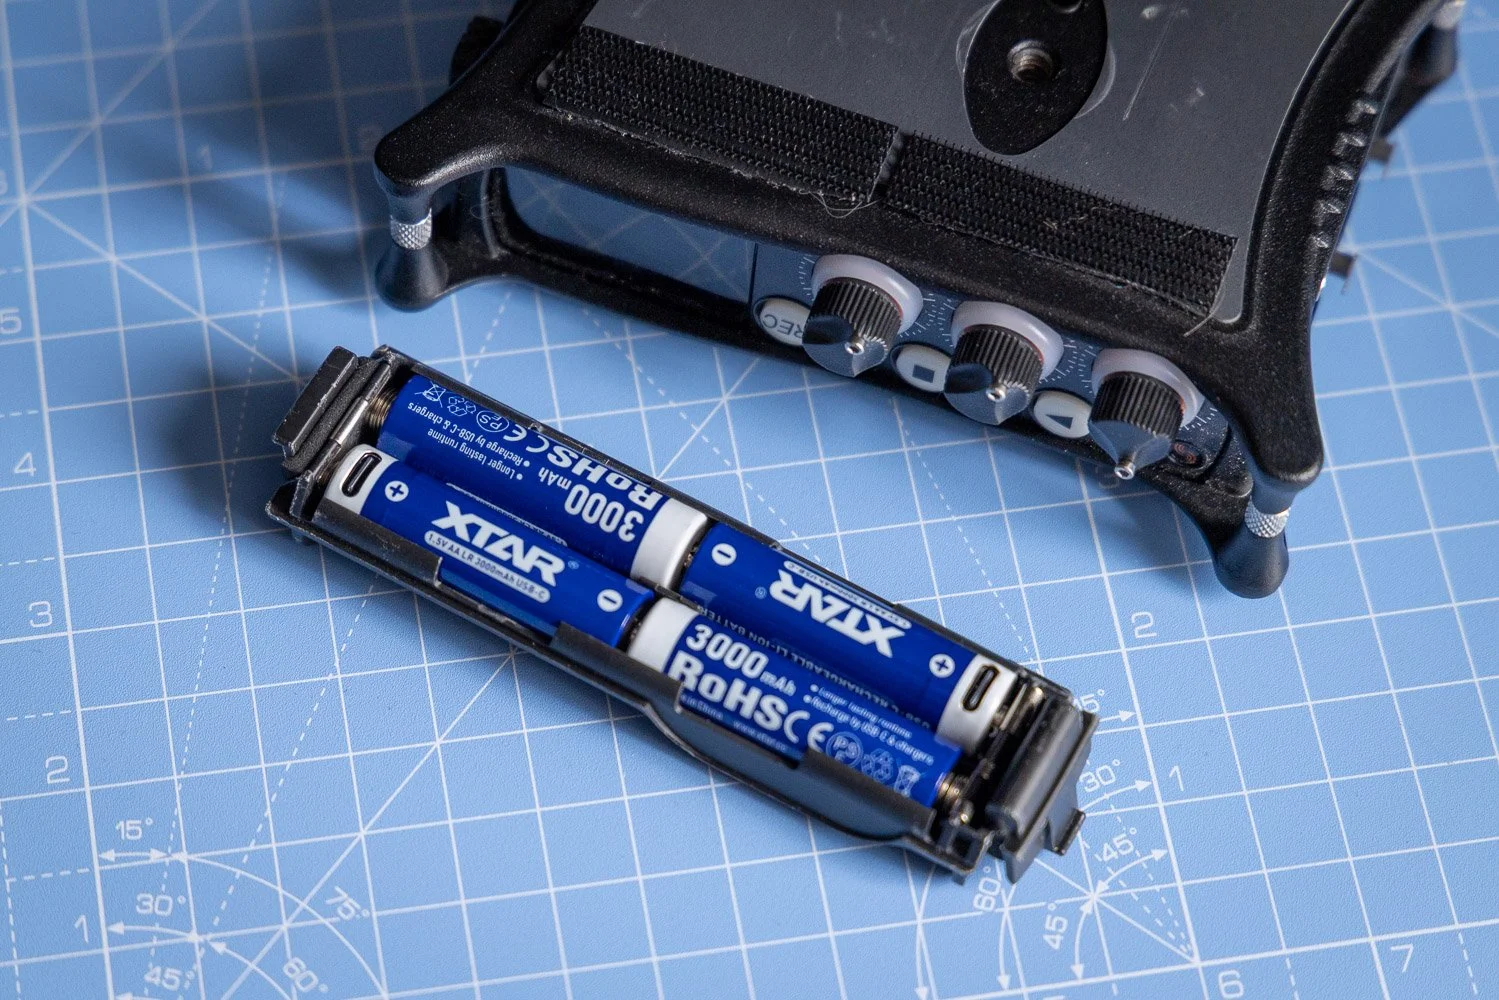
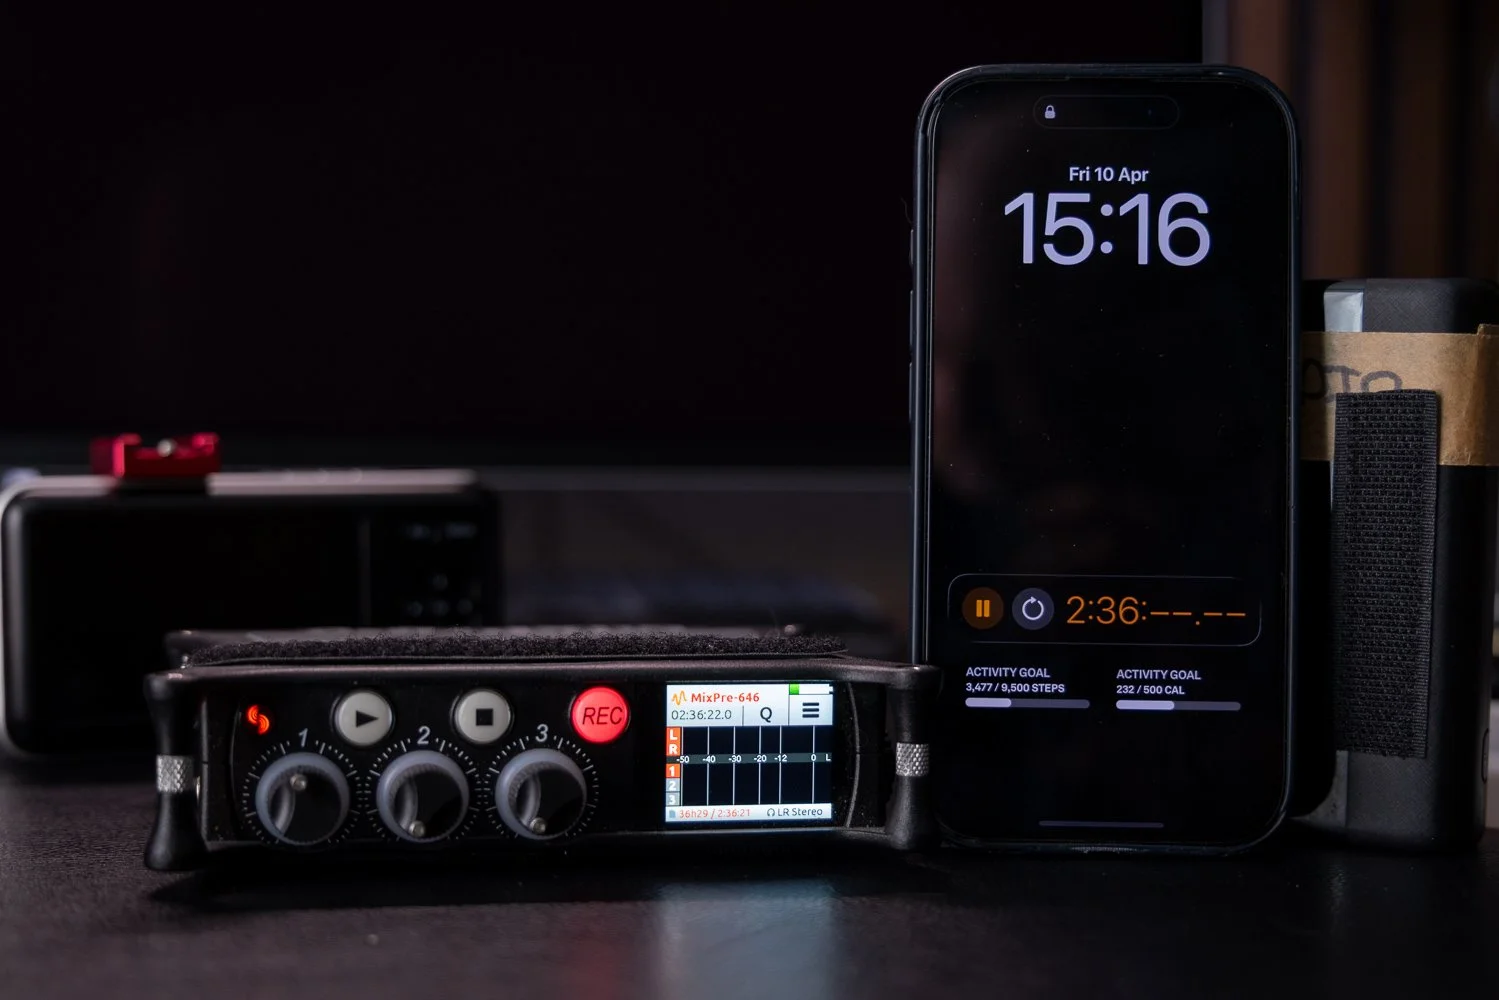
Good rechargeable batteries are especially important if you use devices like wireless microphones, portable audio recorders, LED lights or other accessories that need stable, dependable power over long sessions.
That is why I think XTAR’s focus on quality and longevity is the real selling point here. A battery that lasts well, charges properly and performs consistently is far more valuable over time than a cheaper option that needs replacing sooner or lets you down when it matters.
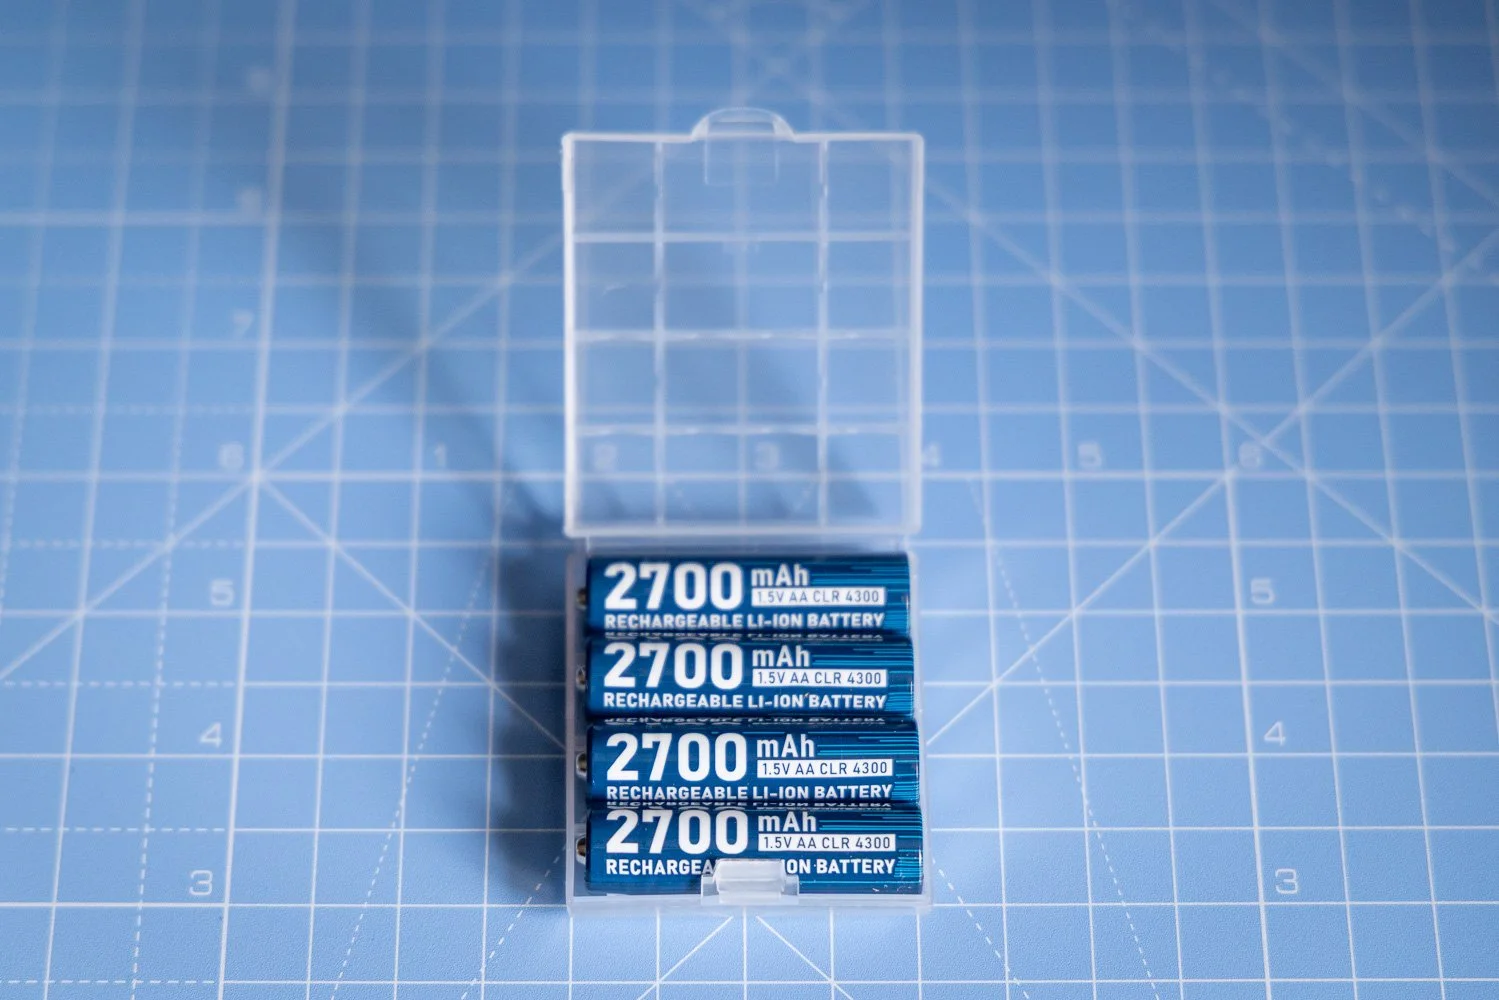
🔋 XTAR AA CLR 4300 vs AA LR 3000 USB-C
One of the more interesting things with this range is that the AA CLR 4300 and AA LR 3000 USB-C have different discharge curves. In practical terms, that means the runtime can vary quite a bit depending on the device and how much load it places on the battery.
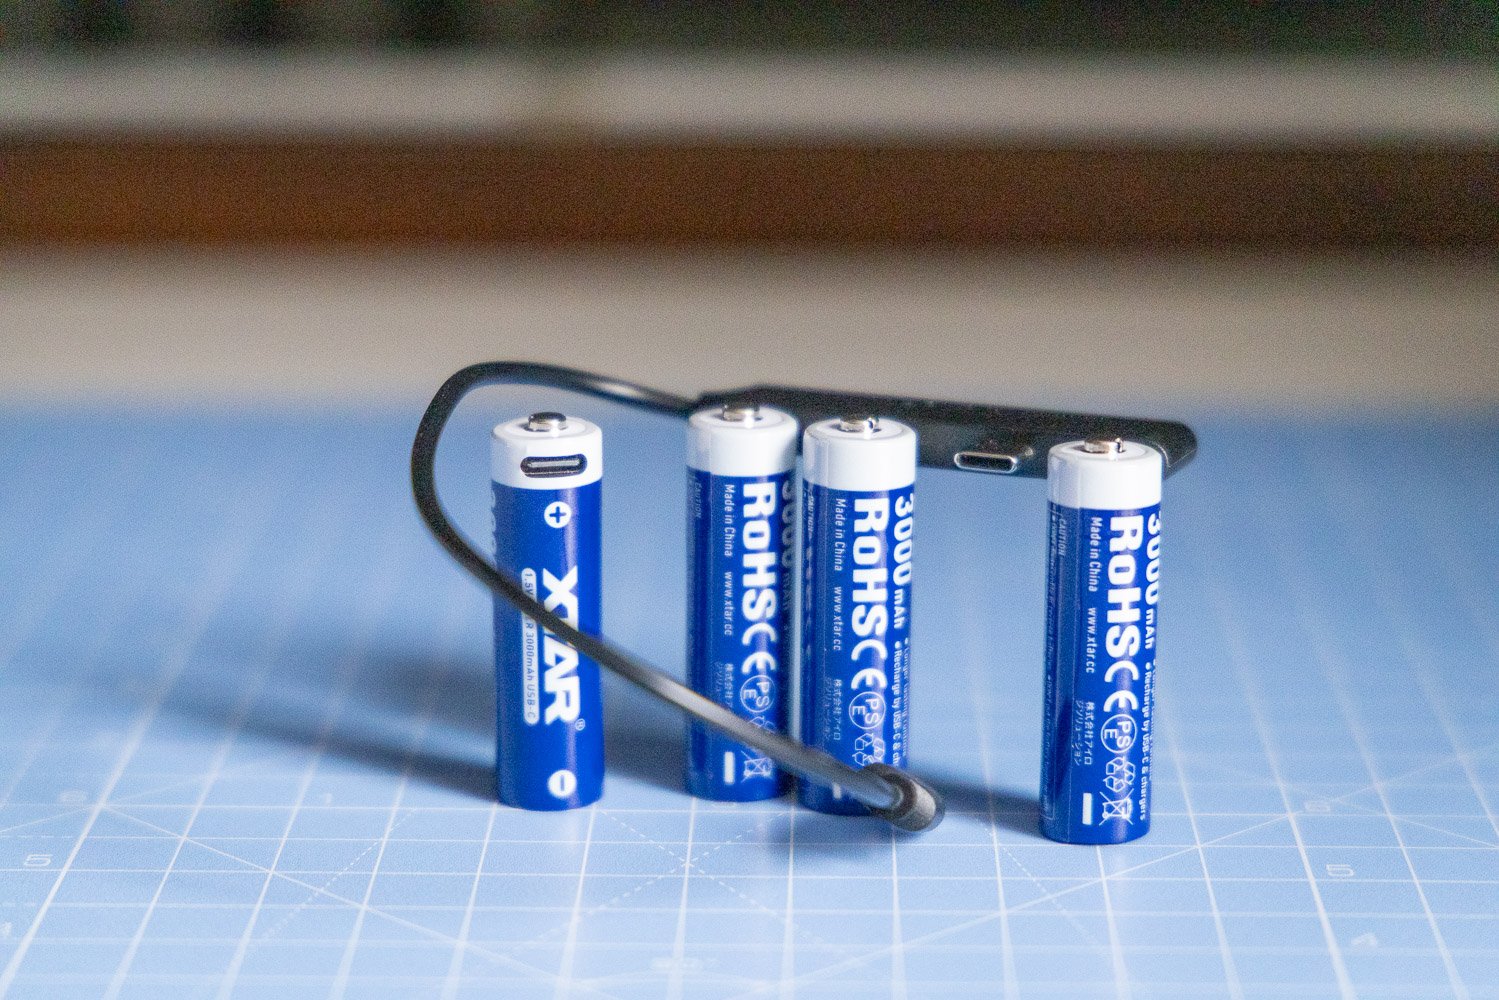
That is actually a good thing to understand, because it shows XTAR is thinking about real-world use rather than pretending one battery is perfect for everything. Some devices will suit one option better than the other, and having both available makes it easier to match the battery to the job.
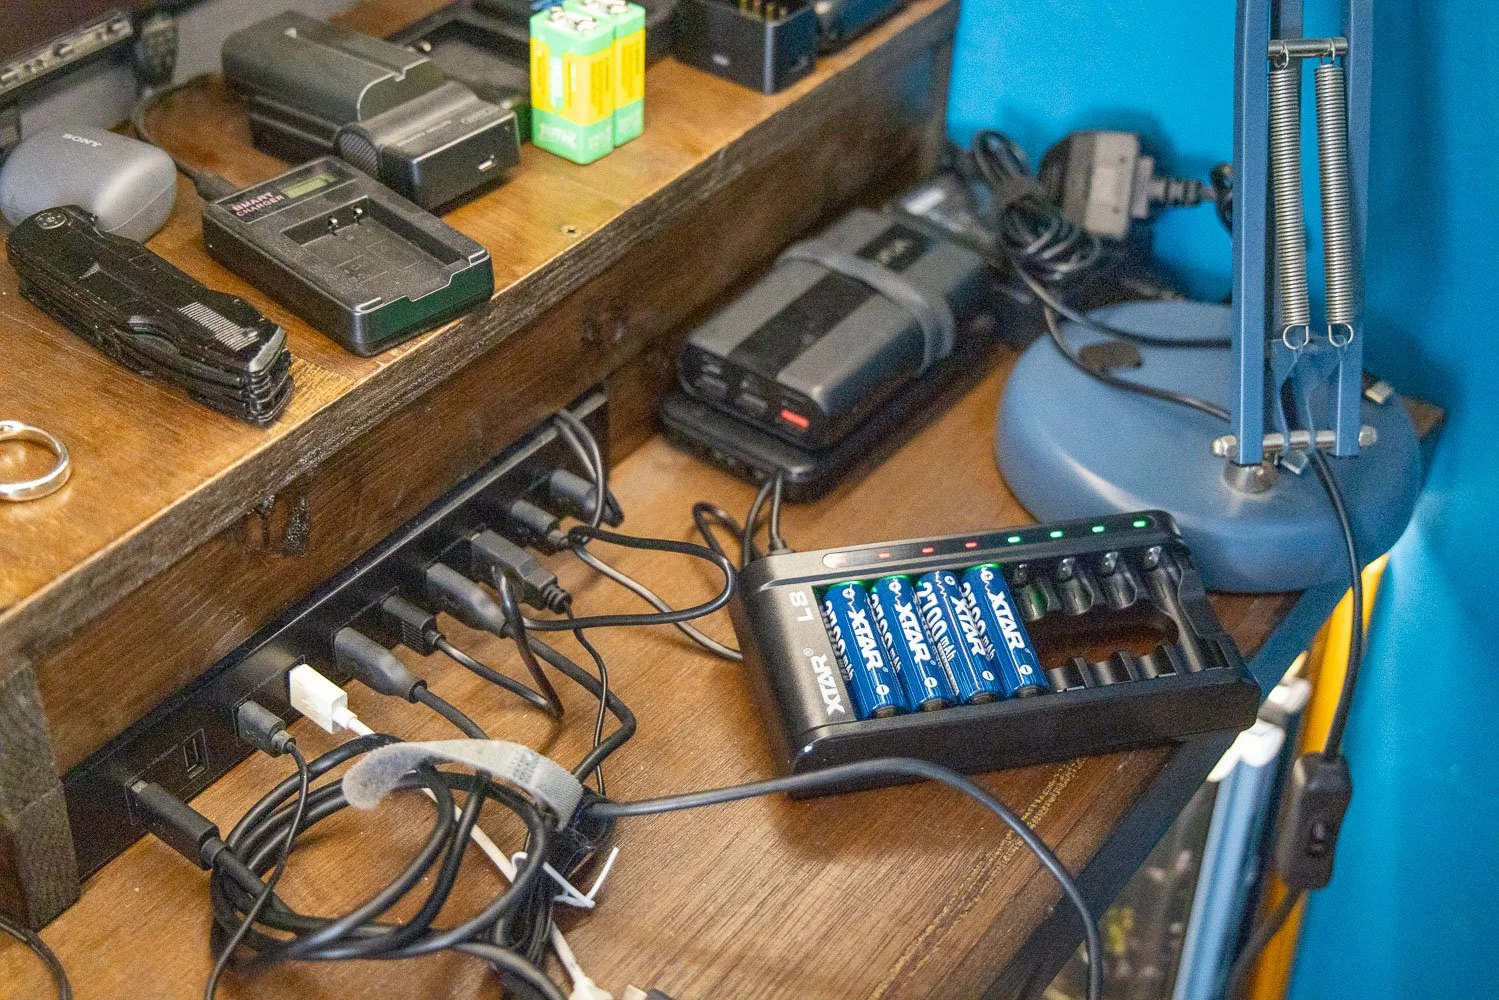
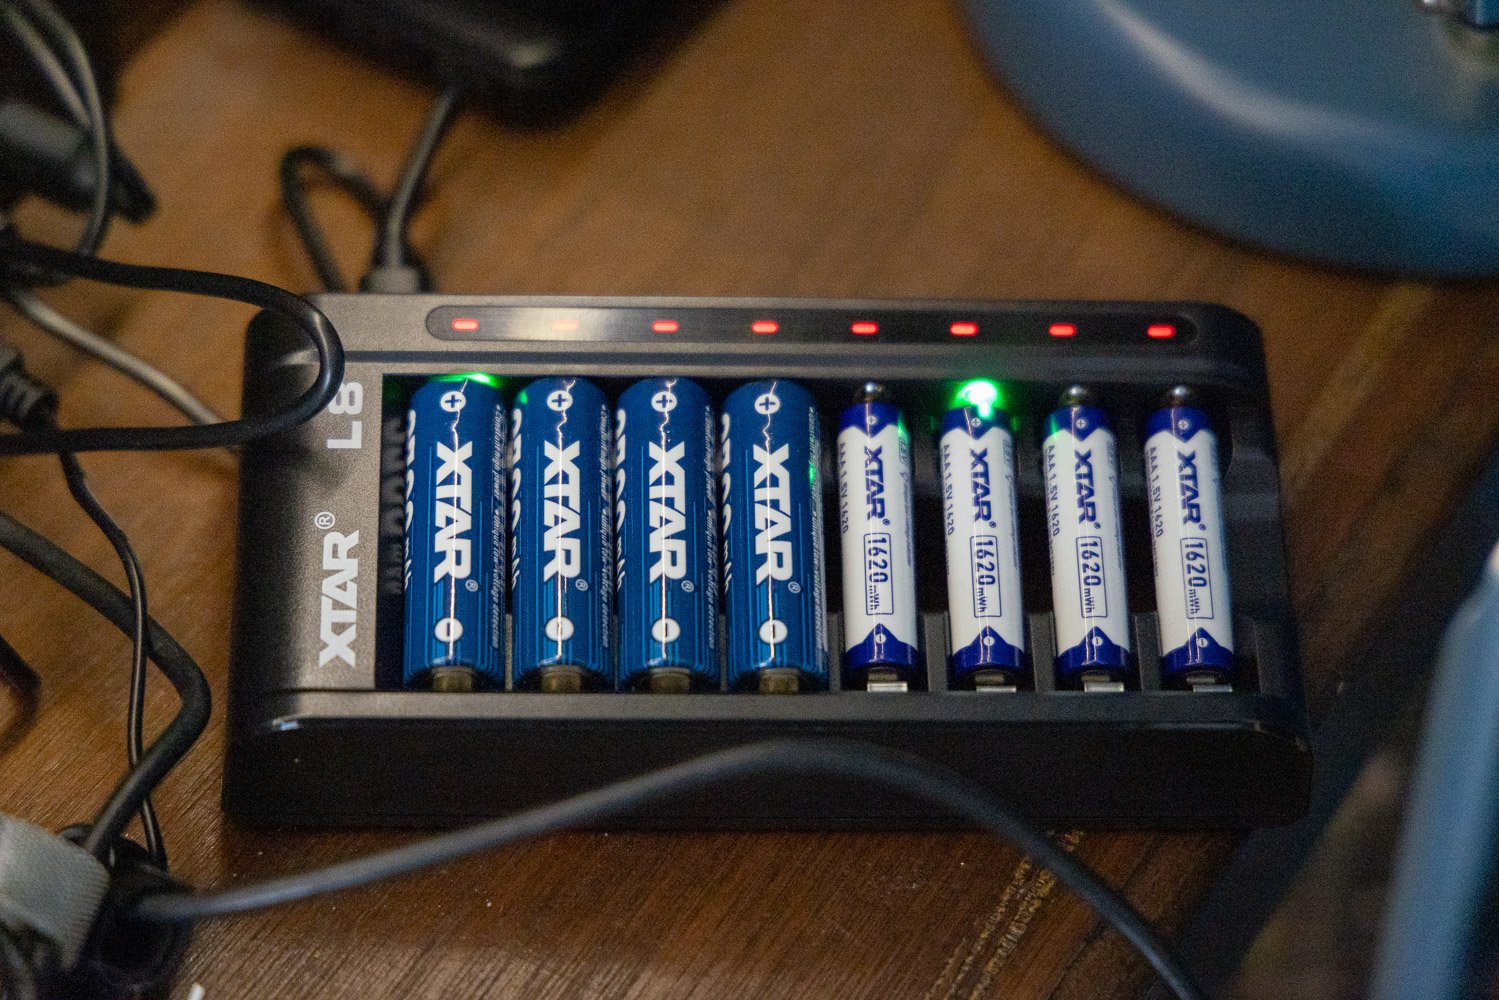
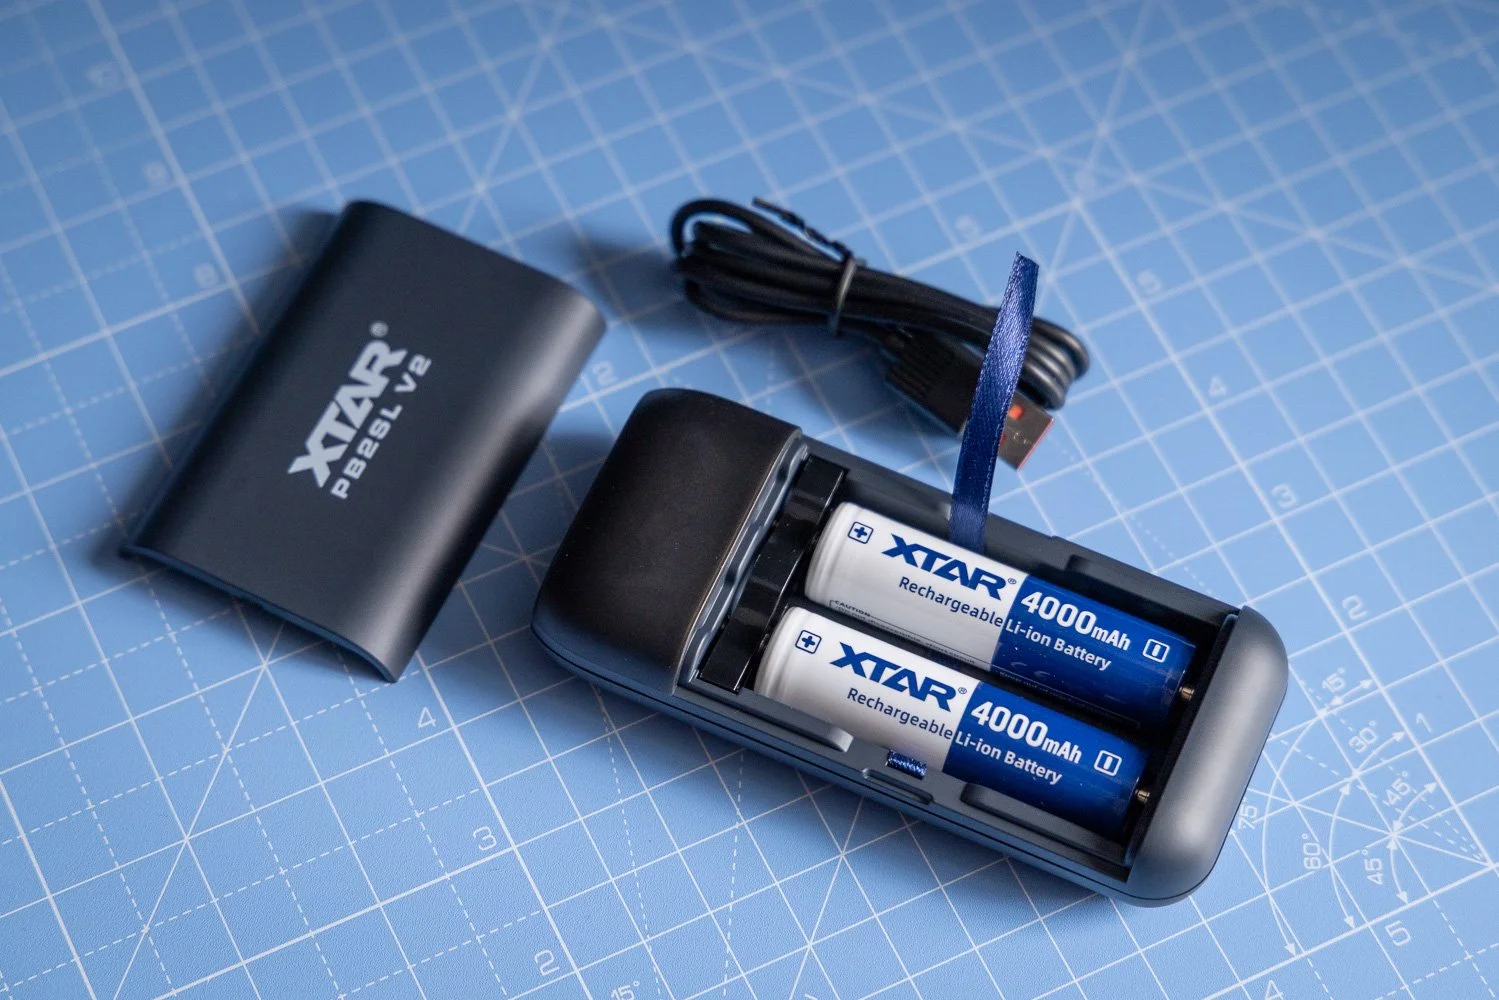
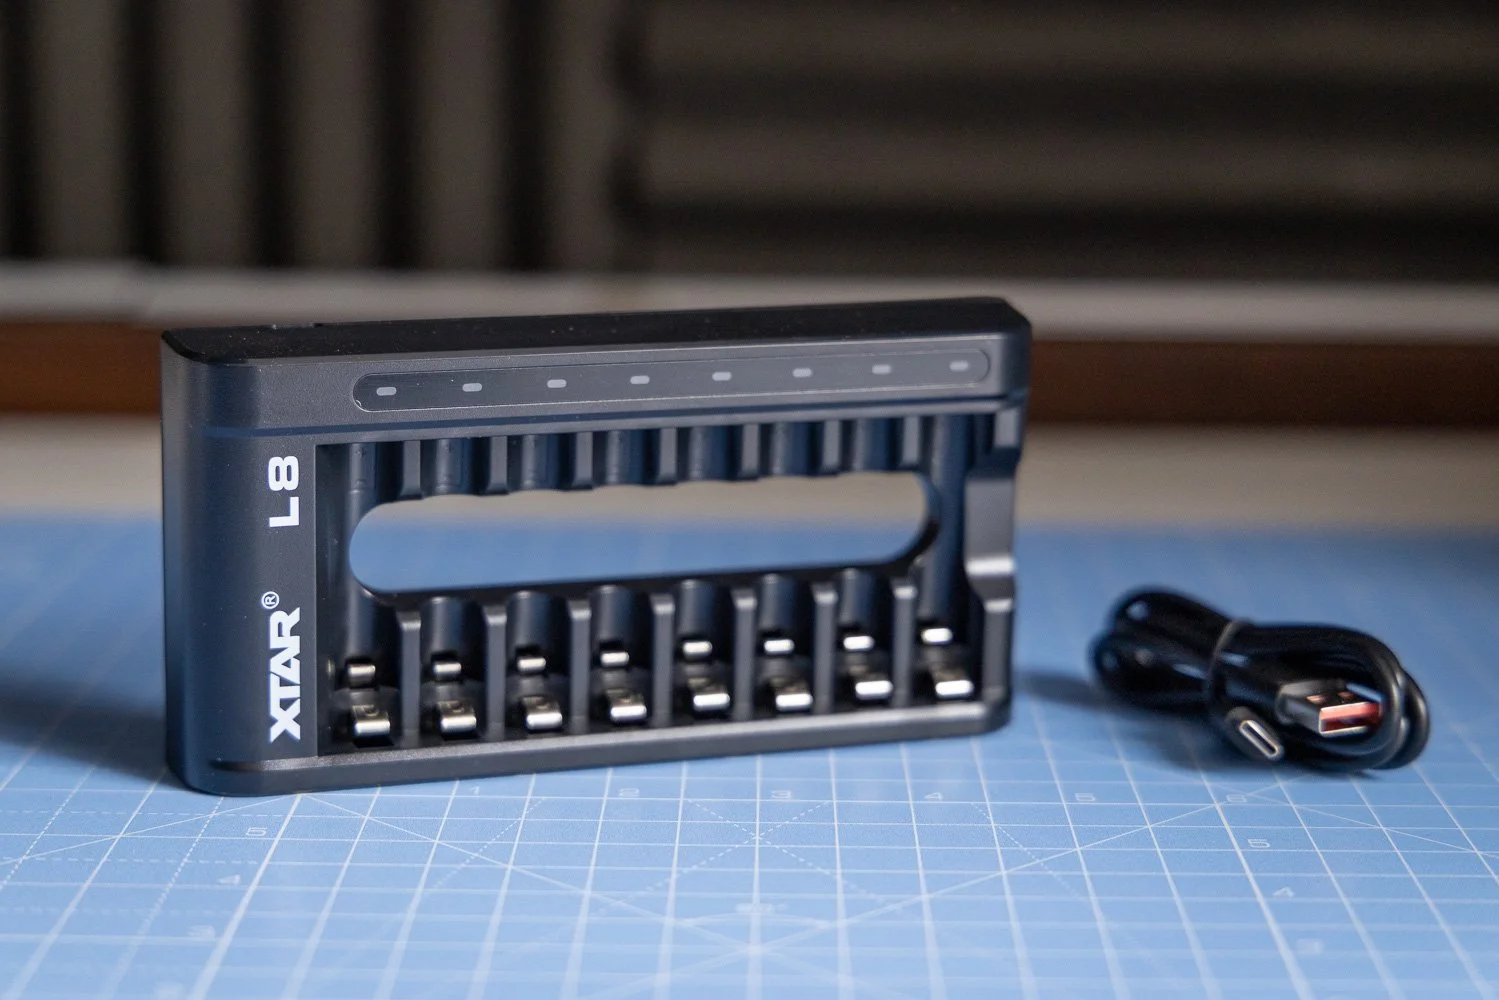
The AA LR 3000 USB-C is especially appealing from a convenience point of view because it can be charged directly via USB-C or with the L8 charger. For anyone working on location, travelling light or trying to keep their charging setup simple, that flexibility is a real plus. Being able to charge batteries directly without always needing a separate charger is one of those small features that can make life much easier.
🎯 Quality and longevity in day-to-day use
For me, the biggest reason to consider XTAR is not just convenience, but confidence over time. Rechargeable batteries only make sense if they hold up well, give consistent performance and feel like they are built to last.
That is the impression these give. They feel like a premium option aimed at people who would rather buy better once than keep replacing cheaper batteries. That is particularly relevant if you are using them regularly in a working setup rather than occasionally around the house.
Yes, they are a bit more expensive than some of the cheaper alternatives you will find online or on the high street. But that extra cost feels justified if you value reliability, longevity and a better overall user experience. In creative work, dependable power is not really an optional extra.
☝️ A couple of practical things to keep in mind
There are a couple of points worth mentioning for balance.
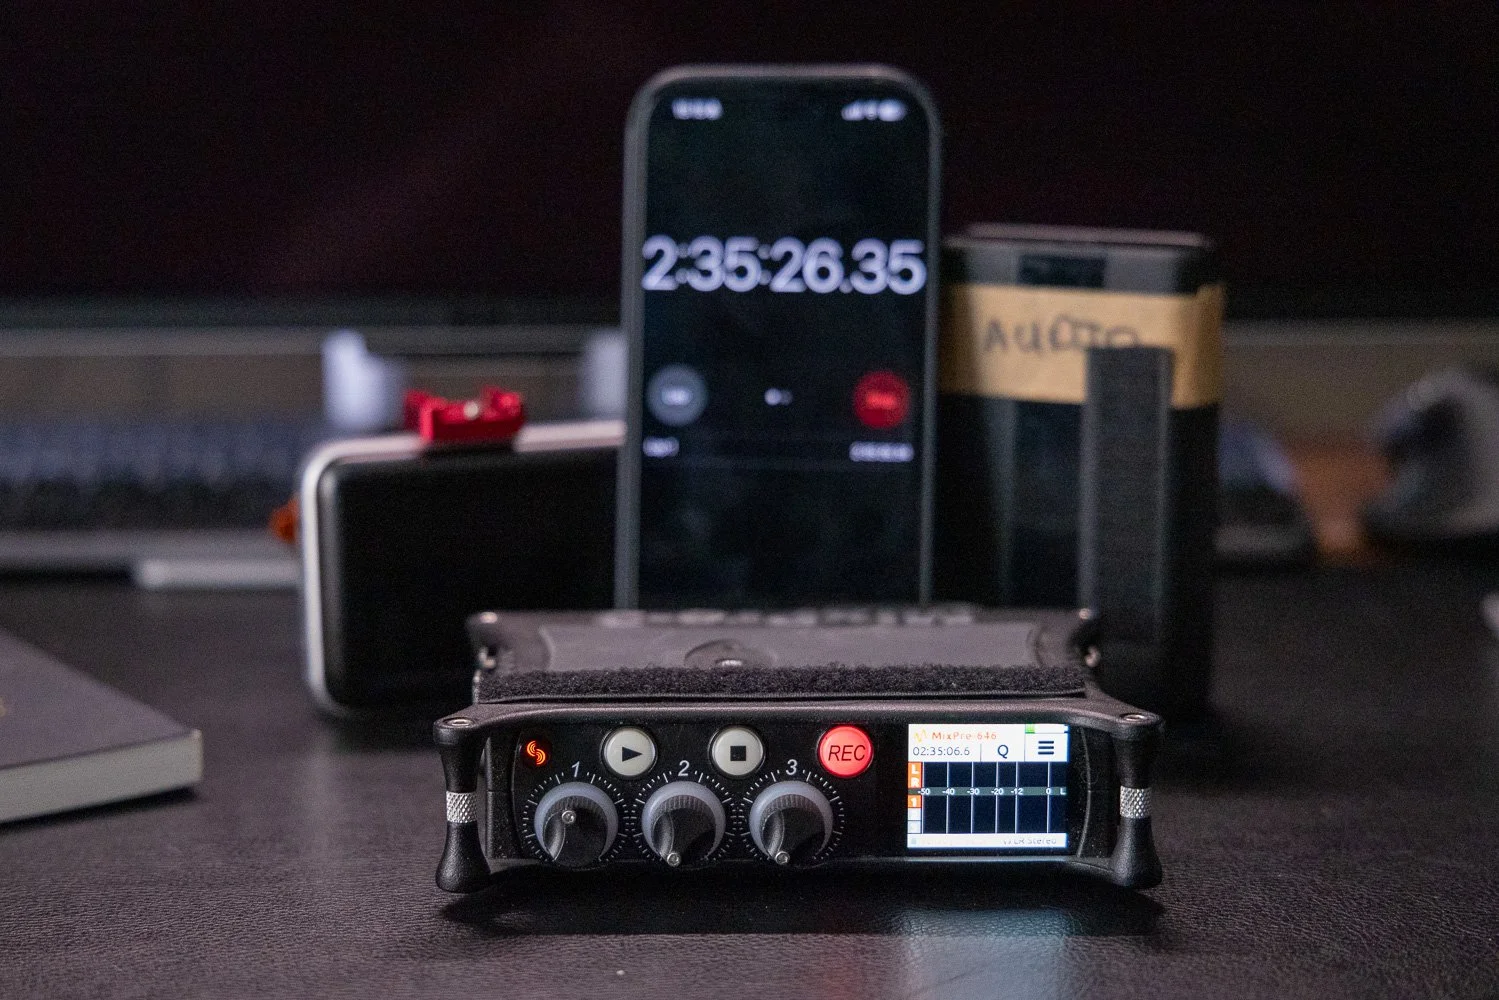
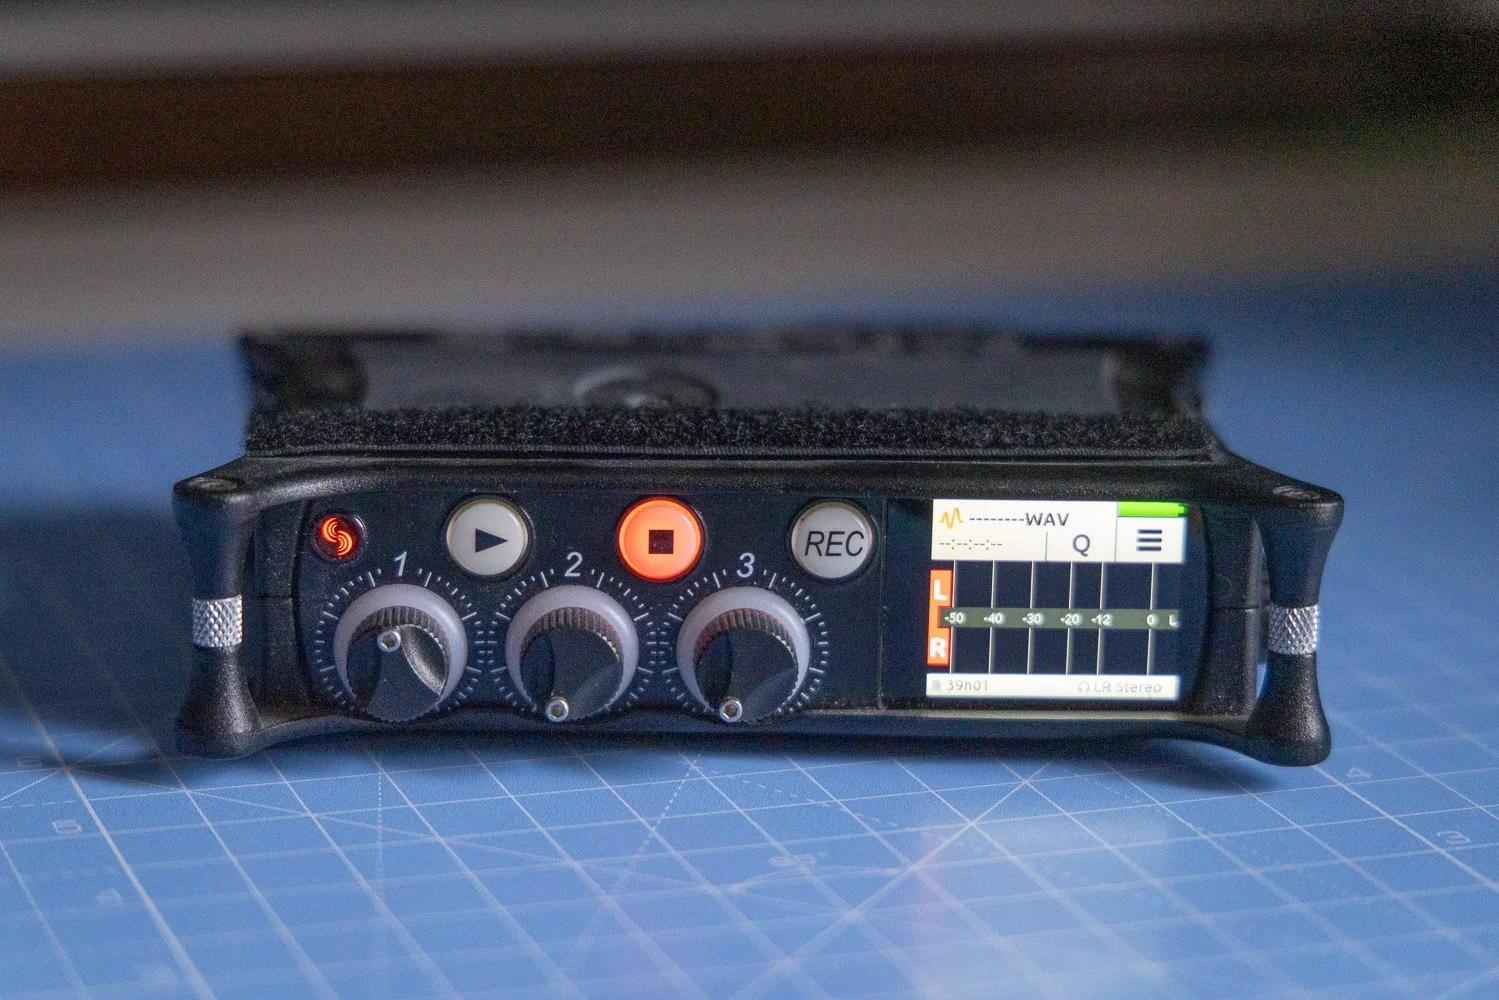
Because these 1.5V rechargeable lithium batteries use a 3.6V battery core with internal charging and discharge management, some devices may produce a slight hum or buzzing noise. This is not unique to XTAR and can happen with 1.5V rechargeable lithium batteries more generally, especially in certain audio devices. If you use battery-powered audio kit, that is something worth testing in your own setup before relying on them for important work.
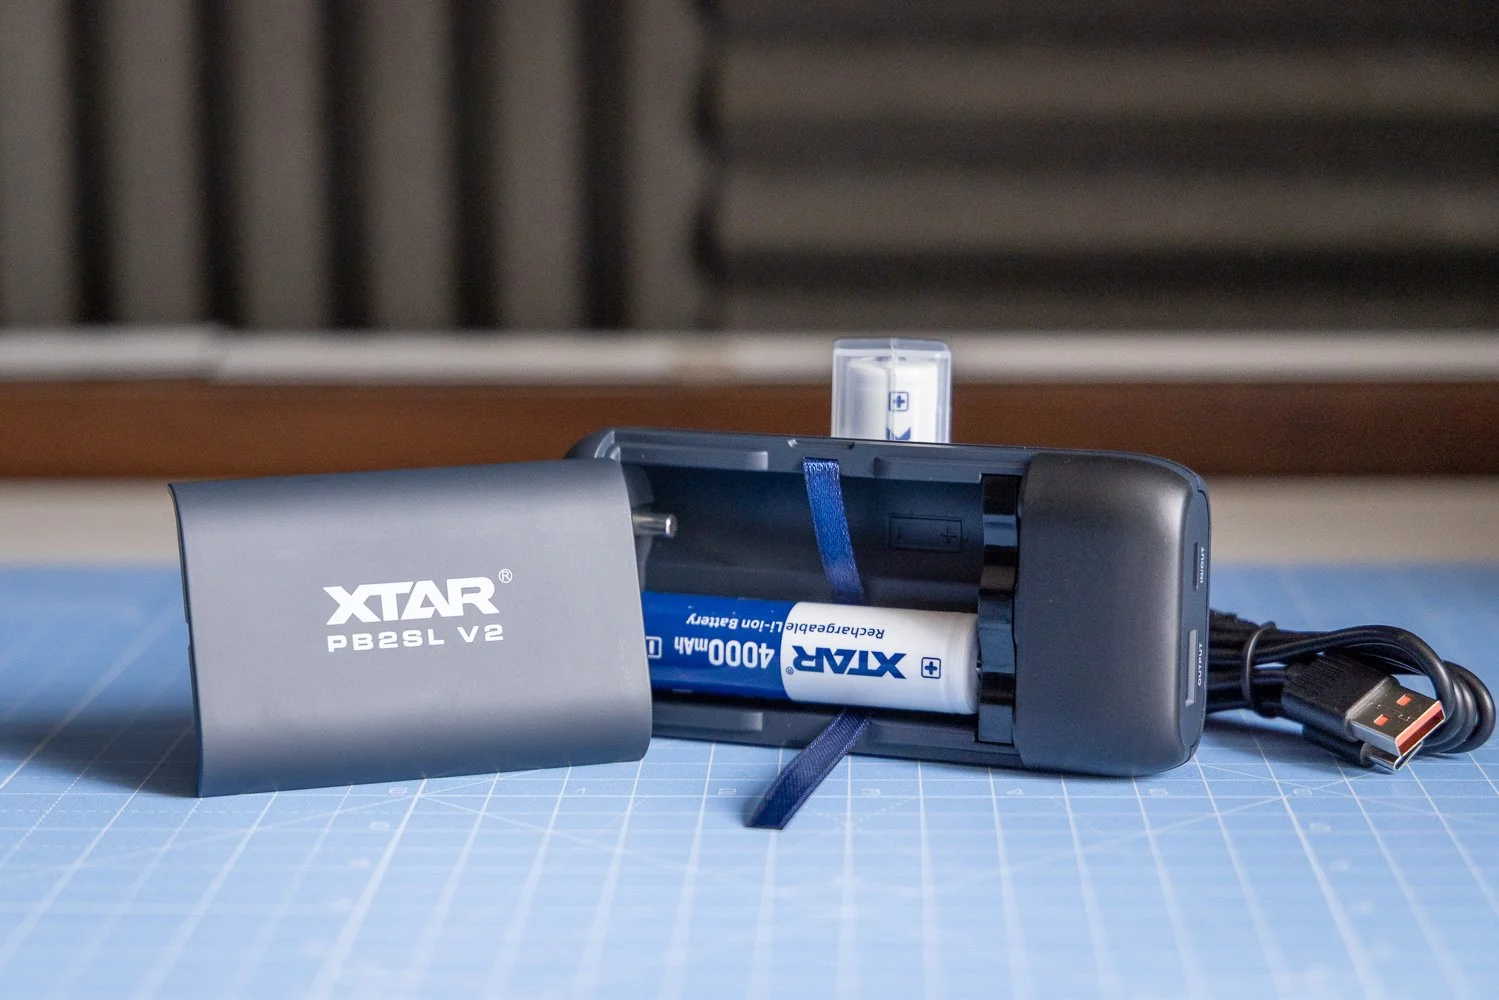
The other thing to be aware of is charger use. If you are using the PB2SL V2 charger, battery polarity needs to be correct when inserting them, as incorrect polarity may damage the charger. It is a simple point, but one worth paying attention to.
Neither of these points would put me off, but they are useful things to know upfront.
❤️ Support and overall experience
One thing that often gets overlooked in a battery review is support. It is easy to focus only on specs, but good custom er support matters, especially when you are buying products designed to be part of a working kit.

That is another area where XTAR comes across well. There is a clear sense that the company understands how these products are actually being used, and that gives a bit more confidence when investing in something slightly more premium.
For me, that is part of the value. It is not just about the battery itself, but the wider experience of using products from a brand that seems serious about quality.

🤑 Are XTAR batteries worth it?
I think XTAR batteries are well worth considering if you are a videographer, photographer or content creator who depends on reliable battery performance.
They offer strong build quality, practical charging options and a more premium feel than many cheaper alternatives. The AA LR 3000 USB-C is particularly useful if you want the flexibility of direct USB-C charging, while the different AA options give you a better chance of finding the right fit for your devices.
They are more expensive than basic off-the-shelf batteries, but in my view, that is the trade-off. You are paying for better quality, better longevity and more confidence in your setup.
If you are the sort of person who would rather invest in gear that lasts and performs properly, XTAR makes a lot of sense.
You can also check out my Lightroom Presets here:https://www.rossjukesphoto.co.uk/lightroom-presets
✅ Final thoughts
Overall, this XTAR Batteries review has left me with a positive impression. These are not bargain-bin batteries, and they are not trying to be. They are aimed at users who want dependable, rechargeable power and are willing to pay a bit more for it.
For anyone working in video, audio or photography, that is usually a worthwhile investment. Reliable batteries help your whole workflow run more smoothly, and that alone can justify spending a little extra.
XTAR seems to understand that well, and that is exactly why these batteries stand out.

🔴 FAQ’s
-
The main difference is their discharge behaviour, which means runtime can vary depending on the device and the load. Some gear may perform better with one than the other.
-
Yes, the AA LR 3000 USB-C can be charged directly via USB-C, and it can also be charged using the L8 charger.
-
Yes, they are a strong option for videographers and photographers who need reliable, rechargeable batteries for accessories such as audio gear, lights and other battery-powered kit.
-
They are a bit more expensive than some cheaper off-the-shelf options, but that extra cost is justified by the focus on quality, longevity and reliability.
-
They can in some cases. A slight hum or buzzing noise may occur in certain audio devices, which is something to test if you plan to use them with sound equipment.
-
If you value dependable performance and longer-term reliability over simply buying the cheapest option, then yes, I think they are worth it.
📸 Are you a photography/videography brand looking to showcase you products? Take a look at my Media Pack and Contact Me to discuss how we can collaborate on a sponsored review.
Posts you might also like…


About the Author - Ross Jukes is a professional Photographer and Videographer with over a decade of experience. Working in both Digital and Analogue formats, Ross has worked with international clients, had his worked published numerous times and exhibited his work extensively. With a passion for all things photographic, Ross combines his experience, enthusiasm and dedication to his art form to create engaging and educational content for the photographic community.
Disclaimer: All links to Amazon UK/US are affiliated links - you will still pay the same price but I will receive a small commission. All information provided in this blog is intended either for educational or entertainment purposes and is accurate to the best knowledge of the author. However, further research/professional advice should be sort before making purchases/implementing any advice given and no responsibility is taken by the author or parties mentioned here within.
Three Pieces of Video Gear I Want to Try from NAB 2026
NAB 2026 has produced plenty of interesting new photo and video gear, but these are the three products I am most looking forward to trying: the DJI Osmo Pocket 4, RØDELink II and EIZO ColorEdge CS3200X.

Every year NAB seems to produce a few bits of kit that make me sit up and pay attention. Some of it is obviously exciting — big cinema cameras, strange rigs, lenses that cost more than a small family car — but often the things that interest me most are the products that could genuinely make a difference to the way I work.
That is really what this post is about.
I am not necessarily looking at these three items as things I am definitely going to buy. That would be a very dangerous path to go down, especially if you already have a cupboard full of camera gear that occasionally looks back at you with judgement. But as a photographer and videographer, I am always interested in tools that could make filming easier, faster, more reliable or simply improve the quality of the final output.
Source: CVP Via YouTube
After watching some of the coverage coming out of NAB 2026, there are three pieces of gear that have really caught my attention: the DJI Osmo Pocket 4, the RØDELink II wireless system and the EIZO ColorEdge CS3200X monitor.
They are three very different products, but they all solve very real problems in a working photo and video setup.
1. DJI Osmo Pocket 4
I have always had a bit of a soft spot for the DJI Osmo Pocket range. On paper, it is one of those products that can easily be dismissed as a “content creator” camera, but in reality, I think it is much more useful than that.
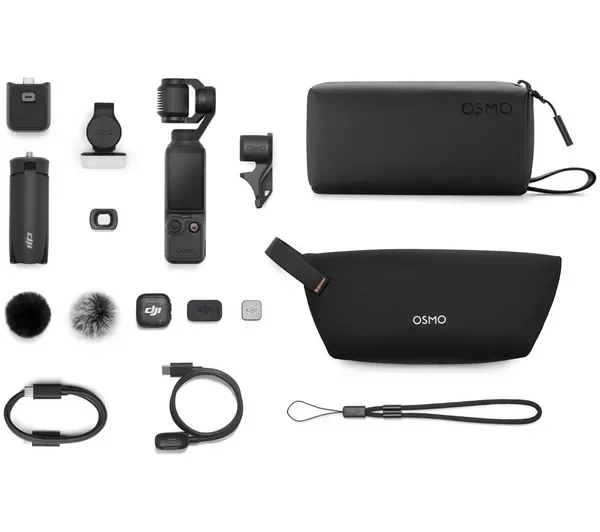
The new Osmo Pocket 4 looks particularly interesting because DJI seems to have pushed it further into serious video territory. The headline feature for me is the 1-inch CMOS sensor, which immediately makes it feel like a more capable tool for real-world shooting. Small cameras are brilliant when they are convenient, but they can fall apart quite quickly when the light drops or when you are working in high contrast situations. So the idea of having something this small with 14 stops of dynamic range and 10-bit D-Log is genuinely exciting.
For the type of work I do, I can see this being incredibly useful as a behind-the-scenes camera, a quick establishing shot camera, or even something to use when I want to travel light but still capture decent quality footage. I am often trying to balance image quality with practicality, and that is where products like this can really earn their place.
Source: Potato Jet via YouTube
I do not always want to pull out a larger camera, rig it up, balance it, add a monitor, sort audio, check settings and make a whole event out of capturing a simple shot. Sometimes I just need something small, quick and reliable that still gives me footage I am happy to put into an edit.
The 3-axis stabilisation is obviously a huge part of the appeal too. I am not expecting it to replace a proper gimbal setup, but if I can get smooth, usable movement from something that fits in a small bag, that is a big win. I can imagine using this for travel videos, studio b-roll, YouTube inserts, product shots and even quick social media content.
There is always a danger with small cameras that you use them because they are easy, rather than because they are good. But from what DJI is promising with the Osmo Pocket 4, it feels like this could be one of those cameras that is both easy and genuinely useful.
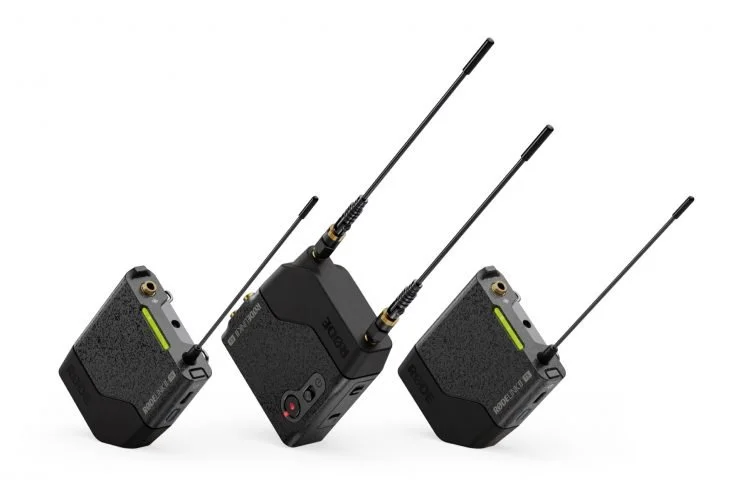
2. RØDELink II Wireless System
Audio is one of those areas where I have become increasingly aware of how important reliability is. You can get away with slightly imperfect lighting or a camera angle that is not quite ideal, but bad audio can ruin a video almost instantly.
That is why the RØDELink II has caught my attention.
I already use wireless audio for a lot of my video work, particularly when filming interviews, talking head content and corporate projects. The problem is that wireless systems can be one of the more stressful parts of a shoot. You are dealing with signal, interference, batteries, mic placement, levels and backup options — all while trying to concentrate on the actual content of the shoot.
The interesting thing about the RØDELink II is that it appears to be a much more serious professional system than some of the smaller compact wireless kits we have seen over the past few years. Those smaller systems absolutely have their place — and I use that kind of gear myself — but there are times when you want something that feels a bit more robust and built for demanding environments.
The fact that this is a UHF system is interesting, especially with RØDE now being part of the same wider group as Lectrosonics. I am not going to pretend to be an audio engineer, but I do know that if I am filming an important interview, I want confidence that the audio is going to work.
Source: RODE Via YouTube
The features that really stand out to me are dual-channel operation, 32-bit float onboard recording and timecode I/O. That combination makes a lot of sense for the kind of work where you cannot afford to lose a take. Being able to record directly on the transmitter as a backup is a massive safety net, and 32-bit float gives you a bit more breathing room if levels are not perfect.
Timecode is another feature that becomes more appealing the more video work you do. If you are working with multiple cameras, separate audio and a decent amount of footage, anything that makes syncing easier in post is worth paying attention to.
I would be really interested to try the RØDELink II in a proper corporate interview setup. Not just a quick test in a quiet room, but a real shoot where there are all the usual variables — people moving around, Wi-Fi everywhere, reflective rooms, time pressure and the mild panic that comes with knowing you only get one chance to capture the audio properly.
If it performs well in that environment, it could be a very useful addition to a professional kit bag.
3. EIZO ColorEdge CS3200X Monitor
This is probably the least “exciting” item on the list to most people, but it might actually be the one that could make the biggest difference day to day.
I spend a lot of time editing. Whether it is photography, video, YouTube content, client work, colour grading, retouching or preparing images for print, the monitor is one of the most important parts of the entire setup. It is also one of those things that is very easy to neglect.
A camera is exciting. A new lens is exciting. A monitor is… well, a monitor.
But the more you work professionally, the more you realise that having a reliable display is absolutely essential. If you cannot trust what you are looking at, everything else becomes guesswork.
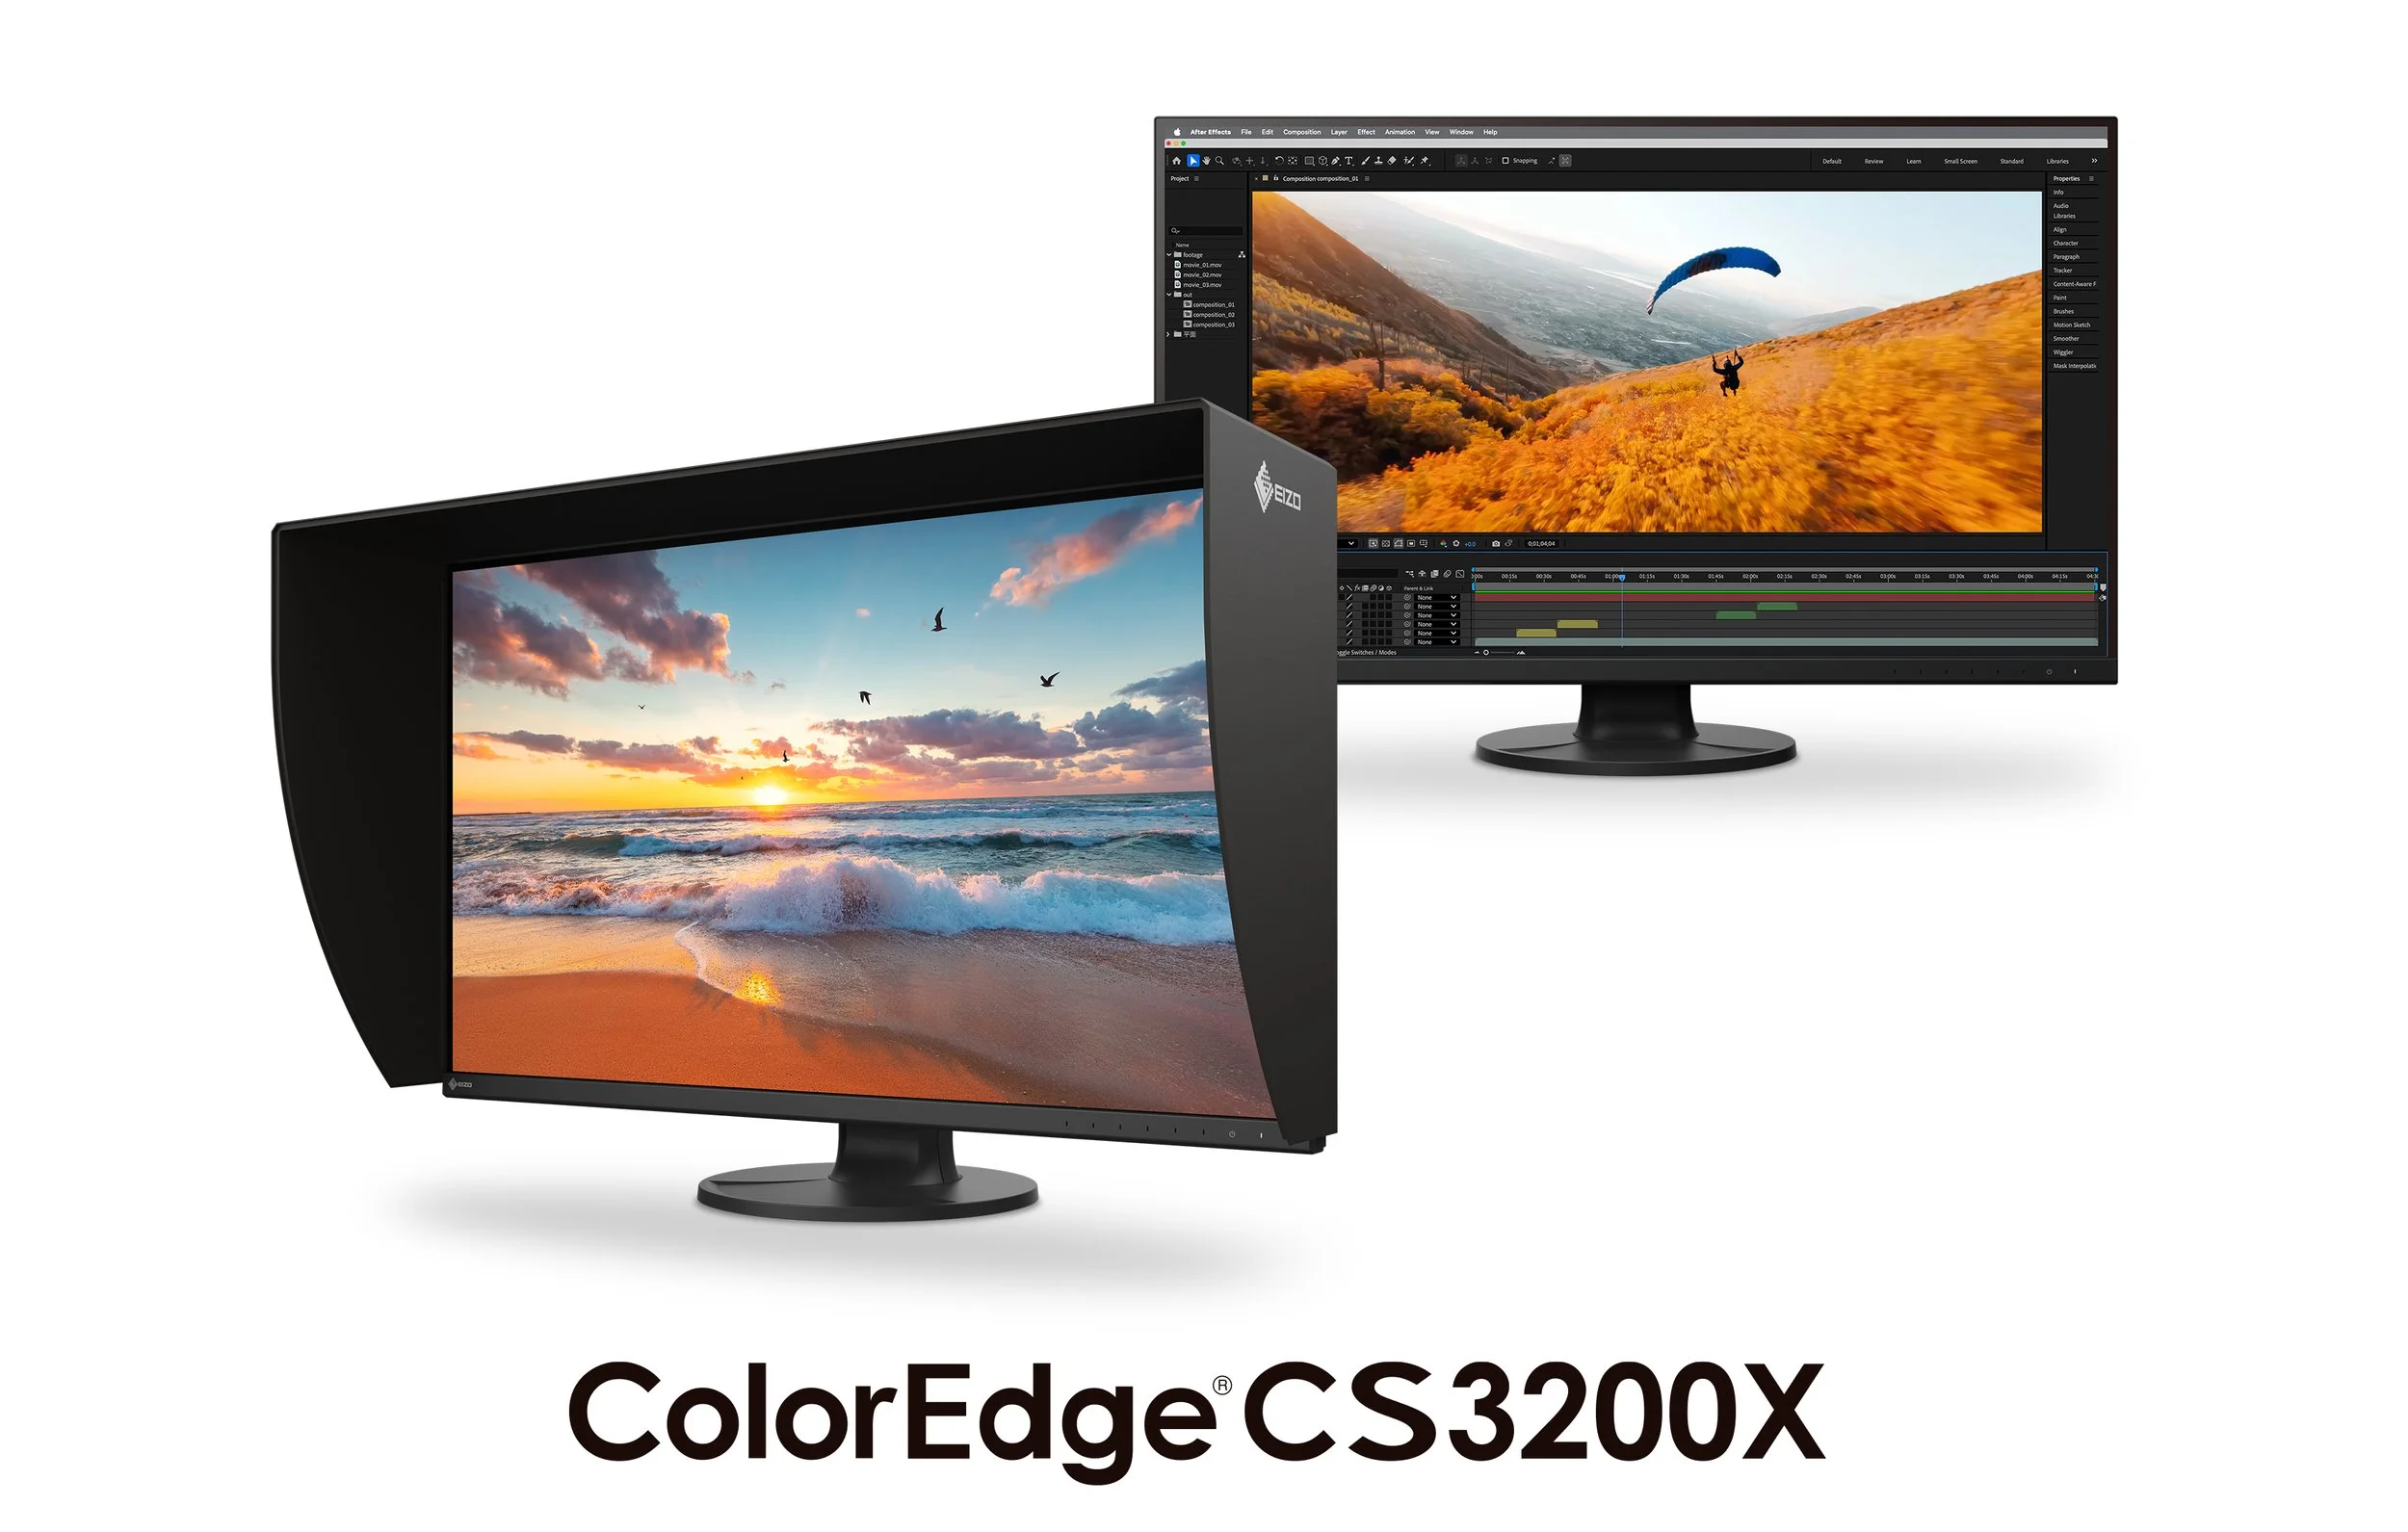
The EIZO ColorEdge CS3200X looks like a really interesting option because it brings a large 31.5-inch 4K display into the ColorEdge CS range. That screen size is very appealing for both photo and video work. I like the idea of having more room for timelines, panels, scopes, layers and all the little bits of software clutter that slowly take over your life.
For photography, the wide colour gamut and focus on colour accuracy are obviously key. For video, the support for workflows like DCI-P3, BT.709, HLG and PQ makes it feel like something that could sit nicely between stills and moving image work. That is important to me because I do not really operate in one world anymore. My work is a mix of photography, videography, YouTube, commercial content and personal projects, so having a monitor that supports that mixed workflow is really appealing.
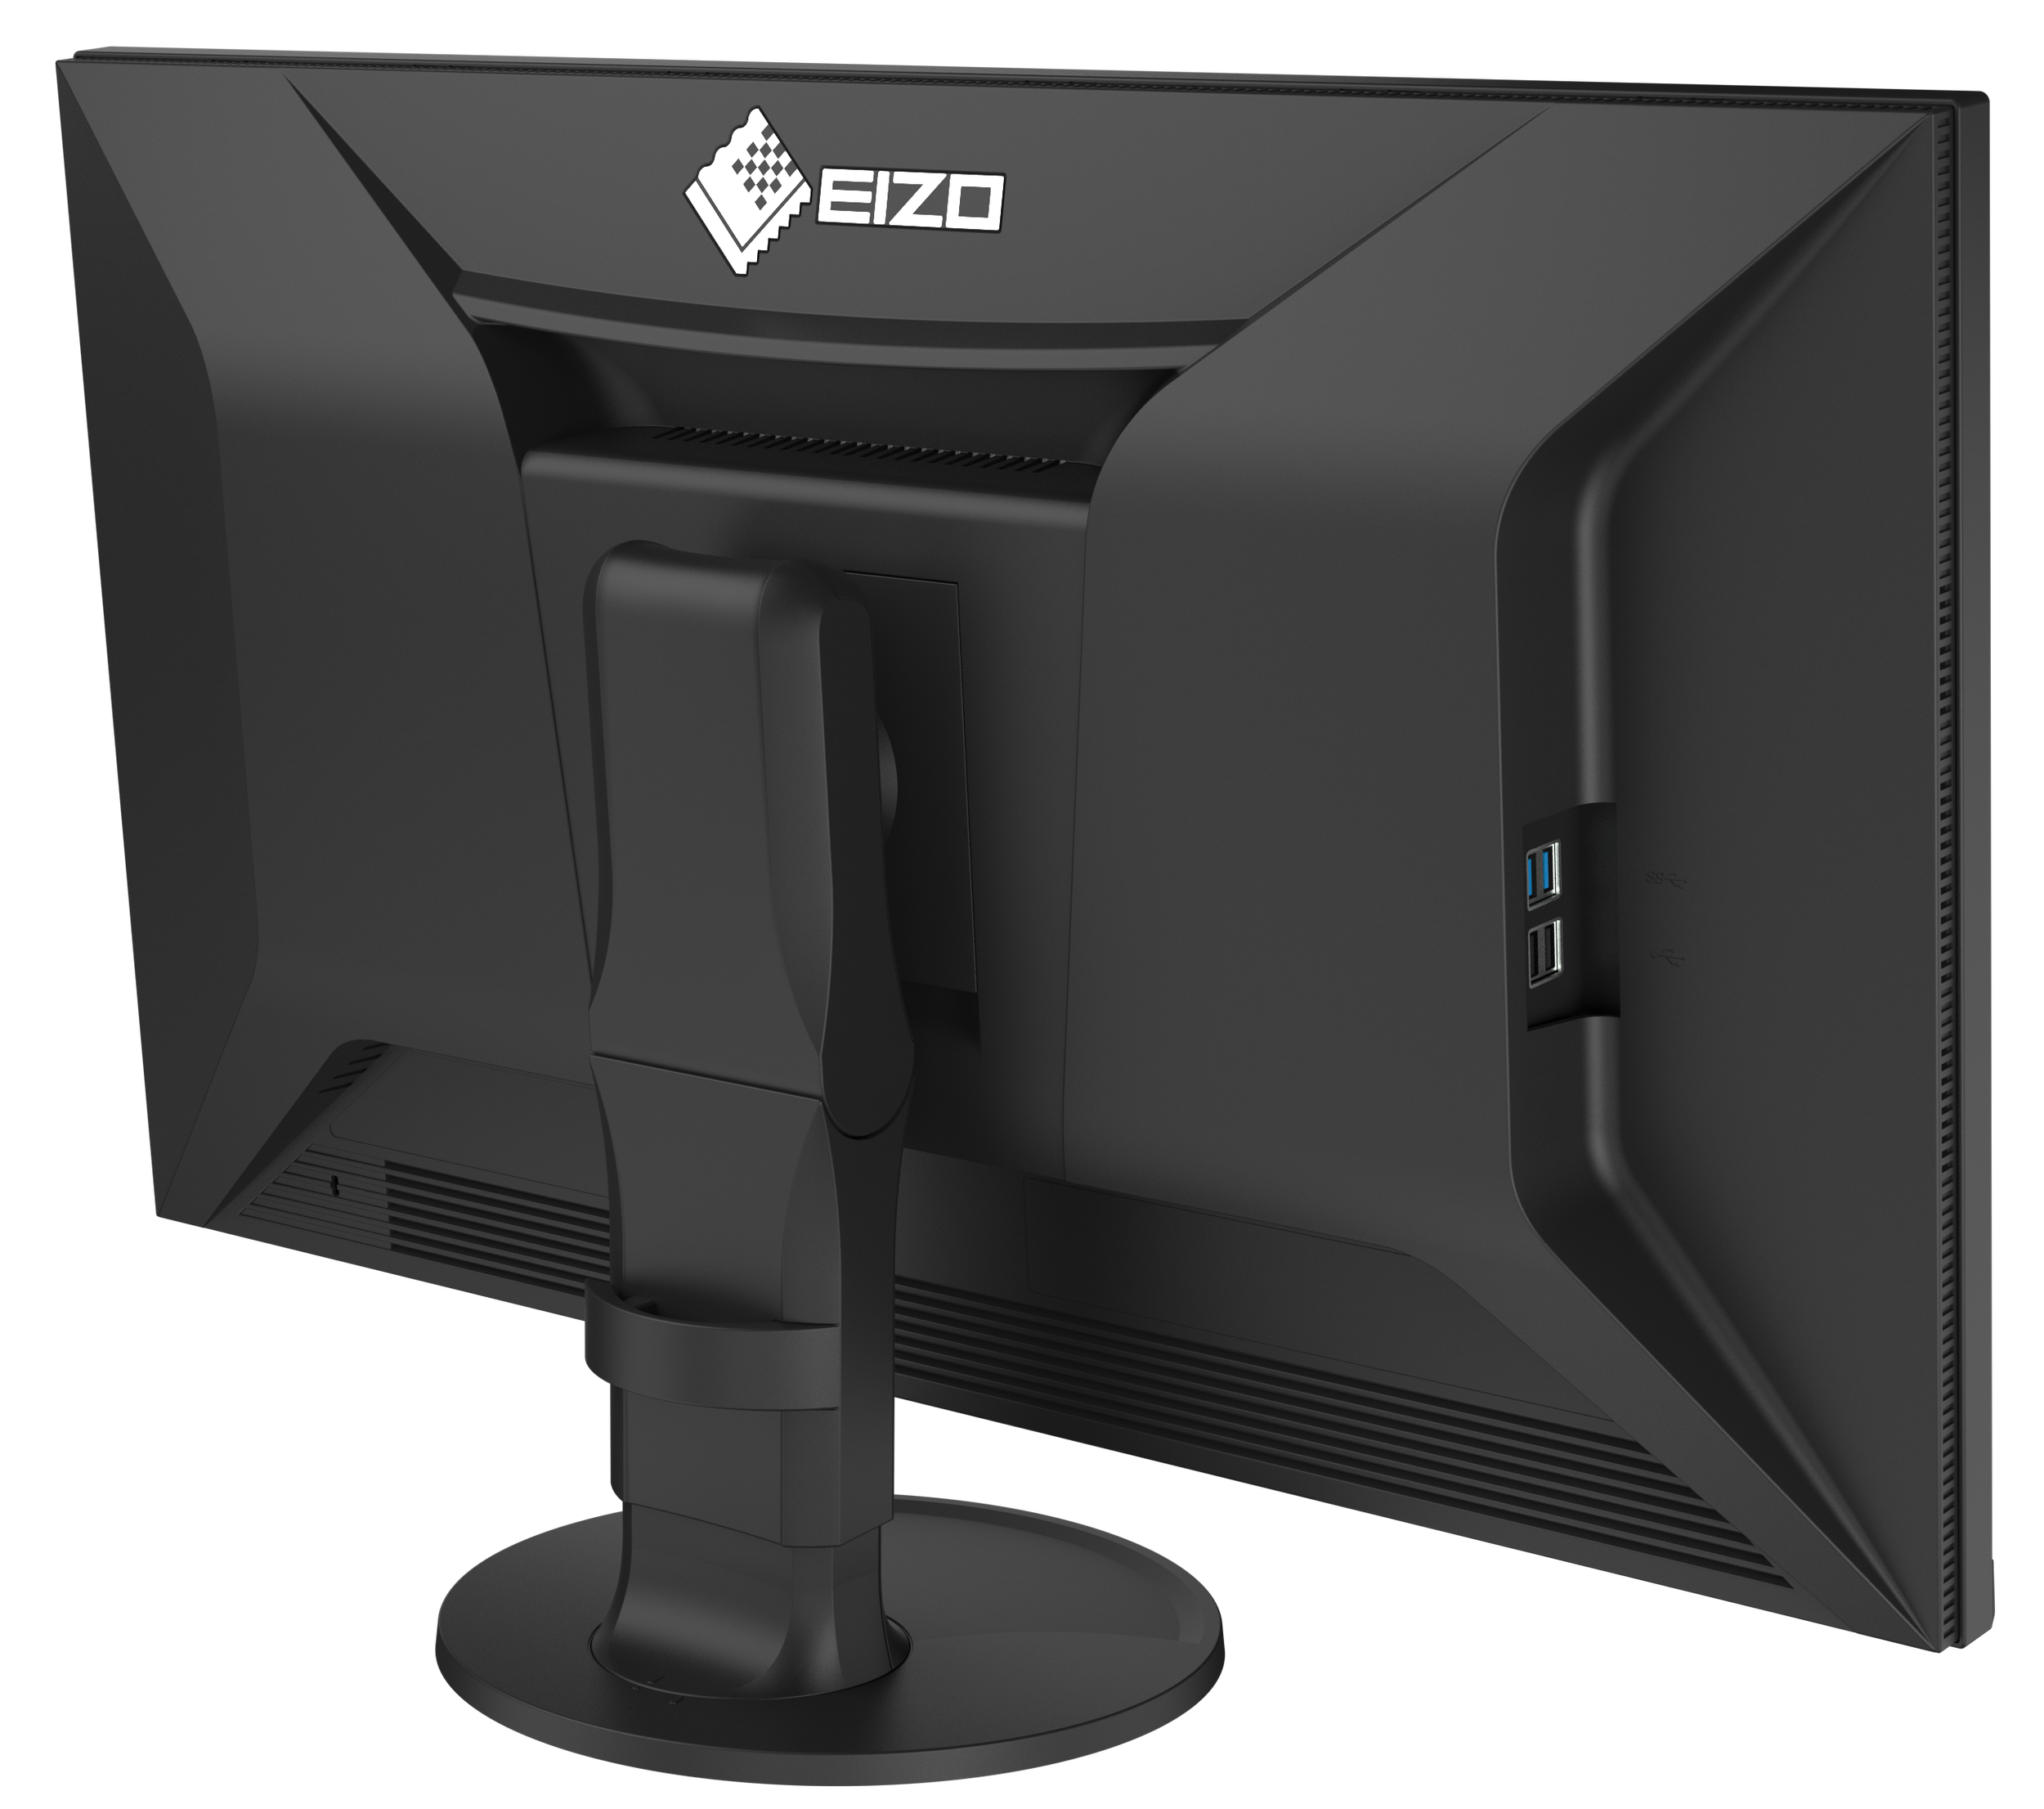
I am also pleased to see that it includes a shading hood. Again, not the most glamorous feature in the world, but anything that helps reduce reflections and creates a more controlled editing environment is useful. I edit in real spaces, not perfect grading suites, so practical touches like that matter.
Would it be overkill for some people? Almost certainly.
But if you are producing paid photo and video work, especially where colour consistency matters, then a proper monitor starts to look less like a luxury and more like an investment.
Why These Three NAB 2026 Releases Stand Out To Me
What I like about these three products is that they each solve a different problem.
The DJI Osmo Pocket 4 is about speed, portability and capturing good footage without turning every shot into a full production.
The RØDELink II is about confidence and reliability in audio, which is an area I am always looking to improve.
The EIZO ColorEdge CS3200X is about trusting the final image and making the editing process more accurate and enjoyable.
None of these products are magic solutions. They will not make bad ideas good, they will not fix poor planning and they certainly will not remove the need to actually know what you are doing. But the right tools can make a real difference, especially when they remove friction from the process.
That is why I enjoy looking at new gear from shows like NAB. Not because I need more things, but because it helps me think about where my own workflow could improve.
And that is probably the most useful part of making a list like this. It is not just a shopping list. It is a way of asking: where are the weak points in my current setup, and what would help me produce better work?
For me, in 2026, those weak points are faster capture, more reliable audio and a more trustworthy editing setup.
So yes, I would very much like to get my hands on the Osmo Pocket 4, the RØDELink II and the EIZO ColorEdge CS3200X.
Whether my bank account agrees is another matter entirely.
📸 Are you a photography/videography brand looking to showcase you products? Take a look at my Media Pack and Contact Me to discuss how we can collaborate on a sponsored review.
Posts you might also like…
About the Author - Ross Jukes is a professional Photographer and Videographer with over a decade of experience. Working in both Digital and Analogue formats, Ross has worked with international clients, had his worked published numerous times and exhibited his work extensively. With a passion for all things photographic, Ross combines his experience, enthusiasm and dedication to his art form to create engaging and educational content for the photographic community.
Disclaimer: All links to Amazon UK/US are affiliated links - you will still pay the same price but I will receive a small commission. All information provided in this blog is intended either for educational or entertainment purposes and is accurate to the best knowledge of the author. However, further research/professional advice should be sort before making purchases/implementing any advice given and no responsibility is taken by the author or parties mentioned here within.
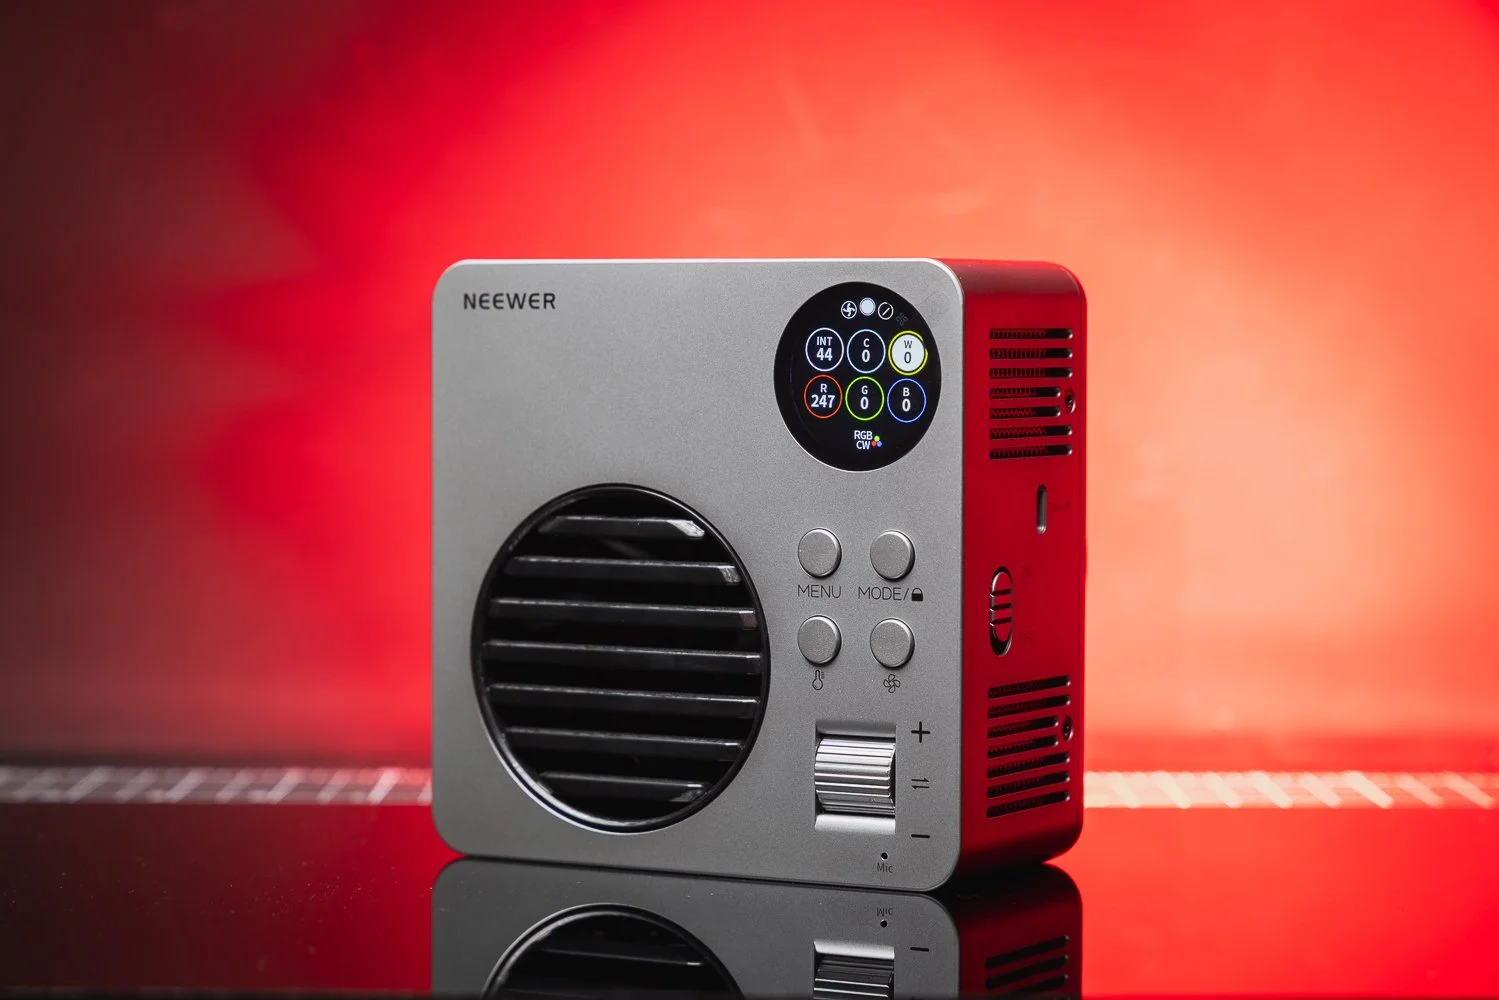
Neewer HB80C Review: A Powerful Portable RGB COB Light for Photo & Video
The Neewer HB80C is a compact 80W RGB COB video light with a built-in battery, Bowens mount and plenty of flexibility for photographers and videographers. In this review, I take a look at its strengths, weaknesses and who it is best suited to.
The Neewer HB80C is a compact and versatile COB video light that will slip nicely into most photographers’ and videographers’ setups. It offers excellent performance for its price point and plenty of useful, well thought out features. However, it is not for everyone. In this review, I’ll take a look at the pros and cons of this little light, who should consider it, and who might be better off looking elsewhere. I’ll also explain what it’s like to use in real world scenarios and where I think its limitations begin.
I’ve been working as a photographer and videographer for over 15 years now and when I first started out, I wouldn’t have dreamt of having such a compact and useful little light like the HB80C at my disposal. It’s fair to say that lighting technology, and COB lights in particular, have come a very long way in that time. The HB80C crams a lot of that progress into a genuinely portable package, with a few neat tricks up its sleeve as well.
❤️ PLEASE NOTE - This item was provided to me by Neewer. No payment was received and all views and opinions are my own. If you would like to support the blog, please consider making a small donation.

🔨 Build Quality
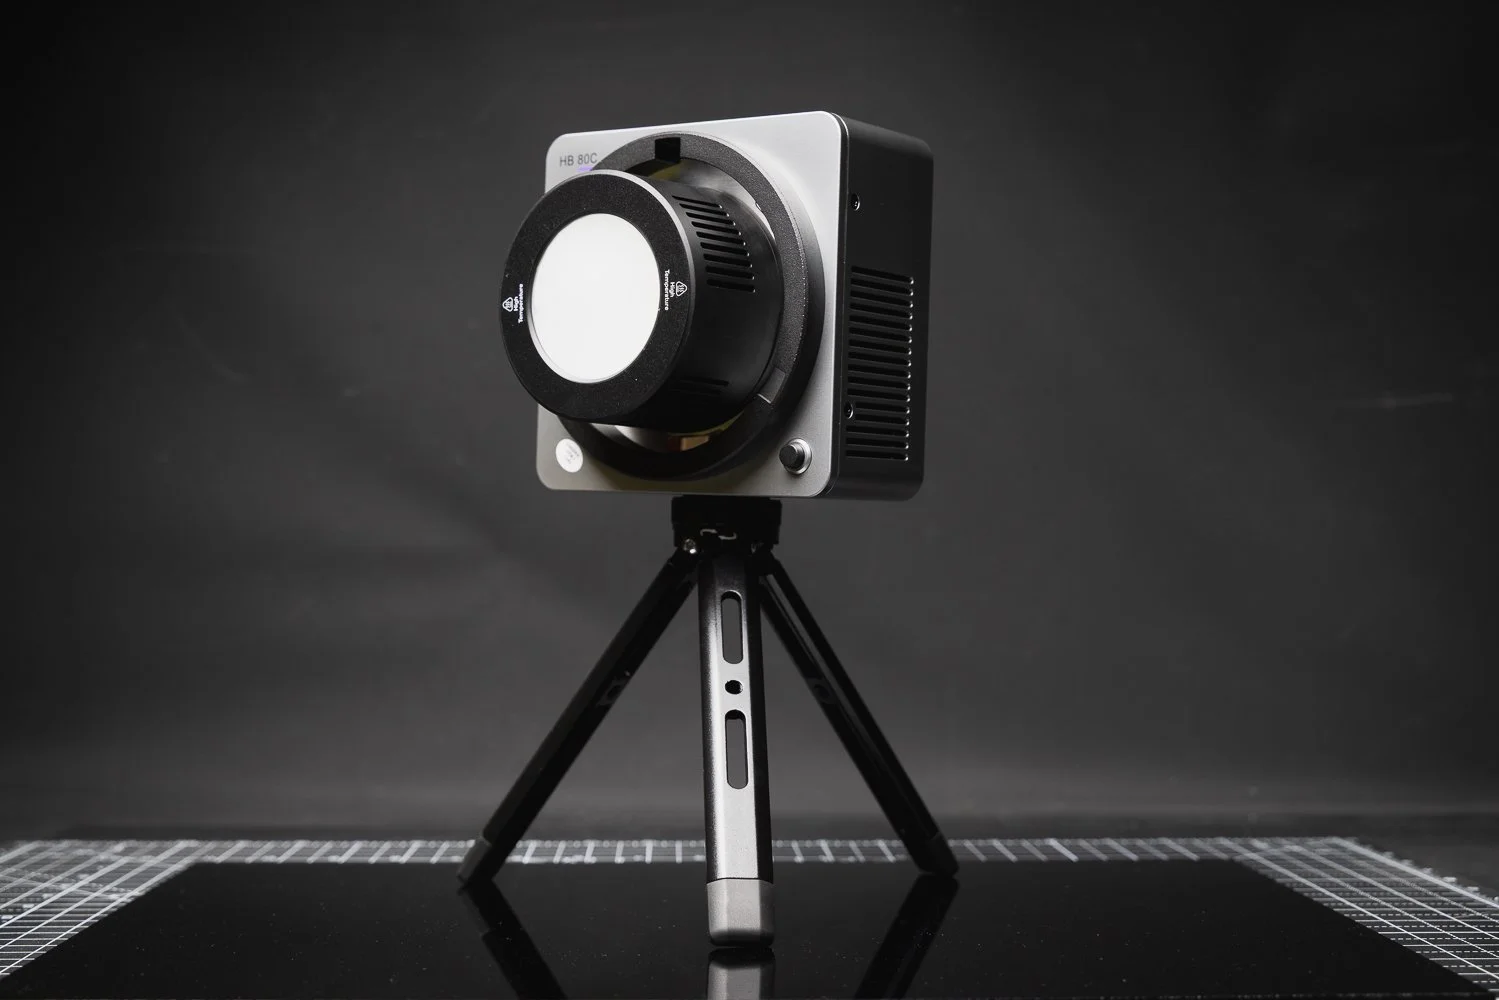
On taking the light out of the box, you notice it has a reassuring weight to it. At around 1.1kg, it’s not what I would call heavy, but it does feel dense and confidence inspiring. A lot of that is down to one of the HB80C’s standout features: the built-in 72Wh battery. Neewer lists the battery as 14.4V / 5000mAh / 72Wh, with quoted runtime of 1 hour 10 minutes in regular mode and 1 hour 34 minutes in mute mode.
That built-in battery helps give the light a more substantial feel, but it also makes it immediately more appealing for anyone who shoots on location and wants to avoid dealing with extra power solutions. There’s something very convenient about being able to pick up a light, throw it in a bag, and know it is ready to go without needing to build an entire support system around it.
The outer shell is mostly plastic, but not in a bad way. It doesn’t feel flimsy or throwaway. In fact, it feels more like practical working gear than a delicate gadget. I obviously wouldn’t recommend dropping it for the sake of testing that theory, but it does feel solid enough for regular use on photo and video jobs.
📝 Key Specifications
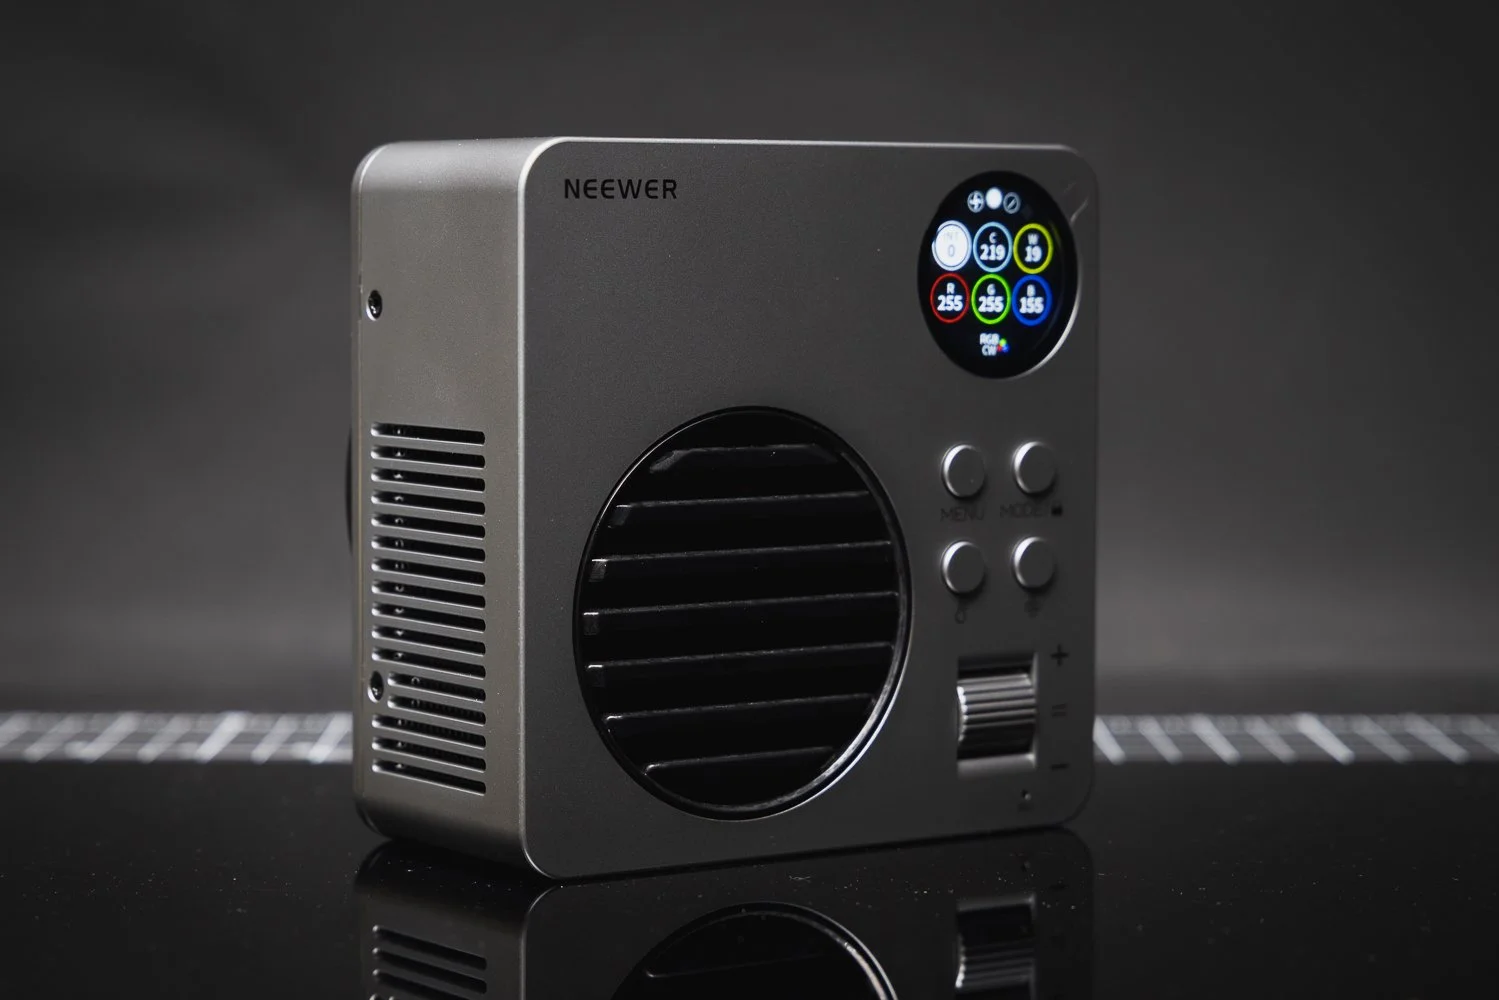
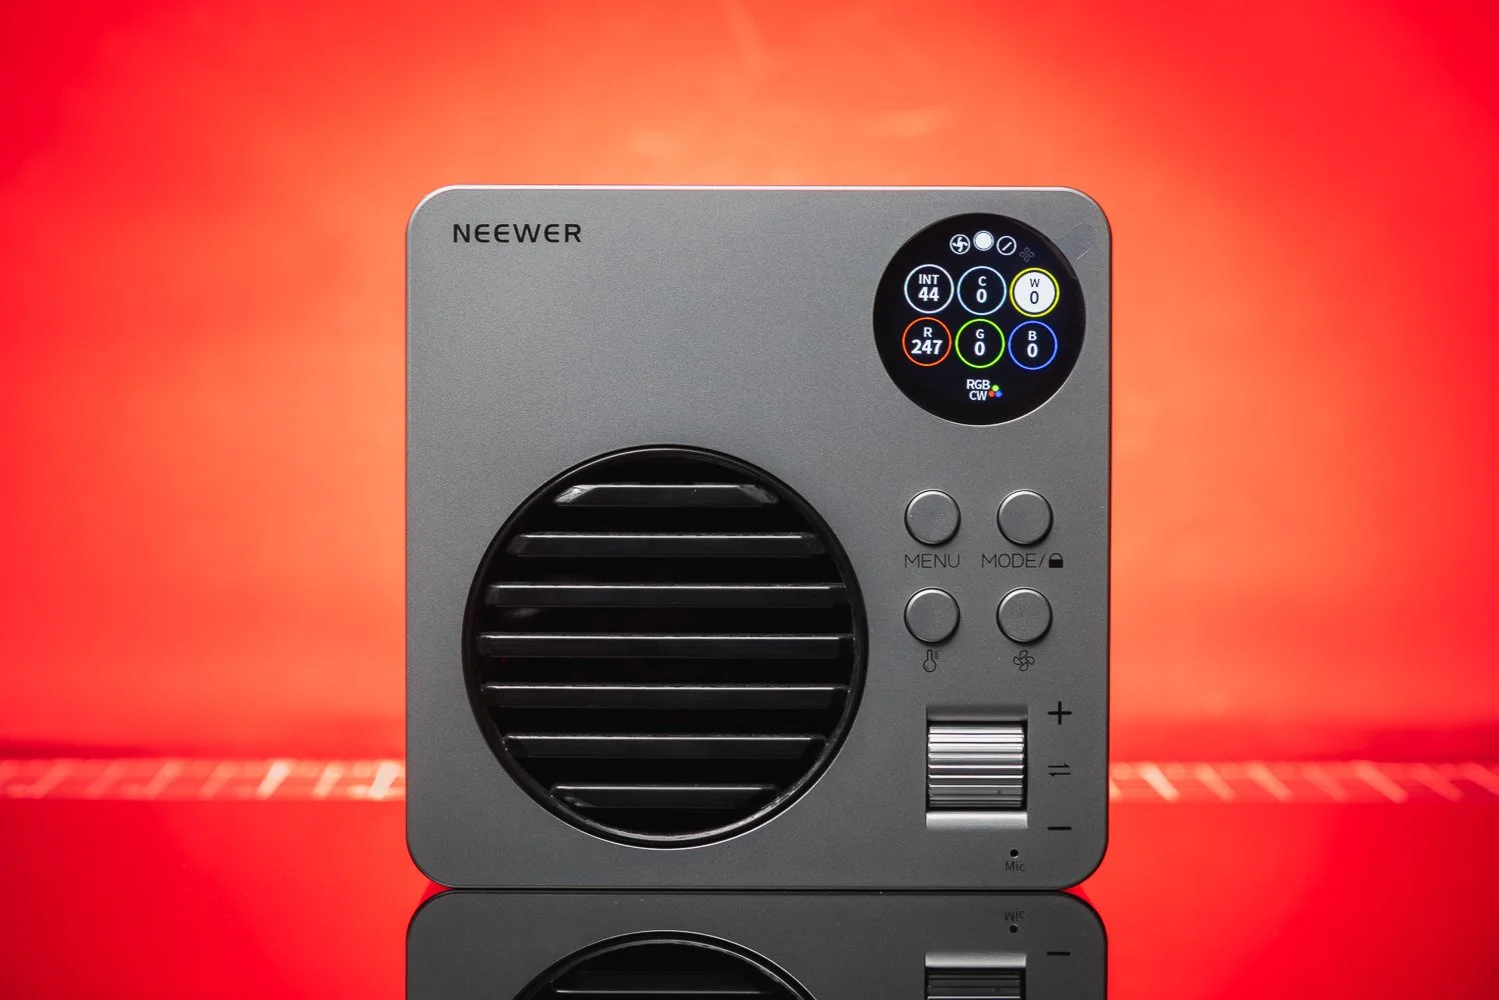
On paper, the Neewer HB80C packs in a lot. It is an 80W RGBWW mini COB LED video light with a colour temperature range of 2500K to 7500K, GM adjustment of ±50, seven lighting modes and 18 built-in special effects. Neewer also states CRI 95+, TLCI 97+, SSI scores of 74 at D56 and 85 at D32, plus TM-30 ratings of Rf 93 and Rg 102.
The lighting modes include CCT, HSI, RGBCW, XY, GEL, Source Match and FX, which gives the HB80C a much broader range of use than a simple daylight or bi-colour light. That matters if you shoot a mix of commercial work, talking head content, product videos, creative portraits or social media work and want one light that can cover multiple roles.
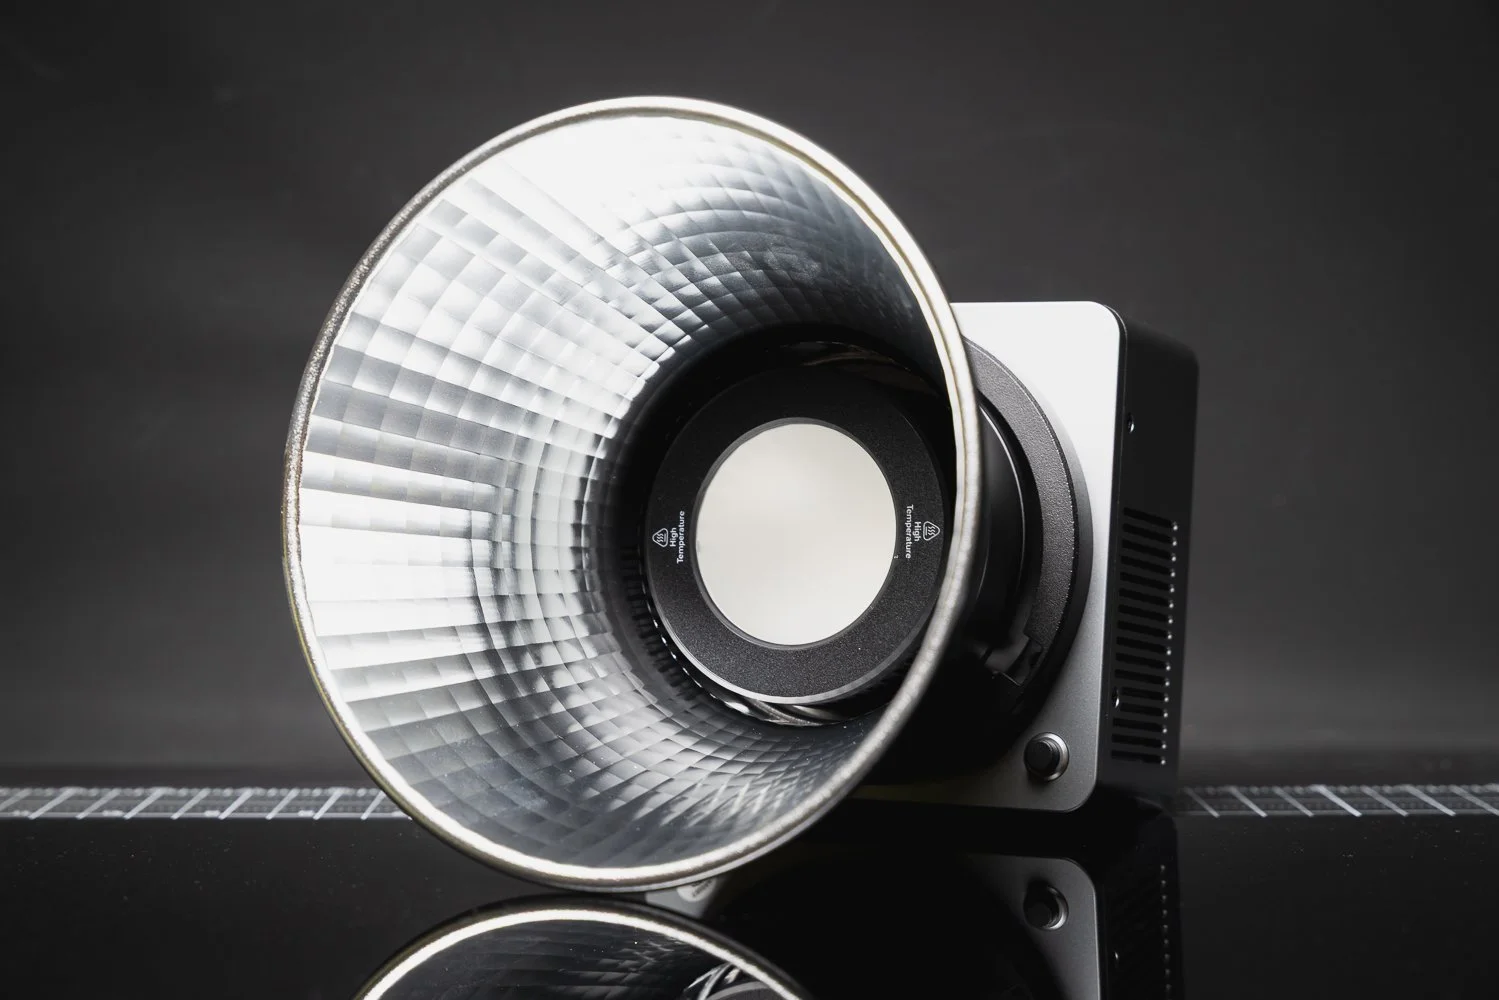
Neewer also quotes a maximum illuminance of 10,400 lux at 1 metre with the reflector fitted at 4400K, and 3,720 lux bare in booster mode. For a light this compact, those are very respectable numbers.
Source: YouTube via BarbsterFilms
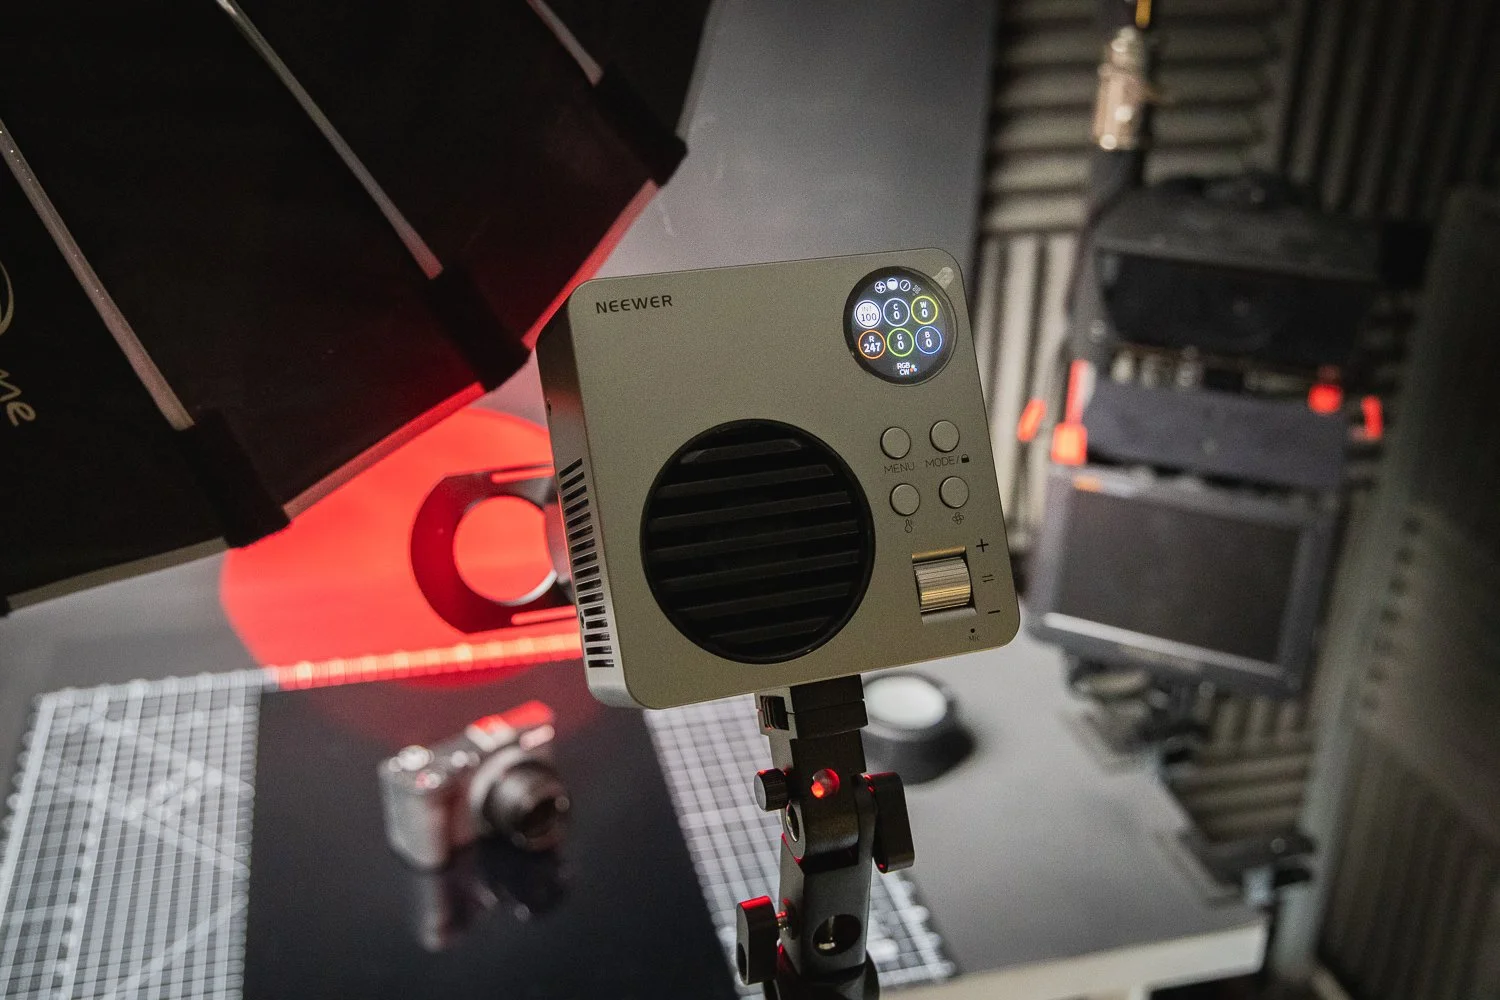
🎥 Real World Use
This is the point where the HB80C starts to make a lot of sense.
There are loads of compact lights on the market now, but not all of them are especially enjoyable to use. Some are designed to be small first and useful second. The HB80C mostly avoids that. It still feels like a proper tool. It is compact enough to travel well and fit into tight setups, but large enough that using it doesn’t become frustrating.
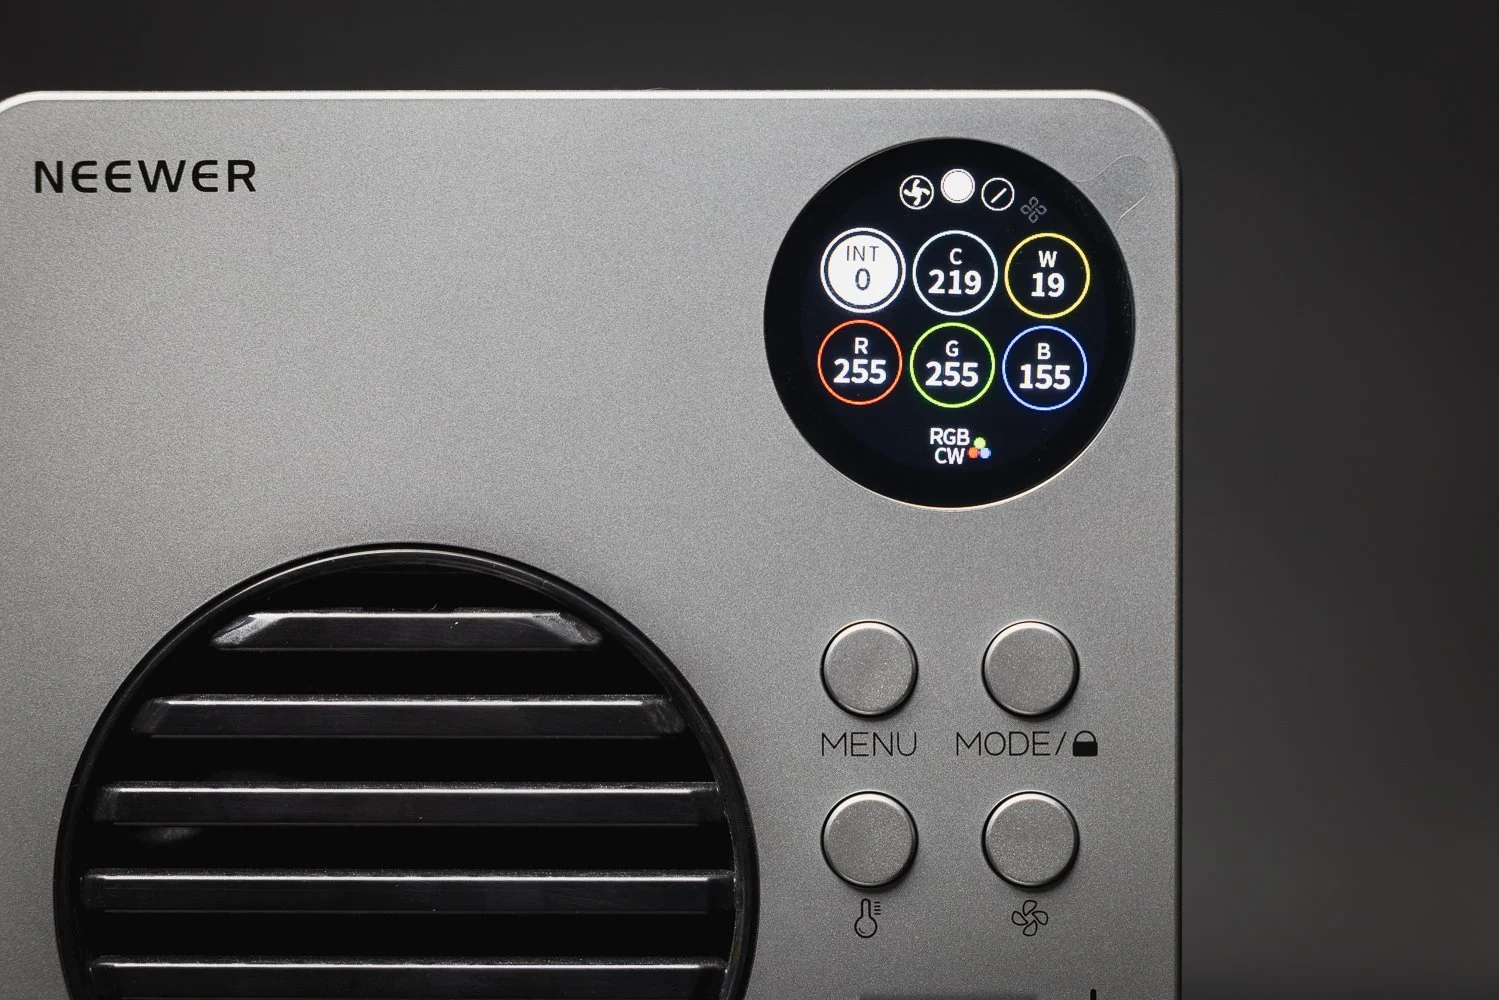
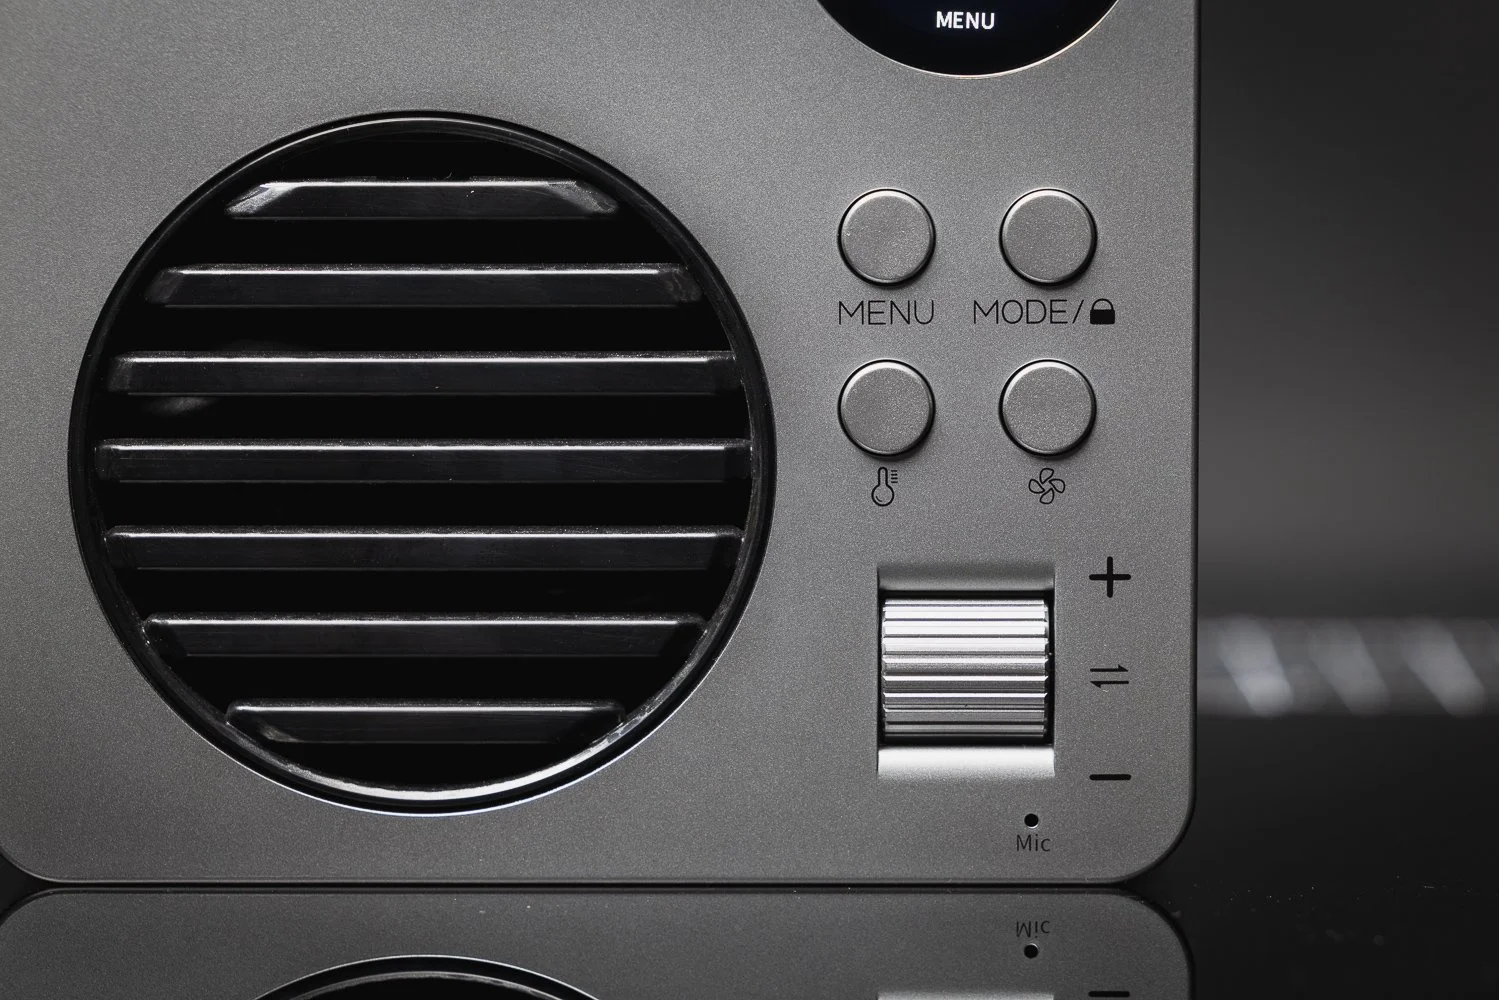
The interface is reasonably intuitive, and once you’ve spent a little time with it, it becomes straightforward enough to adjust on the fly. Neewer also includes a round colour screen, a side-mounted power switch, a locking button to prevent accidental activation and a scroll knob for changing settings. Those little usability features go a long way when you are in the middle of a shoot and don’t want to fight with menus.
What I like about the HB80C is that it feels designed for actual use rather than just for spec sheet bragging rights. It’s quick to set up, simple to move around and flexible enough to work in a range of scenarios without feeling compromised.
💪 Output and Performance
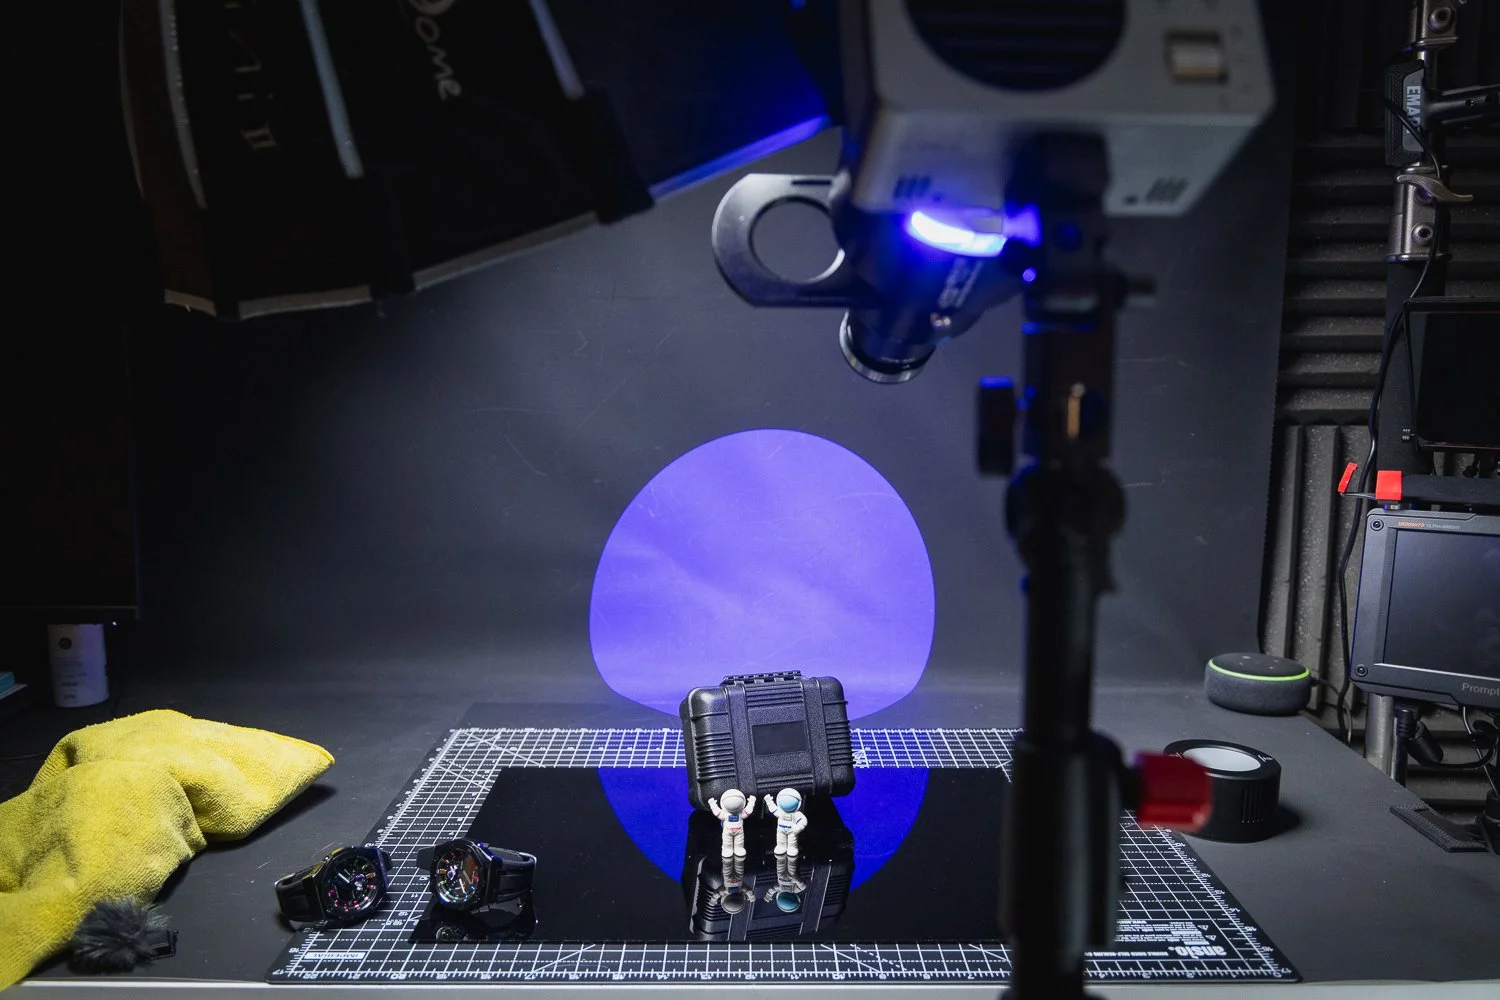
For a light of this size, the output is genuinely impressive.
Now, it is important to keep expectations realistic. This is still an 80W light. It is not trying to replace a much larger mains-powered COB fixture if you are lighting a large interview setup, trying to overpower bright daylight or building a more demanding commercial scene. But that is not really where this light is aimed.
Where the HB80C works well is in smaller and more controlled environments. It makes a lot of sense as a key light for close-up talking head videos, a fill light, a hair light, an accent light or a small product lighting solution. If you’re a solo creator, YouTuber, photographer who occasionally shoots video, or a videographer who values portability, that makes it a much more interesting proposition.
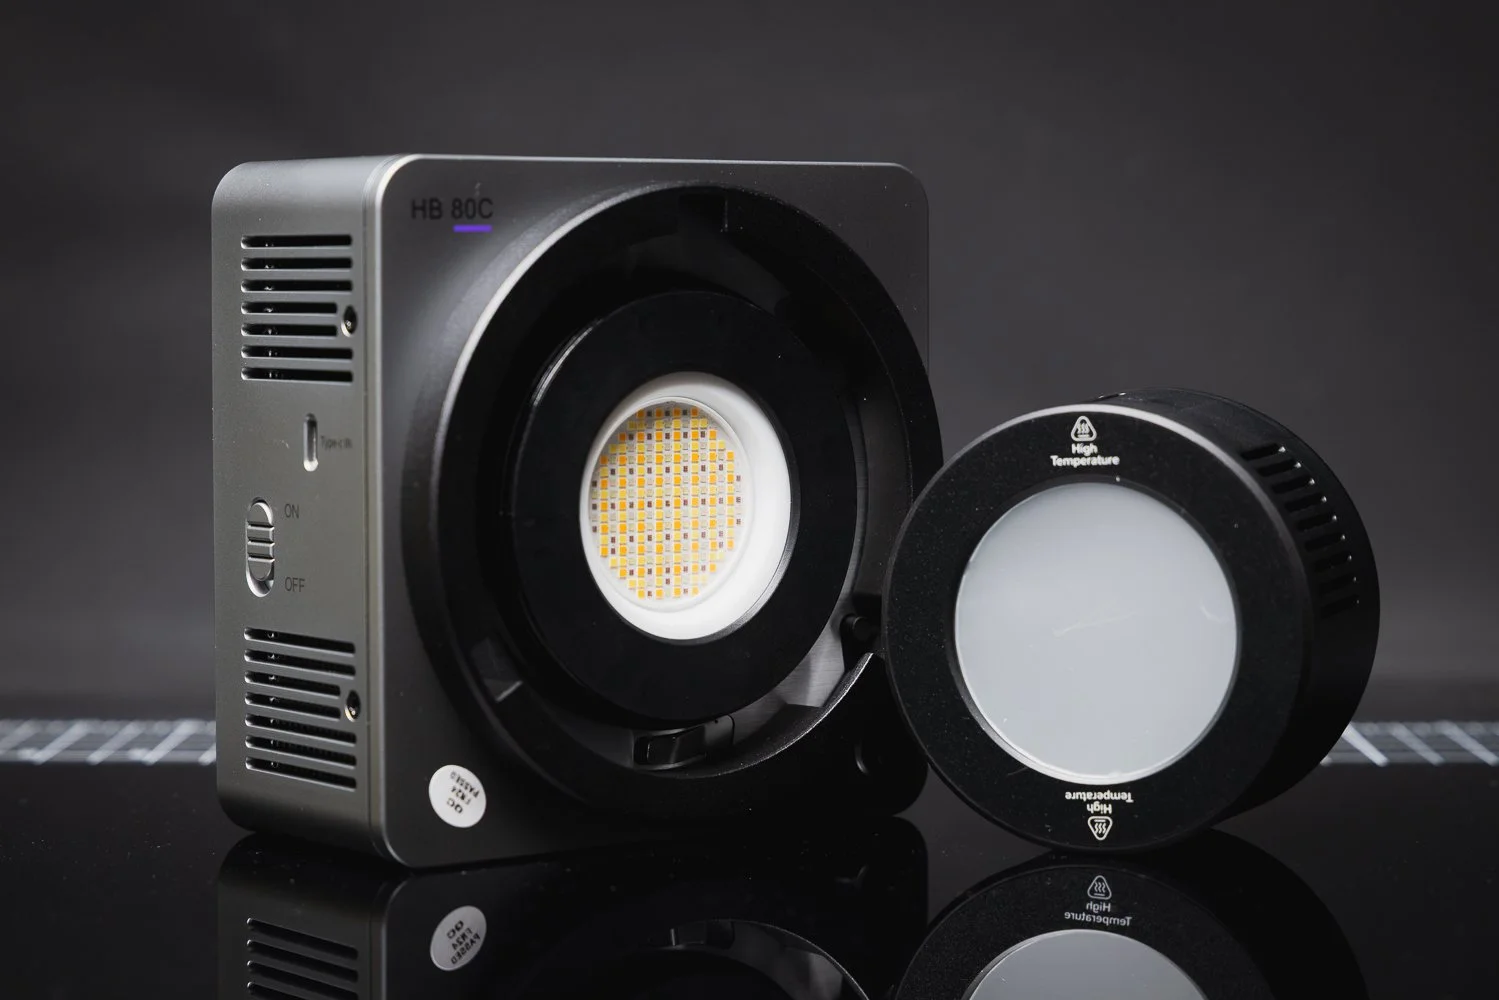
The included Bowens mount reflector helps the light feel more capable, and the Bowens compatibility in general is a big win. The HB80C supports Bowens mount accessories and includes an umbrella socket, which means you can pair it with softboxes, beauty dishes, snoots or photography umbrellas. That alone makes it much more versatile than smaller lights locked into proprietary systems.
🌈 Colour Accuracy and Creative Flexibility
A good video light needs more than just brightness. Colour accuracy matters. Skin tones matter. The ability to match other light sources matters.
On paper, the HB80C looks strong here. Neewer quotes CRI 95+ and TLCI 97+, along with the SSI and TM-30 figures mentioned earlier, and that should give most photographers and videographers a decent level of confidence.
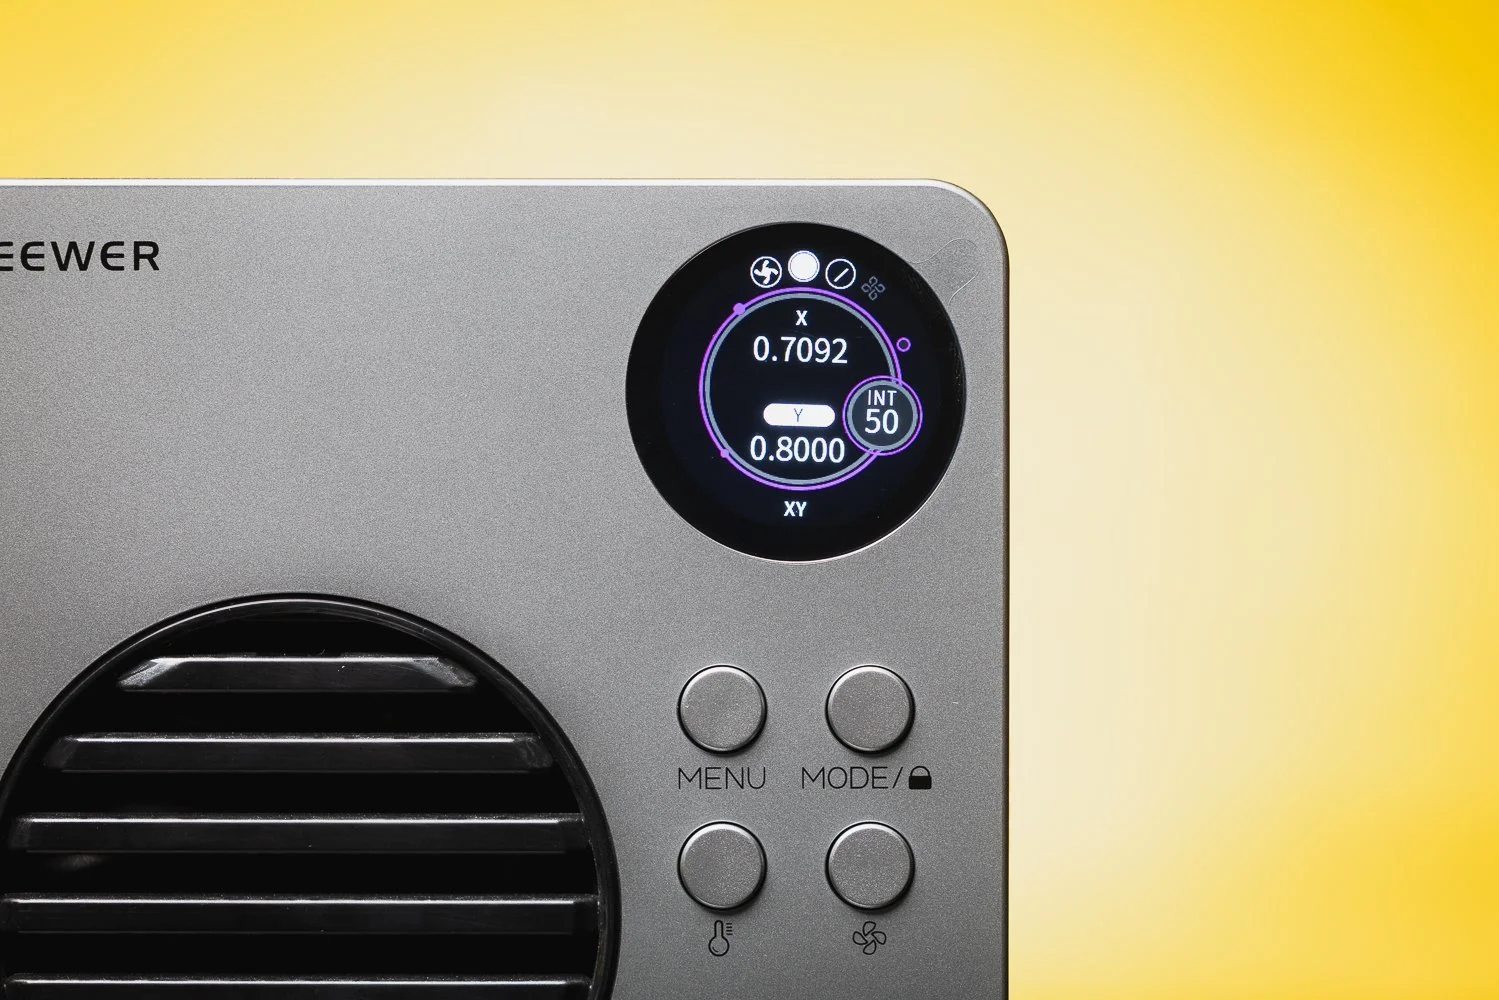
Just as importantly, the light offers proper creative flexibility. The full hue control from 0 to 360 degrees, 0 to 100% saturation, RGBWW design and wide colour temperature range mean you can use it as a clean white light one moment and then switch to something far more stylised the next.
That makes the HB80C feel more like a practical all-rounder than a novelty RGB light. It can help with simple interview setups, product shoots and portraits, but it can also be used to add colour into backgrounds, create mood, simulate practical lighting effects or give videos a more cinematic feel.
🔋 Built-In Battery and USB-C Charging
For me, one of the HB80C’s biggest strengths is the built-in battery.
There are definite advantages to not having to think about external batteries, battery plates or extra power accessories. It makes the whole thing faster and cleaner. If you’re filming behind the scenes content, creating social media videos, or shooting in awkward locations where cables are a pain, that convenience becomes a big selling point.
Neewer says the HB80C supports USB-C PD charging up to 100W input, with up to 65W PD output, and can be fully charged in around 2 hours using a 65W PD charger. It also supports charging and discharging at the same time, which makes it a more flexible option for longer shoots.
That is exactly the kind of practical feature I like seeing in modern gear. It makes the light easier to live with, especially if you are working on location and trying to keep your setup compact.
Source: YouTube via Dano Media
💨 Fan Modes and Limitations
Of course, there are compromises.
The HB80C includes three power and cooling modes: mute, regular and booster. Neewer states that mute mode runs at 45W, regular mode at 65W and booster mode at the full 80W, with booster mode requiring a PD100W charger.
That is all perfectly reasonable, but it does highlight where the compromises are. If you need silent operation, you lose power. If you want the full output, you need the right charging setup. That is not unusual for a compact light, but it is worth knowing before you buy.
So, who might find that limiting? Anyone working in very quiet recording environments, or anyone expecting this to behave like a much larger studio light, may need to adjust expectations. The HB80C is powerful for its size, but size still matters when it comes to heat, fan noise and total output.
📱 App Control and Wireless Features
The HB80C also includes Neewer’s Infinity technology for app control and 2.4G wireless communication. When lights are set to the same channel, the HB80C can be synchronised with other compatible Neewer 2.4G lights for group control.
For solo creators and small teams, that is a genuinely useful feature. Anything that reduces the amount of walking back and forth across a set is a win in my book. It also makes the HB80C more appealing if you already own other Neewer lights or plan to build out a small multi-light setup over time.
🔴 Pros and Cons
Pros
Compact and easy to travel with
Built-in battery is genuinely useful
Bowens mount adds flexibility
Good mix of white light and RGB capability
Strong feature set for the price
USB-C PD charging is a smart addition
Useful app and wireless control options
Cons
80W output will not be enough for every scenario
Silent mode reduces available power
Booster mode needs the right charger setup
Plastic construction may not appeal to everyone
Still best suited to smaller scale setups rather than larger productions
🙋♂️ Who Is the Neewer HB80C Best For?
I think the HB80C makes the most sense for photographers and videographers who want a genuinely portable light that can do a bit of everything. It’s a great fit for content creators, YouTubers, solo shooters, interview setups, product work, social media content and photographers starting to add more video into their workflow.
If portability matters to you, this light becomes even more appealing. The built-in battery, Bowens mount compatibility and strong feature set make it a very practical option for people who want a compact light that still feels capable.
✅ Final Thoughts
The Neewer HB80C is one of those products that feels well judged. It doesn’t try to be everything, but within its intended role it does a lot right. It is compact, flexible, battery powered, Bowens compatible and feature rich, and that combination makes it very easy to like.
What stands out most to me is that it feels useful. Not gimmicky. Not overcomplicated. Not designed purely to look good in a list of features. It feels like a practical working light that suits the way a lot of photographers and videographers actually shoot now.
Is it perfect? No. The output ceiling and cooling-related compromises will matter to some users. But if you want a portable RGB COB video light that offers good flexibility, solid performance and strong value for money, the Neewer HB80C is a very convincing option.
For a lot of creators, this could easily become the light that gets used the most simply because it is so easy to take anywhere.
🔴 FAQ’s
-
Yes, the Neewer HB80C is well suited to video work, especially for solo creators, interviews, YouTube videos, social content and smaller productions. Its 80W output, RGBWW design, 2500K–7500K range and built-in battery make it a flexible option for a wide range of video tasks.
-
Yes, the HB80C has a built-in 72Wh battery rated at 14.4V / 5000mAh. Neewer states runtime of around 1 hour 10 minutes in regular mode and 1 hour 34 minutes in mute mode.
-
Yes, the HB80C supports Bowens mount accessories and includes a reflector. It also has an umbrella socket, which makes it more versatile for photographers and videographers who already use Bowens modifiers.
-
Neewer states that the HB80C can reach up to 10,400 lux at 1 metre with the reflector fitted at 4400K, making it impressive for such a compact light.
-
If you want a compact RGB COB video light with a built-in battery, Bowens mount compatibility and good all-round flexibility, the HB80C looks like a strong option for the money. It makes the most sense for smaller scale photo and video setups rather than large studio productions.
📸 Are you a photography/videography brand looking to showcase you products? Take a look at my Media Pack and Contact Me to discuss how we can collaborate on a sponsored review.
Posts you might also like…
About the Author - Ross Jukes is a professional Photographer and Videographer with over a decade of experience. Working in both Digital and Analogue formats, Ross has worked with international clients, had his worked published numerous times and exhibited his work extensively. With a passion for all things photographic, Ross combines his experience, enthusiasm and dedication to his art form to create engaging and educational content for the photographic community.
Disclaimer: All links to Amazon UK/US are affiliated links - you will still pay the same price but I will receive a small commission. All information provided in this blog is intended either for educational or entertainment purposes and is accurate to the best knowledge of the author. However, further research/professional advice should be sort before making purchases/implementing any advice given and no responsibility is taken by the author or parties mentioned here within.
The Photography Show 2026 Birmingham – My Experience at the NEC
I headed to The Photography & Video Show 2026 at the NEC Birmingham to soak up the latest gear, talks and creative inspiration. Here’s my experience from the day — and why my video is the best way to get a true feel for the event.

There is always something exciting about having a major photography event land right on the doorstep, and that is exactly how The Photography & Video Show 2026 felt. Held at the NEC Birmingham from 14–17 March 2026, the show brought together photographers, videographers and content creators for four days of gear, inspiration, talks and hands-on demos. The official event positions itself as the UK’s leading event for visual storytellers, and after spending time there myself, it is easy to see why. The show combines photography, video and content creation under one roof, with thousands of visitors attending across the four days.
This post is really designed to go hand in hand with my video from the day. I wanted to put together a written overview of my experience at The Photography Show 2026, but the video is where you will get the real atmosphere. It captures the movement, the noise, the scale of the show floor and that sense of being surrounded by creativity, new technology and people who are every bit as obsessed with cameras, lenses and storytelling as you are. So while this article gives you my thoughts on the day, I would definitely encourage you to watch the video as well if you want the true feel for what it was like to be there.
🎥 Why The Photography Show still matters
One of the best things about The Photography & Video Show is that it reflects where the industry is now. This is no longer a world where photography, filmmaking and content creation sit in completely separate lanes. A lot of us now work across all three. You might be shooting stills for one client, filming behind-the-scenes clips for another and creating social media content somewhere in between. The official show focus reflects that, with dedicated coverage around photography, video and film production, and creator-led content.
That is a big reason why events like this are still valuable. Yes, you can watch product launches online and read camera specs from your desk, but there is something very different about seeing everything brought together in person. You can try gear for yourself, compare brands side by side and actually have conversations with people who use this equipment every day. It gives you a much clearer sense of what could genuinely fit your workflow rather than what simply looks good on paper.
🙋♂️A big creative event on Birmingham’s doorstep
From a local perspective, it is also brilliant to have an event of this scale in Birmingham. The show took place in Hall 5 at the NEC, with opening hours running from 10am until 5pm across the four days. That makes it incredibly accessible for photographers and videographers across Birmingham, the West Midlands and beyond.
I have said before that Birmingham deserves more recognition as a creative city, so having an event like this here feels important. For local photographers, Birmingham-based content creators and Midlands videographers, it is a rare chance to experience one of the UK’s biggest industry events without needing to travel down to London. It makes the whole day feel more reachable and more relevant to the people actually working in and around the city.
📸 So much more than just cameras
Of course, the gear is a huge part of the appeal. The show featured more than 250 exhibitors and brands, including names like Adobe, Canon, Capture One, CEWE, EIZO, Fujifilm and Godox. That gives you a good indication of the variety on offer. It is not just about camera bodies and lenses. It is lighting, editing software, colour management, printing, accessories, workflow tools and everything else that supports the wider process of making images and video.
That mix is part of what makes the day so enjoyable. Even if you arrive thinking you are only interested in one specific area, you almost always leave with a broader perspective. You start looking at how different brands solve different problems, what tools might speed up your workflow, and which ideas could actually improve the way you shoot or edit.
🔺 Inspiration is often the real value
As much as it is easy to focus on the latest kit, I think one of the real benefits of attending a show like this is the inspiration side of it. According to the official site, the 2026 show included more than 500 talks and demos, all designed to help visitors learn something new, improve their technique or hear directly from working creatives.
That is hugely valuable, especially if you work for yourself. When you are running your own photography or video business, it is very easy to get trapped in your own routine. You get buried in editing, client deadlines, admin and all the little behind-the-scenes jobs that come with freelance life. Spending a day in a space like this can help break that pattern. It reminds you that there are always new ideas to explore, new ways to work and new creative directions to think about.
Sometimes the most useful thing you take away from an event is not a product at all. It is a fresh perspective.
🔴 Why you should watch the video
This is exactly why I wanted to make a video around my visit rather than just write about it afterwards. A written post can tell you what happened, but a video can show you what it felt like. It gives a much better sense of the scale of the event, the energy of the crowd, the way the stands are laid out and the kind of creative buzz that comes from being surrounded by so much kit and so many like-minded people.
So if you are considering visiting in future, or you simply want to see what The Photography Show 2026 was like from the perspective of a Birmingham photographer and videographer, my video is definitely the place to start. This article is the companion piece. The video is the main experience.
🖥️Events like this always make me think about editing too
One thing that always happens after a day surrounded by photography is that I come away thinking about editing style just as much as shooting. Seeing so many different images, looks and workflows in one place naturally makes you reflect on your own process. How do you want your work to feel? What visual identity are you building? What helps your images stand out while still feeling consistent?
That links closely to my own Lightroom preset packs. If you have followed my work for a while, you will know that I am a big fan of edits that feel cinematic, nostalgic and film-inspired rather than overly polished or clinical. My Lightroom presets are built around that look. On my site, I currently offer the Modern Nostalgia pack for brighter day-time scenes, the Midnight Cinematic pack for darker and moodier work, plus a preset bundle that combines both. There is also a free sample pack for anyone who wants to try the look before buying.
If you are a photographer in Birmingham, or anywhere else for that matter, and you are trying to build a more consistent editing style, preset packs can be a really useful starting point. They are not there to replace your creative decisions, but they can absolutely speed up your workflow and help you shape a more recognisable look across your images.
✅ Final thoughts
Overall, I really enjoyed The Photography & Video Show 2026. It was busy, inspiring, slightly overwhelming in the best possible way, and packed with the kind of ideas and tools that make you want to get out and shoot more. For photographers, videographers and content creators in Birmingham and the wider Midlands, it is exactly the kind of event worth keeping on your radar. Whether you are interested in trying the latest kit, hearing from industry speakers or simply spending a day immersed in the creative world, there is plenty there to make the visit worthwhile.
If you want the real feel for the day though, make sure you watch the video. That is where you will get the atmosphere, the pace and the visual experience that a blog post can only hint at.
And if the show leaves you inspired to refine your own photography style, have a look at my Lightroom preset packs as well. They are built to help you create cinematic, nostalgic edits with less time spent starting from scratch on every image.
📸 Are you a photography/videography brand looking to showcase you products? Take a look at my Media Pack and Contact Me to discuss how we can collaborate on a sponsored review.
Posts you might also like…
About the Author - Ross Jukes is a professional Photographer and Videographer with over a decade of experience. Working in both Digital and Analogue formats, Ross has worked with international clients, had his worked published numerous times and exhibited his work extensively. With a passion for all things photographic, Ross combines his experience, enthusiasm and dedication to his art form to create engaging and educational content for the photographic community.
Disclaimer: All links to Amazon UK/US are affiliated links - you will still pay the same price but I will receive a small commission. All information provided in this blog is intended either for educational or entertainment purposes and is accurate to the best knowledge of the author. However, further research/professional advice should be sort before making purchases/implementing any advice given and no responsibility is taken by the author or parties mentioned here within.

REVIEW: Atomos Ninja TX Go: All Show and Go!
Atomos Ninja TX GO is a 5" 1500-nit monitor-recorder that adds CFexpress Type B, Wi-Fi/cloud workflows, and HDMI camera control + touch-to-focus (on supported cameras)—making it a meaningful upgrade for creators who want a brighter screen, faster media and tighter camera integration.
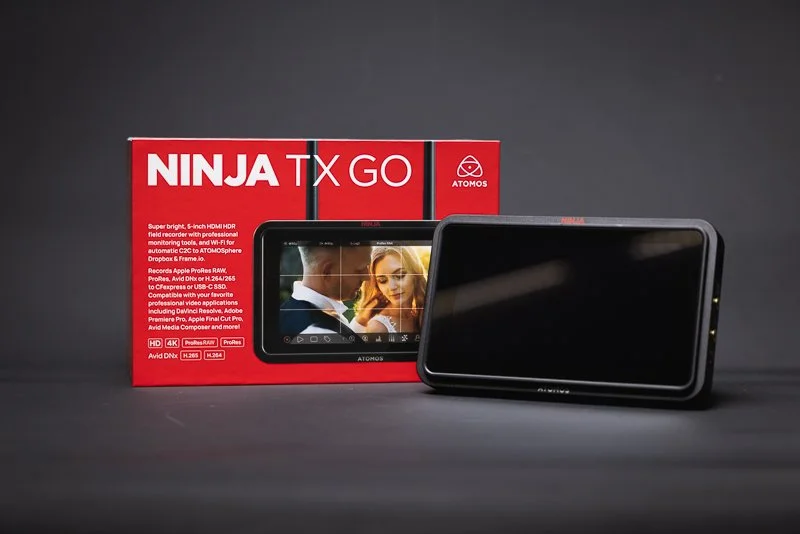
Atomos Ninja TX GO is a 5" 1500-nit monitor-recorder that adds CFexpress Type B, Wi-Fi/cloud workflows, and HDMI camera control + touch-to-focus (on supported cameras)—making it a meaningful upgrade for creators who want a brighter screen, faster media and tighter camera integration.
Buy it if: you record ProRes/ProRes RAW, shoot outdoors, want CFexpress + camera control
Skip it if: your camera isn’t supported for control / you don’t need external recording
Best for: weddings, doc, content creators, small crews
❤️ PLEASE NOTE - No AI was used to make this article. It is my own work based on my experiences and created in my own time. This item was purchased with my own money and is not in collaboration with Atomos. If you would like to support the blog, please consider making a small donation.
Some things simply can’t be improved upon. Take a perfectly worn-in mattress that feels like it was built for you, or a piece of toast, cooked to perfection, heaven! Sounds great, right? Well, swap that mattress for the latest Memory Foam with active cooling or spread a nice thick layer of Jam on that toast and tell me it isn’t ten times better! OK, I’m stretching a bit but you get the point - well that’s exactly where the TX GO comes in - they might seem like little tweaks, but they add up to a world of difference!
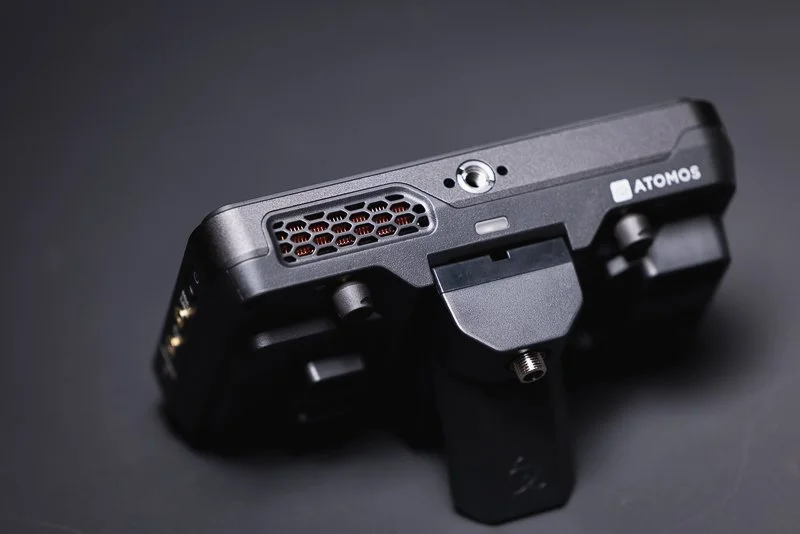
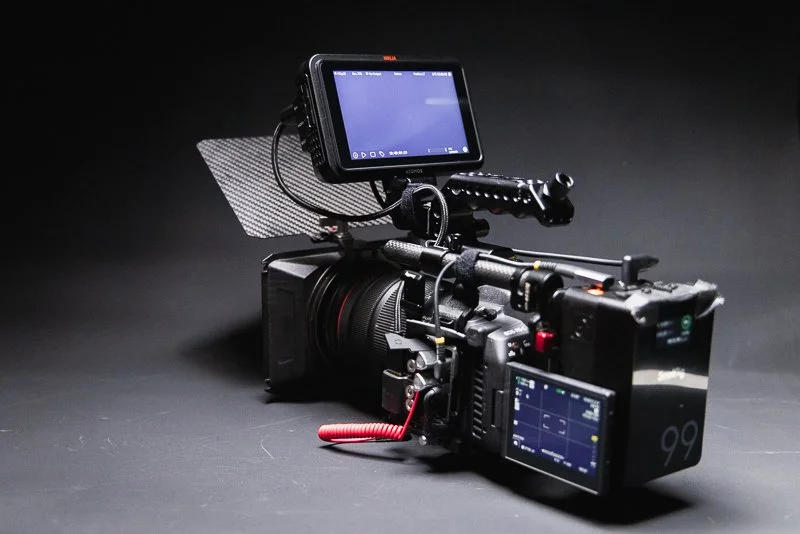
🔨 What is the Build Quality Like?
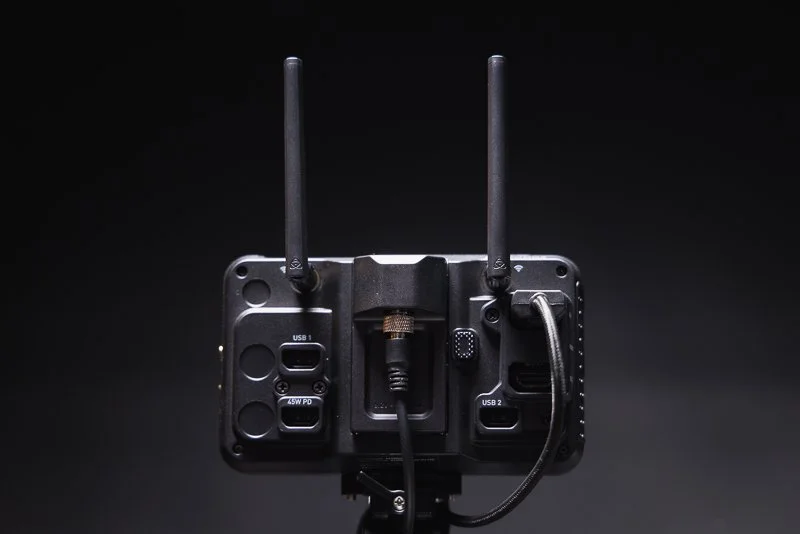
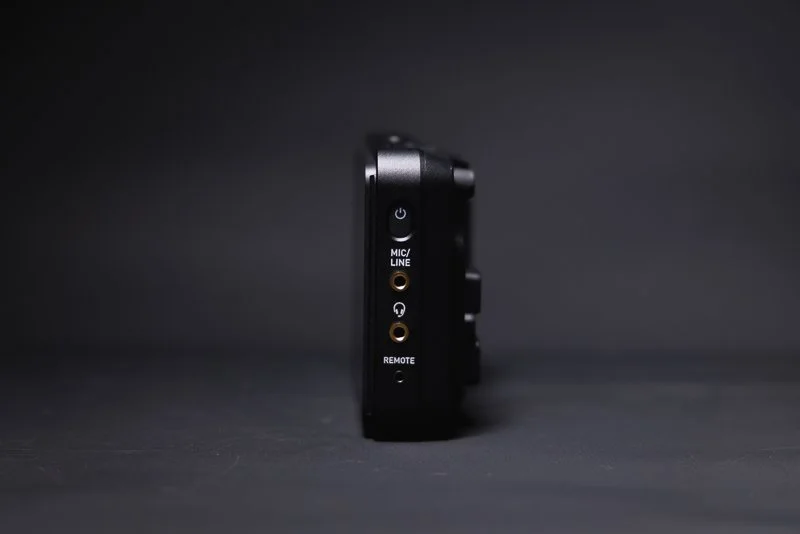
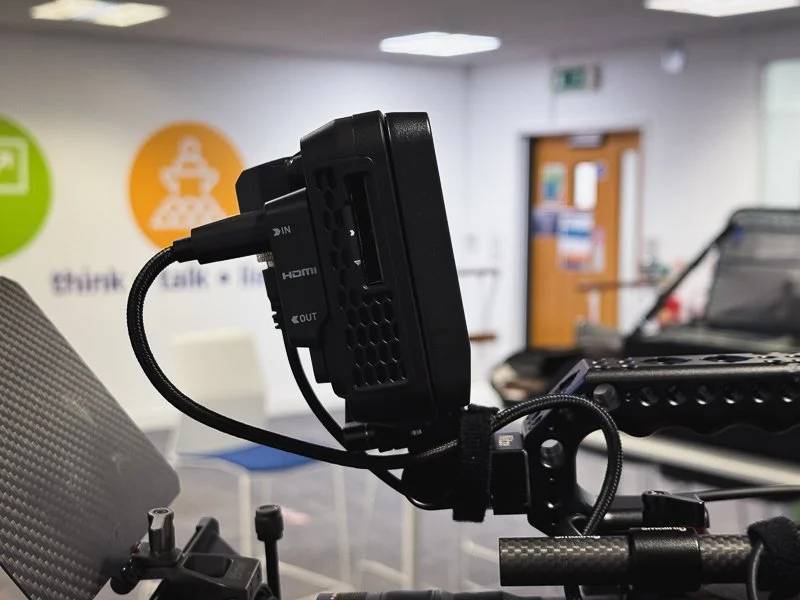
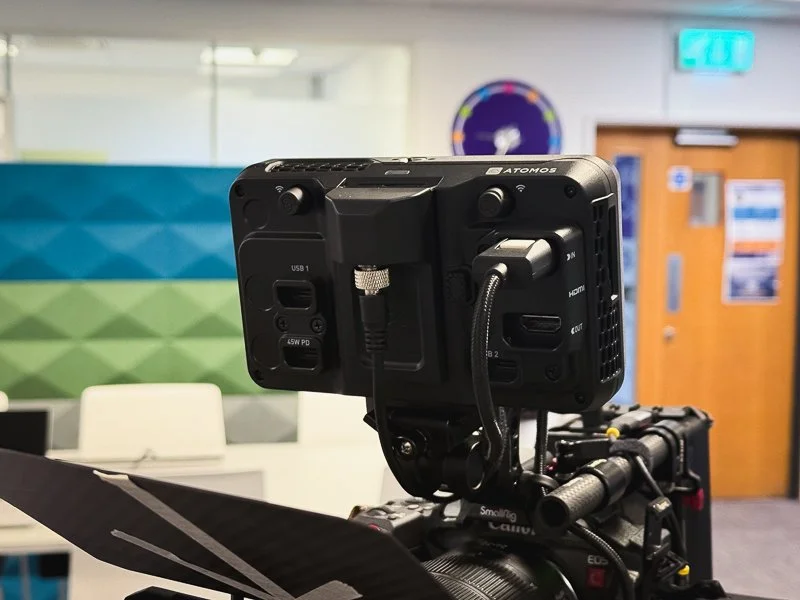
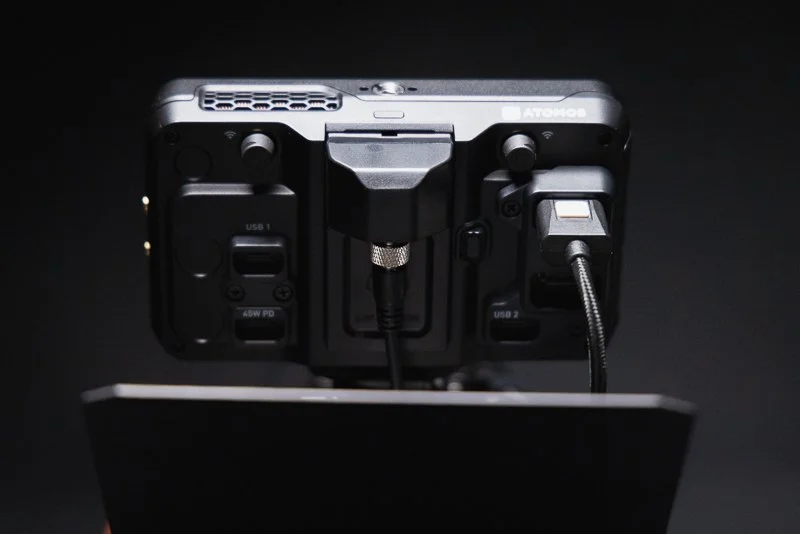
Straight out of the box, this feels like an Atomos product. It is sturdy with a reassuring weight to it. Although it is plastic, it feels sturdy and like it could take a knock or two. Atomos clearly understands its users and it is nice to see mounting points on the top and bottom of the monitor and well throughout additions like the new ‘locking’ cable clamps for the HDMI and USB-C. With the additional ‘Creator Accessory Kit’ you also receive a sunhood which is a nice add-on for those working in nicer climates than the UK!
There are some improvements to airflow and Atomos have changed the fan in the latest TX GO - it is still not silent, with a subtle whirring noise that ramps up on start-up and quickly calms down. This has never been an issue for me personally as even in interview scenarios, it is usually unnoticable. However, it is something to be conscious of if you work in exceptionally quiet environments, it may be irritating - but if you are using video lights etc. then you will be used to some subtle fan noise.
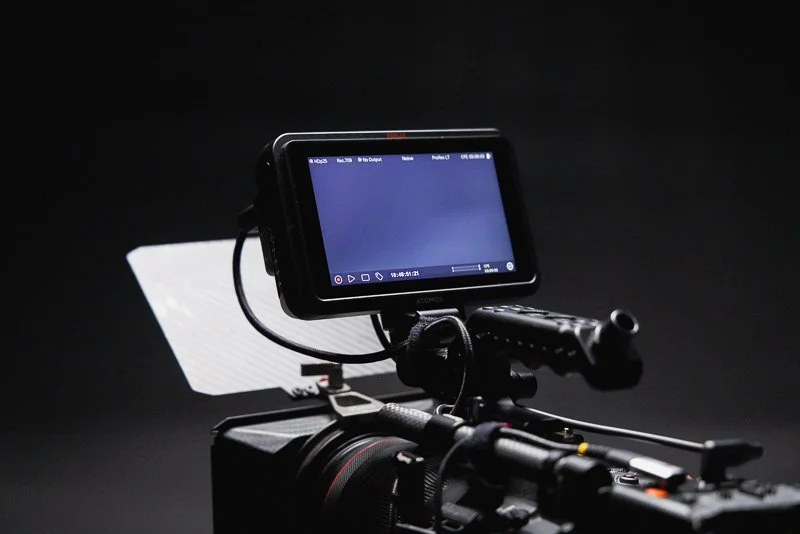
👍 What is the User Experience like?
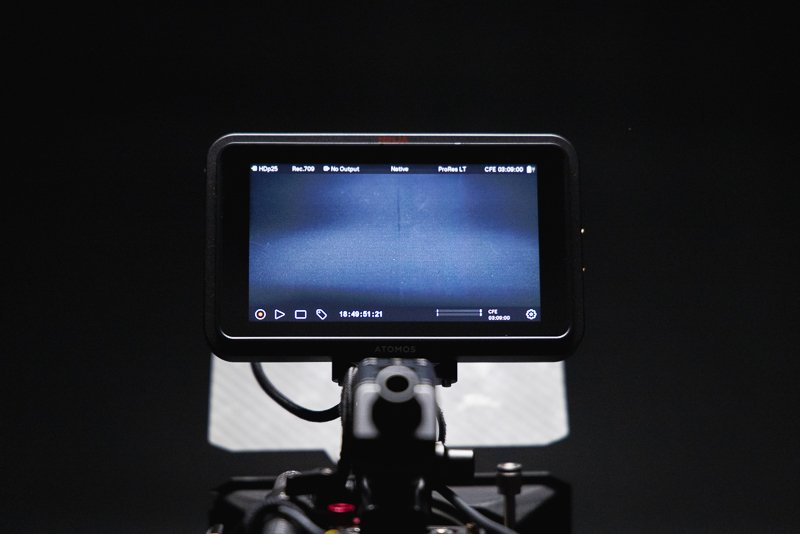
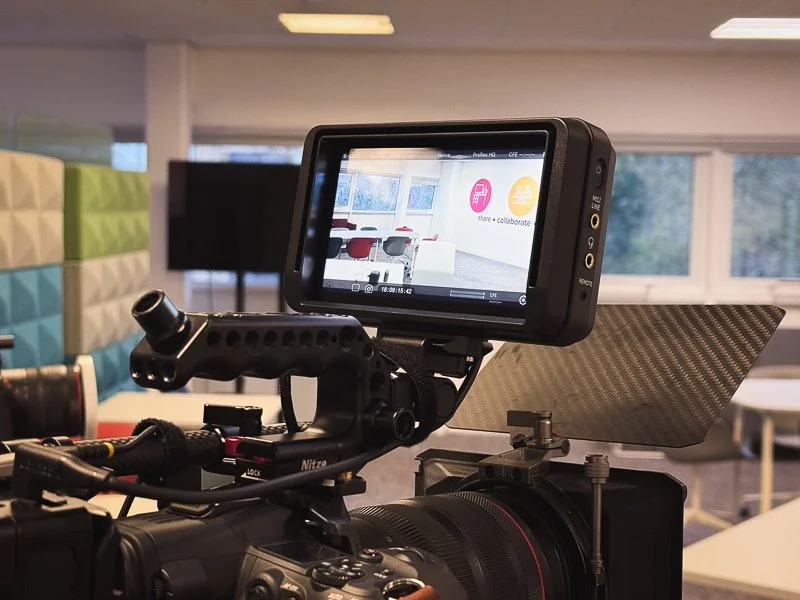
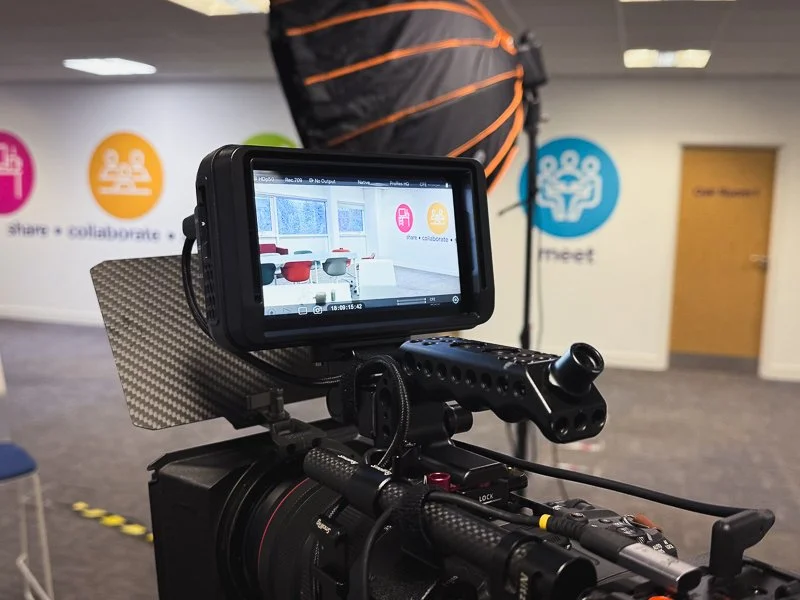
I have used a ninja V for many years and it has always been a delight to use. The TX GO is no different to that. The improved screen brightness (1500nit) is a welcome addition and makes the screen more easily viewable in brighter lighting conditions. However, the included sun shade in the Creator Kit goes a long way to cut down on glare and reflections as well. Colours look fantastic and the screen generally gives you a lot of confidence in terms of setting exposure - though the additional exposure tools such as ‘False Colour’ basically eliminate any concerns anyway.
The touchscreen is fast and responsive and even with my sausage-like clumsy fingers, navigating the tools and menus is simple and rarely have I ever ‘clicked’ something I didn’t intend to. The menus are logical and well laid out, with monitoring tools and features all easily accessible. The Ninja range has certainly developed over my years of use and the menus and options now feel fully rounded with an absolute plethora of recording, monitoring and audio options and that’s before you get to the additional items that the TX brings.

📲 How do the new features work?
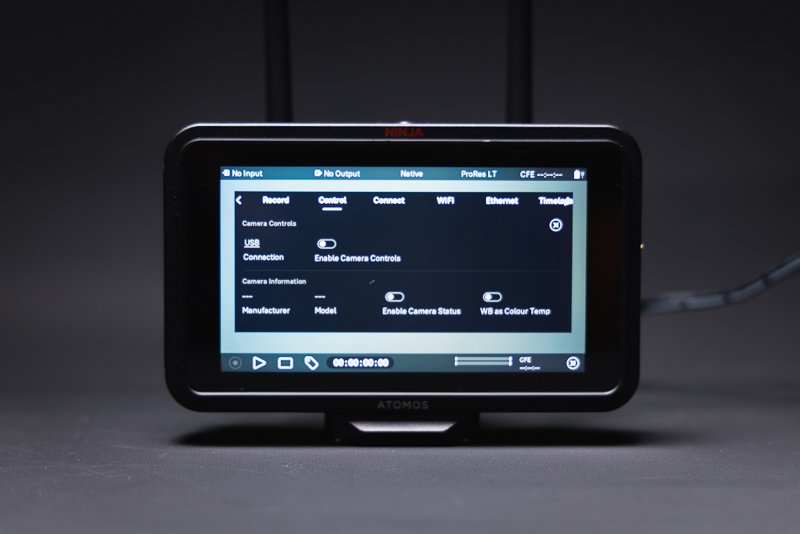
The TX GO feels like a more premium model than its midrange price would suggest and that is down to what Atomos has crammed into the new model. The standout feature for me is the new ‘Camera Control’ which allows compatible cameras to be controlled directly from the monitor. You can change aperture, ISO range and touch to focus which for me, is the real selling point. Unfortunately, my go-to video camera is the Canon R5C which is not currently supported, but having tried these features on my Canon R5 Mkii - they work great and I’m really hoping between Canon and Atomos - this is something that can eventually find its way to the R5C.
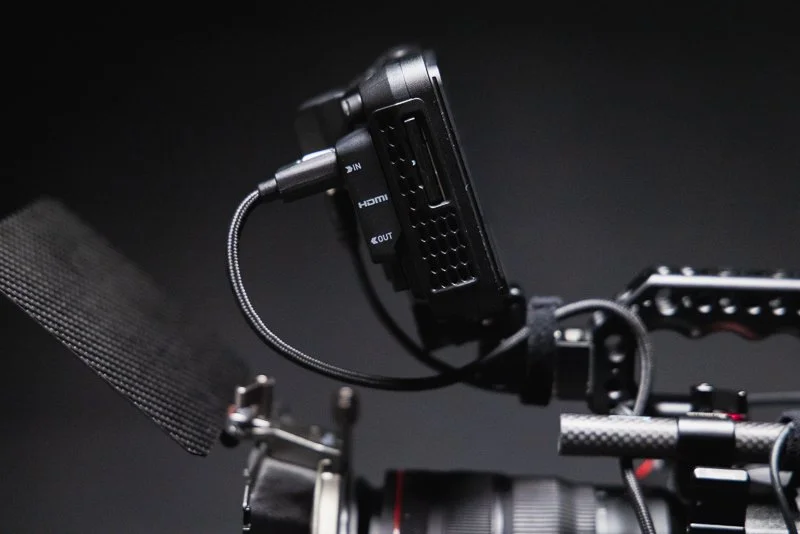
If you do have a camera that is compatible with Camera Control - one other big consideration is how the camera ‘talks’ to the monitor. Obviously, all visuals and audio are handled by HDMI but Camera Control is done over USB-C. This is fine for most users but if you are powering your camera with an external battery and use USB-C - you will need to free that port up. Most modern cameras will have multiple powering options so there will always be a solution, but if your current rig is already utilizing the USB-C port, it is something worth thinking about.
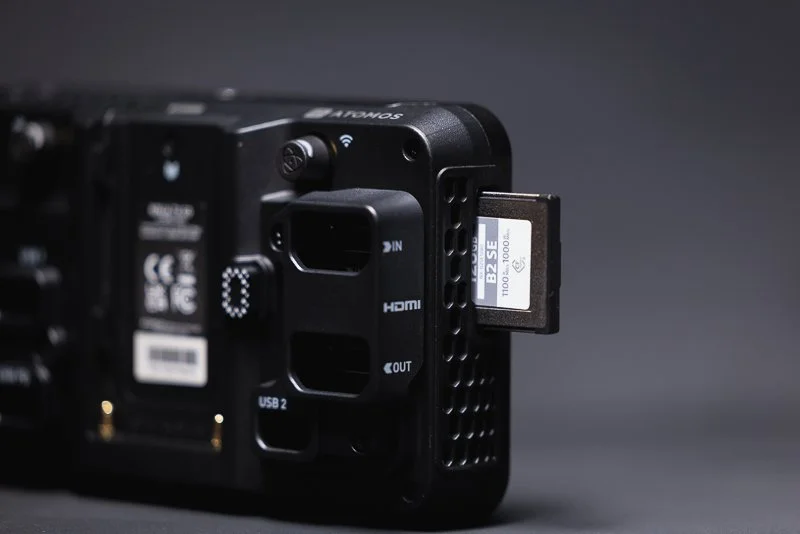
Another big selling point for me is the move away from SSD recording to CFexpress Type-B. The biggest reason I love the Ninja V range is the additional peace of mind that I get from recording to an external recorder. Most modern cameras will have some kind of ‘dual’ recording but there is just something about recording to a completely separate device. However, having to use a caddy and plugging onto an SSD always felt a bit cumbersome. The new CFexpress Type-B option not only reduces that hassle but it feels a bit more future-proof. Additionally, you can still record to an external SSD over USB-C if you desire.
More professional based users will also love the range of Codecs on offer in the TX GO. As standard, it offers Apple ProRes/RAW up to 6Kp30, Avid DNx, H.265 and NDI 6 HX3 TX & RX - so you are basically covered for all but the most demanding of scenarios. Atomos have always offered user upgradable packages that can be purchased via their website - but for me and many other users, the included line-up of codecs is more than enough for most workflows.
Finally, the TX range offers the ability to utilize WiFi cloud compatibility for both streaming and back-up. You even get 20gb of cloud storage which is crazy when you think about it - I only really use a Ninja because of the ‘off-camera’ recording capabilities and now I can send files to the cloud for additional piece-of-mind. Depending on your personal use case, this is an amazing addition.
🔎 QUICK LOOK PRO’S AND CONS
PROs
Exceptionally good touchscreen responsiveness and accuracy
1500nit monitor brightness is great for outdoor use
Camera Control is a brilliant feature (with compatible cameras)
The addition of CFexpress Type-B is more than welcome
Atomos are generally very committed to firmware updates offering new features
CONS
Fan noise might be an issue to some users in extreme circumstances
Camera Control is not compatible with all cameras (not necessarily Atomos’ fault!)
Price point is certainly higher than other options if you don’t need/can’t use all of the features
☝️ Is it worth the upgrade if I own a Ninja V?
For current owners of the Ninja V, the TX Go causes you a bit of headache. The TX GO is similar enough to previous generations that you might not see the point in upgrading. However, the addition of Camera Control (for compatible cameras), the additional connectivity features, improved brightness/fan and CFexpress Type-B - all make this a compelling option and one that I would class as a worthy upgrade.
Source: Pro Moviemaker via YouTube
One thing that I really admire with Atomos is their on-going commitment to firmware updates and a continual striving to improve their products. The difference with the TX range is that the physical upgrades make them a justifiable purchase. Knowing that Atomos are committed to the longevity of their products means that the TX range will be well supported for the next few years at least so investing now in those additional physical benefits, seems like a ‘no-brainer’.
✅ Final Thoughts…
I started this post by suggesting that some things just can’t be improved upon. However, Atomos clearly pay no attention to that idea and have strived to make an already great product range even better! Even though the price point of the TX range might be slightly out of reach for some, the value of what the TX GO delivers compared to some monitors more than double its price can not be understated - it really is a powerhouse of a portable monitor.
The Ninja V has been the go-to choice for many thousands of creatives over the years and with this latest refresh, it seems the TX GO will serve many thousands more, long into the future. With all that said, if you don’t need all of the bells & whistles, Atomos has such depth in their range of products, it’s difficult to believe that they wouldn’t have something that fits your needs. Leave a comment below if this little monitor does the job for you or if you think it’s missing something?
🔴 FAQ’s
-
There are multiple version in the TX range but the TX Go version that I tested was priced at £720 at the time of purchase. This included the additional ‘Creator Kit’.
-
This will completely depend on your own use case but if you can make use of the Camera Control feature, than I would say Yes! The additional upgrades are well worth the price but if you own a ninja V and it’s doing everything you need it too, then maybe hold out for a sale!
-
Honestly, I could see the TX Go being used on all but the most high-end of productions. You will know if it fits your needs but for the vast majority of users, it will get the job done.
-
For me, the price feels high but there are so many features here, it’s difficult to complain. I would love the fan to be silent and I wish the body was metal, but then there are always compromises. I’d also love to see the ‘frame’ of the body covered in mounting options so it feels a bit more adaptable.
-
There are certainly more expensive options out there and there are definitely users that will ‘need’ an alternative option (such as RED owners choosing to use RED monitors etc.) However, ‘better’ is very subjective in this case and I think you would be hard pushed to find a better value proposition for the features on offer.
📸 Are you a photography/videography brand looking to showcase you products? Take a look at my Media Pack and Contact Me to discuss how we can collaborate on a sponsored review.
Posts you might also like…
About the Author - Ross Jukes is a professional Photographer and Videographer with over a decade of experience. Working in both Digital and Analogue formats, Ross has worked with international clients, had his worked published numerous times and exhibited his work extensively. With a passion for all things photographic, Ross combines his experience, enthusiasm and dedication to his art form to create engaging and educational content for the photographic community.
Disclaimer: All links to Amazon UK/US are affiliated links - you will still pay the same price but I will receive a small commission for providing the link. All information provided in this blog is intended either for educational or entertainment purposes and is accurate to the best knowledge of the author. However, further research/professional advice should be sought before making purchases/implementing any advice given and no responsibility is taken by the author or parties mentioned here within.

REVIEW: Comica VM40 Combo Kit - A Budget Friendly Audio Beast!
As a self-employed videographer and content creator, finding the right tools for professional audio capture without breaking the bank can often feel like an uphill battle. Whether you’re shooting commercial videos, podcasts, or YouTube content, reliable audio gear is as essential as a good camera. Enter the Comica VM40 Microphone Combo Kit, a product promising high-quality audio at a relatively affordable price point. But does it live up to expectations?

As a self-employed videographer and content creator, finding the right tools for professional audio capture without breaking the bank can often feel like an uphill battle. Whether you’re shooting commercial videos, podcasts, or YouTube content, reliable audio gear is as essential as a good camera. Enter the Comica VM40 Microphone Combo Kit, a product promising high-quality audio at a relatively affordable price point. But does it live up to expectations?
DICSOUNT CODE: Use the link above to purchase the VM40 Combo kit and Comica have also provided a discount code - use ‘Q3LSUFVE’ - limited time only.
PLEASE NOTE: I WAS SENT THIS ITEM FOR REVIEW BUT NO OTHER PAYMENT OR CONTROL WAS EXCHANGED FOR PUBLISHING THIS UNBIASED REVIEW
👀 Unboxing and First Impressions
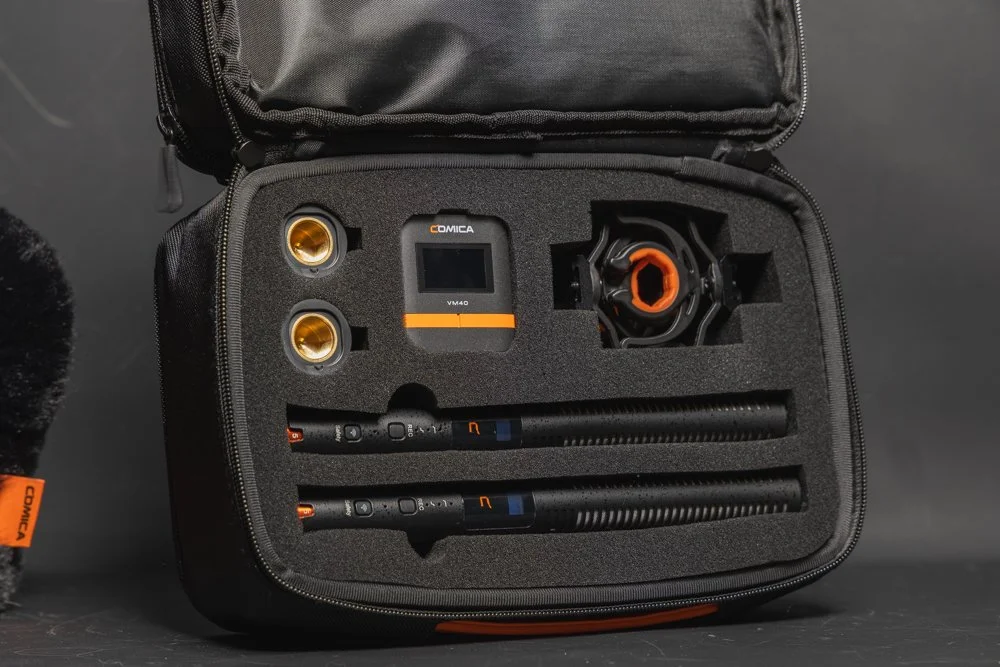
Out of the box, the Comica VM40 Microphone Combo Kit comes across as a thoughtfully packaged product. The kit includes the VM40 condenser microphone, a sturdy shock mount, a pop filter, a foam windscreen, and necessary cables to connect it to most devices - Well actually there are TWO of each of those items! It also comes with a single wireless receiver that can pick up both mics! The kit is fully packed for a two mic setup that is ideal for video or podcast setups as well as a host of other use cases.

The build quality is solid, with the microphone’s metal body exuding durability and professionalism. The sleek black finish feels modern, and the overall design suggests that this kit is targeted towards semi-professionals and hobbyists alike. If you are working with commercial clients, the looks will certainly not give away the budget-friendly price!


For someone who juggles between recording interviews for clients and creating social media content, the included accessories provide a comprehensive setup for various use cases. The kit thoughtfully consists of all the things you need to get you started and it’s nice to see the inclusion of items like the shock mounts for both microphones - it would have been easy for Comica to skimp on these items but they have you covered!
🔊 Audio Quality
At the heart of any microphone review lies the question of audio quality, and the VM40 doesn’t disappoint. The microphone features a super-cardioid polar pattern, which is excellent for capturing sound from the front while minimising background noise. This makes it ideal for recording in less-than-ideal environments – something many self-employed creators can appreciate.

Testing the VM40 in multiple scenarios, from a quiet home studio to a moderately noisy office, yielded consistently impressive results. For voiceovers and podcasts, the microphone captured rich, clear audio with a warm tone, lending a professional quality to the recordings. When used for YouTube content, such as tutorials or vlogs, the clarity and directional focus significantly reduced the need for extensive post-production work to clean up background noise - though a little is usually required regardless of your given setup.

However, while the VM40 excels in controlled environments, its sensitivity can pick up unwanted sounds in noisier spaces, even with the cardioid pattern. The pop filter and foam windscreen do a decent job of reducing plosive sounds and minor wind interference, but they’re not a substitute for a properly treated recording space. Outdoor recording is certainly possible with these mics and the provided windscreens but avoiding wind is always the best prevention.
Source: YouTube - Dale Cambell
👍 Usability
The Comica VM40 scores high on usability. Setting it up is straightforward, even for those with minimal technical expertise. The microphone connects via a 3.5mm jack, making it compatible with most cameras, laptops, and audio interfaces. Alternatively, the kit comes with the wireless receiver and even more, both microphones have internal 32-bit recording - making capturing audio an absolute breeze in almost any scenario, regardless of your camera setup.

For those not in-the-know, 32-bit internal recording is an incredible feature to have at this pricepoint and in particular, on a shotgun mic. 32-bit is effectively a wide-dynamic range for audio allowing users to capture very quiet noise, through to very loud and be able to restore them in post-production, saving the all-important content. It is still possible to ‘overwhelm’ the microphone in extreme circumstances but for 99% of use cases(not an accurate stat but you get the point), 32-bit float can save misgained audio. With around 40 hours internal storage, these mics truly have you covered.


Another feature is the microphone’s gain control knob, conveniently located on the body. This allows for on-the-fly adjustments without needing to access software or external mixers. Whether you’re recording a soft-spoken podcast or narrating a high-energy video, having this level of control at your fingertips is invaluable. Some may be tempted to ignore this and just rely on the aforementioned 32-bit float - but best practice is always to set your gain appropriately!

In addition, users have access to the Comica Audio App - ideal for conveniently checking gain settings and recording status. The app, whilst fairly basic in it’s layout has the majority of features that users would need. I personally found that I didn’t need to use the app (I mean, 32-bit internal recording, that has you covered in most circumstances!) but having access to the app is a welcome addition. The presence of high and low cut filters are also welcome in particular for recording in more challenging environments.

The mics have a very useful OLED screen for quickly checking details. Another great feature is the reported 200m range - however, I haven’t personally tested the range as in most use cases, you would never be that far away from the subject. Also, with internal recording, the mic could be practically anywhere and as long as it’s recording, range is not an issue.
🎒 Portability
As a self-employed videographer who often shoots on location, portability is a significant consideration. The VM40’s compact design and included accessories make it a practical choice for creators on the go. Everything fits neatly into a small carry bag that is padded and allows you to conveniently carry all accessories. Personally, I just add what I need to my current backpack but always take care to protect the microphones from any shock or water damage.

🔨 Durability and Build Quality
Durability is another area where the VM40 shines. The metal body feels robust and capable of withstanding the wear and tear of regular use. The included shock mount and tabletop stand, while not top-tier in terms of materials, perform adequately for stationary setups. For more demanding shoots, you might want to invest in a heavier-duty stand or boom arm. Battery life is good at 32 hours when wired or around 10 hours when used wirelessly.
Source: Youtube - Comica
🙋♂️ Personal Experience
One thing that I didn’t mention in the ‘usability’ section was the controls for the mics and wireless receiver. When not ‘wired’ to a camera or transmitting to the wireless receiver, the microphones can be set to record internally. However, setting to record and using certain functions on the microphones requires some button combinations that are not always intuitive. Likewise, I personally had a few issues with the wireless receiver seemingly not connecting but this was almost certainly user error.

With that in mind, I’m a bit loathed to ‘knock’ the usability of the mics because some users may pick up the button combinations quickly, others may find them confusing but ultimately, there is a learning curve. I would have liked to have seen an easier setup or maybe more dedicated buttons but this really is just personal opinion and I’m sure others won’t have any issues with the usability of these mics. I would love to see some auto-recording options that can be set to user preference - like internal recording being triggered when the camera starts recording but in truth, I’m not even sure that is technically possible.
What I can say confidently though is that these microphones are almost ideal for people like me, who have to operate on their own or have the additional strains of producing YouTube content etc. The speed of set up and ease of use (once you’ve got the button combinations locked in!) is fantastic. The safety net that 32-bit float and onboard recording offer is almost priceless when you live in constant fear of missing a crucial piece of audio or having a file corrupt.
☝️ Who Is This Kit For?
The Comica VM40 Microphone Combo Kit is an excellent option for:
Aspiring Podcasters: If you’re just starting a podcast and want professional-sounding audio without investing in high-end equipment, the VM40 is a solid choice.
YouTube Content Creators: Whether you’re filming tutorials, vlogs, or product reviews, the VM40’s clarity and directional focus will enhance the audio quality of your videos.
Self-Employed Videographers: For those who need an affordable yet reliable microphone for client projects or personal ventures, this kit ticks many boxes.
Remote Workers and Online Educators: If you frequently host webinars or record online courses, the VM40’s user-friendly setup and sound quality will elevate your presentations.
🔴 Pros and Cons
Pros:
32-bit float and internal recording (approx 40hours) - these are top-tier features!
Wireless transmission for both mics - ideal for video, podcasts and much more!
Affordable price point without compromising quality.
Excellent audio clarity and warmth, particularly for voice recording.
Includes all necessary accessories for a complete setup.
Compact and portable design.
Easy to use, with a convenient gain control knob.
Durable metal construction.
USB-C Charging with approximately 10 hours battery life in wireless mode
Cons:
The included tabletop stand could be more robust.
Sensitivity to ambient noise in less controlled environments.
Fiddly controls and the wireless receiver seemed a little temperamental
Wireless receivers in particular feel very plasticky - functions fine but not great build quality.
Would love to see an XLR version but this would be a more ‘pro’ level model

✅ Final Verdict
The Comica VM40 Microphone Combo Kit is a versatile and budget-friendly solution for self-employed videographers and content creators. Its balance of affordability, durability, and impressive audio quality makes it an excellent choice for beginners and intermediate users alike. While it may not replace higher-end microphones in a professional studio setup, it’s more than capable of delivering quality results for podcasts, YouTube videos, and client projects.
If you’re looking to invest in a microphone that delivers solid performance without costing a fortune, the Comica VM40 should be high on your list. With a few minor upgrades – such as a sturdier stand and a dedicated carrying case – this kit could easily become a staple in any content creator’s arsenal.
FAQS
-
It’s a dual-microphone kit built around two VM40 mics and one wireless receiver that can pick up both mics, designed for creators who want flexible audio for video, podcasting, interviews, and content creation.
-
You get two of the key accessories (for a true 2-mic setup): the mics, shock mounts, pop filters, foam windscreens, and cables—plus the receiver.
-
Yes, testing notes highlight rich, clear audio with a warm tone, which works particularly well for voice recording and spoken content.
-
The VM40 uses a super-cardioid pattern, which focuses on sound from the front and helps reduce background noise—useful in home/office setups.
-
It can work, but you mention it’s sensitive—so in noisier spaces it may still pick up unwanted sound. The included pop filter/windscreen helps with plosives and light wind, but it’s not a replacement for good mic placement and basic wind control.
-
You note it can connect via 3.5mm, making it compatible with many cameras and devices, and it also supports wireless use via the receiver.
-
Both mics can record internally in 32-bit, giving you a much wider dynamic range safety net (recovering quiet vs loud audio in post). You also note roughly 40 hours of internal storage.
-
Comica claims up to ~200m range (you didn’t test it). Battery-wise you cite about 32 hours wired or ~10 hours wireless, with USB-C charging.
-
The tabletop stand could be sturdier, the mic can be sensitive in noisier spaces, and some controls/pairing steps have a learning curve; the receiver feels a bit plasticky even though it performs well.
Posts you might also like…
About the Author - Ross Jukes is a professional Photographer and Videographer with over a decade of experience. Working in both Digital and Analogue formats, Ross has worked with international clients, had his worked published numerous times and exhibited his work extensively. With a passion for all things photographic, Ross combines his experience, enthusiasm and dedication to his art form to create engaging and educational content for the photographic community.
Disclaimer: All links to Amazon UK/US are affiliated links - you will still pay the same price but I will receive a small commission for providing the link. All information provided in this blog is intended either for educational or entertainment purposes and is accurate to the best knowledge of the author. However, further research/professional advice should be sought before making purchases/implementing any advice given and no responsibility is taken by the author or parties mentioned here within.