

XTAR Batteries Review: Reliable Rechargeable Batteries for Video and Audio Gear
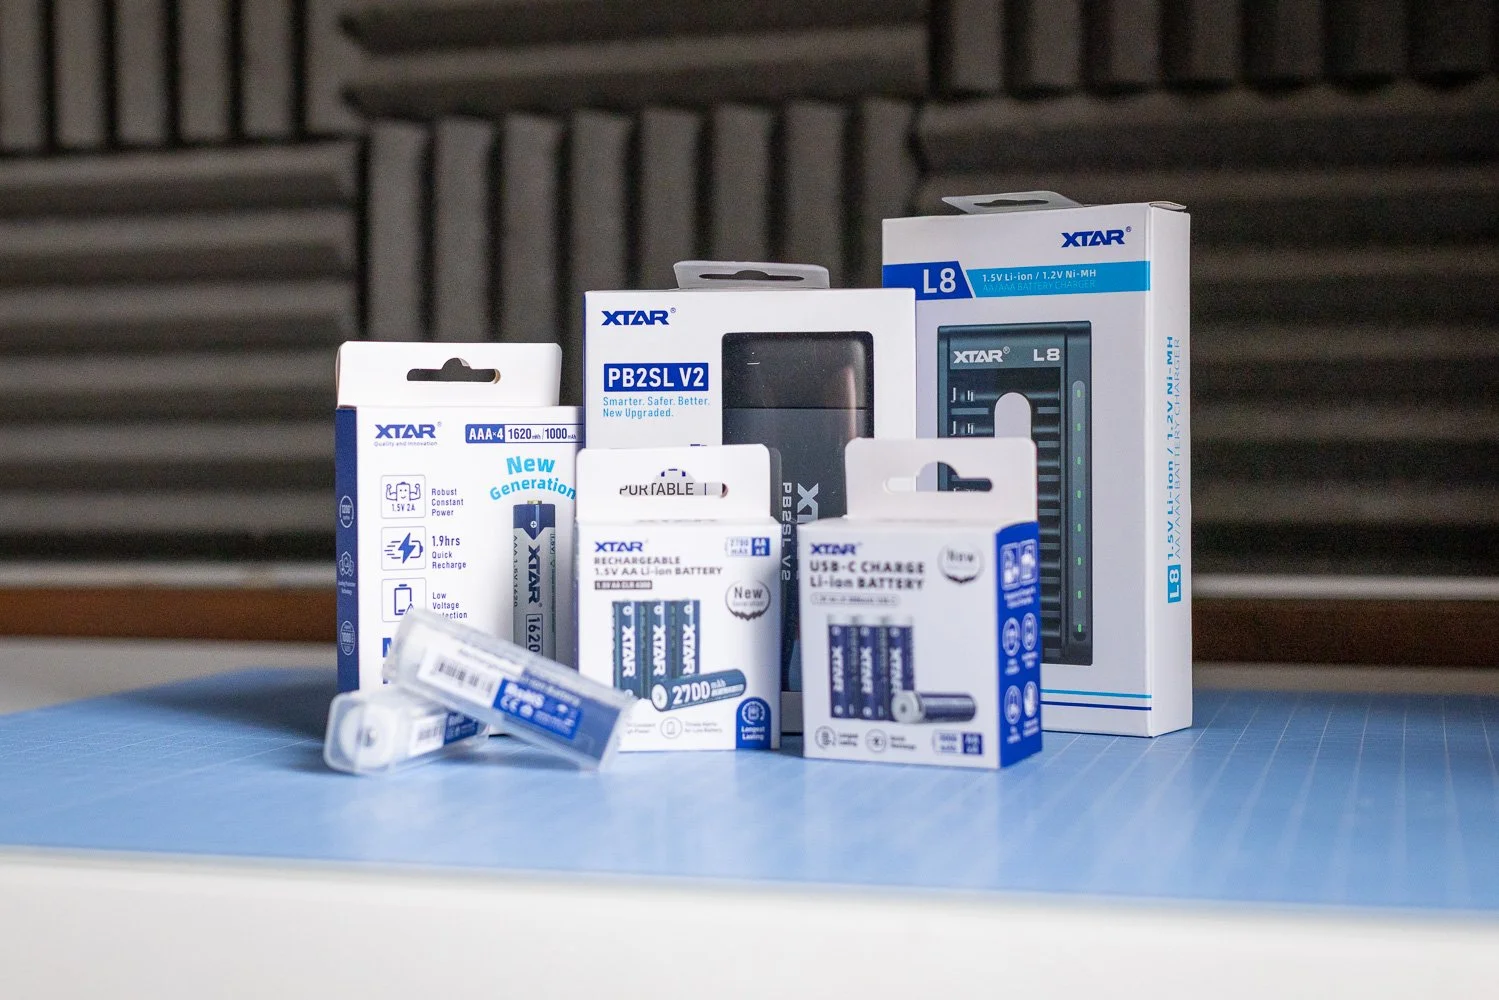
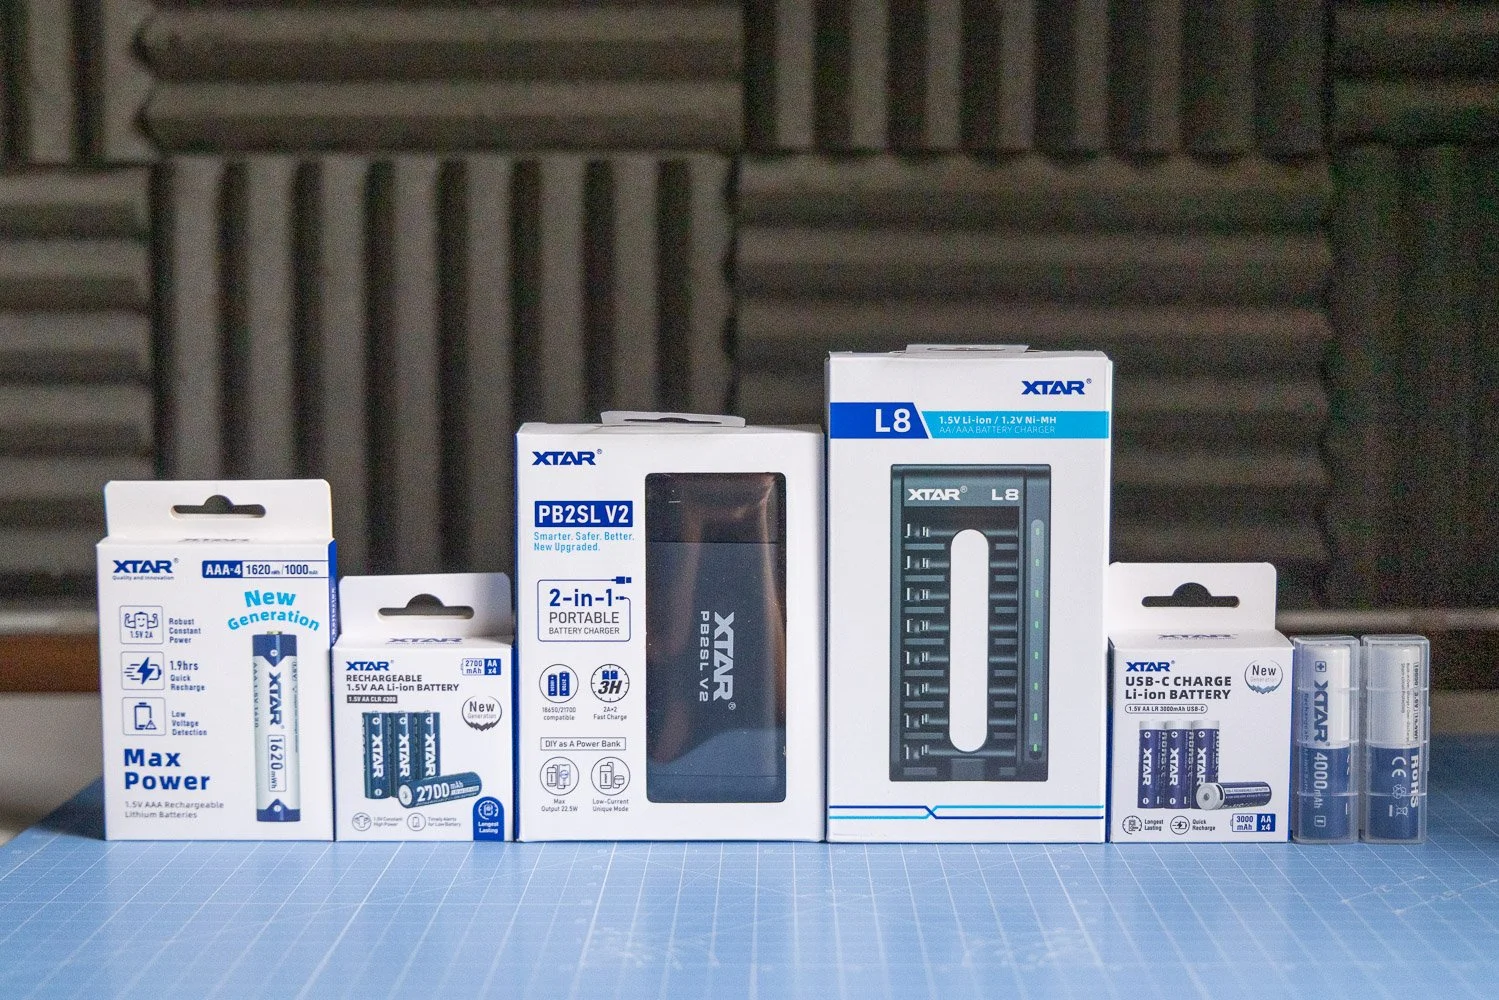
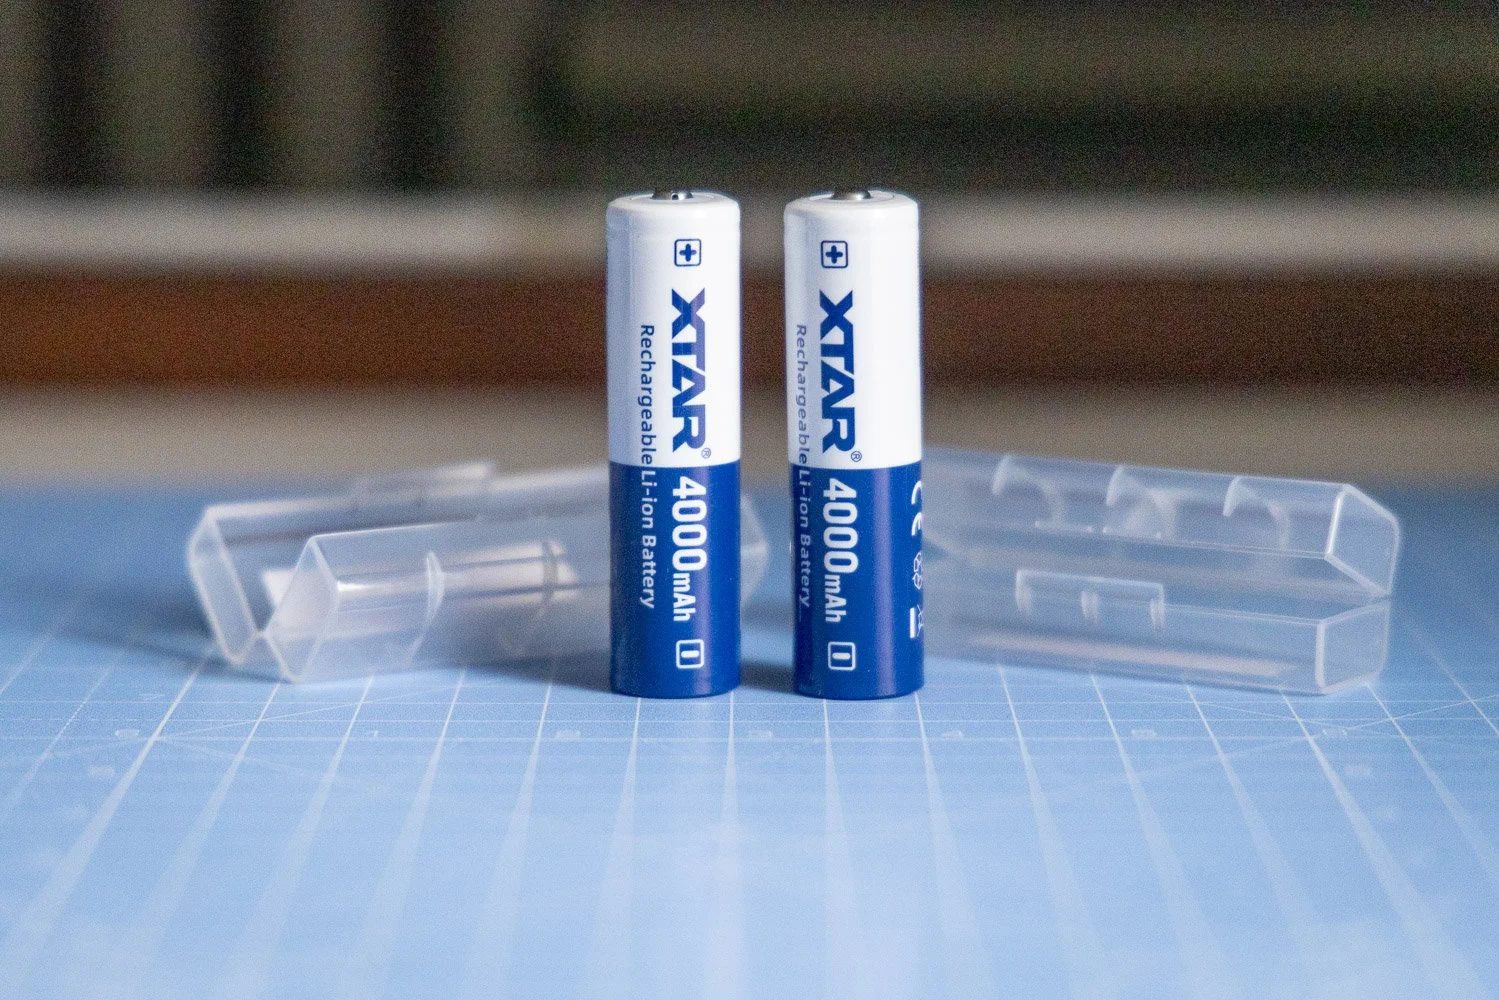
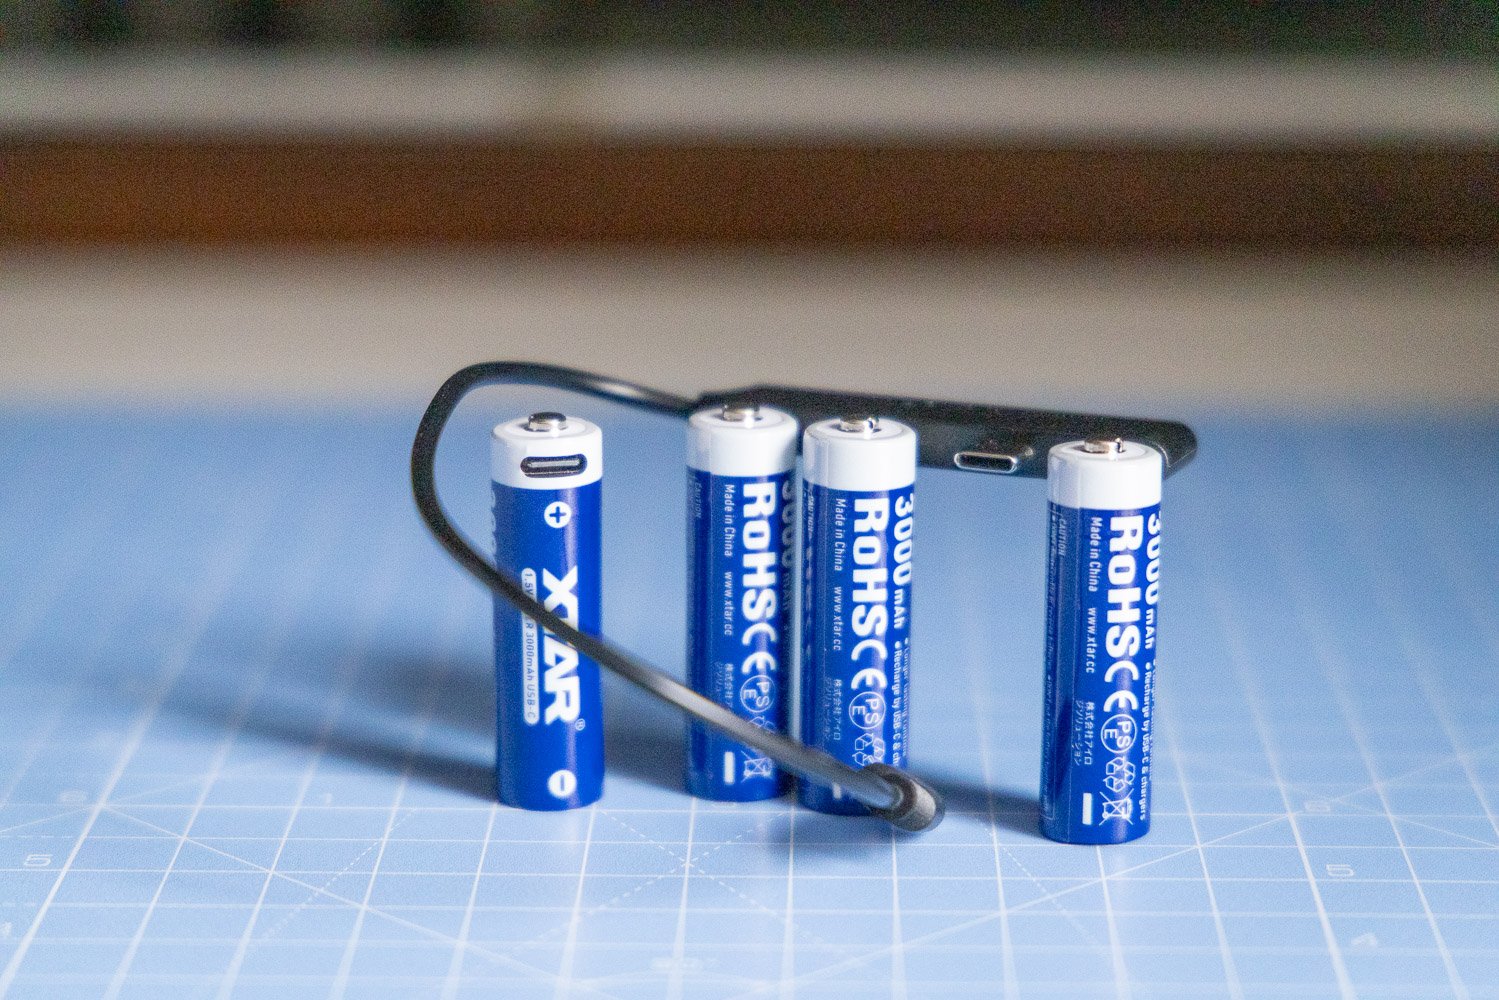
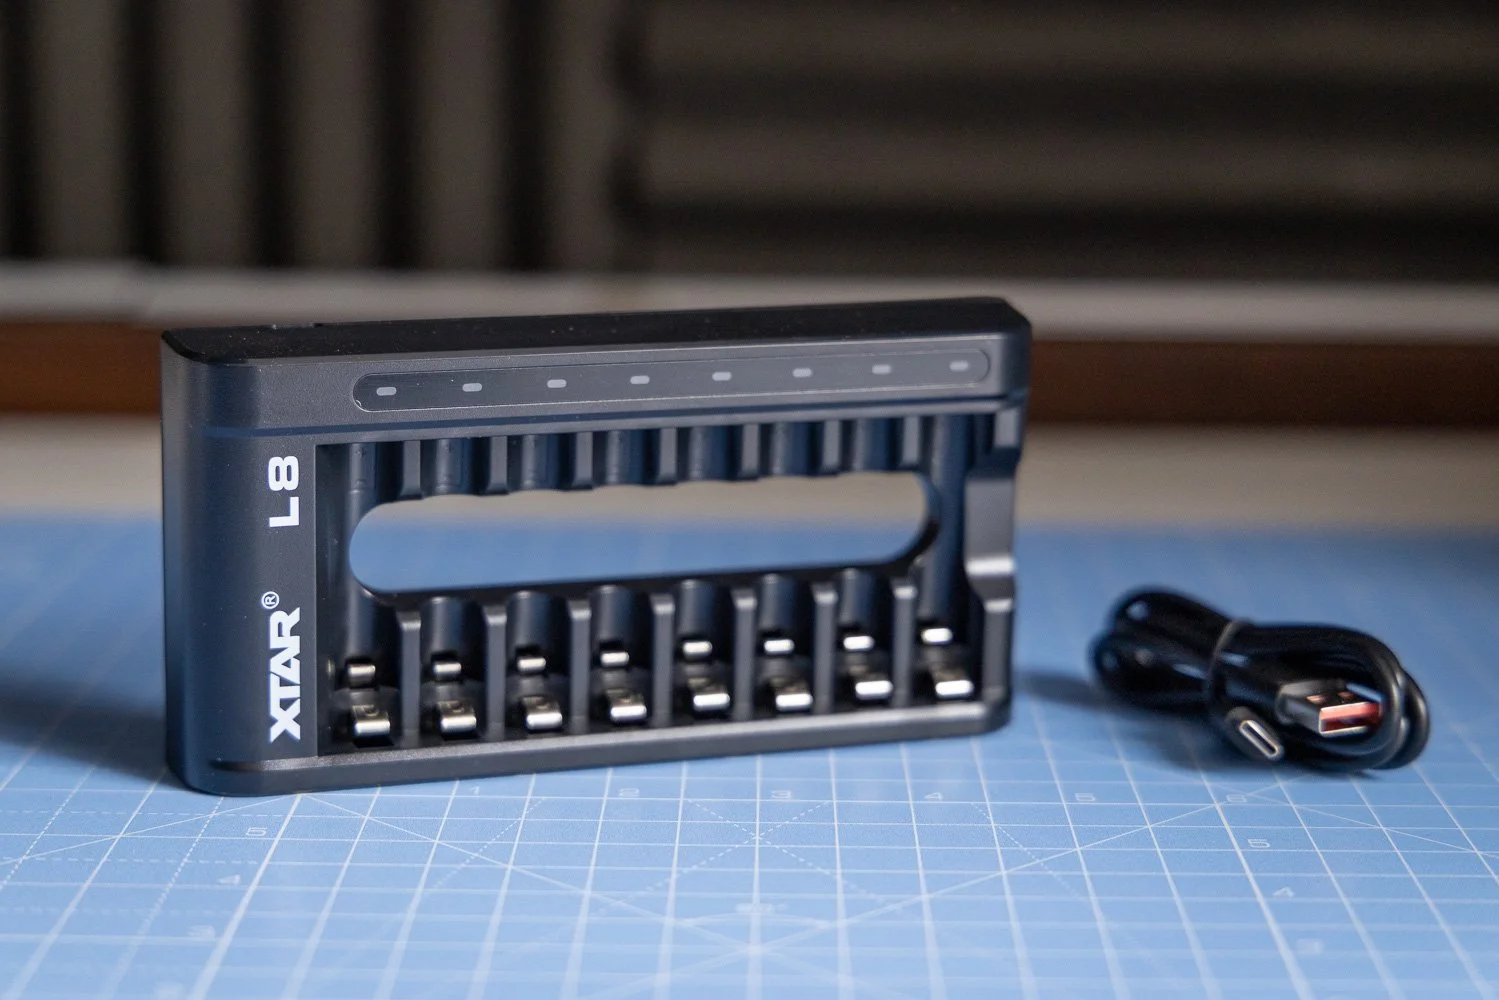
In this XTAR Batteries review, I take a closer look at the AA CLR 4300, AA LR 3000 USB-C and AAA 1620 batteries. For videographers, photographers and content creators who rely on dependable power, these are well worth considering if quality and longevity matter more than simply buying the cheapest option.
When you work in photography and videography, reliable batteries are one of those things you stop taking for granted very quickly. It does not matter how good your camera, lights or audio kit are if the batteries powering your accessories let you down halfway through a shoot.


That is where XTAR comes in. In this XTAR Batteries review, I have been looking at a selection of their rechargeable options, including the AA CLR 4300, AA LR 3000 USB-C and AAA 1620. On paper, these are clearly aimed at users who want more than a cheap off-the-shelf battery, and after spending time with them, that is exactly how they come across.
❤️ PLEASE NOTE - No AI was used to make this article. It is my own work based on my experiences and created in my own time. These items were sent to me to test by XTAR in collaboration. No further money/control was exchanged. If you would like to support the blog, consider making a small donation.
They are not the cheapest option out there, but for anyone shooting regularly and depending on consistent performance, I think that extra cost makes sense.
👀 First impressions of XTAR batteries
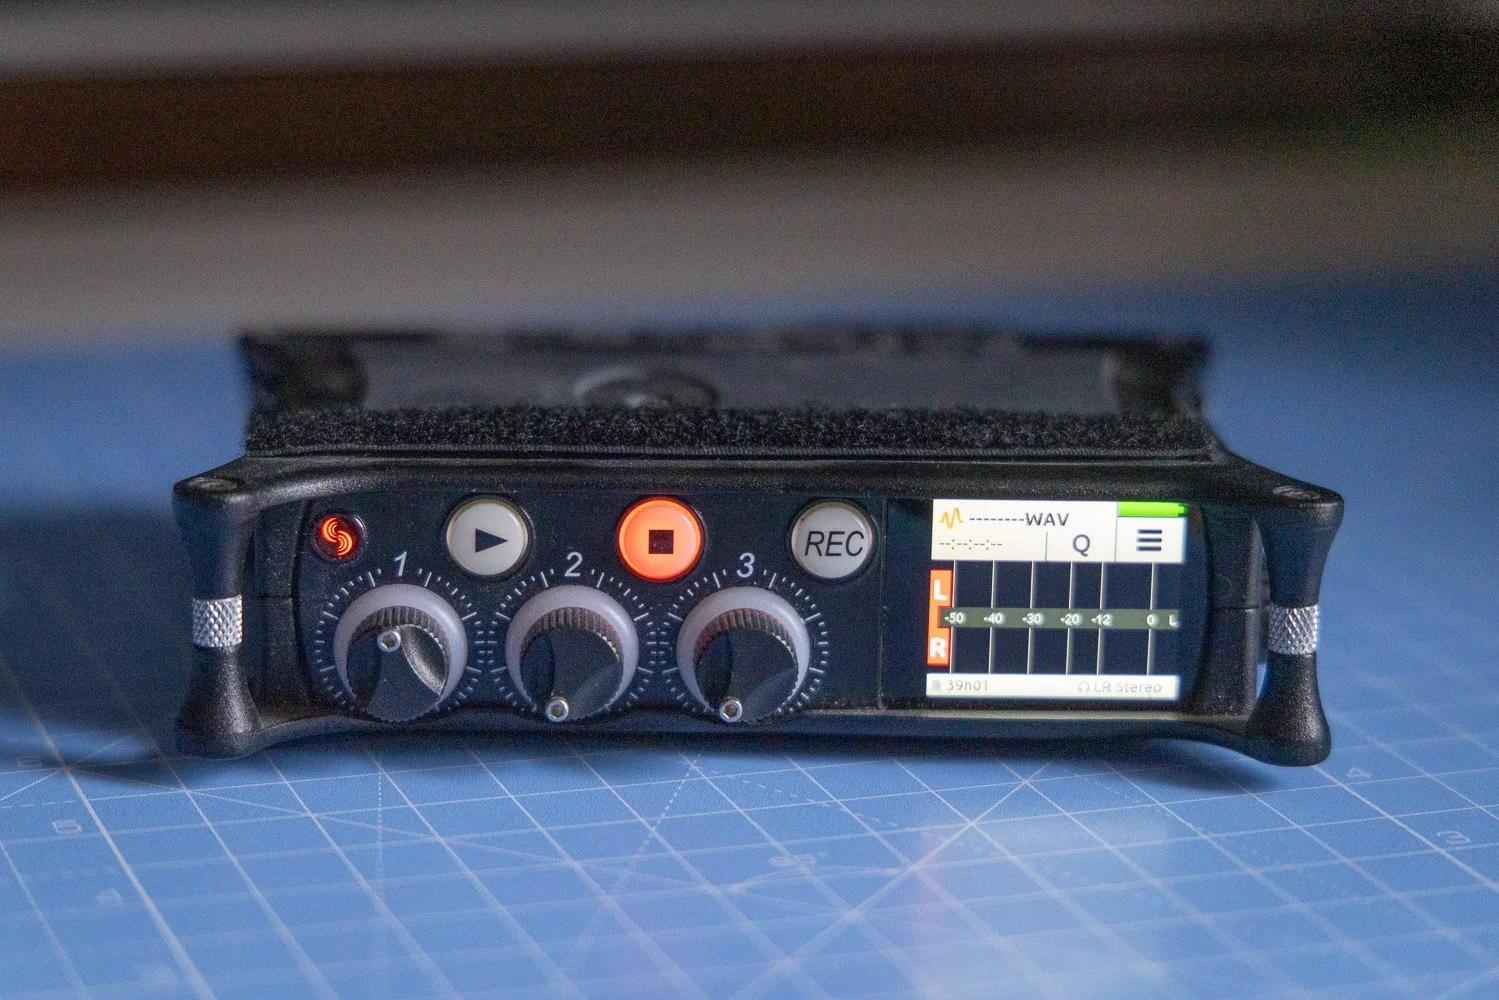
The first thing that stood out to me with XTAR is that these feel like products designed for people who actually rely on their kit. That sounds simple, but it matters. When you are working with wireless mics, audio recorders, LED lights or other battery-powered accessories, you want something dependable and easy to live with.
The range I looked at included the AA CLR 4300, AA LR 3000 USB-C and AAA 1620 batteries. Each one is aimed at slightly different use cases, which is useful because not every device behaves the same way in real-world shooting conditions.
What I like here is that XTAR has not gone down the route of making everything feel overly technical or complicated. The batteries are clearly designed with performance in mind, but they still feel practical and accessible for everyday use.
🎥 Why battery quality matters for videographers
As videographers, we often focus on cameras, lenses and lighting, but power is just as important. A poor battery can create all sorts of avoidable problems, from shorter runtimes to unreliable performance and the hassle of constantly swapping cells during a job.
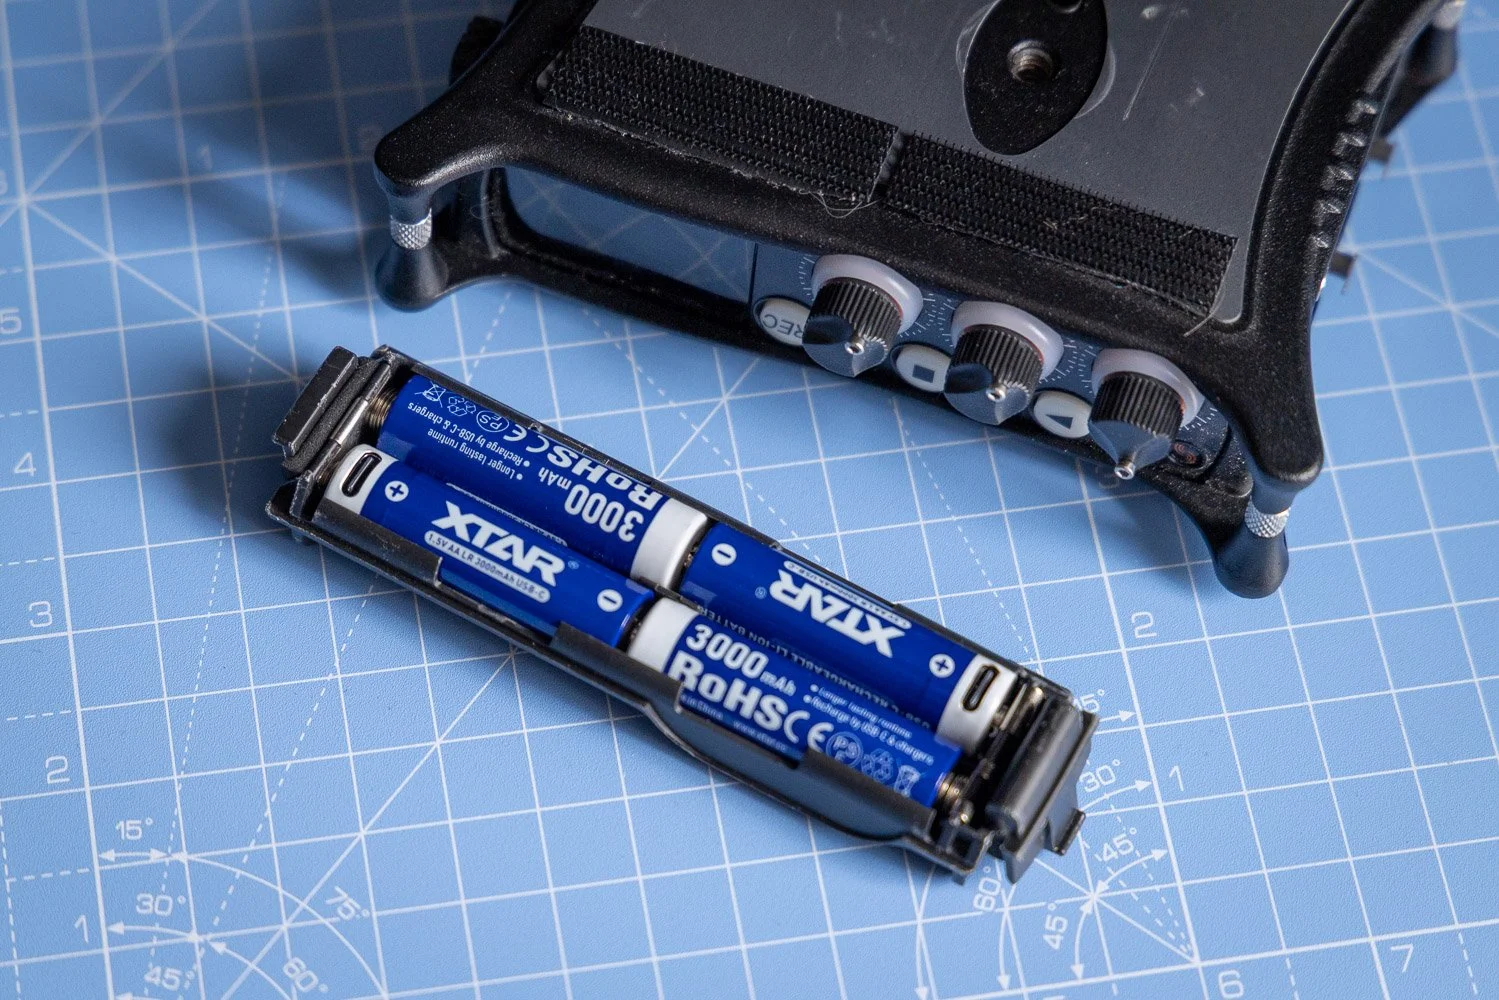
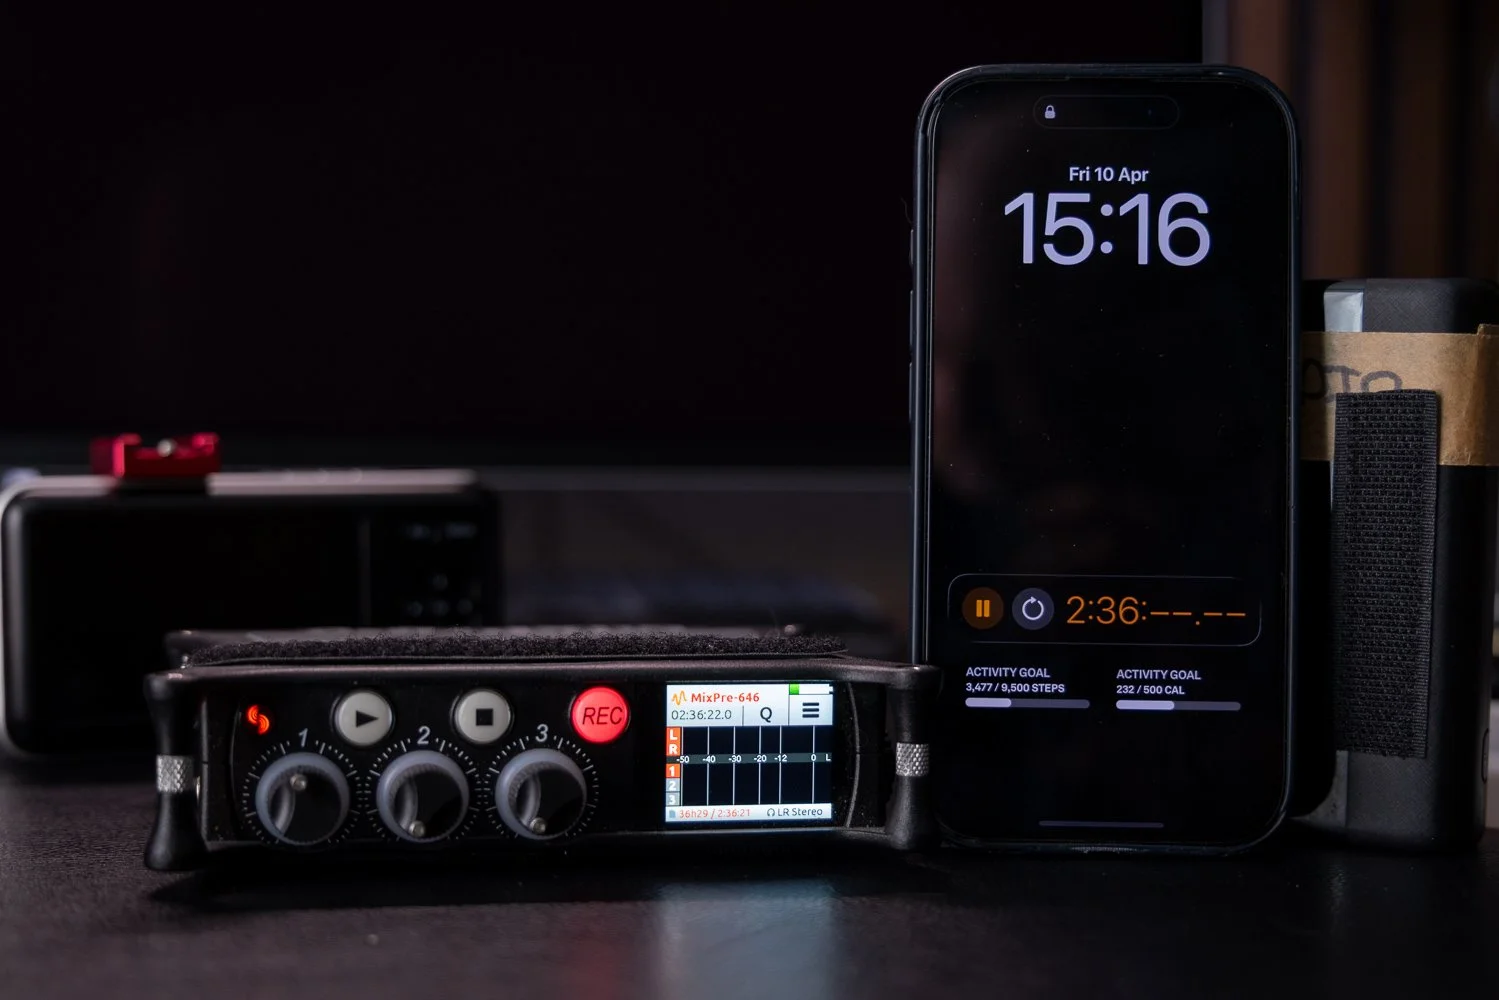
Good rechargeable batteries are especially important if you use devices like wireless microphones, portable audio recorders, LED lights or other accessories that need stable, dependable power over long sessions.
That is why I think XTAR’s focus on quality and longevity is the real selling point here. A battery that lasts well, charges properly and performs consistently is far more valuable over time than a cheaper option that needs replacing sooner or lets you down when it matters.
🔋 XTAR AA CLR 4300 vs AA LR 3000 USB-C
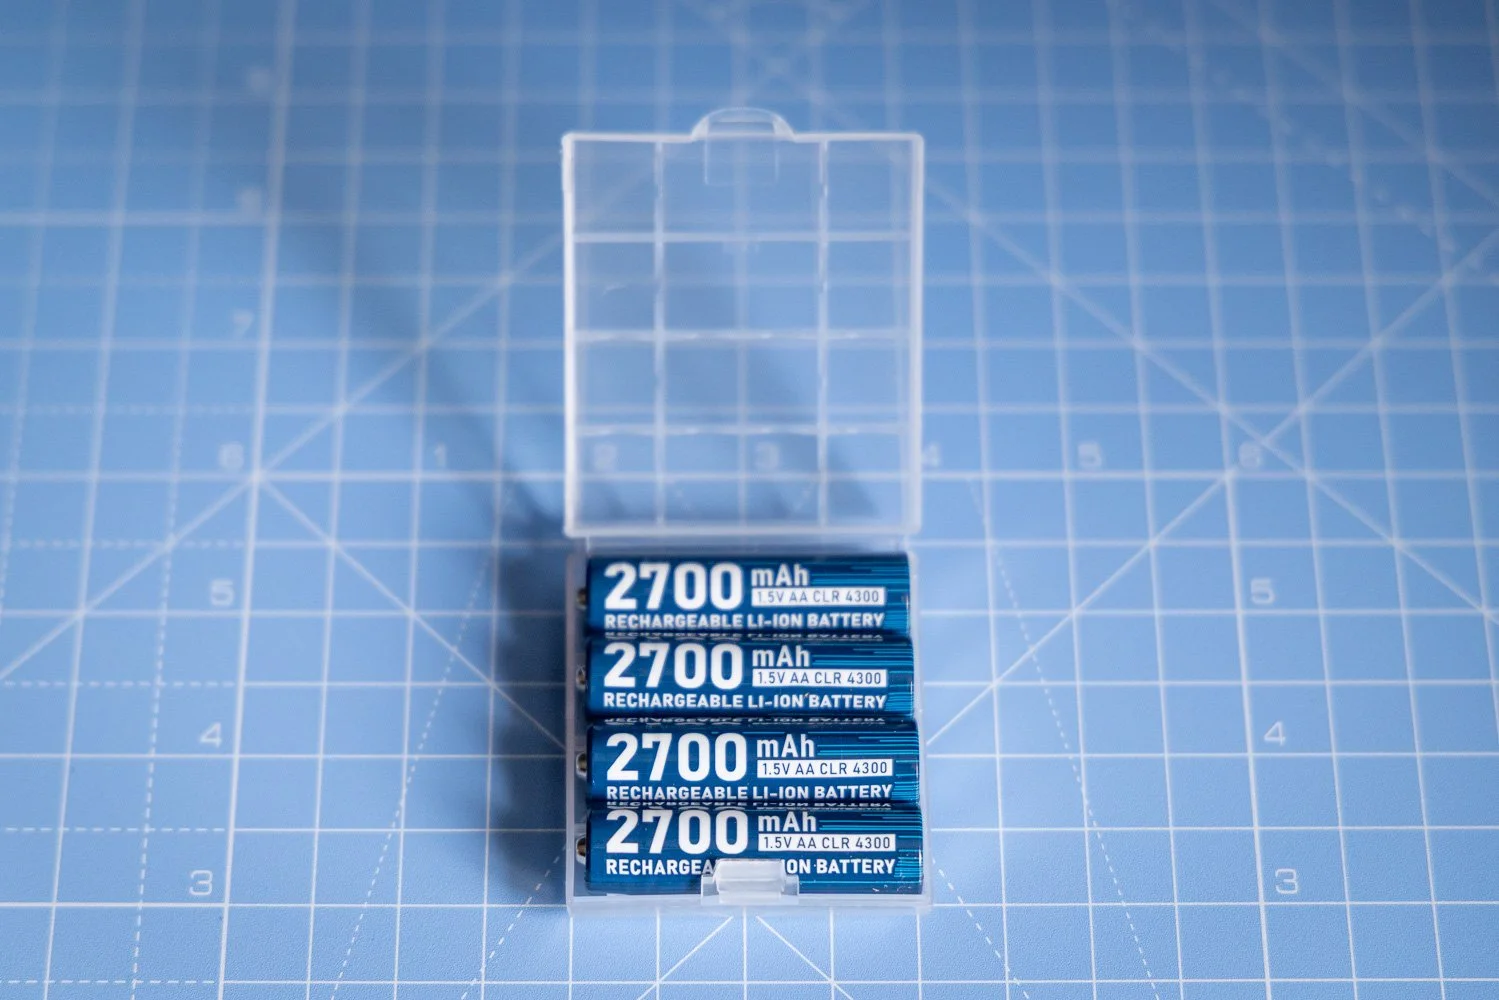
One of the more interesting things with this range is that the AA CLR 4300 and AA LR 3000 USB-C have different discharge curves. In practical terms, that means the runtime can vary quite a bit depending on the device and how much load it places on the battery.
That is actually a good thing to understand, because it shows XTAR is thinking about real-world use rather than pretending one battery is perfect for everything. Some devices will suit one option better than the other, and having both available makes it easier to match the battery to the job.
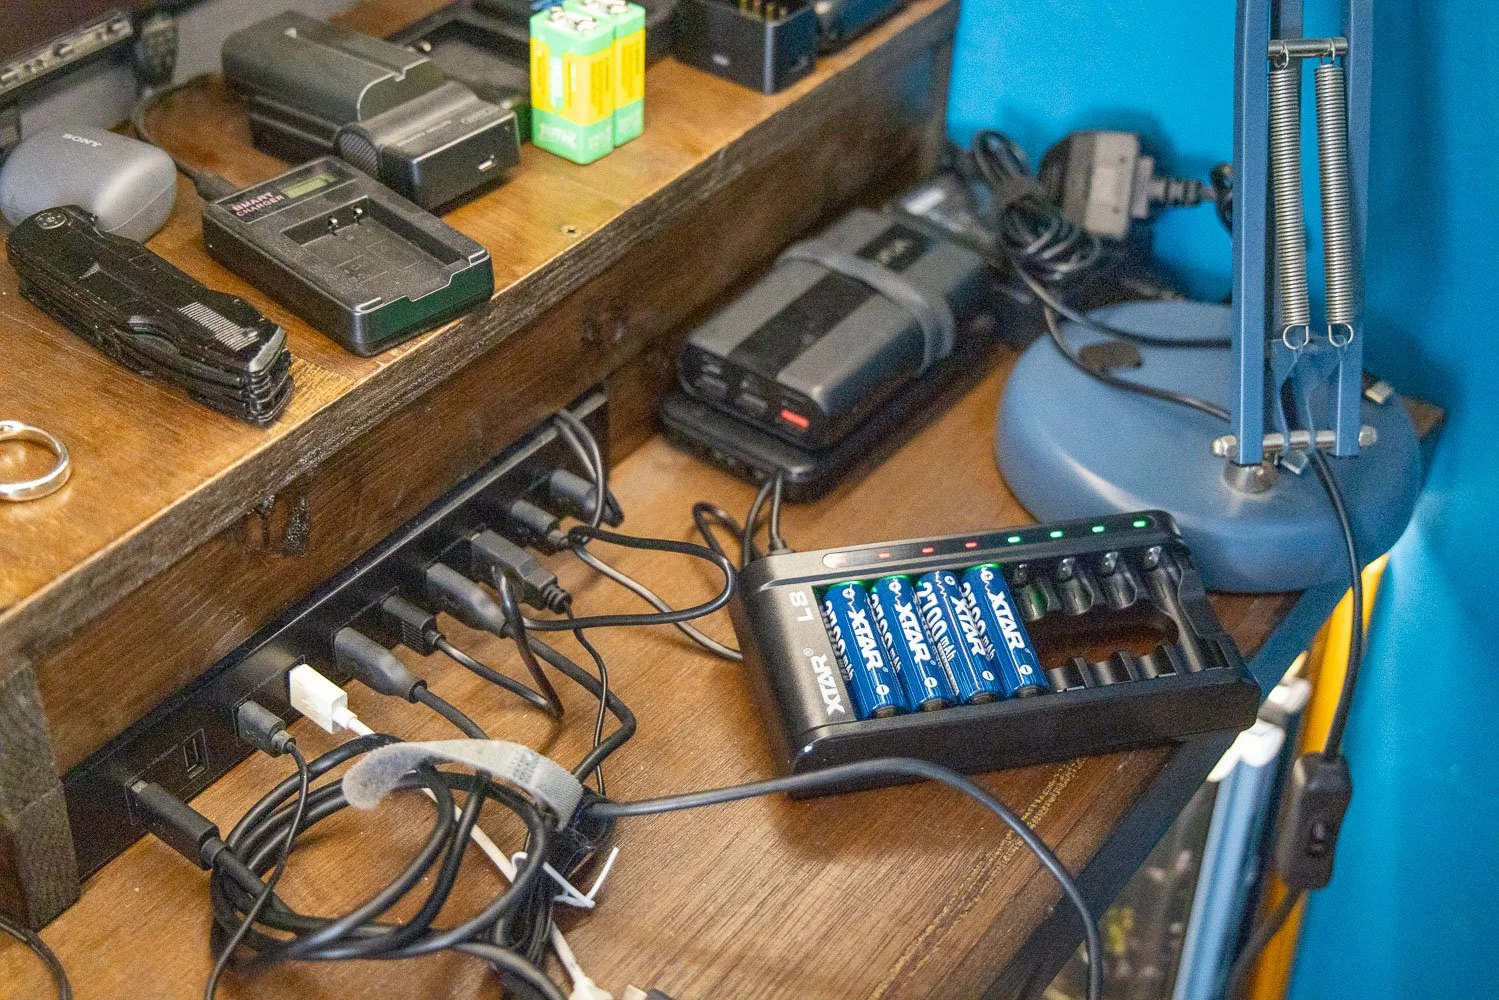
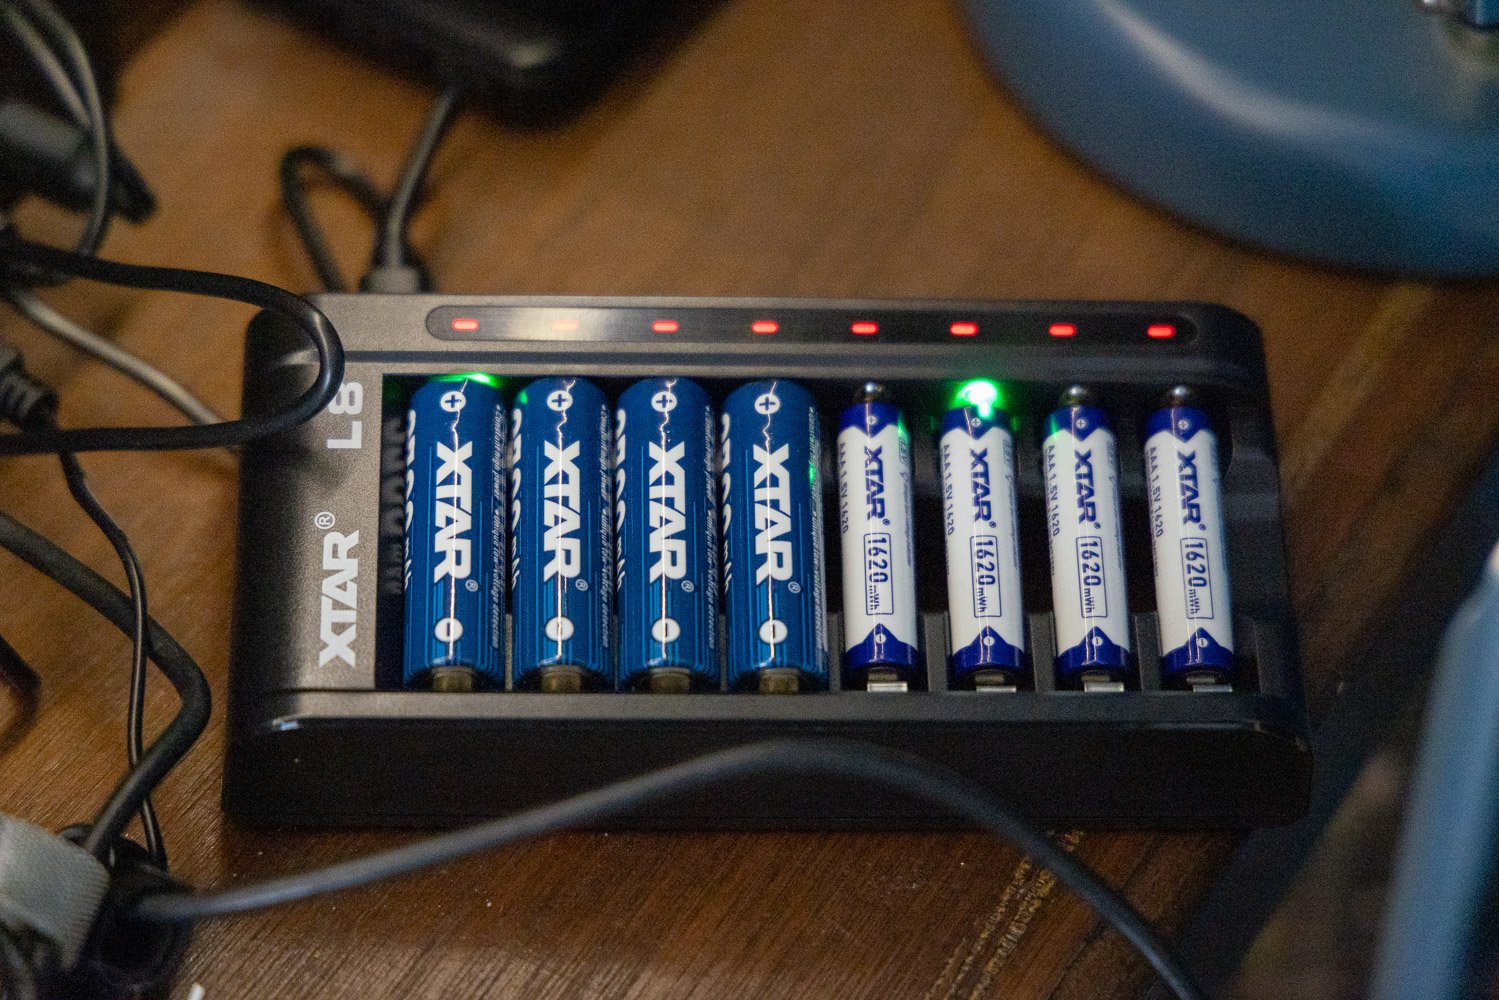
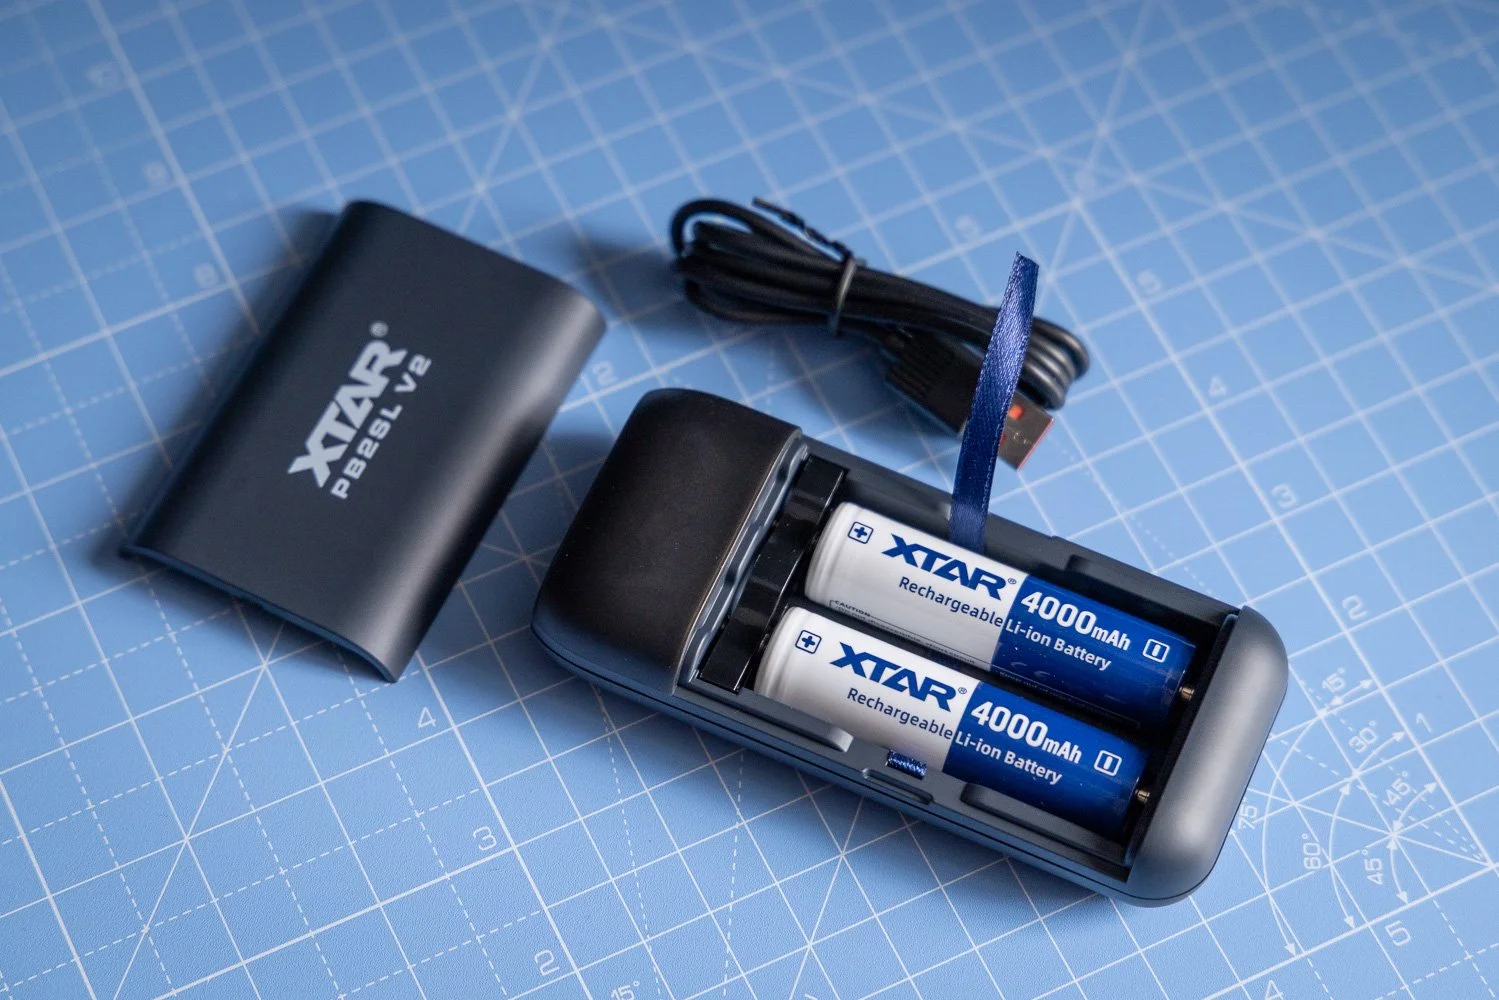
The AA LR 3000 USB-C is especially appealing from a convenience point of view because it can be charged directly via USB-C or with the L8 charger. For anyone working on location, travelling light or trying to keep their charging setup simple, that flexibility is a real plus. Being able to charge batteries directly without always needing a separate charger is one of those small features that can make life much easier.
🎯 Quality and longevity in day-to-day use
For me, the biggest reason to consider XTAR is not just convenience, but confidence over time. Rechargeable batteries only make sense if they hold up well, give consistent performance and feel like they are built to last.
That is the impression these give. They feel like a premium option aimed at people who would rather buy better once than keep replacing cheaper batteries. That is particularly relevant if you are using them regularly in a working setup rather than occasionally around the house.
Yes, they are a bit more expensive than some of the cheaper alternatives you will find online or on the high street. But that extra cost feels justified if you value reliability, longevity and a better overall user experience. In creative work, dependable power is not really an optional extra.
☝️ A couple of practical things to keep in mind
There are a couple of points worth mentioning for balance.
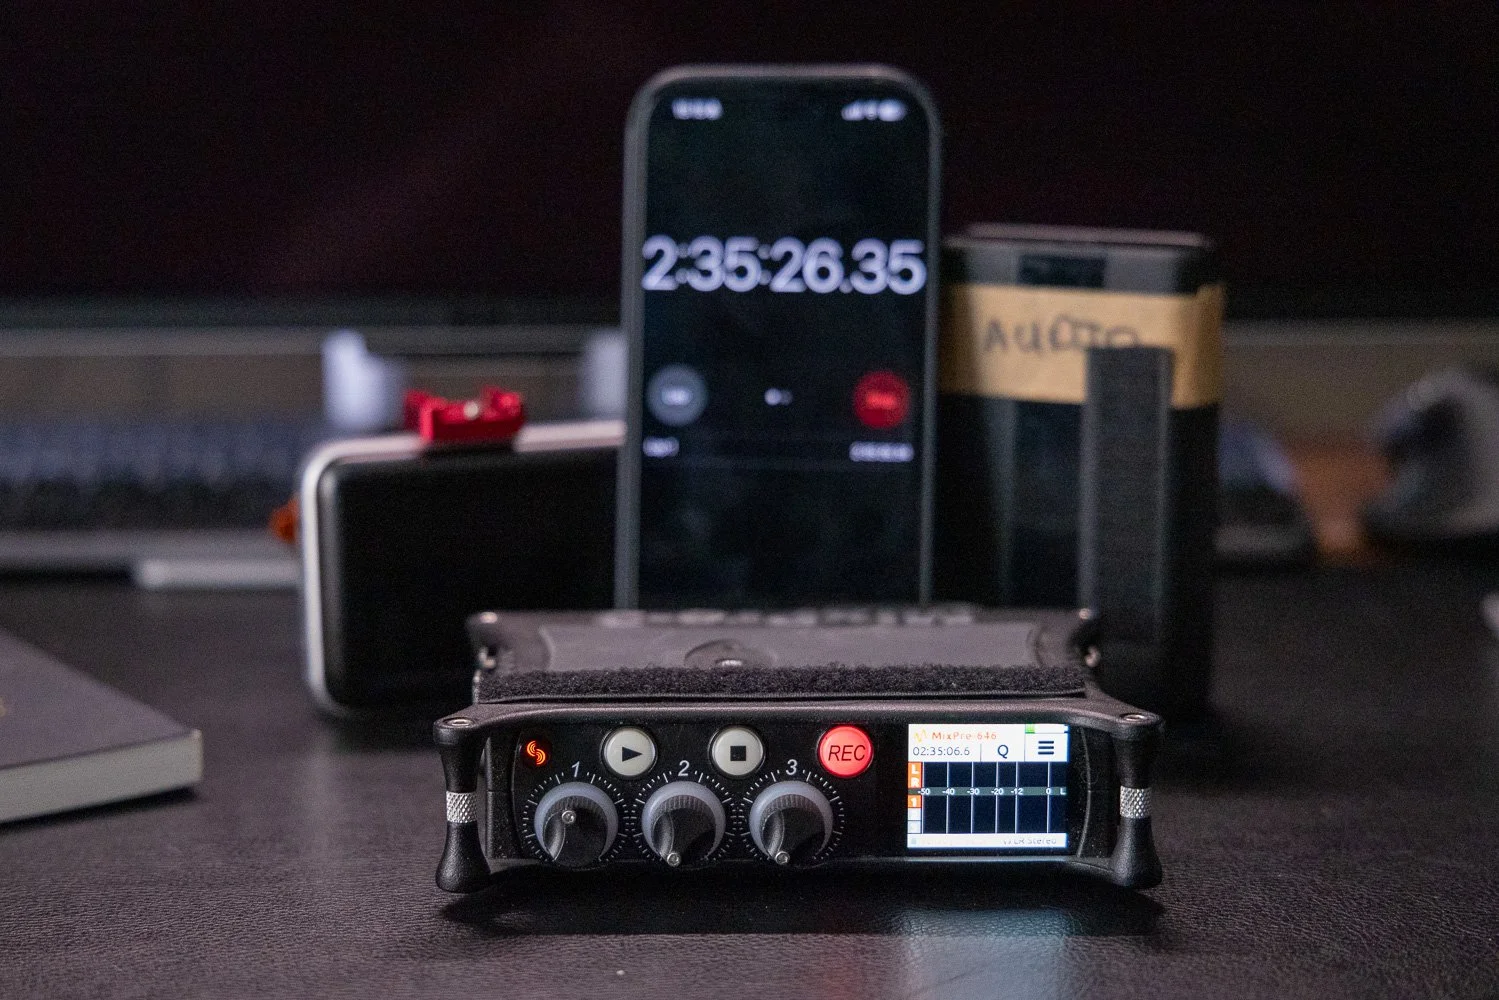
Because these 1.5V rechargeable lithium batteries use a 3.6V battery core with internal charging and discharge management, some devices may produce a slight hum or buzzing noise. This is not unique to XTAR and can happen with 1.5V rechargeable lithium batteries more generally, especially in certain audio devices. If you use battery-powered audio kit, that is something worth testing in your own setup before relying on them for important work.
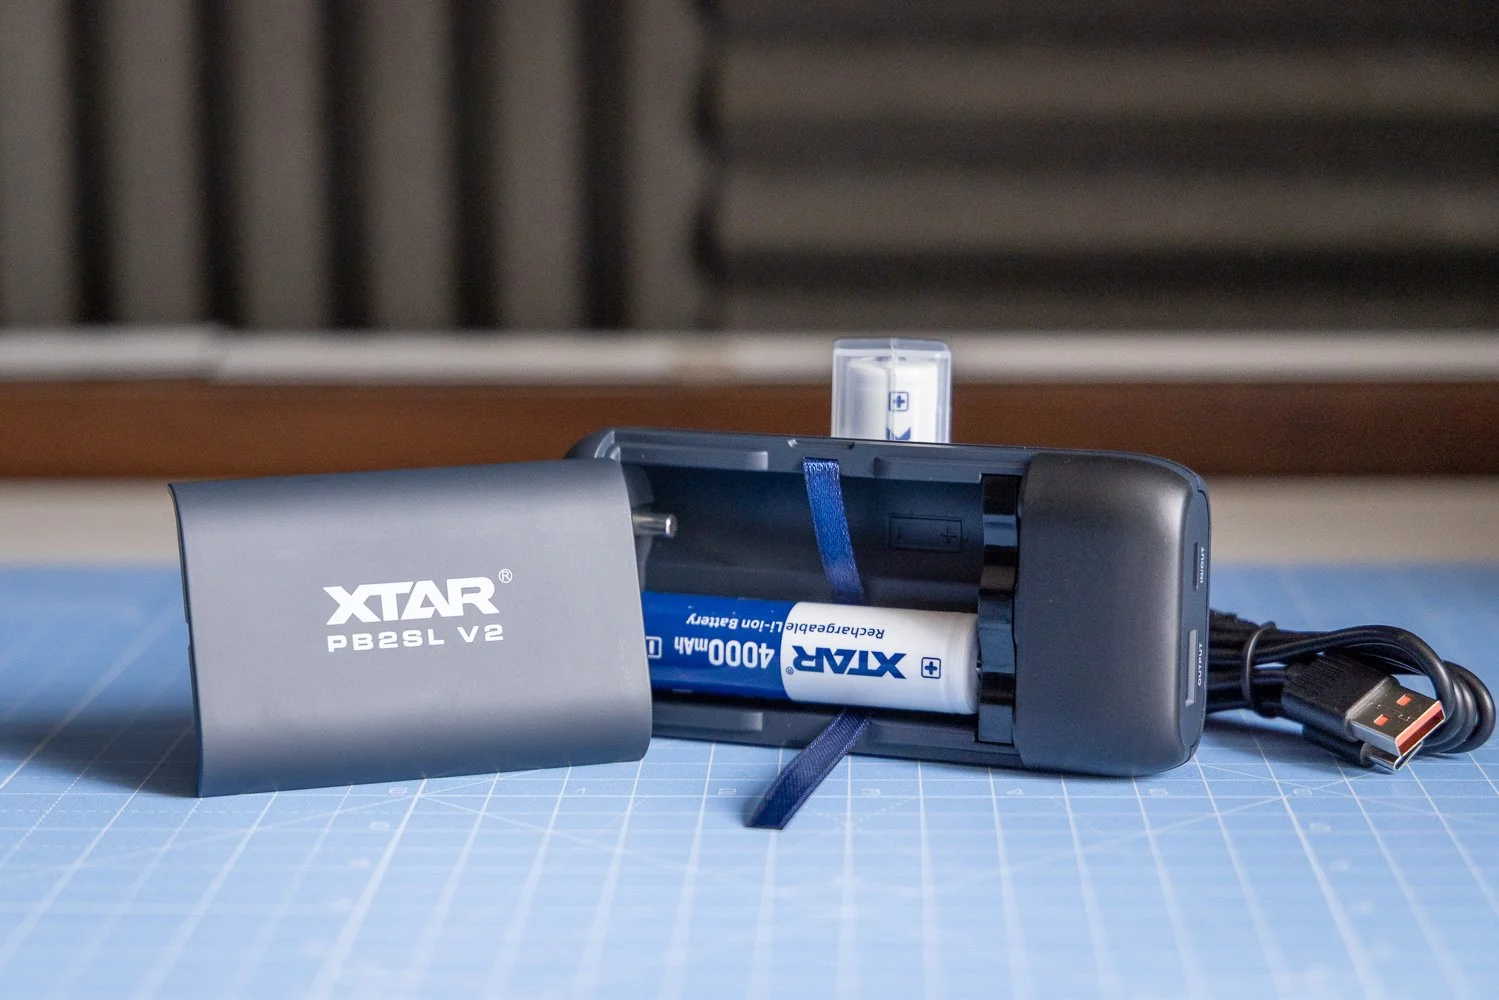
The other thing to be aware of is charger use. If you are using the PB2SL V2 charger, battery polarity needs to be correct when inserting them, as incorrect polarity may damage the charger. It is a simple point, but one worth paying attention to.
Neither of these points would put me off, but they are useful things to know upfront.
❤️ Support and overall experience
One thing that often gets overlooked in a battery review is support. It is easy to focus only on specs, but good custom er support matters, especially when you are buying products designed to be part of a working kit.

That is another area where XTAR comes across well. There is a clear sense that the company understands how these products are actually being used, and that gives a bit more confidence when investing in something slightly more premium.
For me, that is part of the value. It is not just about the battery itself, but the wider experience of using products from a brand that seems serious about quality.

🤑 Are XTAR batteries worth it?
I think XTAR batteries are well worth considering if you are a videographer, photographer or content creator who depends on reliable battery performance.
They offer strong build quality, practical charging options and a more premium feel than many cheaper alternatives. The AA LR 3000 USB-C is particularly useful if you want the flexibility of direct USB-C charging, while the different AA options give you a better chance of finding the right fit for your devices.
They are more expensive than basic off-the-shelf batteries, but in my view, that is the trade-off. You are paying for better quality, better longevity and more confidence in your setup.
If you are the sort of person who would rather invest in gear that lasts and performs properly, XTAR makes a lot of sense.
You can also check out my Lightroom Presets here:https://www.rossjukesphoto.co.uk/lightroom-presets
✅ Final thoughts
Overall, this XTAR Batteries review has left me with a positive impression. These are not bargain-bin batteries, and they are not trying to be. They are aimed at users who want dependable, rechargeable power and are willing to pay a bit more for it.
For anyone working in video, audio or photography, that is usually a worthwhile investment. Reliable batteries help your whole workflow run more smoothly, and that alone can justify spending a little extra.
XTAR seems to understand that well, and that is exactly why these batteries stand out.

🔴 FAQ’s
-
The main difference is their discharge behaviour, which means runtime can vary depending on the device and the load. Some gear may perform better with one than the other.
-
Yes, the AA LR 3000 USB-C can be charged directly via USB-C, and it can also be charged using the L8 charger.
-
Yes, they are a strong option for videographers and photographers who need reliable, rechargeable batteries for accessories such as audio gear, lights and other battery-powered kit.
-
They are a bit more expensive than some cheaper off-the-shelf options, but that extra cost is justified by the focus on quality, longevity and reliability.
-
They can in some cases. A slight hum or buzzing noise may occur in certain audio devices, which is something to test if you plan to use them with sound equipment.
-
If you value dependable performance and longer-term reliability over simply buying the cheapest option, then yes, I think they are worth it.
📸 Are you a photography/videography brand looking to showcase you products? Take a look at my Media Pack and Contact Me to discuss how we can collaborate on a sponsored review.
Posts you might also like…

About the Author - Ross Jukes is a professional Photographer and Videographer with over a decade of experience. Working in both Digital and Analogue formats, Ross has worked with international clients, had his worked published numerous times and exhibited his work extensively. With a passion for all things photographic, Ross combines his experience, enthusiasm and dedication to his art form to create engaging and educational content for the photographic community.
Disclaimer: All links to Amazon UK/US are affiliated links - you will still pay the same price but I will receive a small commission. All information provided in this blog is intended either for educational or entertainment purposes and is accurate to the best knowledge of the author. However, further research/professional advice should be sort before making purchases/implementing any advice given and no responsibility is taken by the author or parties mentioned here within.
Three Pieces of Video Gear I Want to Try from NAB 2026
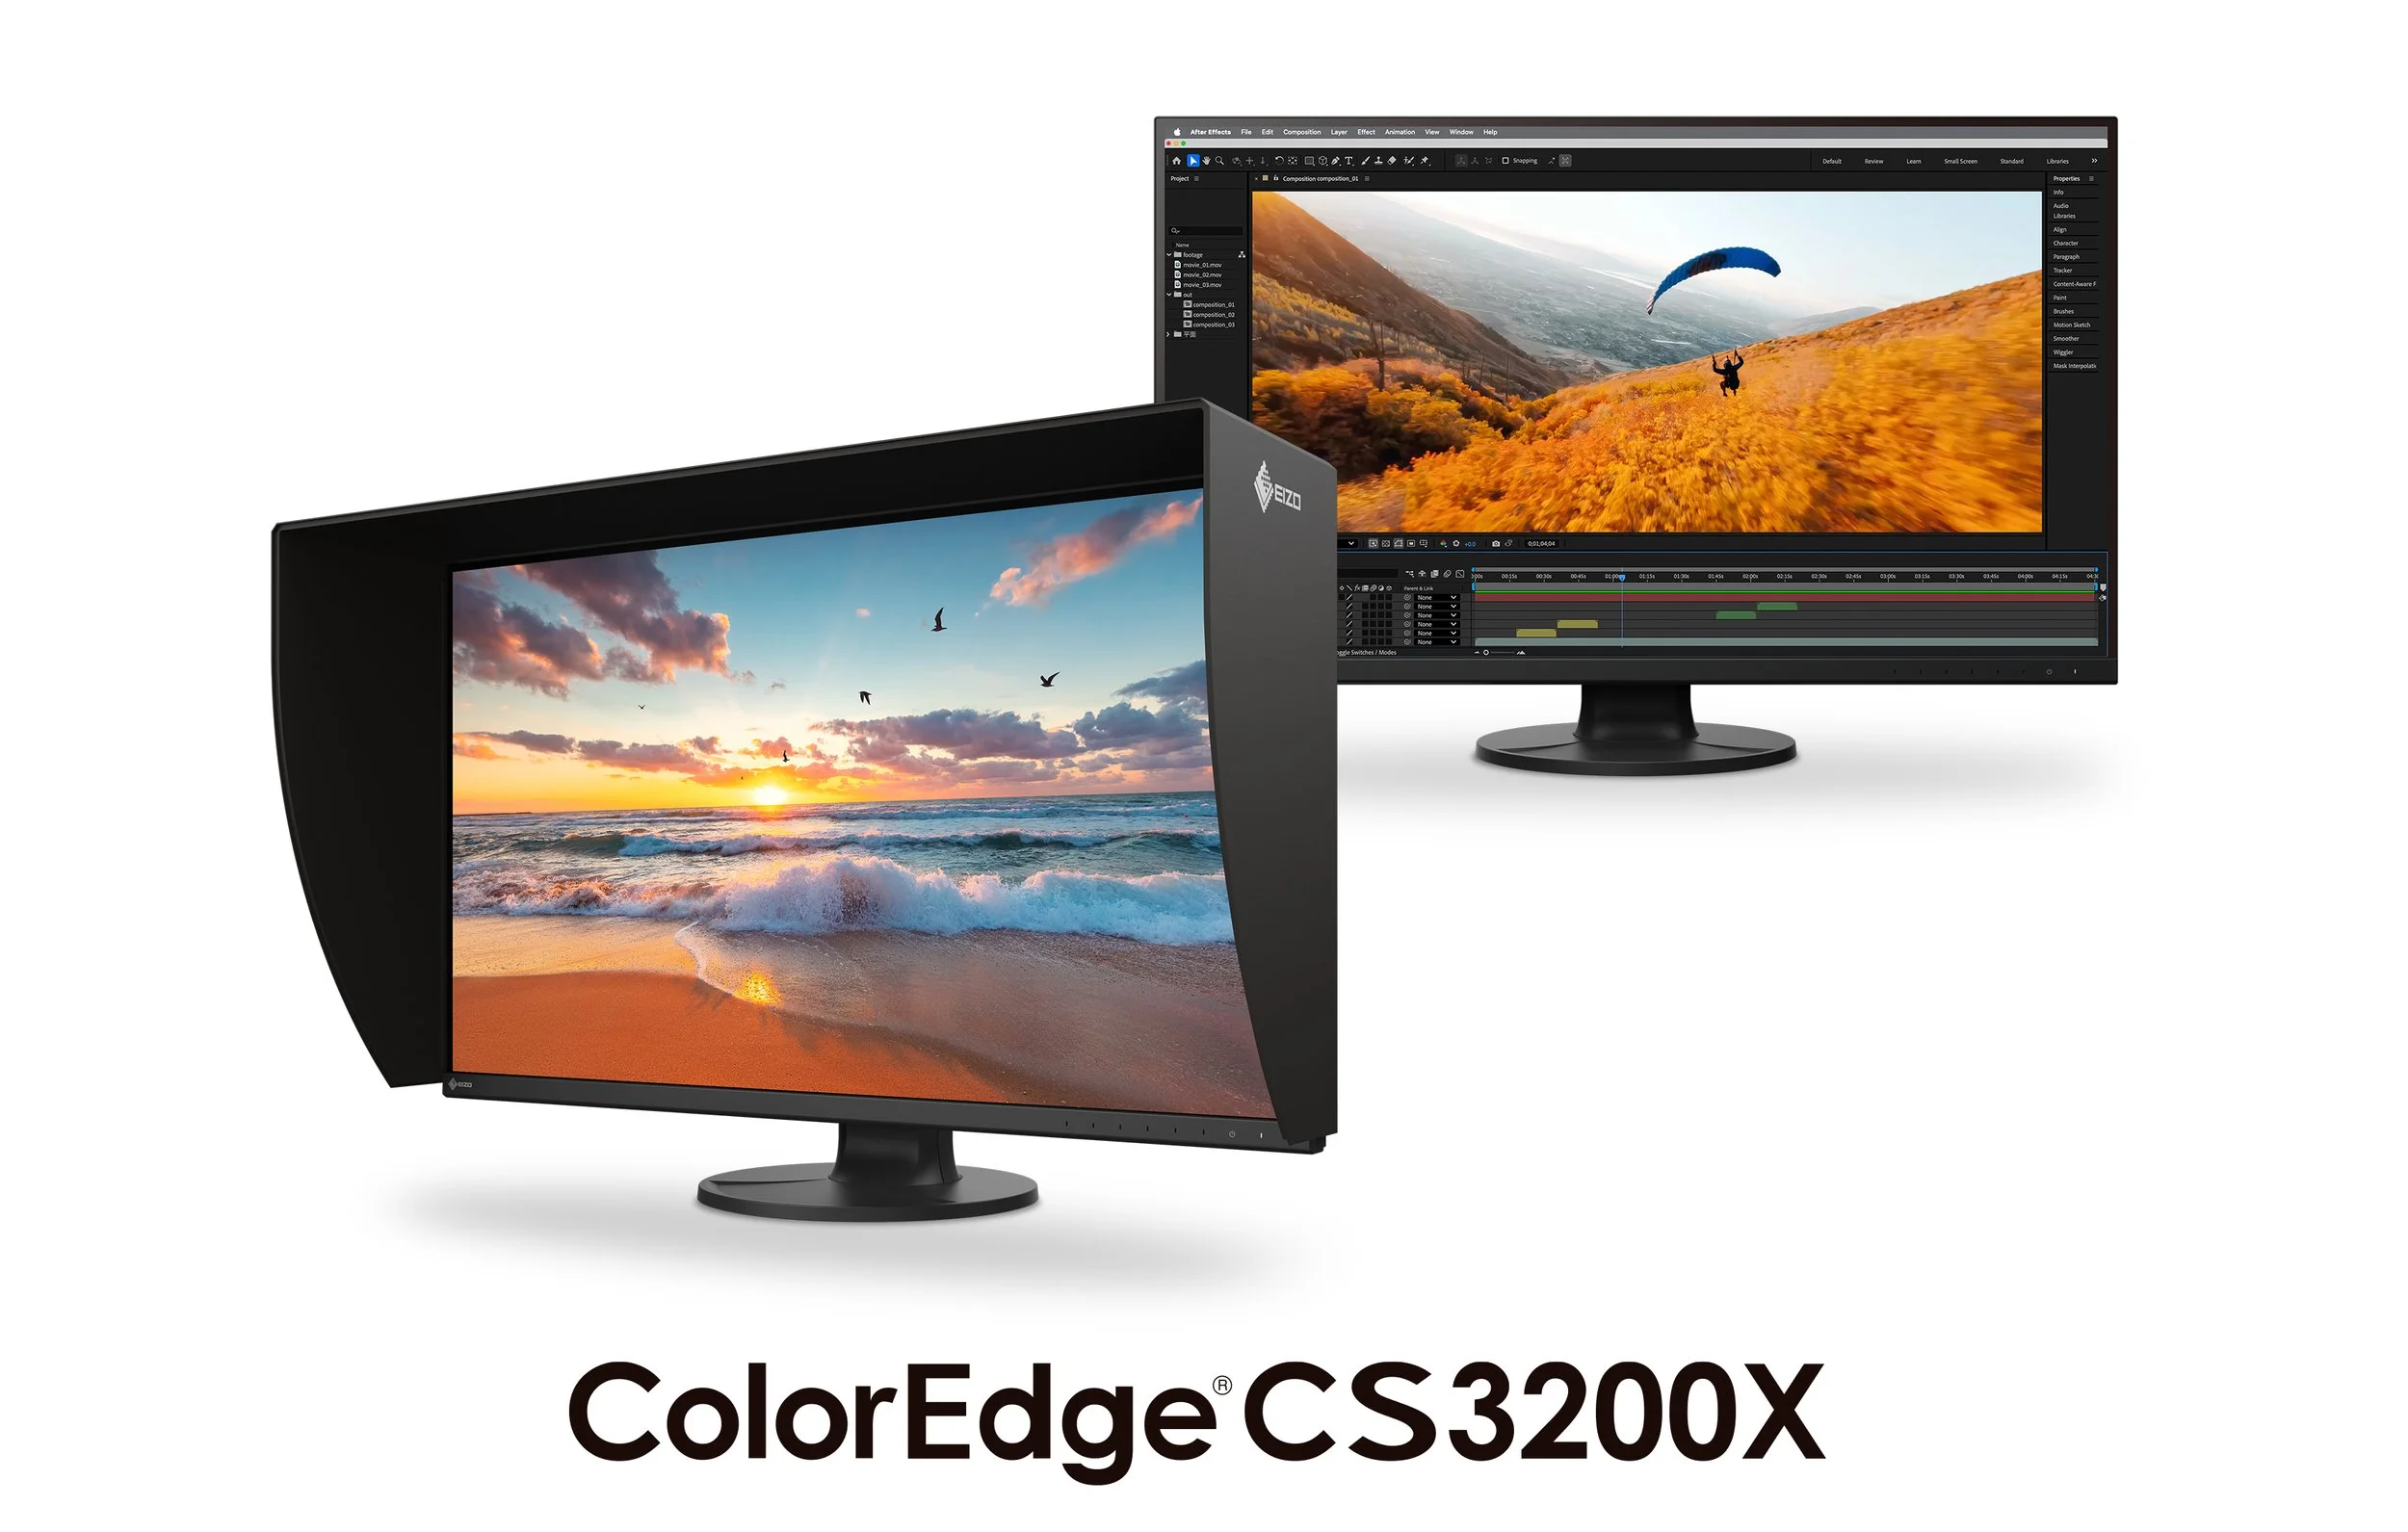
NAB 2026 has produced plenty of interesting new photo and video gear, but these are the three products I am most looking forward to trying: the DJI Osmo Pocket 4, RØDELink II and EIZO ColorEdge CS3200X.

Every year NAB seems to produce a few bits of kit that make me sit up and pay attention. Some of it is obviously exciting — big cinema cameras, strange rigs, lenses that cost more than a small family car — but often the things that interest me most are the products that could genuinely make a difference to the way I work.
That is really what this post is about.
I am not necessarily looking at these three items as things I am definitely going to buy. That would be a very dangerous path to go down, especially if you already have a cupboard full of camera gear that occasionally looks back at you with judgement. But as a photographer and videographer, I am always interested in tools that could make filming easier, faster, more reliable or simply improve the quality of the final output.
Source: CVP Via YouTube
After watching some of the coverage coming out of NAB 2026, there are three pieces of gear that have really caught my attention: the DJI Osmo Pocket 4, the RØDELink II wireless system and the EIZO ColorEdge CS3200X monitor.
They are three very different products, but they all solve very real problems in a working photo and video setup.
1. DJI Osmo Pocket 4
I have always had a bit of a soft spot for the DJI Osmo Pocket range. On paper, it is one of those products that can easily be dismissed as a “content creator” camera, but in reality, I think it is much more useful than that.
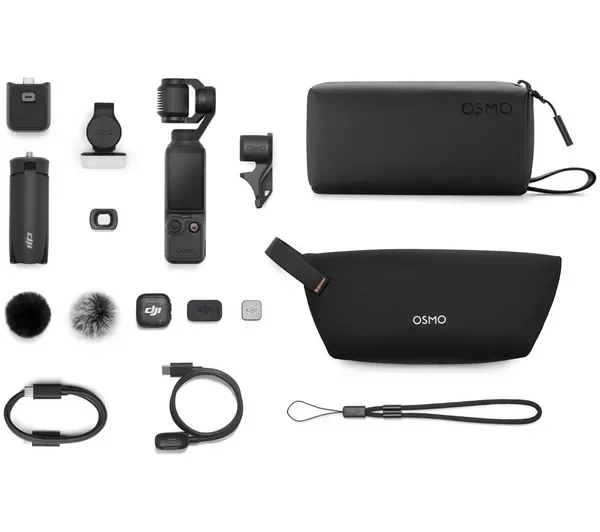
The new Osmo Pocket 4 looks particularly interesting because DJI seems to have pushed it further into serious video territory. The headline feature for me is the 1-inch CMOS sensor, which immediately makes it feel like a more capable tool for real-world shooting. Small cameras are brilliant when they are convenient, but they can fall apart quite quickly when the light drops or when you are working in high contrast situations. So the idea of having something this small with 14 stops of dynamic range and 10-bit D-Log is genuinely exciting.
For the type of work I do, I can see this being incredibly useful as a behind-the-scenes camera, a quick establishing shot camera, or even something to use when I want to travel light but still capture decent quality footage. I am often trying to balance image quality with practicality, and that is where products like this can really earn their place.
Source: Potato Jet via YouTube
I do not always want to pull out a larger camera, rig it up, balance it, add a monitor, sort audio, check settings and make a whole event out of capturing a simple shot. Sometimes I just need something small, quick and reliable that still gives me footage I am happy to put into an edit.
The 3-axis stabilisation is obviously a huge part of the appeal too. I am not expecting it to replace a proper gimbal setup, but if I can get smooth, usable movement from something that fits in a small bag, that is a big win. I can imagine using this for travel videos, studio b-roll, YouTube inserts, product shots and even quick social media content.
There is always a danger with small cameras that you use them because they are easy, rather than because they are good. But from what DJI is promising with the Osmo Pocket 4, it feels like this could be one of those cameras that is both easy and genuinely useful.
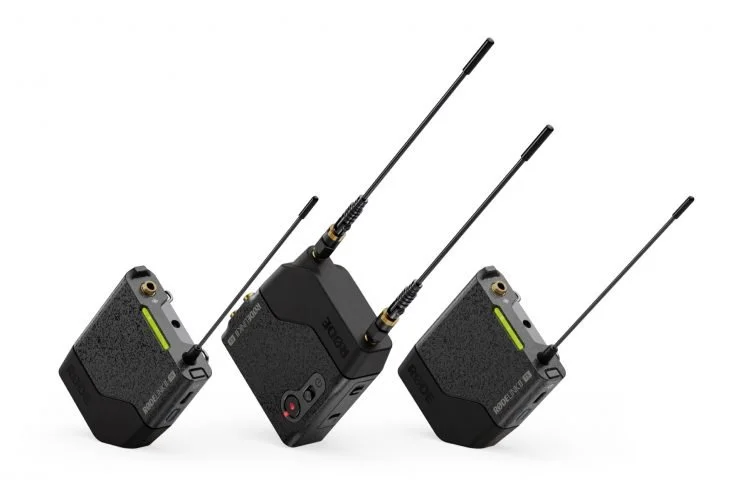
2. RØDELink II Wireless System
Audio is one of those areas where I have become increasingly aware of how important reliability is. You can get away with slightly imperfect lighting or a camera angle that is not quite ideal, but bad audio can ruin a video almost instantly.
That is why the RØDELink II has caught my attention.
I already use wireless audio for a lot of my video work, particularly when filming interviews, talking head content and corporate projects. The problem is that wireless systems can be one of the more stressful parts of a shoot. You are dealing with signal, interference, batteries, mic placement, levels and backup options — all while trying to concentrate on the actual content of the shoot.
The interesting thing about the RØDELink II is that it appears to be a much more serious professional system than some of the smaller compact wireless kits we have seen over the past few years. Those smaller systems absolutely have their place — and I use that kind of gear myself — but there are times when you want something that feels a bit more robust and built for demanding environments.
The fact that this is a UHF system is interesting, especially with RØDE now being part of the same wider group as Lectrosonics. I am not going to pretend to be an audio engineer, but I do know that if I am filming an important interview, I want confidence that the audio is going to work.
Source: RODE Via YouTube
The features that really stand out to me are dual-channel operation, 32-bit float onboard recording and timecode I/O. That combination makes a lot of sense for the kind of work where you cannot afford to lose a take. Being able to record directly on the transmitter as a backup is a massive safety net, and 32-bit float gives you a bit more breathing room if levels are not perfect.
Timecode is another feature that becomes more appealing the more video work you do. If you are working with multiple cameras, separate audio and a decent amount of footage, anything that makes syncing easier in post is worth paying attention to.
I would be really interested to try the RØDELink II in a proper corporate interview setup. Not just a quick test in a quiet room, but a real shoot where there are all the usual variables — people moving around, Wi-Fi everywhere, reflective rooms, time pressure and the mild panic that comes with knowing you only get one chance to capture the audio properly.
If it performs well in that environment, it could be a very useful addition to a professional kit bag.
3. EIZO ColorEdge CS3200X Monitor
This is probably the least “exciting” item on the list to most people, but it might actually be the one that could make the biggest difference day to day.
I spend a lot of time editing. Whether it is photography, video, YouTube content, client work, colour grading, retouching or preparing images for print, the monitor is one of the most important parts of the entire setup. It is also one of those things that is very easy to neglect.
A camera is exciting. A new lens is exciting. A monitor is… well, a monitor.
But the more you work professionally, the more you realise that having a reliable display is absolutely essential. If you cannot trust what you are looking at, everything else becomes guesswork.
The EIZO ColorEdge CS3200X looks like a really interesting option because it brings a large 31.5-inch 4K display into the ColorEdge CS range. That screen size is very appealing for both photo and video work. I like the idea of having more room for timelines, panels, scopes, layers and all the little bits of software clutter that slowly take over your life.
For photography, the wide colour gamut and focus on colour accuracy are obviously key. For video, the support for workflows like DCI-P3, BT.709, HLG and PQ makes it feel like something that could sit nicely between stills and moving image work. That is important to me because I do not really operate in one world anymore. My work is a mix of photography, videography, YouTube, commercial content and personal projects, so having a monitor that supports that mixed workflow is really appealing.
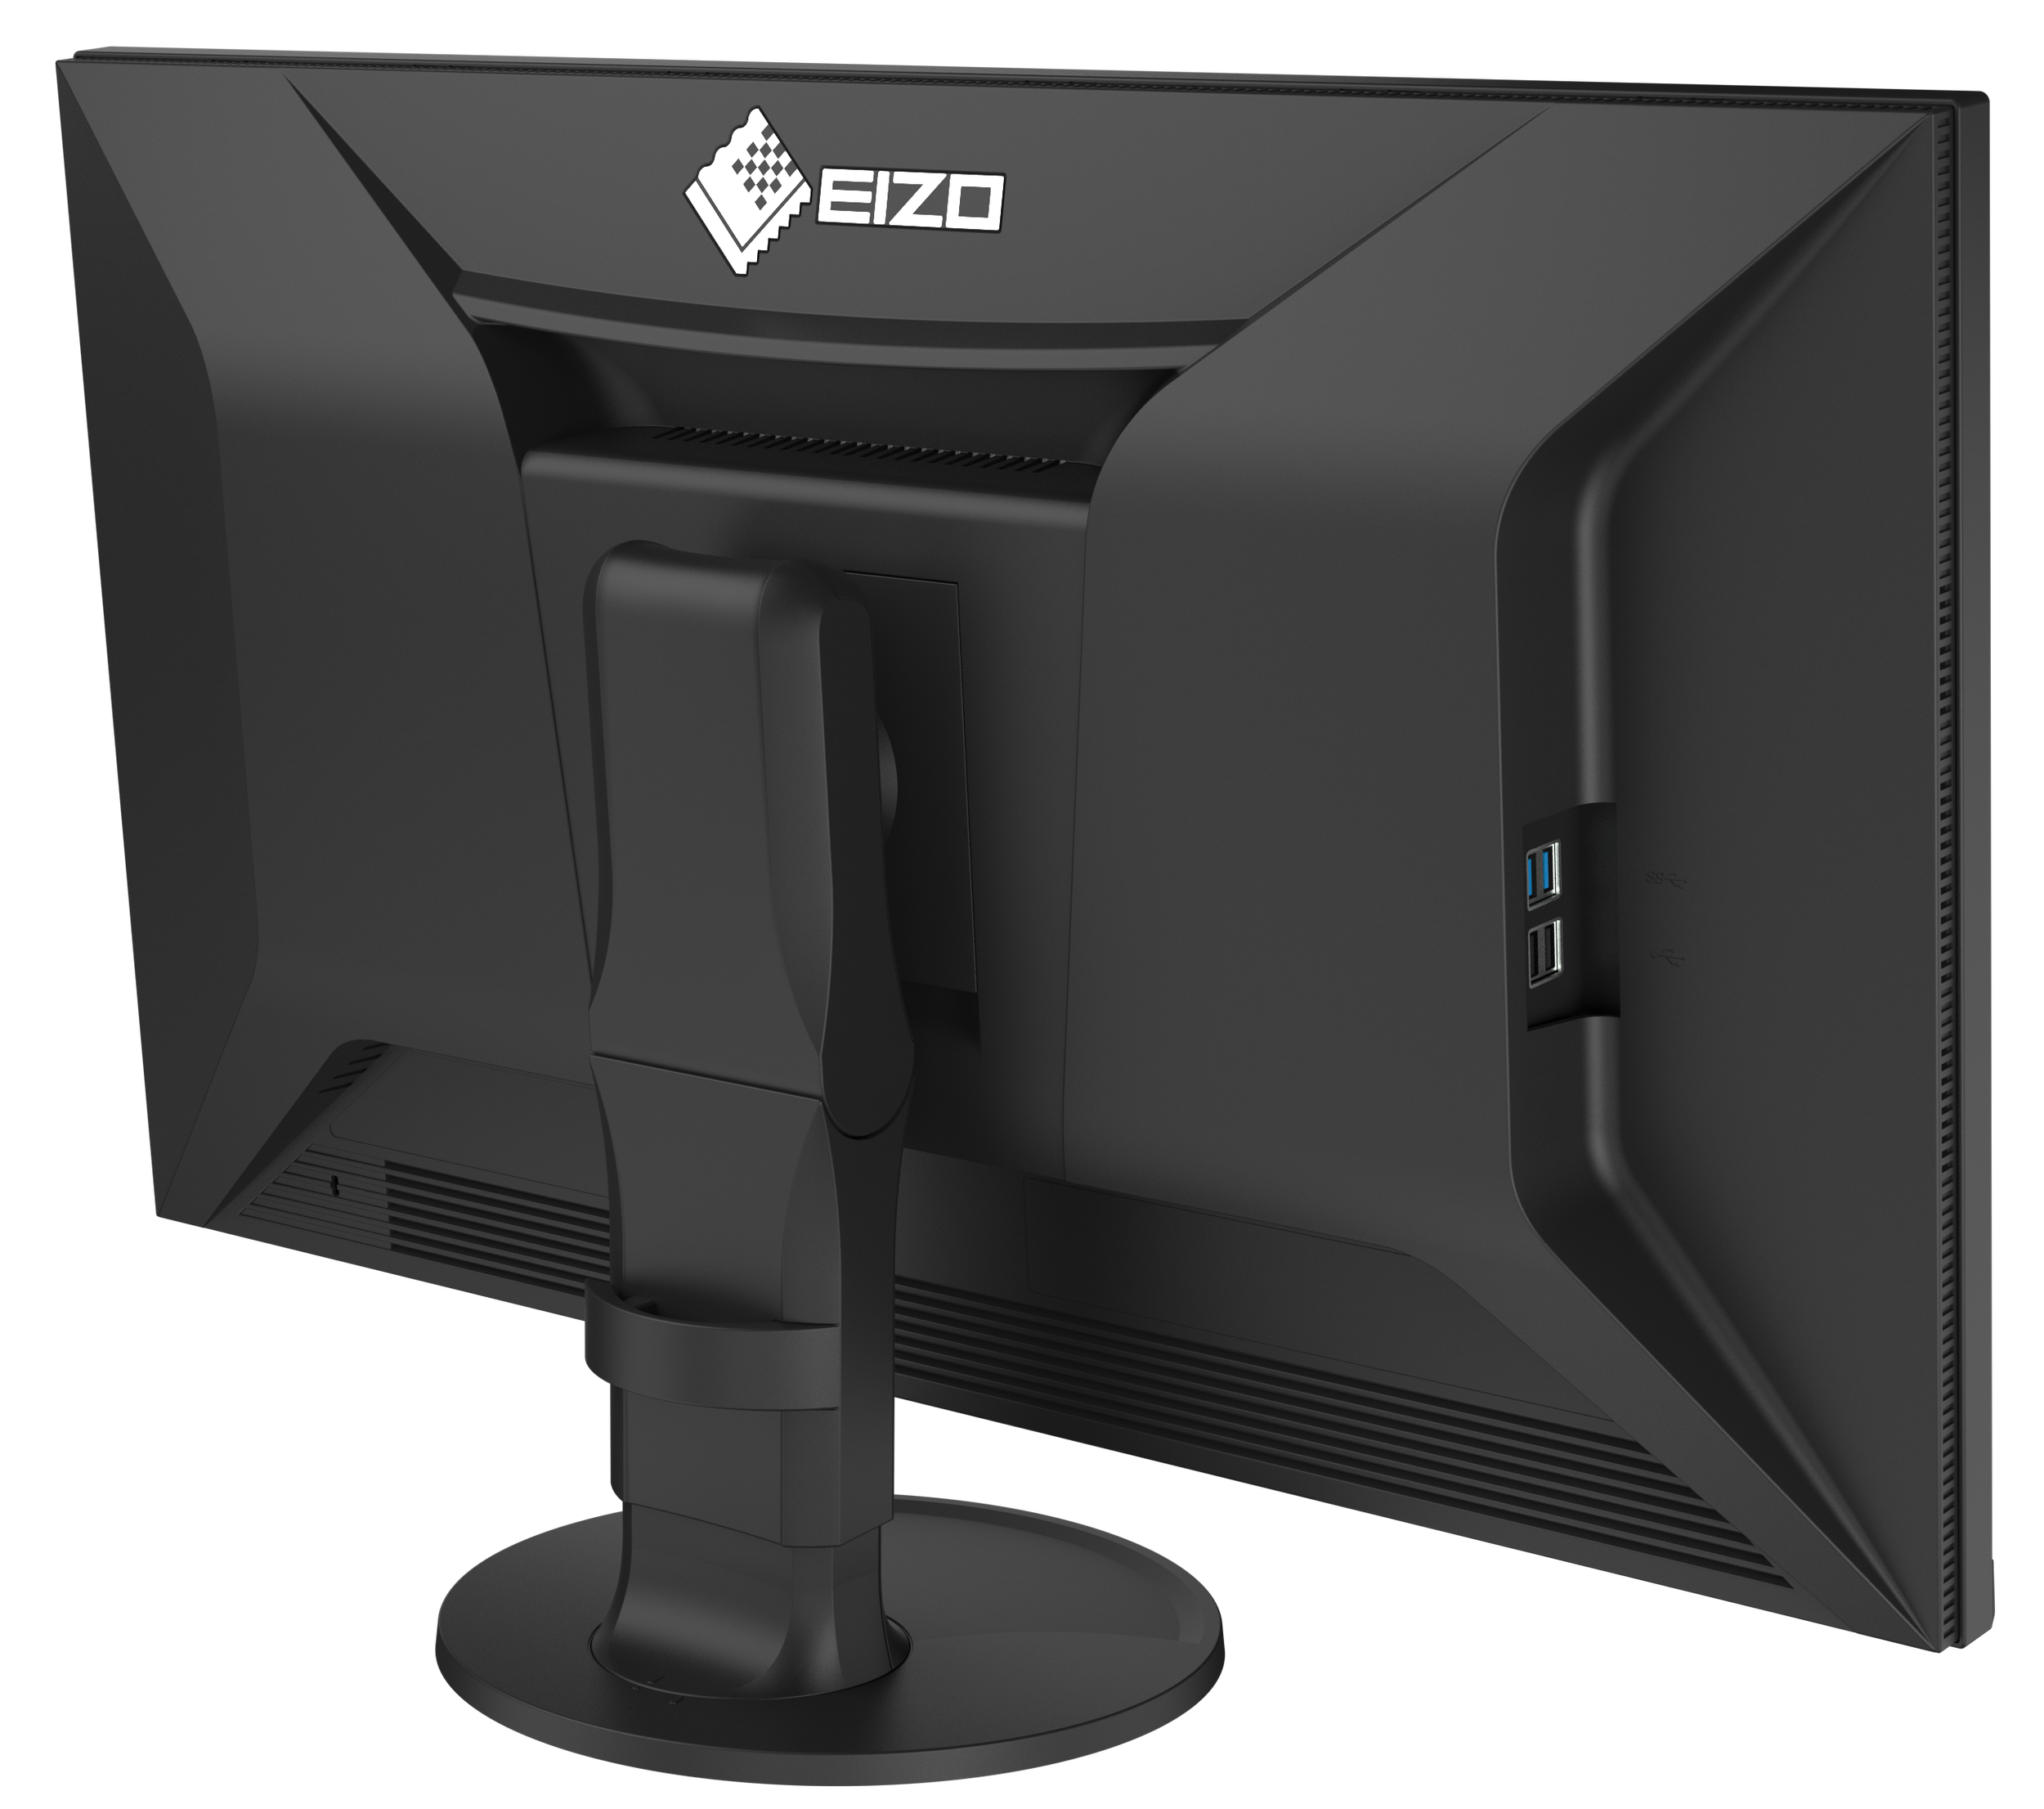
I am also pleased to see that it includes a shading hood. Again, not the most glamorous feature in the world, but anything that helps reduce reflections and creates a more controlled editing environment is useful. I edit in real spaces, not perfect grading suites, so practical touches like that matter.
Would it be overkill for some people? Almost certainly.
But if you are producing paid photo and video work, especially where colour consistency matters, then a proper monitor starts to look less like a luxury and more like an investment.
Why These Three NAB 2026 Releases Stand Out To Me
What I like about these three products is that they each solve a different problem.
The DJI Osmo Pocket 4 is about speed, portability and capturing good footage without turning every shot into a full production.
The RØDELink II is about confidence and reliability in audio, which is an area I am always looking to improve.
The EIZO ColorEdge CS3200X is about trusting the final image and making the editing process more accurate and enjoyable.
None of these products are magic solutions. They will not make bad ideas good, they will not fix poor planning and they certainly will not remove the need to actually know what you are doing. But the right tools can make a real difference, especially when they remove friction from the process.
That is why I enjoy looking at new gear from shows like NAB. Not because I need more things, but because it helps me think about where my own workflow could improve.
And that is probably the most useful part of making a list like this. It is not just a shopping list. It is a way of asking: where are the weak points in my current setup, and what would help me produce better work?
For me, in 2026, those weak points are faster capture, more reliable audio and a more trustworthy editing setup.
So yes, I would very much like to get my hands on the Osmo Pocket 4, the RØDELink II and the EIZO ColorEdge CS3200X.
Whether my bank account agrees is another matter entirely.
📸 Are you a photography/videography brand looking to showcase you products? Take a look at my Media Pack and Contact Me to discuss how we can collaborate on a sponsored review.
Posts you might also like…
About the Author - Ross Jukes is a professional Photographer and Videographer with over a decade of experience. Working in both Digital and Analogue formats, Ross has worked with international clients, had his worked published numerous times and exhibited his work extensively. With a passion for all things photographic, Ross combines his experience, enthusiasm and dedication to his art form to create engaging and educational content for the photographic community.
Disclaimer: All links to Amazon UK/US are affiliated links - you will still pay the same price but I will receive a small commission. All information provided in this blog is intended either for educational or entertainment purposes and is accurate to the best knowledge of the author. However, further research/professional advice should be sort before making purchases/implementing any advice given and no responsibility is taken by the author or parties mentioned here within.

How to Make the Most of Lightroom Presets | Tips for Better Photo Editing
Lightroom presets can be a bit misunderstood. Some photographers absolutely love them, some dismiss them as a shortcut, and others download a preset pack, try it once, then never really use it again. In my opinion, all of those approaches miss the point slightly.
Lightroom presets can be a bit misunderstood.
Some photographers absolutely love them, some dismiss them as a shortcut, and others download a preset pack, try it once, then never really use it again. In my opinion, all of those approaches miss the point slightly.

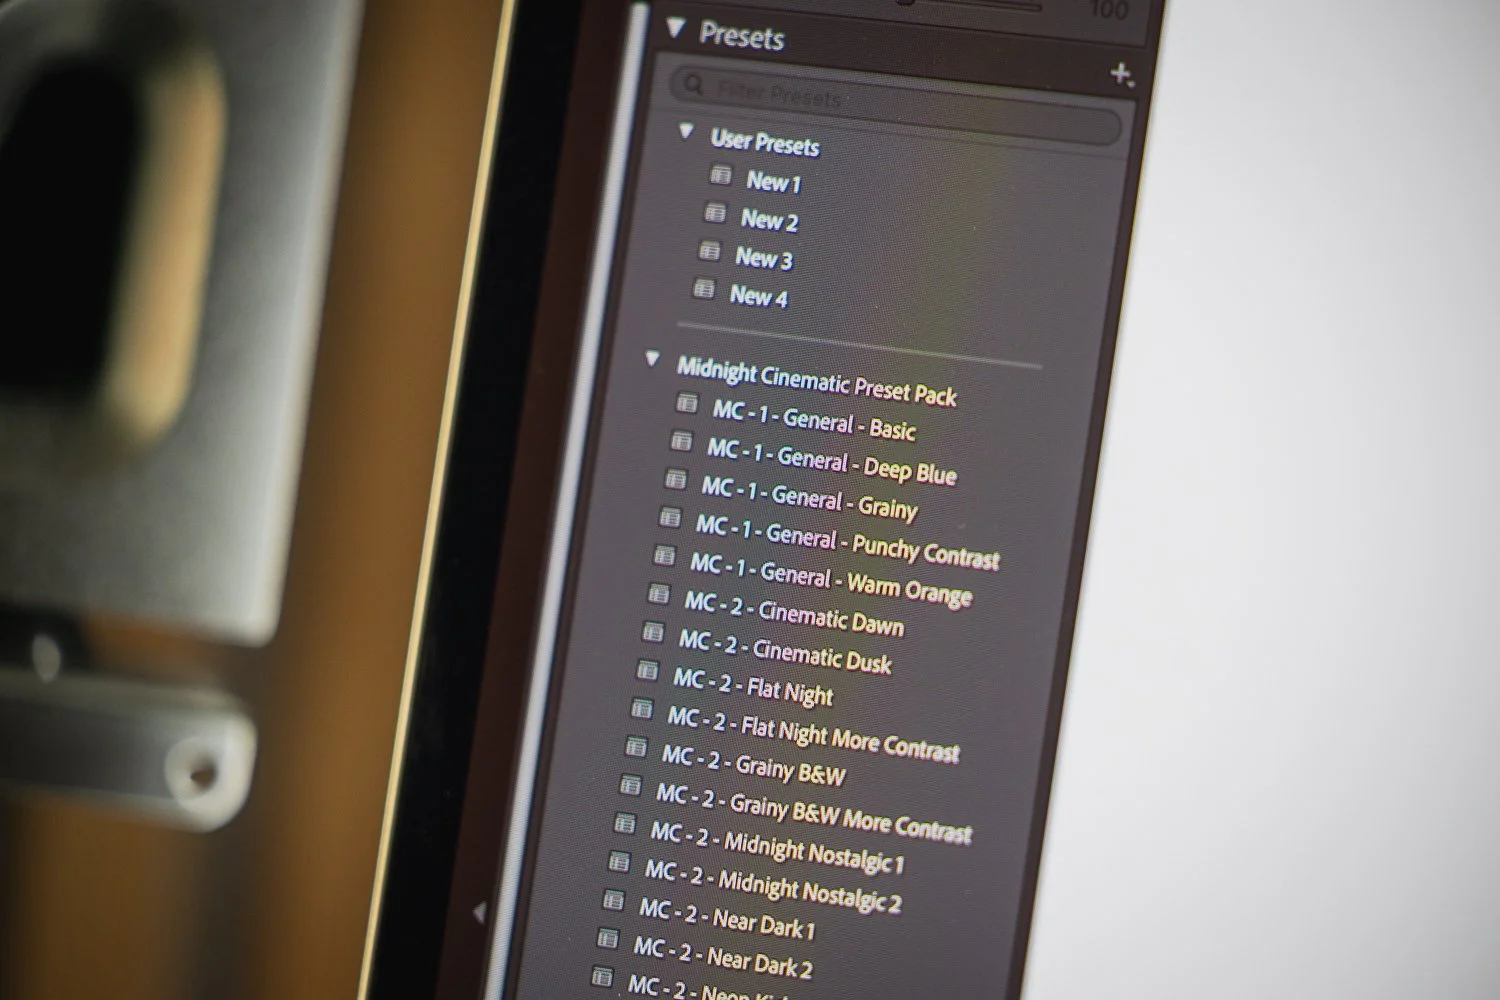
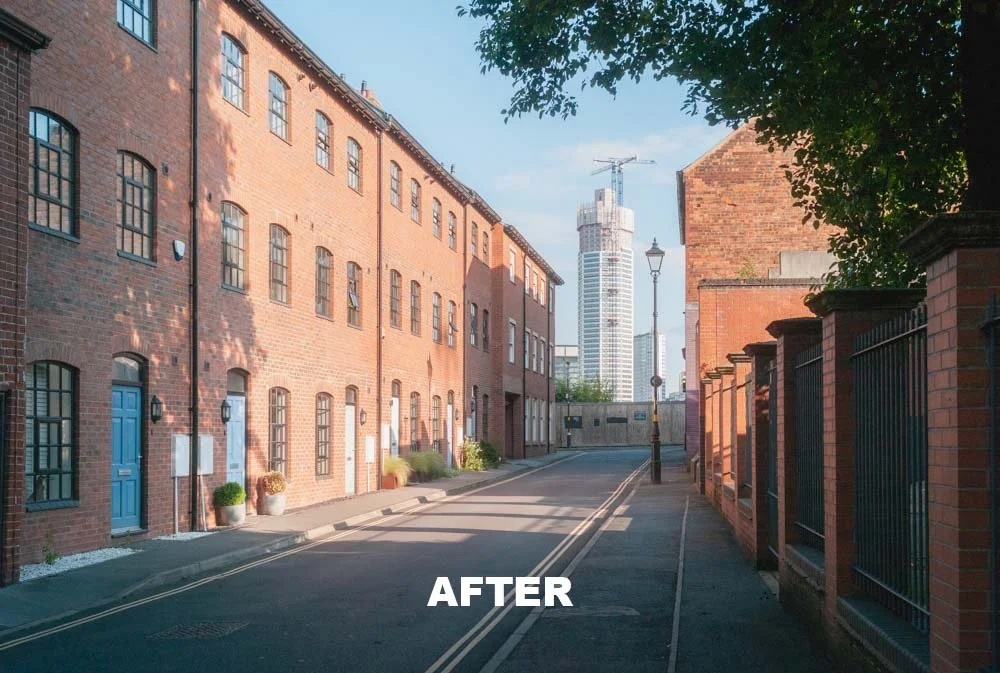
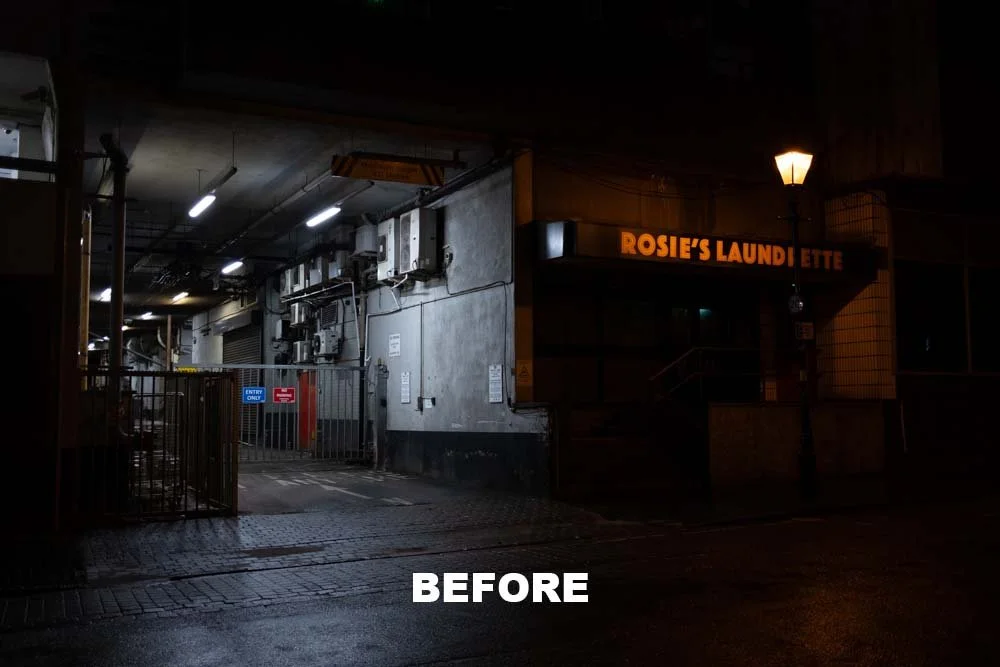
Edited with my Midnight Cinematic preset
Used properly, Lightroom presets can be a genuinely useful part of your editing workflow. They can save you time, help you create a more consistent style across your images and even teach you a lot about editing along the way. They are not magic, and they certainly will not turn a poor photo into a great one, but they can make strong images look even better and make the editing process far more efficient.
❤️ PLEASE NOTE - If you would like to support the blog, please consider making a small donation.
Whether you are new to Lightroom or have been editing for years, it is well worth understanding how to use presets properly. In this post, I want to look at how to get the best out of Lightroom presets, where people often go wrong with them and why a good preset pack can be such a useful tool for both beginner and experienced photographers.
What is a Lightroom preset?
At its simplest, a Lightroom preset is a saved group of editing settings.
So rather than manually adjusting exposure, contrast, highlights, shadows, colour, sharpening and tone every single time, a preset lets you apply a look or starting point instantly.
That is the key thing here though: a preset is a starting point.
It is not there to do all of the work for you. A preset helps you get closer to the final look more quickly, but most images will still need a few tweaks afterwards. The light will be different, the colours in the scene will be different and your camera settings will be different too.
That is why the best way to use Lightroom presets is as part of your workflow, not as a one-click fix.
Why Lightroom presets are so useful
The biggest benefit is speed.
If you are editing a full set of photos from a portrait session, an event, a trip or even just a day out shooting, it can take a long time to start every image from scratch. Presets can massively reduce that editing time by giving you a solid base to work from.
They are also very useful for consistency.
If you want your Instagram feed, portfolio, blog or client galleries to feel cohesive, presets can help create that visual consistency. Not every image needs to look exactly the same, but it does help when your work feels like it belongs together.

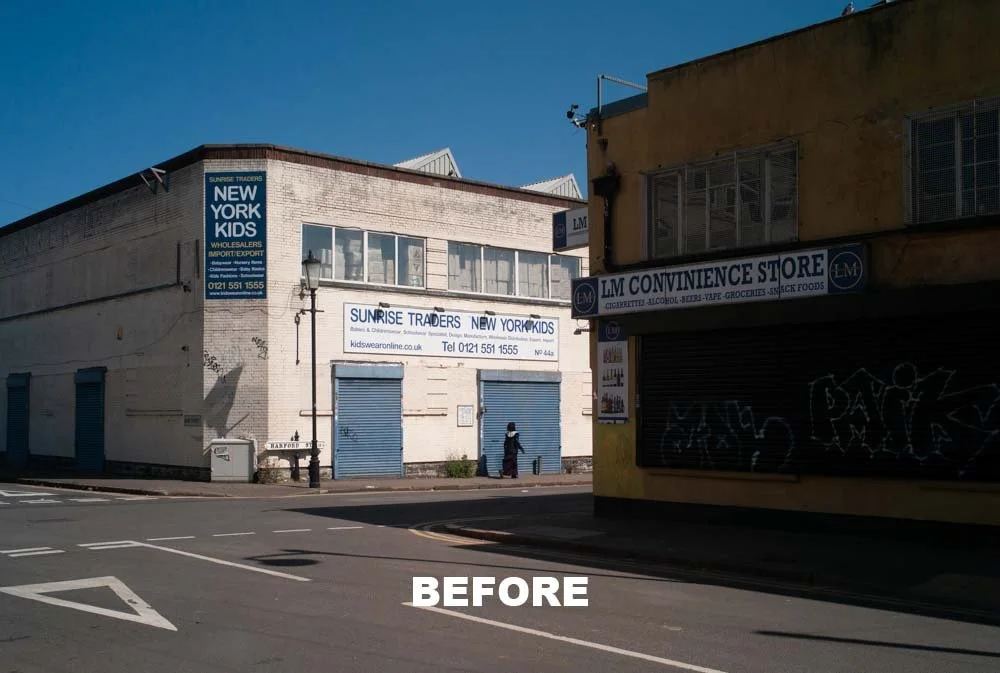
Edited with my Modern Nostalgia preset
Another big benefit is that presets can help you learn.
This is especially useful if you are still getting comfortable with Lightroom. When you apply a preset and then look through the settings, you can start to understand what has actually changed. You begin to notice how contrast is being shaped, how colour is being handled and how different tones affect the mood of the image.
So while presets are often seen as a shortcut, they can actually be one of the most useful ways to improve your editing knowledge.
The biggest mistake people make with presets
The most common mistake is expecting a preset to rescue a weak photo.
A preset will not fix bad composition. It will not correct missed focus. It will not suddenly turn poor light into beautiful light. If the image is not very strong in the first place, the preset can only do so much.
That is why presets work best when they are applied to solid images with good exposure, decent light and a strong starting point.

The second big mistake is applying the same preset to every image and leaving it at that.
A preset that looks brilliant on a warm outdoor portrait might look completely wrong on an overcast urban scene. That does not mean the preset is bad. It just means it is not suited to every situation.
The photographers who get the most from presets are usually the ones who know when to use them, when to tweak them and when to choose a different one altogether.

Some tools make editing even easier, check out my TourBox review
Start with the best file possible
If you want presets to work well, it helps to give them a strong image to work with.
That means paying attention while shooting. Try to get your exposure right in camera, be mindful of your white balance and, wherever possible, shoot in RAW rather than JPEG.
RAW files give you much more flexibility in Lightroom and tend to respond far better to presets than JPEGs do. You have more room to recover highlights, lift shadows and refine colour without the file falling apart.
It sounds obvious, but it is worth saying: the better your original image is, the better your preset will look.
Use presets to create a more consistent style
One of the most valuable things about using Lightroom presets is the consistency they can bring to your work.
If you like warmer tones, softer contrast, muted greens, rich shadows or a cleaner editorial look, presets can help you apply that style more consistently across different shoots.
That matters more than people think.
A consistent edit makes your work feel more polished and intentional. It helps your website, social media and portfolio feel more cohesive. It can also make your work more recognisable, which is useful if you are trying to build a stronger visual identity as a photographer.
That does not mean every image should be edited in exactly the same way. In fact, that can make your work feel a little flat. But having a set of presets that reflect your taste can be a really good way to tie your images together.
An old video of mine but still relevant in 2026!
Don’t just apply a preset and leave it there
For me, this is where presets become genuinely useful rather than just convenient.
Once a preset is applied, there are usually a few adjustments worth checking straight away.
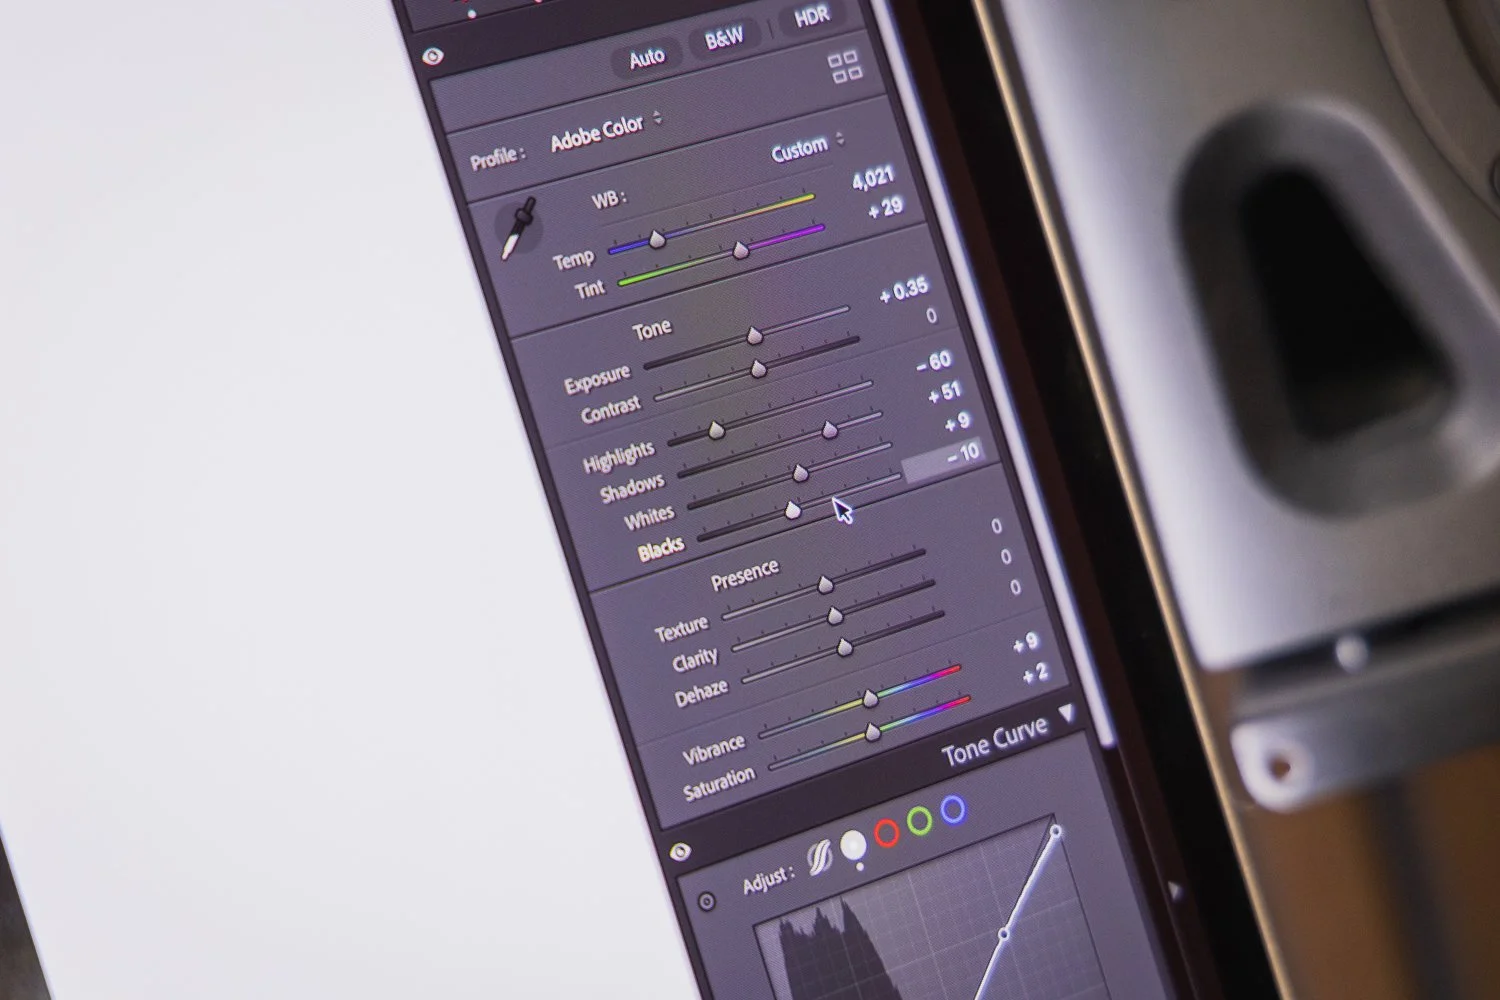
Exposure is usually the first one. White balance is often the second. These are the areas most likely to vary from image to image, regardless of how good the preset is.
After that, it is worth checking:
Highlights and shadows
Whites and blacks
Overall colour balance
Skin tones
Cropping and straightening
Any local adjustments that might improve the image further
Most of the time, these are only small tweaks. But those small tweaks are what make the image feel properly finished.
A good preset should save you time, not remove you from the editing process completely.
Learn which presets work best for different situations
Not every preset works for every subject or every lighting condition.
A cleaner, more natural preset might work well for portraits, family photos or commercial jobs where accurate colour matters. A moodier preset may suit street photography, travel photography or more atmospheric scenes. A punchier black and white preset might work brilliantly for one image and feel far too strong on another.

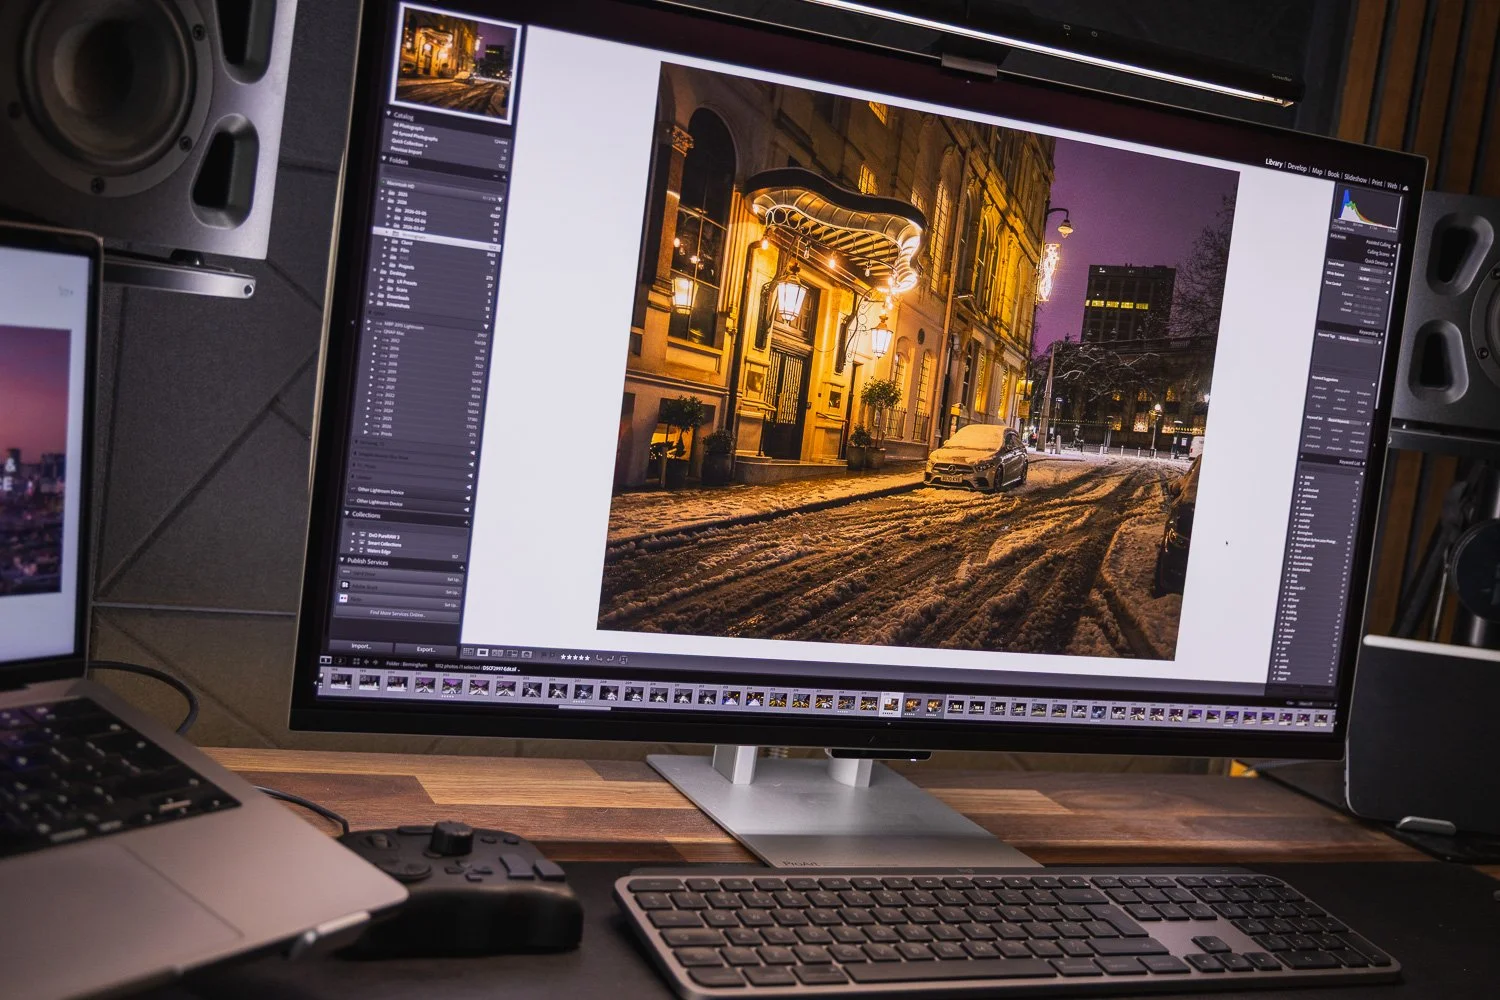
Edited with my Midnight Cinematic preset
Part of getting good with presets is learning which ones suit different types of images.
Once you start recognising that, presets stop feeling like random filters and start becoming much more useful creative tools.
Use presets to improve your workflow
One of the best ways to use presets is to make them part of a repeatable editing workflow.
A simple workflow might look like this:
Import your images
Cull the set down to your favourites
Apply a preset that suits the shoot
Adjust exposure and white balance
Sync edits across similar images
Fine-tune individual photos where needed
Export
This sort of process can save a huge amount of time, especially if you are editing larger sets of images.
It also helps reduce decision fatigue. Rather than rebuilding your edit from scratch every time, you can begin with a look you already trust and then refine from there.
Another old video from when I had more hair! But still has some useful info…
Lightroom presets can also help you learn
If you are newer to editing, this is one of the most overlooked benefits of presets.
When you find a preset you like, go through the settings panel by panel and see what it is doing. Look at the tone curve. Look at the HSL sliders. Look at the colour calibration. Notice how the shadows are being handled or how the colour temperature has shifted.
Doing that regularly can teach you a lot.
You start to understand why some images feel warm and natural while others feel cinematic or moody. You also start to recognise the sort of edits you are personally drawn to, which is useful if you eventually want to develop your own style further.
So no, presets are not cheating. In many cases, they are actually a very good way to learn how editing works.

Good peripherals can make the edit process more enjoyable, check out my MX 4 Master review
Try not to overdo it
Because presets can make dramatic changes quickly, it is easy to push an image too far.
Too much contrast, too much saturation, strange skin tones, crushed blacks or overly faded edits can all make an image feel a bit forced. In my opinion, the best preset edits still let the photo breathe.

Edited with my Modern Nostalgia preset
This is particularly important with portraits. Skin tones can go wrong very quickly, and once they do, the whole image feels off. Always take a close look at faces after applying a preset, even if the rest of the image looks great.
Generally speaking, subtle editing tends to age better than heavy-handed editing.
Build a smaller set of favourites
A lot of photographers end up collecting too many presets.
They download huge packs, use two or three favourites regularly and ignore the rest. There is nothing wrong with variety, but in practical terms, you are usually better off having a smaller set of presets that you know really well.
For example, you might have:
one preset for bright outdoor work
one for moodier images
one for black and white
one for a cleaner, more natural finish
That is often far more useful than scrolling through dozens of options every time you edit.
The more familiar you become with your go-to presets, the faster and more effective your editing will be.

It’s useful to build an environment you ‘want’ to edit in - check out my desk setup for 2026
Why presets are useful for both beginners and experienced photographers
Beginners often benefit from presets because they make Lightroom feel less overwhelming.
Instead of starting with every slider at zero and not knowing where to begin, presets provide a useful starting point and help you see what is possible.
More experienced photographers often benefit for a different reason: efficiency.
Once you know the kind of look you like, presets can help you apply that style quickly and consistently. That means less time repeating the same technical adjustments and more time focusing on the images themselves.
That is why presets are not just for beginners. They can be a very practical tool for photographers at every level.
Final thoughts
Lightroom presets are not a gimmick, and they are not a replacement for good photography.
They are simply a tool, and like any tool, they are only as useful as the way you use them.
Used properly, presets can help you edit more quickly, keep your work consistent, understand editing more clearly and build a stronger visual style across your photography. Used badly, they can lead to lazy edits and unrealistic expectations.
For me, the best way to think about presets is this: they should support your photography, not dominate it.


Edited with my Midnight Cinematic preset
Start with strong images. Choose presets that suit the scene. Make a few adjustments afterwards. Learn why they work. And do not be afraid to settle on a smaller number of presets that genuinely fit the way you like your work to look.
If you do that, presets can become a really useful part of your editing process rather than just another thing sitting unused in Lightroom.
And if you are currently experimenting with your own editing style or want to speed up your workflow without losing control over the final result, it is well worth trying a well-built preset pack. If you would like to see the sort of looks I personally use and prefer, you can also take a look at my Lightroom Presets.
🔴 FAQs
-
Yes, I think Lightroom presets are absolutely worth it if you want to speed up your editing and create a more consistent look across your images. A good preset pack gives you a strong starting point, saves time and can also help you understand how different edits are built. The key is using presets properly rather than expecting them to do all of the work for you.
-
Yes, plenty of professional photographers use Lightroom presets. They are not just for beginners. In fact, presets can be even more useful when you are editing large numbers of images and want to keep your work looking consistent. Most professionals will still fine-tune each image afterwards, but presets can make the whole editing process much more efficient.
-
Not really. They are often compared to filters, but Lightroom presets are more flexible than that. A preset applies a saved group of editing adjustments, but you can still go in and change the exposure, white balance, colours, contrast and everything else afterwards. So rather than being a fixed effect, they are better thought of as a starting point for your edit.
-
No, not perfectly. That is one of the biggest misconceptions around presets. A preset can work brilliantly on one image and need tweaking on another. Different lighting conditions, colours, camera settings and subjects all affect the final result. That is why it is important to treat presets as part of your workflow rather than a one-click solution.
-
Usually, it comes down to the original image. If a photo is underexposed, badly lit, poorly composed or shot in JPEG rather than RAW, a preset may not look as good as expected. It can also happen when the preset simply does not suit that particular scene. In most cases, adjusting the exposure and white balance after applying the preset makes a big difference.
-
Yes, I would recommend shooting RAW wherever possible. RAW files contain much more image data than JPEGs, which gives you more flexibility when editing. That means presets usually work better on RAW files because there is more room to adjust highlights, shadows and colour without damaging the image quality.
-
Yes, definitely. Presets can actually be a really useful learning tool. If you apply a preset and then look through all of the settings it has changed, you start to see how tone, contrast, colour and detail are being handled. Over time, that can help you understand Lightroom much better and build confidence in your own editing decisions.
-
Probably fewer than you think. A lot of photographers end up with far too many presets and only use a small handful regularly. In most cases, it is better to have a smaller collection of presets that you know really well. A few reliable options for different types of images is usually far more useful than a huge preset library you barely touch.
-
You can, but I would not recommend doing that without making adjustments. Even if you like a consistent style, every image is different. Lighting, colour and subject matter change from photo to photo, so it is usually better to apply a preset and then make a few small tweaks to suit the image properly.
-
The first things I would normally check are exposure and white balance. After that, it is worth looking at highlights, shadows, blacks, whites and overall colour balance. If there are people in the shot, skin tones should always get a quick check as well. Cropping and straightening can also make a big difference to the finished result.
-
Yes, that is one of their biggest advantages. If you want your portfolio, Instagram feed or client galleries to feel more cohesive, presets can help you apply a more consistent look across your images. They will not create your style for you, but they can make it much easier to repeat and refine the look you already like.
-
Not always, but good premium presets are often more carefully designed and more reliable across a wider range of images. Free presets can be useful for experimenting, but they are sometimes a bit extreme or less refined. A well-built premium preset pack is usually more balanced, more practical and easier to adapt to your own images.
-
Yes, absolutely. Experienced photographers often benefit from presets because they already know the sort of style they want and can use presets to speed up the editing process. Rather than starting from scratch every time, they can begin with a look that suits their work and then make any finishing adjustments from there.
-
Yes, many Lightroom presets can be used in Lightroom Mobile as well as the desktop version, depending on the format. That can be really useful if you like editing on the go or want to keep a consistent look across images edited on different devices.
-
There are lots of Lightroom preset packs available online, but it is worth choosing ones that are designed with real-world use in mind rather than overly heavy effects. If you want to explore a few options, you can also browse my own Lightroom presets to see if there is a style that suits the way you like to shoot and edit.
📸 Are you a photography/videography brand looking to showcase your products? Take a look at my Media Pack and Contact Me to discuss how we can collaborate on a sponsored review.
Posts you might also like…
About the Author - Ross Jukes is a professional Photographer and Videographer with over a decade of experience. Working in both Digital and Analogue formats, Ross has worked with international clients, had his worked published numerous times and exhibited his work extensively. With a passion for all things photographic, Ross combines his experience, enthusiasm and dedication to his art form to create engaging and educational content for the photographic community.
Disclaimer: All links to Amazon UK/US are affiliated links - you will still pay the same price but I will receive a small commission. All information provided in this blog is intended either for educational or entertainment purposes and is accurate to the best knowledge of the author. However, further research/professional advice should be sort before making purchases/implementing any advice given and no responsibility is taken by the author or parties mentioned here within.

Neewer HB80C Review: A Powerful Portable RGB COB Light for Photo & Video
The Neewer HB80C is a compact 80W RGB COB video light with a built-in battery, Bowens mount and plenty of flexibility for photographers and videographers. In this review, I take a look at its strengths, weaknesses and who it is best suited to.
The Neewer HB80C is a compact and versatile COB video light that will slip nicely into most photographers’ and videographers’ setups. It offers excellent performance for its price point and plenty of useful, well thought out features. However, it is not for everyone. In this review, I’ll take a look at the pros and cons of this little light, who should consider it, and who might be better off looking elsewhere. I’ll also explain what it’s like to use in real world scenarios and where I think its limitations begin.
I’ve been working as a photographer and videographer for over 15 years now and when I first started out, I wouldn’t have dreamt of having such a compact and useful little light like the HB80C at my disposal. It’s fair to say that lighting technology, and COB lights in particular, have come a very long way in that time. The HB80C crams a lot of that progress into a genuinely portable package, with a few neat tricks up its sleeve as well.
❤️ PLEASE NOTE - This item was provided to me by Neewer. No payment was received and all views and opinions are my own. If you would like to support the blog, please consider making a small donation.

🔨 Build Quality
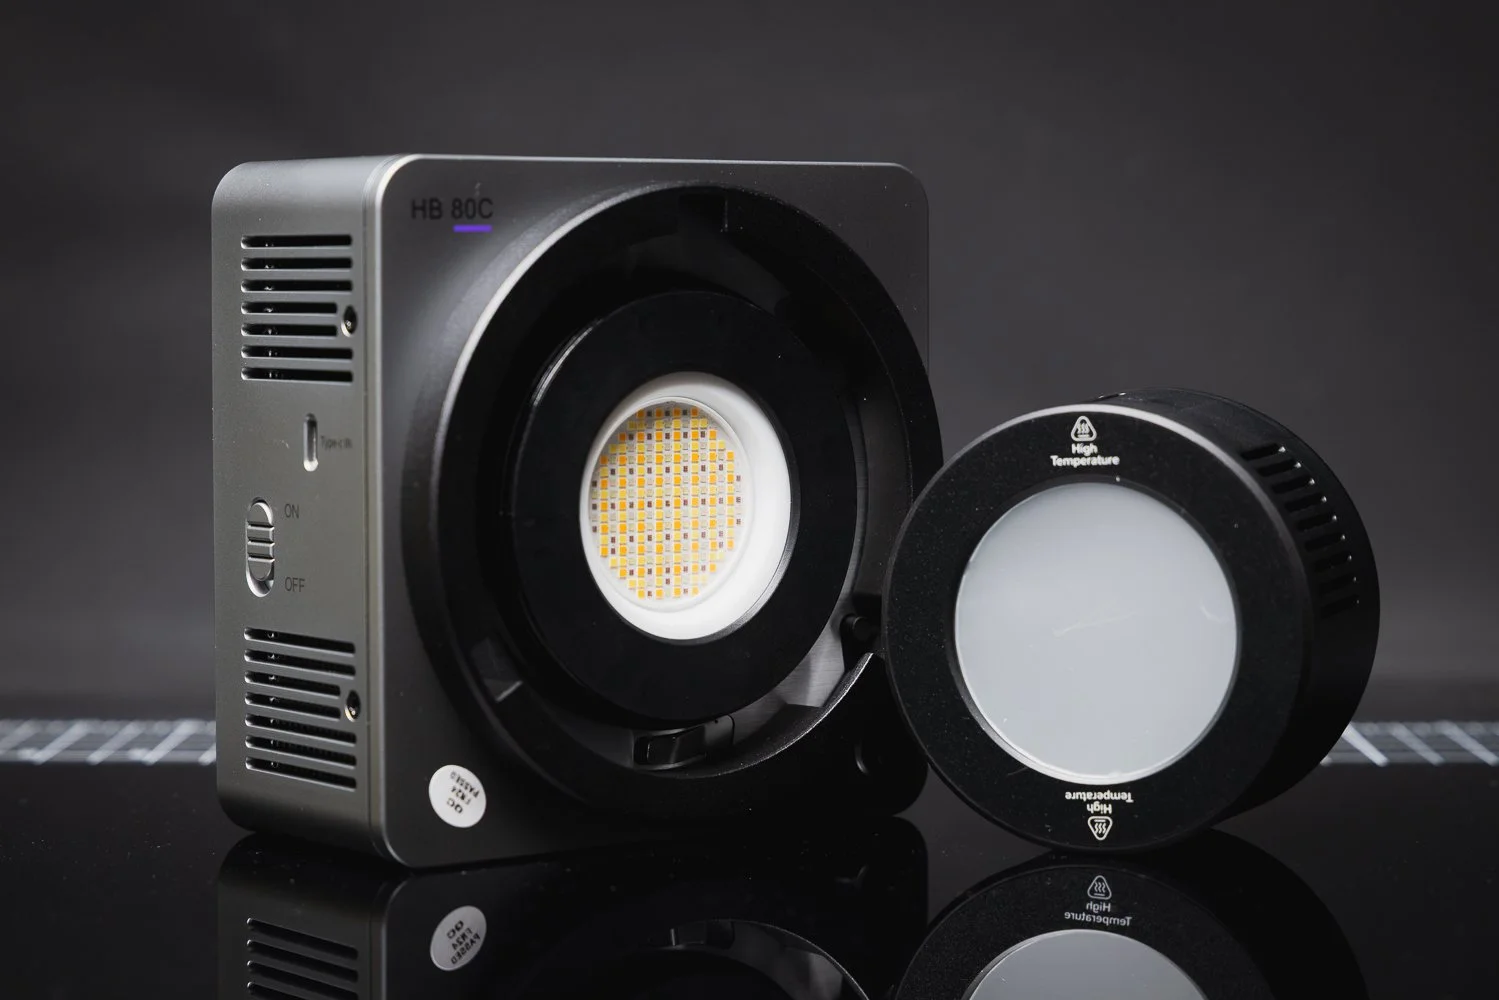
On taking the light out of the box, you notice it has a reassuring weight to it. At around 1.1kg, it’s not what I would call heavy, but it does feel dense and confidence inspiring. A lot of that is down to one of the HB80C’s standout features: the built-in 72Wh battery. Neewer lists the battery as 14.4V / 5000mAh / 72Wh, with quoted runtime of 1 hour 10 minutes in regular mode and 1 hour 34 minutes in mute mode.

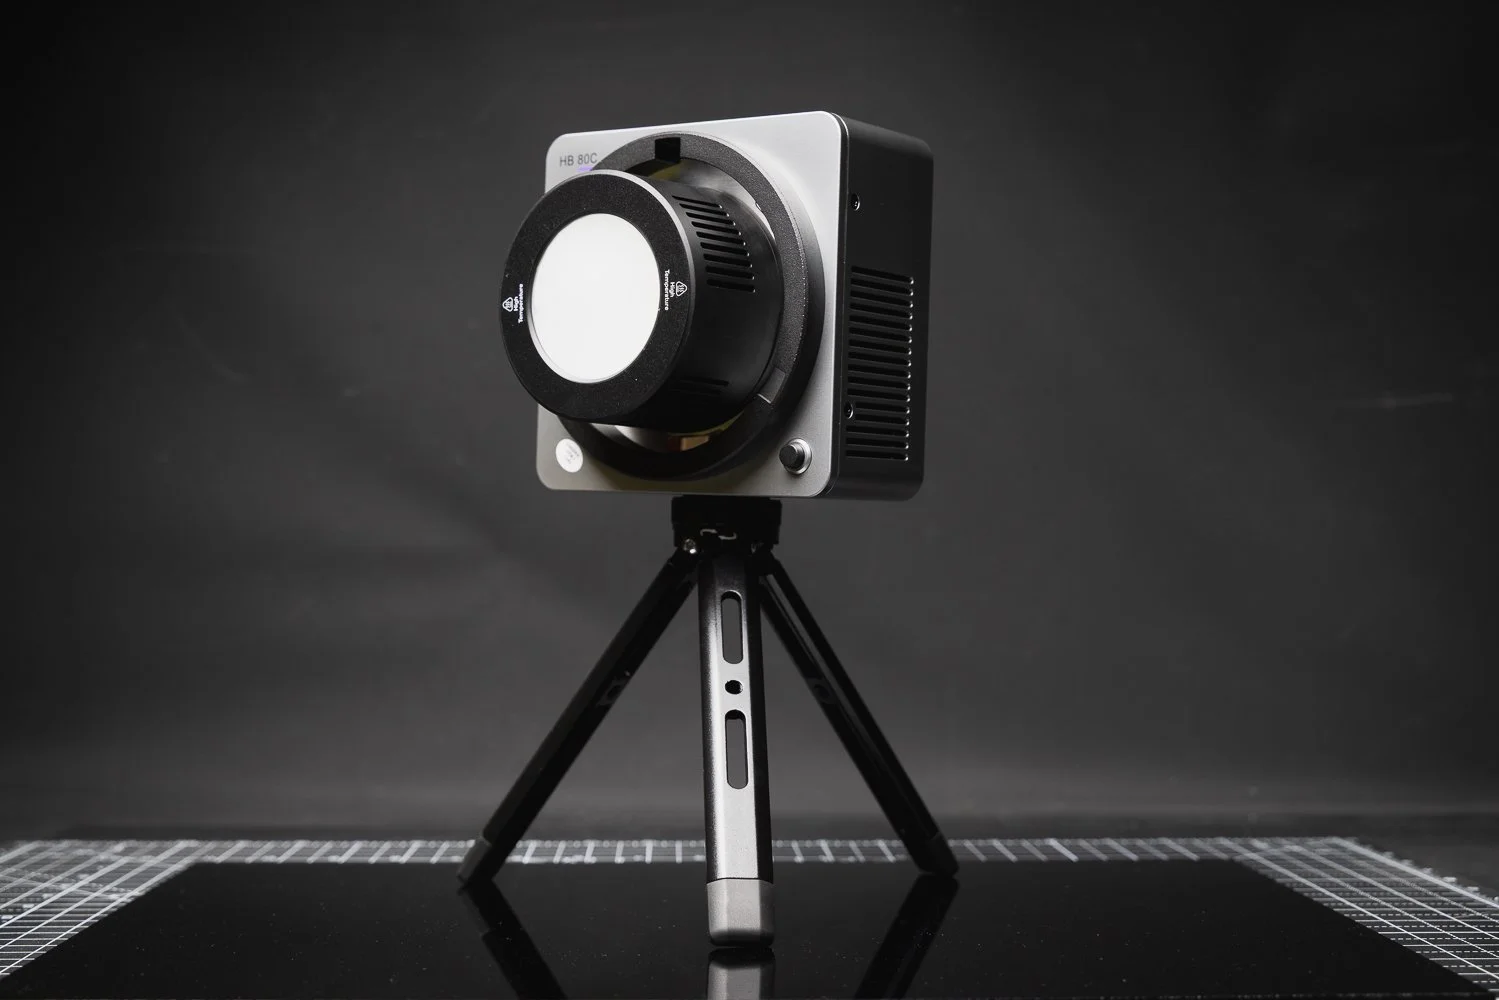
That built-in battery helps give the light a more substantial feel, but it also makes it immediately more appealing for anyone who shoots on location and wants to avoid dealing with extra power solutions. There’s something very convenient about being able to pick up a light, throw it in a bag, and know it is ready to go without needing to build an entire support system around it.
The outer shell is mostly plastic, but not in a bad way. It doesn’t feel flimsy or throwaway. In fact, it feels more like practical working gear than a delicate gadget. I obviously wouldn’t recommend dropping it for the sake of testing that theory, but it does feel solid enough for regular use on photo and video jobs.
📝 Key Specifications
On paper, the Neewer HB80C packs in a lot. It is an 80W RGBWW mini COB LED video light with a colour temperature range of 2500K to 7500K, GM adjustment of ±50, seven lighting modes and 18 built-in special effects. Neewer also states CRI 95+, TLCI 97+, SSI scores of 74 at D56 and 85 at D32, plus TM-30 ratings of Rf 93 and Rg 102.
The lighting modes include CCT, HSI, RGBCW, XY, GEL, Source Match and FX, which gives the HB80C a much broader range of use than a simple daylight or bi-colour light. That matters if you shoot a mix of commercial work, talking head content, product videos, creative portraits or social media work and want one light that can cover multiple roles.
Neewer also quotes a maximum illuminance of 10,400 lux at 1 metre with the reflector fitted at 4400K, and 3,720 lux bare in booster mode. For a light this compact, those are very respectable numbers.
Source: YouTube via BarbsterFilms
🎥 Real World Use
This is the point where the HB80C starts to make a lot of sense.
There are loads of compact lights on the market now, but not all of them are especially enjoyable to use. Some are designed to be small first and useful second. The HB80C mostly avoids that. It still feels like a proper tool. It is compact enough to travel well and fit into tight setups, but large enough that using it doesn’t become frustrating.
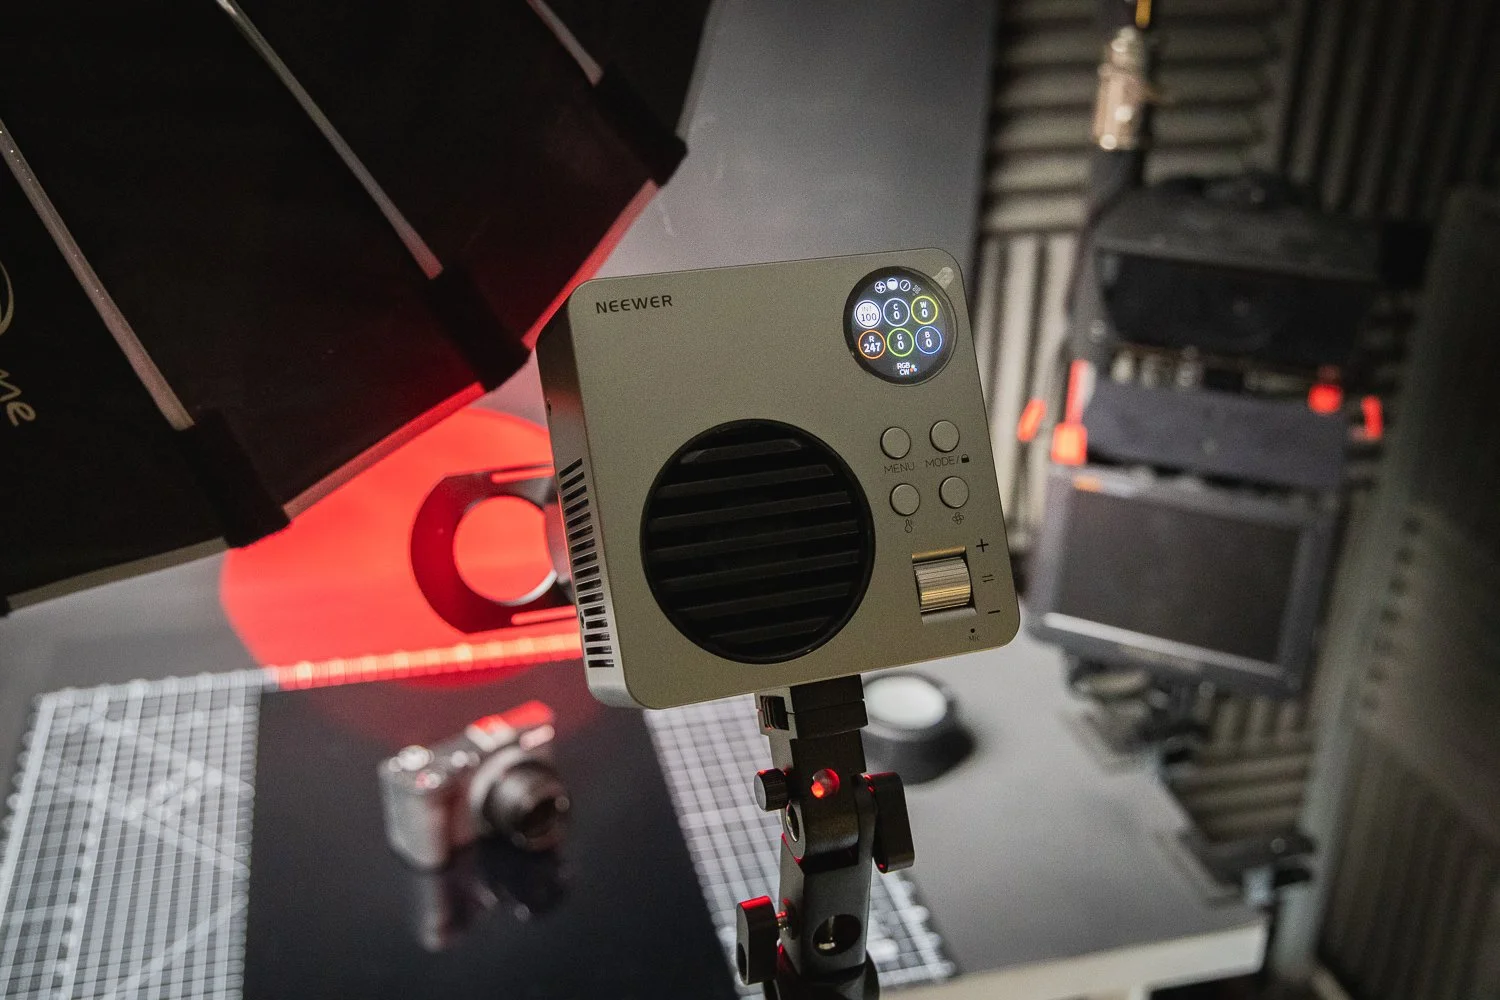
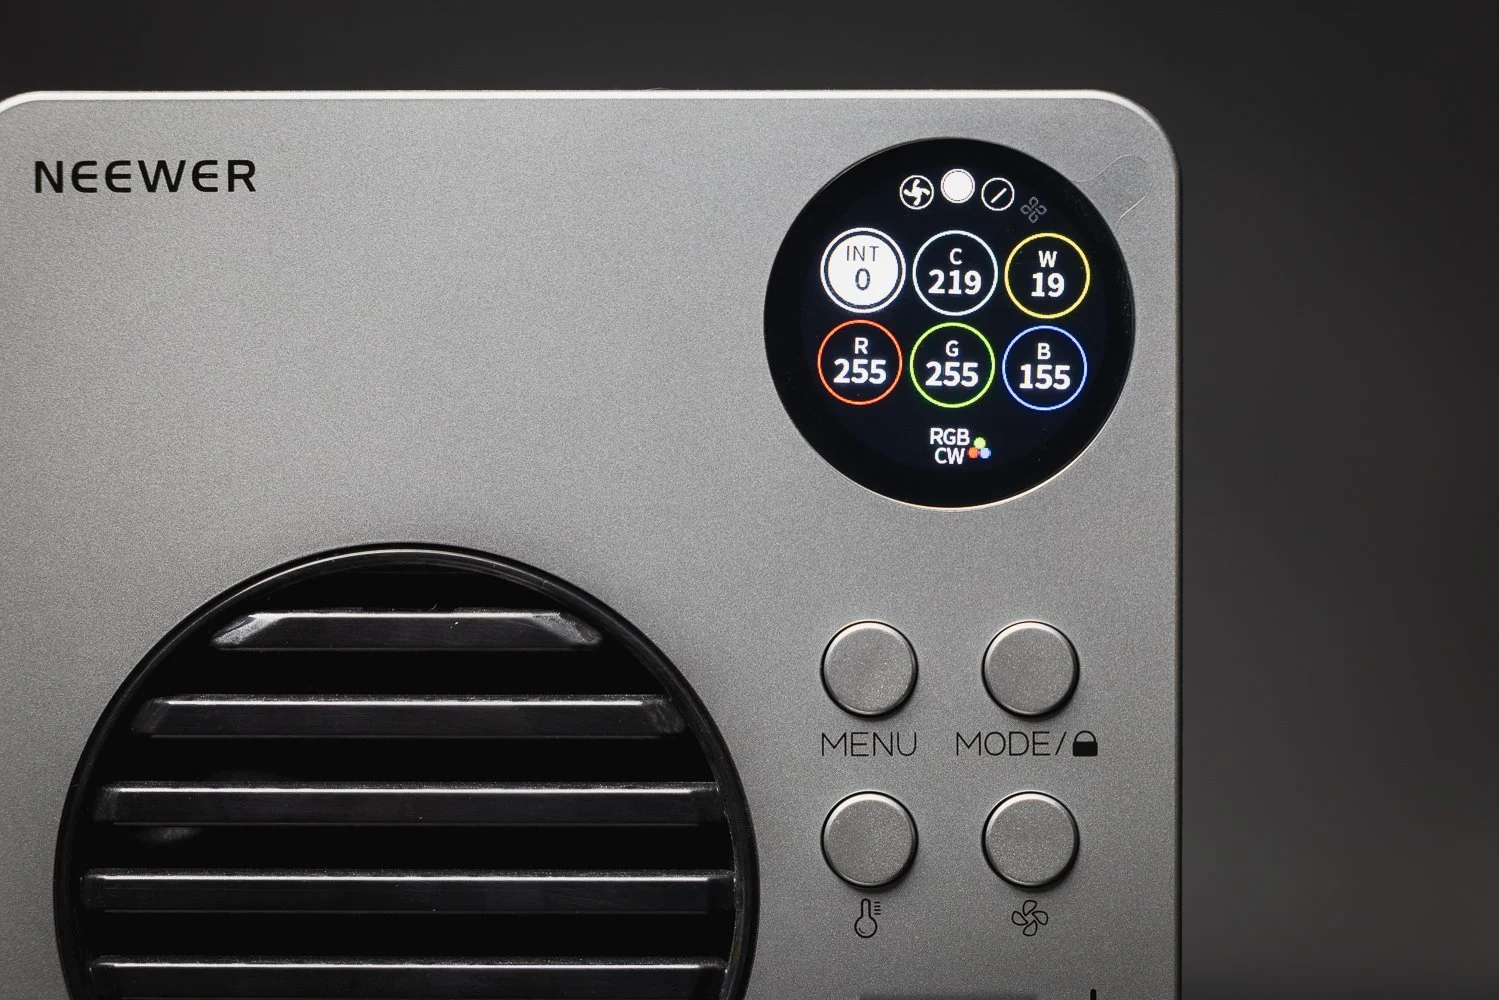
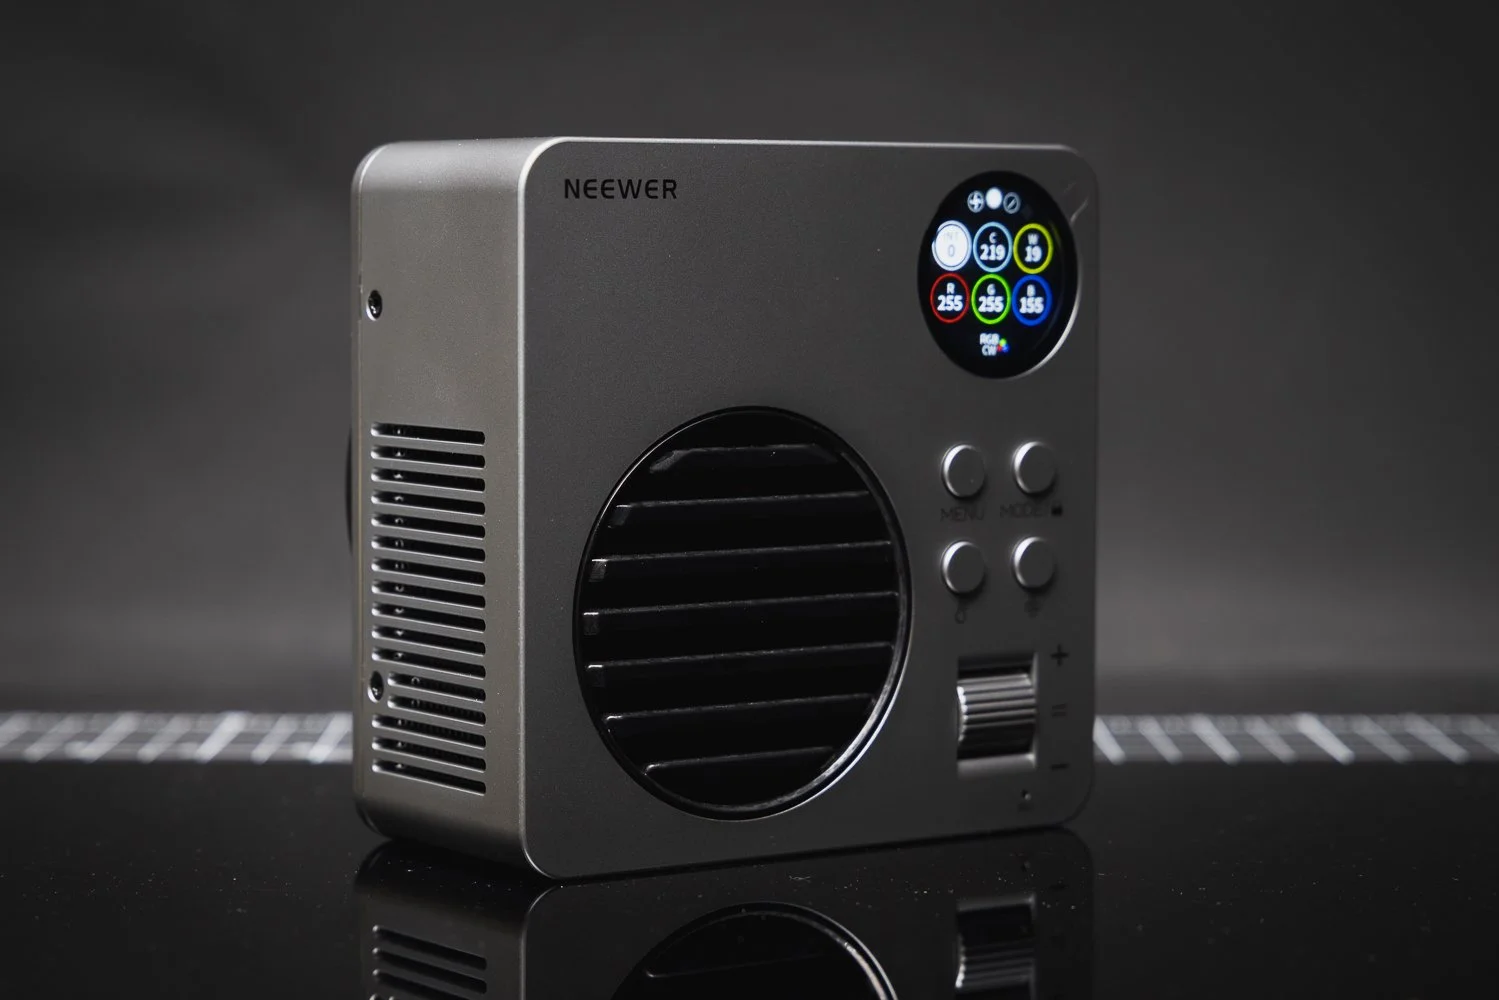
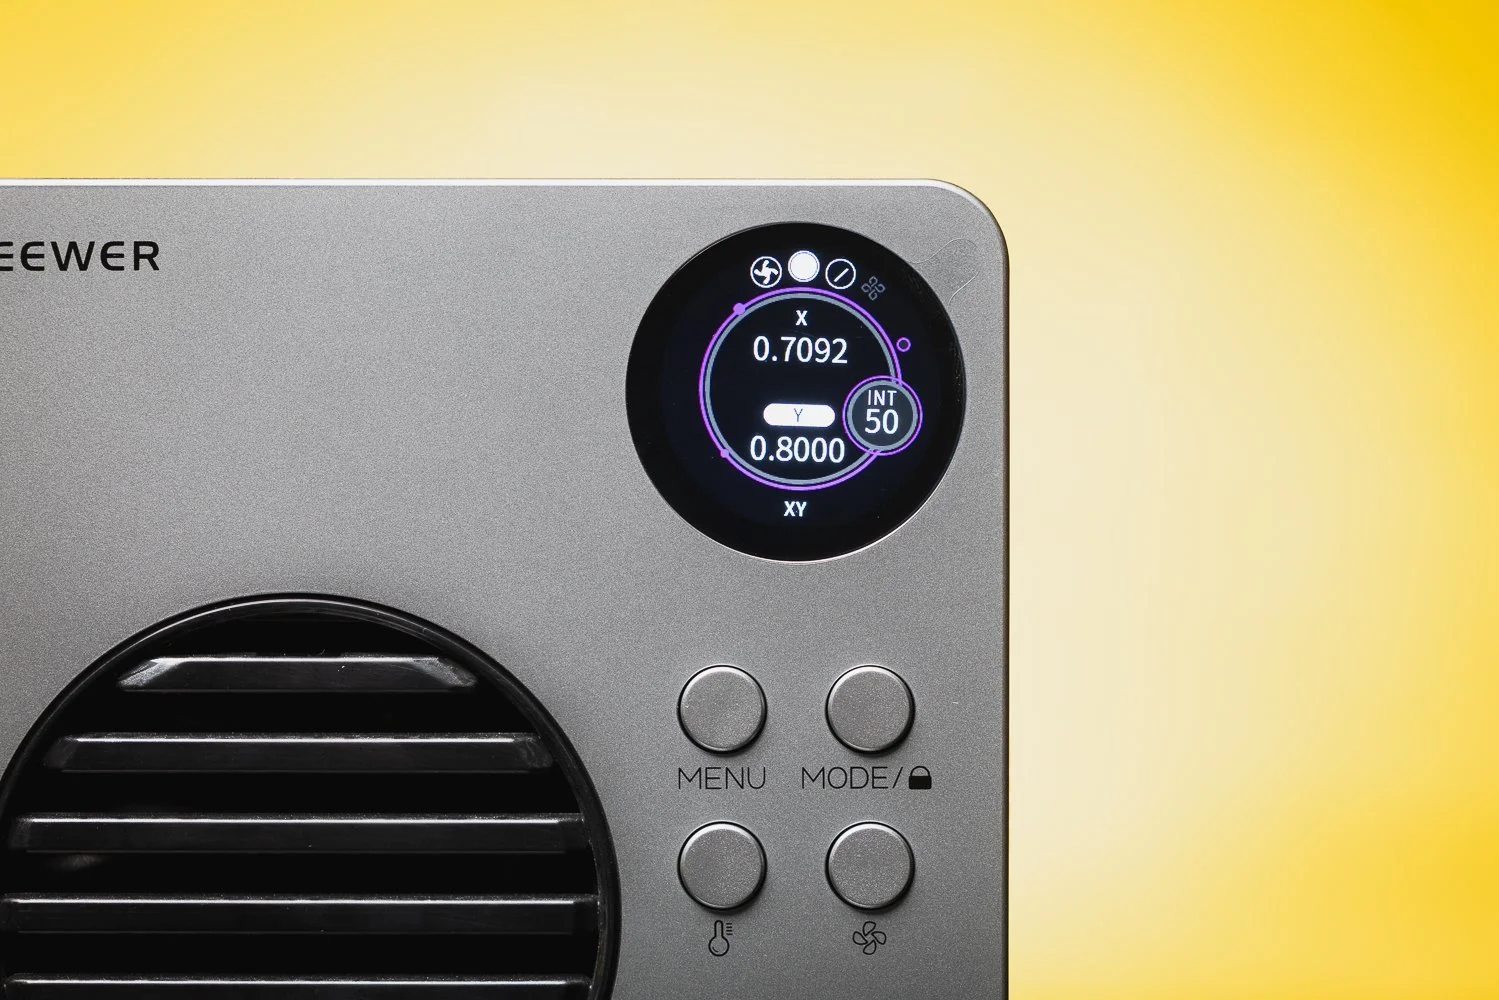
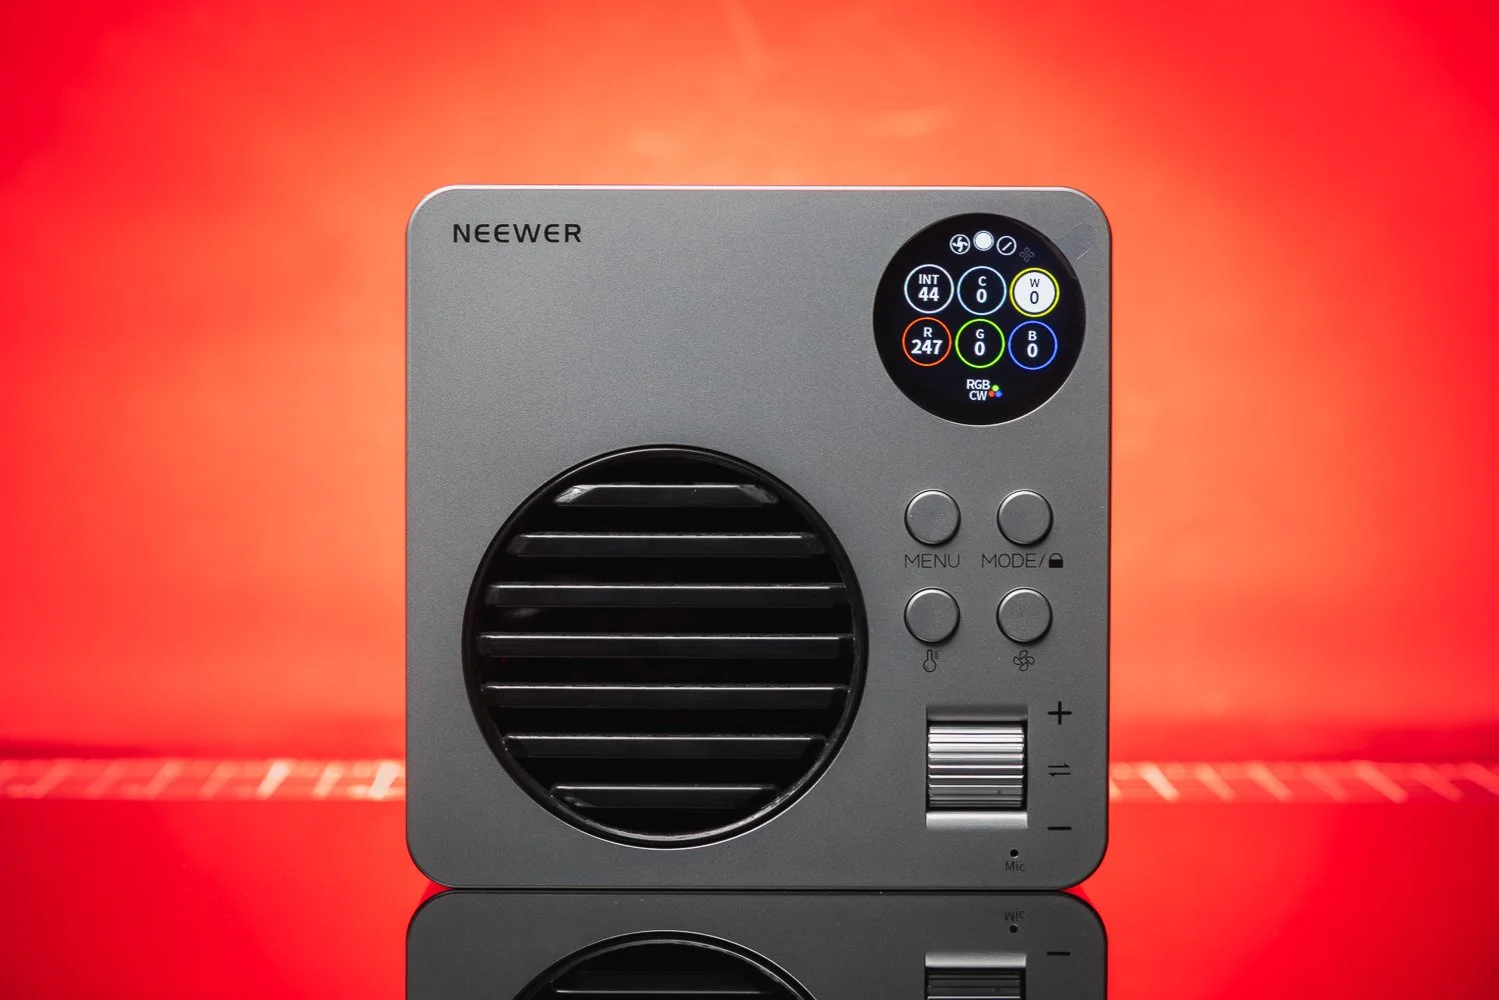
The interface is reasonably intuitive, and once you’ve spent a little time with it, it becomes straightforward enough to adjust on the fly. Neewer also includes a round colour screen, a side-mounted power switch, a locking button to prevent accidental activation and a scroll knob for changing settings. Those little usability features go a long way when you are in the middle of a shoot and don’t want to fight with menus.
What I like about the HB80C is that it feels designed for actual use rather than just for spec sheet bragging rights. It’s quick to set up, simple to move around and flexible enough to work in a range of scenarios without feeling compromised.
💪 Output and Performance
For a light of this size, the output is genuinely impressive.
Now, it is important to keep expectations realistic. This is still an 80W light. It is not trying to replace a much larger mains-powered COB fixture if you are lighting a large interview setup, trying to overpower bright daylight or building a more demanding commercial scene. But that is not really where this light is aimed.

Where the HB80C works well is in smaller and more controlled environments. It makes a lot of sense as a key light for close-up talking head videos, a fill light, a hair light, an accent light or a small product lighting solution. If you’re a solo creator, YouTuber, photographer who occasionally shoots video, or a videographer who values portability, that makes it a much more interesting proposition.
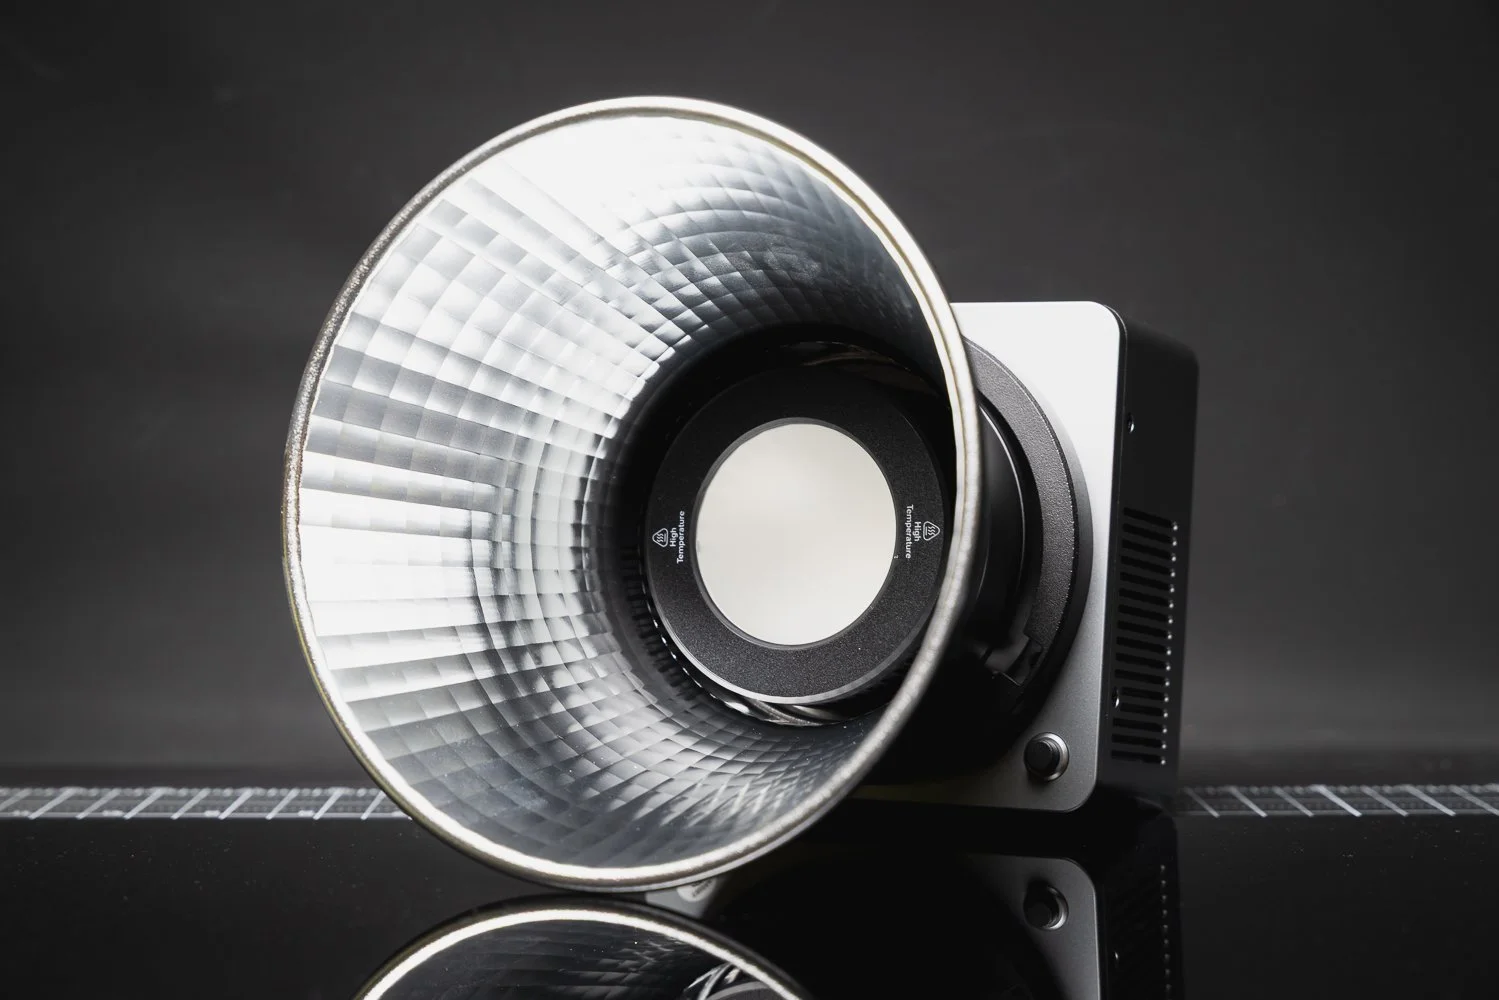
The included Bowens mount reflector helps the light feel more capable, and the Bowens compatibility in general is a big win. The HB80C supports Bowens mount accessories and includes an umbrella socket, which means you can pair it with softboxes, beauty dishes, snoots or photography umbrellas. That alone makes it much more versatile than smaller lights locked into proprietary systems.
🌈 Colour Accuracy and Creative Flexibility
A good video light needs more than just brightness. Colour accuracy matters. Skin tones matter. The ability to match other light sources matters.
On paper, the HB80C looks strong here. Neewer quotes CRI 95+ and TLCI 97+, along with the SSI and TM-30 figures mentioned earlier, and that should give most photographers and videographers a decent level of confidence.
Just as importantly, the light offers proper creative flexibility. The full hue control from 0 to 360 degrees, 0 to 100% saturation, RGBWW design and wide colour temperature range mean you can use it as a clean white light one moment and then switch to something far more stylised the next.
That makes the HB80C feel more like a practical all-rounder than a novelty RGB light. It can help with simple interview setups, product shoots and portraits, but it can also be used to add colour into backgrounds, create mood, simulate practical lighting effects or give videos a more cinematic feel.
🔋 Built-In Battery and USB-C Charging
For me, one of the HB80C’s biggest strengths is the built-in battery.
There are definite advantages to not having to think about external batteries, battery plates or extra power accessories. It makes the whole thing faster and cleaner. If you’re filming behind the scenes content, creating social media videos, or shooting in awkward locations where cables are a pain, that convenience becomes a big selling point.
Neewer says the HB80C supports USB-C PD charging up to 100W input, with up to 65W PD output, and can be fully charged in around 2 hours using a 65W PD charger. It also supports charging and discharging at the same time, which makes it a more flexible option for longer shoots.
That is exactly the kind of practical feature I like seeing in modern gear. It makes the light easier to live with, especially if you are working on location and trying to keep your setup compact.
Source: YouTube via Dano Media
💨 Fan Modes and Limitations
Of course, there are compromises.
The HB80C includes three power and cooling modes: mute, regular and booster. Neewer states that mute mode runs at 45W, regular mode at 65W and booster mode at the full 80W, with booster mode requiring a PD100W charger.
That is all perfectly reasonable, but it does highlight where the compromises are. If you need silent operation, you lose power. If you want the full output, you need the right charging setup. That is not unusual for a compact light, but it is worth knowing before you buy.
So, who might find that limiting? Anyone working in very quiet recording environments, or anyone expecting this to behave like a much larger studio light, may need to adjust expectations. The HB80C is powerful for its size, but size still matters when it comes to heat, fan noise and total output.
📱 App Control and Wireless Features
The HB80C also includes Neewer’s Infinity technology for app control and 2.4G wireless communication. When lights are set to the same channel, the HB80C can be synchronised with other compatible Neewer 2.4G lights for group control.
For solo creators and small teams, that is a genuinely useful feature. Anything that reduces the amount of walking back and forth across a set is a win in my book. It also makes the HB80C more appealing if you already own other Neewer lights or plan to build out a small multi-light setup over time.
🔴 Pros and Cons
Pros
Compact and easy to travel with
Built-in battery is genuinely useful
Bowens mount adds flexibility
Good mix of white light and RGB capability
Strong feature set for the price
USB-C PD charging is a smart addition
Useful app and wireless control options
Cons
80W output will not be enough for every scenario
Silent mode reduces available power
Booster mode needs the right charger setup
Plastic construction may not appeal to everyone
Still best suited to smaller scale setups rather than larger productions
🙋♂️ Who Is the Neewer HB80C Best For?
I think the HB80C makes the most sense for photographers and videographers who want a genuinely portable light that can do a bit of everything. It’s a great fit for content creators, YouTubers, solo shooters, interview setups, product work, social media content and photographers starting to add more video into their workflow.
If portability matters to you, this light becomes even more appealing. The built-in battery, Bowens mount compatibility and strong feature set make it a very practical option for people who want a compact light that still feels capable.
✅ Final Thoughts
The Neewer HB80C is one of those products that feels well judged. It doesn’t try to be everything, but within its intended role it does a lot right. It is compact, flexible, battery powered, Bowens compatible and feature rich, and that combination makes it very easy to like.
What stands out most to me is that it feels useful. Not gimmicky. Not overcomplicated. Not designed purely to look good in a list of features. It feels like a practical working light that suits the way a lot of photographers and videographers actually shoot now.
Is it perfect? No. The output ceiling and cooling-related compromises will matter to some users. But if you want a portable RGB COB video light that offers good flexibility, solid performance and strong value for money, the Neewer HB80C is a very convincing option.
For a lot of creators, this could easily become the light that gets used the most simply because it is so easy to take anywhere.
🔴 FAQ’s
-
Yes, the Neewer HB80C is well suited to video work, especially for solo creators, interviews, YouTube videos, social content and smaller productions. Its 80W output, RGBWW design, 2500K–7500K range and built-in battery make it a flexible option for a wide range of video tasks.
-
Yes, the HB80C has a built-in 72Wh battery rated at 14.4V / 5000mAh. Neewer states runtime of around 1 hour 10 minutes in regular mode and 1 hour 34 minutes in mute mode.
-
Yes, the HB80C supports Bowens mount accessories and includes a reflector. It also has an umbrella socket, which makes it more versatile for photographers and videographers who already use Bowens modifiers.
-
Neewer states that the HB80C can reach up to 10,400 lux at 1 metre with the reflector fitted at 4400K, making it impressive for such a compact light.
-
If you want a compact RGB COB video light with a built-in battery, Bowens mount compatibility and good all-round flexibility, the HB80C looks like a strong option for the money. It makes the most sense for smaller scale photo and video setups rather than large studio productions.
📸 Are you a photography/videography brand looking to showcase you products? Take a look at my Media Pack and Contact Me to discuss how we can collaborate on a sponsored review.
Posts you might also like…
About the Author - Ross Jukes is a professional Photographer and Videographer with over a decade of experience. Working in both Digital and Analogue formats, Ross has worked with international clients, had his worked published numerous times and exhibited his work extensively. With a passion for all things photographic, Ross combines his experience, enthusiasm and dedication to his art form to create engaging and educational content for the photographic community.
Disclaimer: All links to Amazon UK/US are affiliated links - you will still pay the same price but I will receive a small commission. All information provided in this blog is intended either for educational or entertainment purposes and is accurate to the best knowledge of the author. However, further research/professional advice should be sort before making purchases/implementing any advice given and no responsibility is taken by the author or parties mentioned here within.
The Photography Show 2026 Birmingham – My Experience at the NEC
I headed to The Photography & Video Show 2026 at the NEC Birmingham to soak up the latest gear, talks and creative inspiration. Here’s my experience from the day — and why my video is the best way to get a true feel for the event.

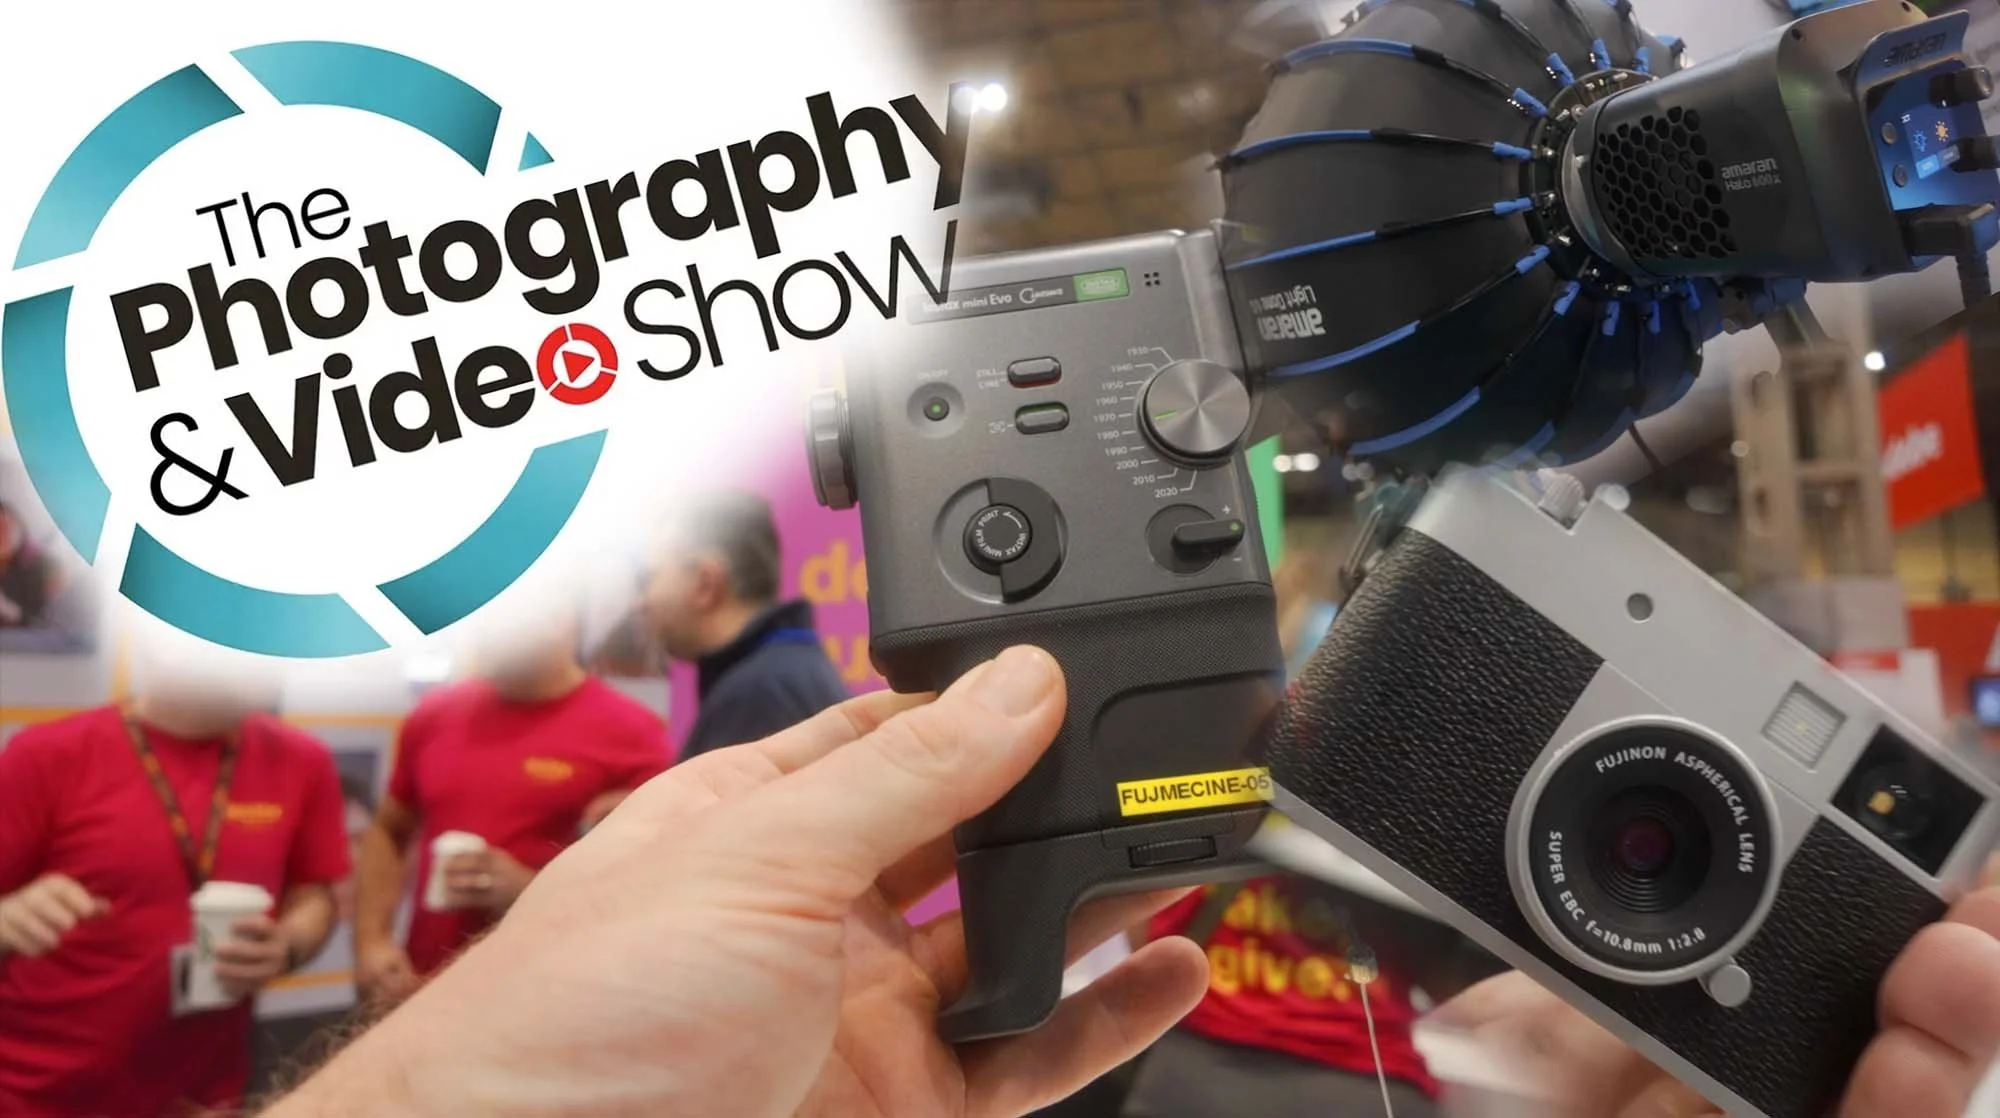
There is always something exciting about having a major photography event land right on the doorstep, and that is exactly how The Photography & Video Show 2026 felt. Held at the NEC Birmingham from 14–17 March 2026, the show brought together photographers, videographers and content creators for four days of gear, inspiration, talks and hands-on demos. The official event positions itself as the UK’s leading event for visual storytellers, and after spending time there myself, it is easy to see why. The show combines photography, video and content creation under one roof, with thousands of visitors attending across the four days.
This post is really designed to go hand in hand with my video from the day. I wanted to put together a written overview of my experience at The Photography Show 2026, but the video is where you will get the real atmosphere. It captures the movement, the noise, the scale of the show floor and that sense of being surrounded by creativity, new technology and people who are every bit as obsessed with cameras, lenses and storytelling as you are. So while this article gives you my thoughts on the day, I would definitely encourage you to watch the video as well if you want the true feel for what it was like to be there.
🎥 Why The Photography Show still matters
One of the best things about The Photography & Video Show is that it reflects where the industry is now. This is no longer a world where photography, filmmaking and content creation sit in completely separate lanes. A lot of us now work across all three. You might be shooting stills for one client, filming behind-the-scenes clips for another and creating social media content somewhere in between. The official show focus reflects that, with dedicated coverage around photography, video and film production, and creator-led content.
That is a big reason why events like this are still valuable. Yes, you can watch product launches online and read camera specs from your desk, but there is something very different about seeing everything brought together in person. You can try gear for yourself, compare brands side by side and actually have conversations with people who use this equipment every day. It gives you a much clearer sense of what could genuinely fit your workflow rather than what simply looks good on paper.
🙋♂️A big creative event on Birmingham’s doorstep
From a local perspective, it is also brilliant to have an event of this scale in Birmingham. The show took place in Hall 5 at the NEC, with opening hours running from 10am until 5pm across the four days. That makes it incredibly accessible for photographers and videographers across Birmingham, the West Midlands and beyond.
I have said before that Birmingham deserves more recognition as a creative city, so having an event like this here feels important. For local photographers, Birmingham-based content creators and Midlands videographers, it is a rare chance to experience one of the UK’s biggest industry events without needing to travel down to London. It makes the whole day feel more reachable and more relevant to the people actually working in and around the city.
📸 So much more than just cameras
Of course, the gear is a huge part of the appeal. The show featured more than 250 exhibitors and brands, including names like Adobe, Canon, Capture One, CEWE, EIZO, Fujifilm and Godox. That gives you a good indication of the variety on offer. It is not just about camera bodies and lenses. It is lighting, editing software, colour management, printing, accessories, workflow tools and everything else that supports the wider process of making images and video.
That mix is part of what makes the day so enjoyable. Even if you arrive thinking you are only interested in one specific area, you almost always leave with a broader perspective. You start looking at how different brands solve different problems, what tools might speed up your workflow, and which ideas could actually improve the way you shoot or edit.
🔺 Inspiration is often the real value
As much as it is easy to focus on the latest kit, I think one of the real benefits of attending a show like this is the inspiration side of it. According to the official site, the 2026 show included more than 500 talks and demos, all designed to help visitors learn something new, improve their technique or hear directly from working creatives.
That is hugely valuable, especially if you work for yourself. When you are running your own photography or video business, it is very easy to get trapped in your own routine. You get buried in editing, client deadlines, admin and all the little behind-the-scenes jobs that come with freelance life. Spending a day in a space like this can help break that pattern. It reminds you that there are always new ideas to explore, new ways to work and new creative directions to think about.
Sometimes the most useful thing you take away from an event is not a product at all. It is a fresh perspective.
🔴 Why you should watch the video
This is exactly why I wanted to make a video around my visit rather than just write about it afterwards. A written post can tell you what happened, but a video can show you what it felt like. It gives a much better sense of the scale of the event, the energy of the crowd, the way the stands are laid out and the kind of creative buzz that comes from being surrounded by so much kit and so many like-minded people.
So if you are considering visiting in future, or you simply want to see what The Photography Show 2026 was like from the perspective of a Birmingham photographer and videographer, my video is definitely the place to start. This article is the companion piece. The video is the main experience.
🖥️Events like this always make me think about editing too
One thing that always happens after a day surrounded by photography is that I come away thinking about editing style just as much as shooting. Seeing so many different images, looks and workflows in one place naturally makes you reflect on your own process. How do you want your work to feel? What visual identity are you building? What helps your images stand out while still feeling consistent?
That links closely to my own Lightroom preset packs. If you have followed my work for a while, you will know that I am a big fan of edits that feel cinematic, nostalgic and film-inspired rather than overly polished or clinical. My Lightroom presets are built around that look. On my site, I currently offer the Modern Nostalgia pack for brighter day-time scenes, the Midnight Cinematic pack for darker and moodier work, plus a preset bundle that combines both. There is also a free sample pack for anyone who wants to try the look before buying.
If you are a photographer in Birmingham, or anywhere else for that matter, and you are trying to build a more consistent editing style, preset packs can be a really useful starting point. They are not there to replace your creative decisions, but they can absolutely speed up your workflow and help you shape a more recognisable look across your images.
✅ Final thoughts
Overall, I really enjoyed The Photography & Video Show 2026. It was busy, inspiring, slightly overwhelming in the best possible way, and packed with the kind of ideas and tools that make you want to get out and shoot more. For photographers, videographers and content creators in Birmingham and the wider Midlands, it is exactly the kind of event worth keeping on your radar. Whether you are interested in trying the latest kit, hearing from industry speakers or simply spending a day immersed in the creative world, there is plenty there to make the visit worthwhile.
If you want the real feel for the day though, make sure you watch the video. That is where you will get the atmosphere, the pace and the visual experience that a blog post can only hint at.
And if the show leaves you inspired to refine your own photography style, have a look at my Lightroom preset packs as well. They are built to help you create cinematic, nostalgic edits with less time spent starting from scratch on every image.
📸 Are you a photography/videography brand looking to showcase you products? Take a look at my Media Pack and Contact Me to discuss how we can collaborate on a sponsored review.
Posts you might also like…
About the Author - Ross Jukes is a professional Photographer and Videographer with over a decade of experience. Working in both Digital and Analogue formats, Ross has worked with international clients, had his worked published numerous times and exhibited his work extensively. With a passion for all things photographic, Ross combines his experience, enthusiasm and dedication to his art form to create engaging and educational content for the photographic community.
Disclaimer: All links to Amazon UK/US are affiliated links - you will still pay the same price but I will receive a small commission. All information provided in this blog is intended either for educational or entertainment purposes and is accurate to the best knowledge of the author. However, further research/professional advice should be sort before making purchases/implementing any advice given and no responsibility is taken by the author or parties mentioned here within.
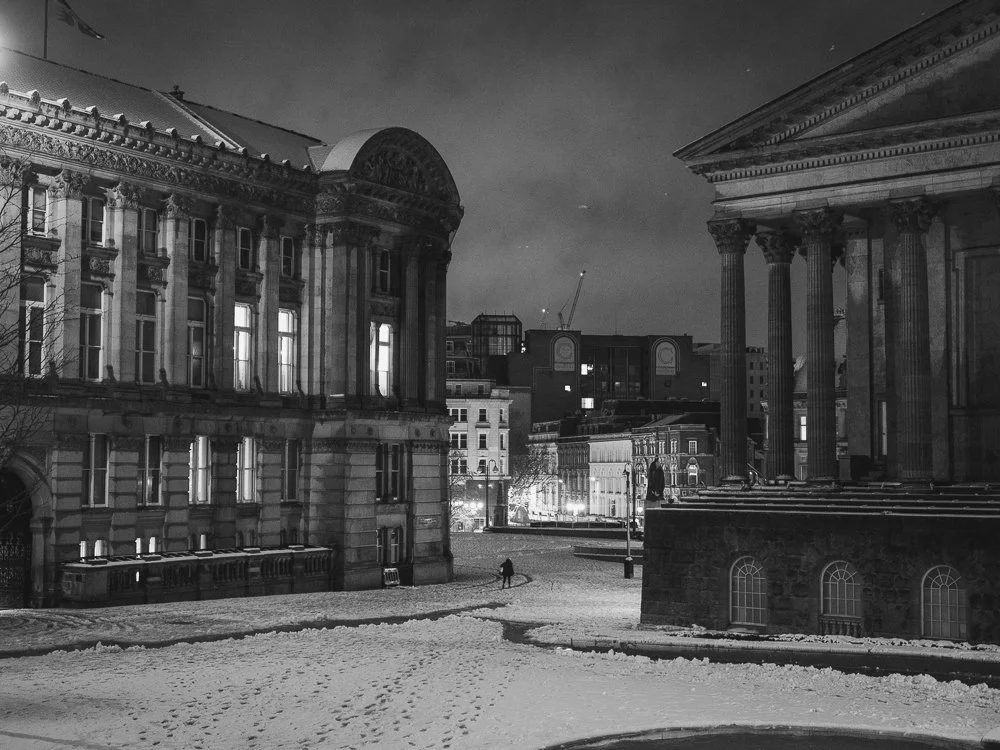
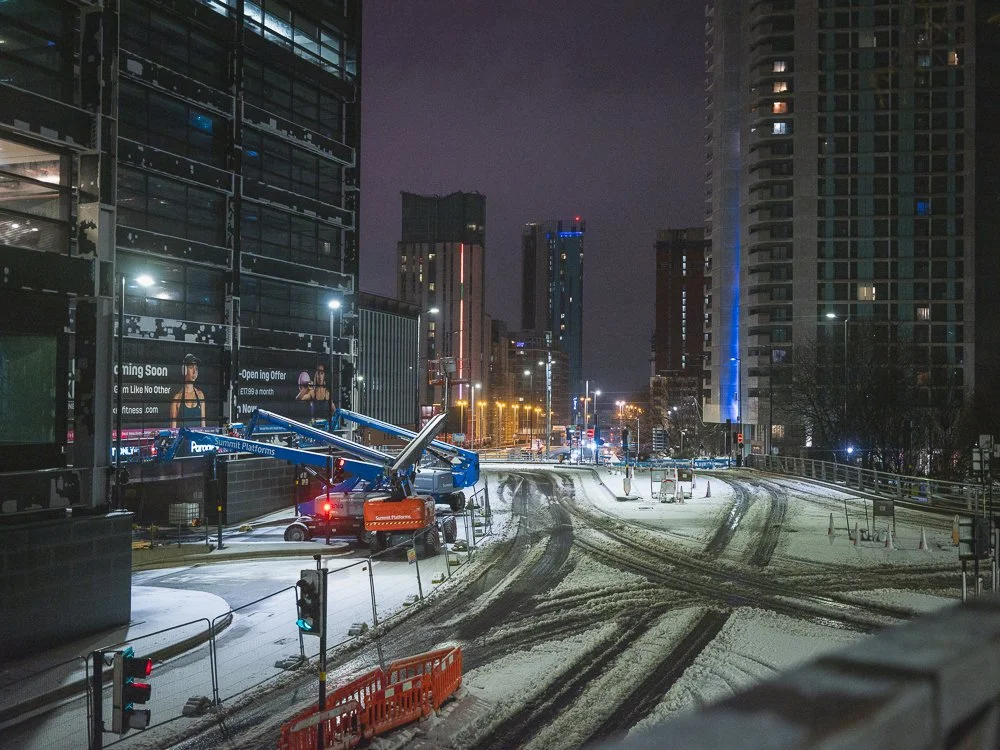
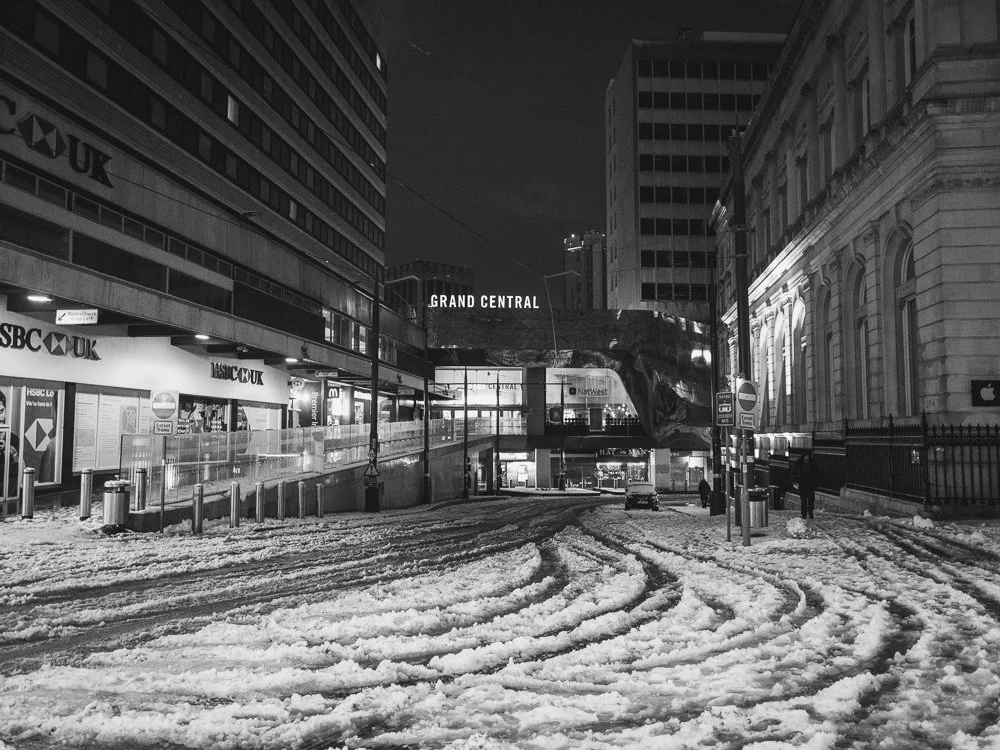
Birmingham Snow Photography - Storm Goretti
I love Birmingham at the best of times but give it a fresh sprinkling of snow and you have something really special. As Storm Goretti made its way across the country, countless Birmingham Photographers licked their lips at the idea of capturing some beautiful scenes of our city covered in the white stuff!
I love Birmingham at the best of times but give it a fresh sprinkling of snow and you have something really special. As Storm Goretti made its way across the country, countless Birmingham Photographers licked their lips at the idea of capturing some beautiful scenes of our city covered in the white stuff!
Late on Thursday evening, thick snow started to fall across the city and with memories of the ‘Beast from the East’ I prepared myself for an early rise to get out and capture some images. Due to personal commitments, I would have to be out for about 6am and home by 7.30am - not much time to rush around the city and grab images!
After somehow dragging myself out of bed I hurriedly made my way out onto the streets of Birmingham and was not disappointed as a thick layer of snow, at least a few inches deep covered the roads and paths. I couldn’t wait for the crunchy feeling of trudging through the fine powder but was somewhat disappointed as to be honest, it was more slushy than anything. Within 5 minutes, my boots were already leaking, not a great start!
I planned on just hitting a few of the regular spots, Snowhill, Colmore Row, Bullring, Victoria Square and back to Broad Street and Jewellery Quarter. I dashed around the loop I had mapped out in my head and just pointed the camera at anything that interested, this was not fine art photography, more documentary style than anything.
One thing that always amazes me about this city is the people. I was sure I would have the city to myself but the fearless Brummies had other ideas as plenty of people were out making their way to work. If it wasn’t for my insistence on wearing headphones, I was pretty sure I would have heard at least one ‘Alright Bab! Nippy out’!
I grabbed image after image, not putting too much thought into what I was shooting and not really thinking about it in the same way as I do my regular Birmingham Photography. As I got home and trawled through the images, I definitely had a few ‘why did I take this?’ moments. Nonetheless, it felt good to just capture the city under the snow.
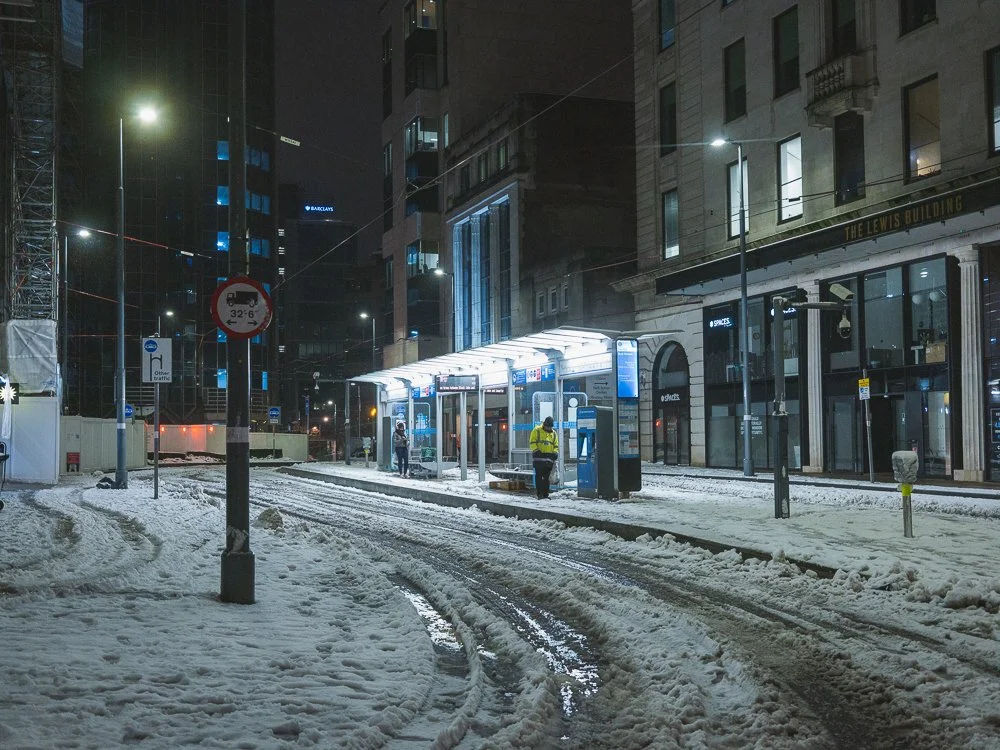
It was a shame that I had to cut my walk short but that is a whole other story. I’m just glad that I had some opportunity to get out and grab a few shots. With soaking boots, freezing fingers and images to edit, I was glad to get home in the warm and who knows, maybe this won’t be the last snow of the year! Enjoy and stay safe.
Posts you might also like…
About the Author - Ross Jukes is a professional Photographer and Videographer with over a decade of experience. Working in both Digital and Analogue formats, Ross has worked with international clients, had his worked published numerous times and exhibited his work extensively. With a passion for all things photographic, Ross combines his experience, enthusiasm and dedication to his art form to create engaging and educational content for the photographic community.
Disclaimer: All links to Amazon UK/US are affiliated links - you will still pay the same price but I will receive a small commission. All information provided in this blog is intended either for educational or entertainment purposes and is accurate to the best knowledge of the author. However, further research/professional advice should be sort before making purchases/implementing any advice given and no responsibility is taken by the author or parties mentioned here within.

2026 Update: Yashica Mat 124G Review - Budget Beauty or Twin Lens Tat?
The Yashica Mat 124 G is a medium format twin-lens reflex camera known for its sharp Yashinon lenses, built-in light meter, and classic design. However, is this a budget beauty that can stand up to it’s more expensive rivals or simply a conversation starter? Let’s find out…
📆 2026 Update: YASHICA MAT 124 G REVIEW
The Yashica Mat 124G impressed me when I first reviewed it back in 2023. However, with a few more years of usage under my belt, I can honestly say that this has grown to be one of my most loved cameras. I find myself enjoying the lightweight but sturdy build and the TLR experience is one of the most satisfying of all cameras - It is also a great talking point for other camera enthusiasts.
Quick Verdict: In short, it is a great camera to use and the lens renders a great image. It is simple enough to use to make it a perfect first camera for those just getting into Medium Format photography and as long as you enjoy composing and working with the square format, there is very little not to like about this great little camera.
Who is it for?/Who should avoid it?: It really is a fun camera to use so it is well worth a try for most people who want to shoot Medium Format. However, for those where image quality is the utmost importance or those needing interchangeable lenses/technical movements etc. There are better options.
Typical Used Prices: In early 2026, you can expect to pay around £200-£300 / $260-$400 depending on condition - look for a good, clean example and ask if it has been CLA’d and if the light meter works.
Pros:
Excellent fun to use and the TLR experience is a joy for most photographers
Good value compared to other options and pretty abundant so easy to find
Great image quality for it’s age and the lens (depending on condition) is sharp and contrasty
Cons
Not the greatest build quality but fair for the price, just be gentle with it
No interchangeable lenses so you need to be comfortable with using a fixed focal length
The Square format isn’t for everyone, you can always crop but there are better options if 1:1 isn’t for you
Read my original review below and if you find it useful in any way, please consider making a small donation to help support the blog and my work, thank you! Don’t forget to check out the FAQ’s at the end of the post 👍
It takes immense dedication to be running around these days with an old vintage camera. And when I say 'old', I don't mean the 2000s or 1990s 'old'... I mean back when cameras had cogs, pulleys, and gears in them, as if a simple service meant pulling apart the innards of Big Ben. Just like my Yashica Mat 124 G, using something this vintage is quite an interesting experience in almost every regard, from repairs to taking photos.


You'd typically have to persevere with the oddity of the mechanics and ergonomics when shooting with an old camera, back when things were less standardised. Not to mention, the mind-numbing aspect of having to fix stuff when things go wrong. To be a vintage camera owner is akin to driving around in a Ford Model T, at a time when Teslas are commonplace. So, with that being said, why bother with vintage cameras?
PLEASE NOTE: I PURCHASED THIS WITH MY OWN MONEY AND NO PAYMENT OR CONTROL WAS EXCHANGED FOR PUBLISHING THIS UNBIASED REVIEW
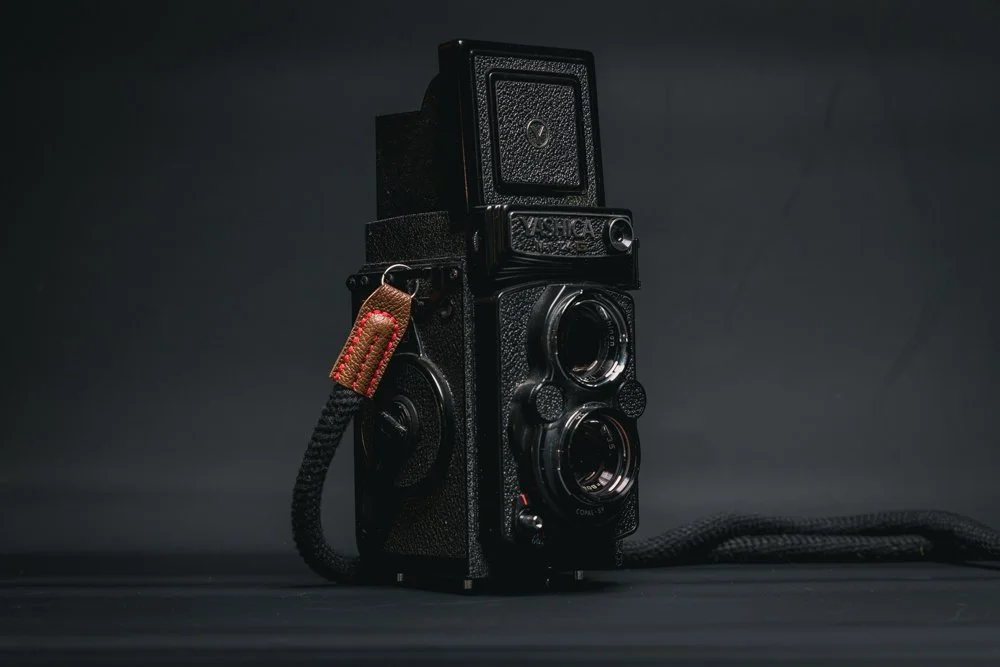


Well, as my experience with the Yashica Mat 124 G has told me, these ancient cameras are a lot of fun! For a spot of context, the Yashica Mat 124 G is a TLR, or 'twin-lens reflex'. If you were born early this century, it means that it has two lenses at the front... There's the 'viewing' lens at the top, which you view through by looking from the waist-level viewfinder at the top. This gives you an idea of what you're taking a photo of.

Then, there's another lens at the bottom - this is what's taking photos onto the film, otherwise referred to as a 'taking' lens. Historically, the Yashica Mat 124 G is one of many cheaper alternatives to the legendary Rolleiflex cameras. The latter of which can often cost you thousands of dollars. That, of course, depends on their condition, the specific model or variant, not to mention the market and who you're buying from.
📸 The Merits Of Using Vintage Cameras
While the Rolleiflex can be classed as a high-end collector's piece, the Yashica Mat 124 G could be had for anywhere between £250 to £500. It should be noted that the "G" model is one of many other Yashica Mat 124 versions sold, so each one does have it’s own merits. As for mine, I bought it on the former end of that price range, and it is even in pretty good condition, as well. With that out of the way, how do you use it?


To anyone who's used DSLRs or their iPhones to take pictures, the idea of a waist-level viewfinder may, at first, appear somewhat archaic. But, I'd argue that we should bring waist-level viewfinders back, because there's a shocking amount of practicality to be found. On those long days of shooting, not having to lift up a camera to your eye level and hold it there could be surprisingly comfortable and ergonomic.
Video Source - Kyle McDougal via YouTube
Instead, all you need to do is let it hang by your waist level - or bring it up slightly to your chest - and look down at it to peer through the viewfinder or the focusing screen. There are other practical use cases for it, too. For instance, with a waist-level viewfinder, you could take photos while also being discreet... Holding up a big camera to your face does catch people's attention. This makes it ideal for street photography.

There are certainly worse looking cameras out there! <3
Similarly, imagine wanting to take a portrait of a model, and still have that eye-to-eye communication with them as you're keeping your TLR still, without having a giant camera in your face, getting in the way. If not for any practical reasons, an old-fashioned TLR is certainly a conversation starter for passers-by. Alas, its perhaps not strong enough of an argument for any camera maker to engineer new TLRs in 2023.
“A great buy for anyone who’s enthusiastic about film photography, but without breaking the bank”

🎞️ A Rolleiflex For Those With Tight Budgets
Specs-wise, the Yashica Mat 124 G is a medium-format film camera, with a 6x6 square negative. And, they come with fixed 80mm lenses, which is a 50mm equivalent to the 35mm standard. As there are two lenses on TLRs, they each have their own focal length, and the same goes with the Yashica Mat 124 G. Its viewing lens at the top is an f2.8, while the taking lens at the bottom (responsible for taking photos) is an f3.5.


On the other hand, the shutter speeds can vary between 1/500th of a second to 1 second. So far, its pretty standard fare for medium-format film cameras, even in the decades following its initial release. Plus, you'd even get a Bulb mode. Naturally, being a film camera, you'll need a roll of film to capture photos with it. A Yashica Mat 124 G takes in either 120 or 220 films, with options between 12-exposure to 24-exposure.

Given the fact that 220-roll film is no longer in production these days, you're mostly stuck with 120. With it, you'll get 12 shots out of a single roll, which is modestly economical. Being an older camera, the 124 G is a very mechanical device to use. Albeit, the 124 G (not necessarily a staple of all 124 models) comes with an included light meter. Unfortunately, the light meter on my unit here is very broken and doesn't work.
Once you dive into the forums, you'll realise that light meter failures are a common fault on these. So, if a photoshoot demands that you need one, make sure you have an external light meter or even a simple light meter app on your phone at the ready... Just in case. That's unless you happen to have some spare PX625 mercury oxide batteries around to recharge the built-in light meter on the Yashica Mat 124 G.
✅ Simple To Use, Yet Brilliant To Take Photos With
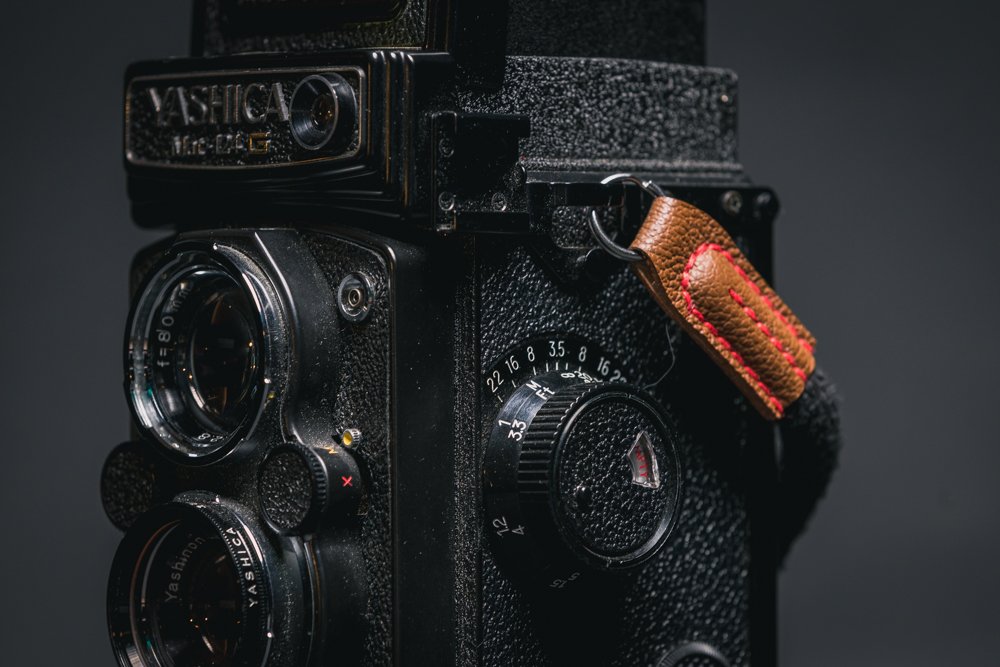
As is expected of a camera from yesteryear, there aren't a lot of controls to fiddle around with. There's the focusing knob, with aperture and shutter speed controls on the very front of the camera, besides the lens. Elsewhere, on the right-hand side of the camera, there's the winding lever, as well as a sports finder for a direct shoot. To be fair, the placement of things on the 124 G does take some getting used to.
That's especially if you're more accustomed to the industry-standardised layouts of modern cameras. Just as peculiar is having to use that waist-level viewfinder. Despite all my praises for it, having the picture be inverted requires some degree of patience as you're getting the hang of trying to compose a shot. Though, if the image quality to come out of it is at least okay, then the Yashica Mat 124 G is worth it, right?
Video Source - Jaycie Linh via YouTube
Actually, its more than just 'good', as this relic of the 1970s takes some staggeringly great photos. Yes, a bit of technique is required when you're dealing with a lot of manual controls - its hardly point-and-shoot, as you would with a digital camera. But, do it right, and the images that come out of the 124 G often tend to be quite sharp. That's particularly, as I've found, once its stopped to between f8 to f11.
You will probably guess my location from the photos and ‘Photographer Birmingham’ plastered all over my website. However, this little beauty is also great for travelling with. Its (relatively) diminutive size means it is easy to throw in a bag and apart from being conscious of its age, its pretty solid, as long as you take care of it. The only thing better than using this camera is using it in some beautiful, far-flung location!

This is partly aided by the Yashica Mat 124 G's crisp lens, and that square 6x6 negative. Not only would it afford you a high level of detail in your shots, it even has a good amount of depth of field. You'd think the quality would absolutely be demolished when looking side by side compared to a modern camera. Yet, it holds up quite well on its own. As such, you could totally rely solely on the 124 G for taking photos.
🕰️ A Time Capsule For The Good Old Days
It is fair to say that given the practical functionality and great image quality, owning a vintage camera like the Yashica Mat 124 G is more than a mere gimmick. Or, simply trying to be all cool and hipster. Still, that doesn't mean that there aren't any novelties to be enjoyed with it. Viewing through the focusing screen as well as the 124 G's waist-level viewfinder is no doubt a pretty unique photo-taking experience.


Compared to viewing with just one eye through a DSLR's digital viewfinder, being able to use both eyes and look into a TLR viewfinder gives off a 3D-like quality that's hard to match. Equally as old-school is the build quality of the Yashica Mat 124 G. It is decent, but nothing extraordinary, and is most certainly fragile. Take a look inside any vintage camera, and you'll have an idea of how many moving parts there are.
So, make sure you don't drop it. Additionally, since it is a camera from the 1970s, buying one almost always requires that you at least give it an in-depth inspection before any serious shooting. There's likely at least something in there that needs urgent servicing. Or, it is nearing the end of its usable service life and needs a full replacement. A saving grace here is the relative abundance of 124 Gs on the used market.
Video Source - Imran Nuri via Youtube
With that in mind, it might not be too tough to find spares. If you are to carry it around day-to-day, make sure you also have a strap for it. Unlike most other 124s, the 124 'G' variant has a bit of plastic in its build. Yet, with a nearly all-metal construction, the Yashica Mat 124 G is still pretty heavy. This does translate to a solid - if not a bit clunky - feel to it anytime you pick it up or have it hanging around your neck.
🤔 Specs, Details, And Closing Thoughts
Despite being an ancient camera, the Yashica Mat 124 G is still a nice bit of kit. Some might argue that it is really only functional as some sort of collector's toy or a hipster fashion statement. But, once you spend a good bit of time with it, and see how well it takes photos, you'll realise how capable it can really be. It even stands toe-to-toe with modern cameras of today (those huge negatives can render a lot of detail!), even if a phone camera might match it.
The most important factor for me, in all of this, is F-U-N. It is a fun alternative to a digital camera or even a later film camera and is enjoyable to take photos with. This joyousness is also the reason why I try to bring it with me as frequently as I can. To be fair, if I had deep pockets, I'd still go for a Rolleiflex. Regardless, the Yashica Mat 124 G is still a fantastic pick and a great buy for any budget-friendly film camera enthusiast.

FAQS
-
If you’ve never shot medium format before, it’s one of the most approachable ways in. The layout is simple, it’s hard to get distracted by settings, and the 6x6 negatives are wildly forgiving compared to 35mm. It’s also a camera that rewards slowing down — which is basically the whole point of shooting film in the first place.
-
If you only do a few checks, do these:
Look through the viewfinder: is it bright enough to focus easily, or is it dim/hazy? (Dirty screens are common, but heavy haze can be a pain.)
Focus: wind focus from near to infinity — it should feel smooth, not gritty.
Shutter speeds: fire it at a few speeds (especially 1/500 and 1/30). You’re listening for consistency, not perfection.
Film advance: winding should be smooth and stop positively at frame “1” after loading.
Lens condition: small dust is normal; haze/fungus is not. Shine a torch through if the seller allows it.
-
The big three I see mentioned (and occasionally experienced) are:
Sticky/slow shutter speeds (especially the slower ones)
Dim finder / focusing screen issues (age + dirt makes them feel “harder” than they should)
Light meter problems (dead meters, inaccurate readings, battery weirdness)
None of these are instant deal-breakers, but you want to price them in — and ideally buy from someone who can show it working.
-
Nice-to-have, not essential. If it works and is accurate, great — but I wouldn’t pay a big premium for it. If it doesn’t, you can:
use a phone light meter app,
carry a small handheld meter,
or shoot using sunny-16 if you’re that way inclined.
The camera is completely usable without the meter, and plenty of people prefer it that way.
-
A dim focusing experience. When the finder is murky, you’ll miss focus more often, and the camera stops being fun. If you’re buying in person, spend 30 seconds focusing on edges/contrast (signs, door frames) — if you’re fighting it, you’ll fight it forever. Some people upgrade focusing screens, but ideally you start with a decent example.
-
You’re mainly listening for consistency across repeats. Fire the same speed 3–4 times; it should sound the same each time. Then do a slow speed (like 1/8 or 1/15) and listen for anything that sounds like it’s dragging or sticking. If you’re buying remotely, ask for a short video of the shutter firing at a few speeds — it’s a completely reasonable request.
-
In the “I want the vibe without selling a kidney” sense, yes. The shooting experience is similar enough to scratch the itch: waist-level, square format, slowed-down pace, and surprisingly good results if your camera is in decent nick. It’s not a Rolleiflex, but it’s also not trying to be — it’s a proper camera in its own right.
-
A few things that helped me:
Focus carefully and don’t rush the last millimetre of the focus knob.
Use higher shutter speeds than you think you need if you’re handheld.
Brace the camera against your body — waist-level shooting is naturally steadier if you use it properly.
If you’re shooting wide open, take a breath and treat it like a portrait lens: nail the focus, then shoot.
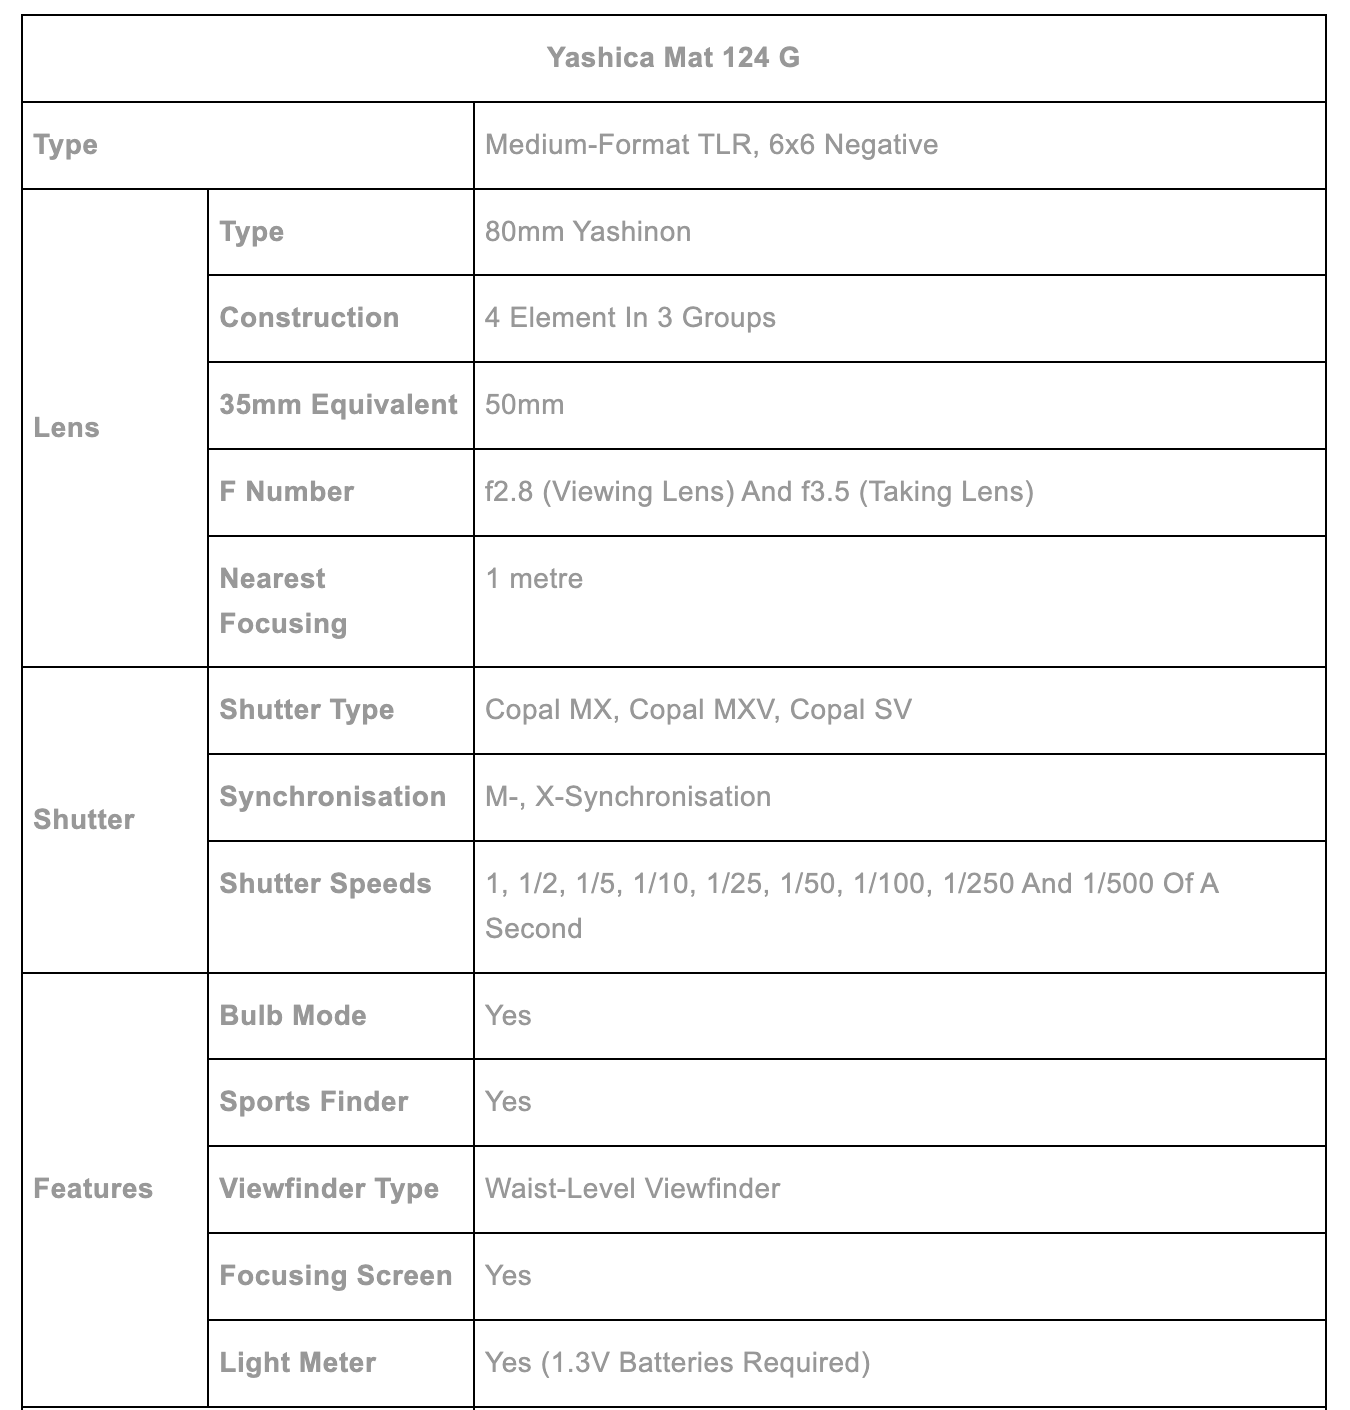

About the Author - Ross Jukes is a professional Photographer and Videographer with over a decade of experience. Working in both Digital and Analogue formats, Ross has worked with international clients, had his work published numerous times and exhibited his work extensively. With a passion for all things photographic, Ross combines his experience, enthusiasm and dedication to his art form to create engaging and educational content for the photographic community.
Disclaimer: All links to Amazon UK/US are affiliated links - you will still pay the same price but I will receive a small commission for providing the link. All information provided in this blog is intended either for educational or entertainment purposes and is accurate to the best knowledge of the author. However, further research/professional advice should be sought before making purchases/implementing any advice given and no responsibility is taken by the author or parties mentioned here within.

Hebridean Way Bikepacking Adventure - A Photographer’s Dream!
The Outer Hebrides, in the far reaches of Scotland’s Western Isles, are often described as one of the most beautiful places in the UK — and arguably, the world. So it is no surprise that Landscape photographers and those seeking adventure flock to the remote islands in search of beauty in this barren landscape.
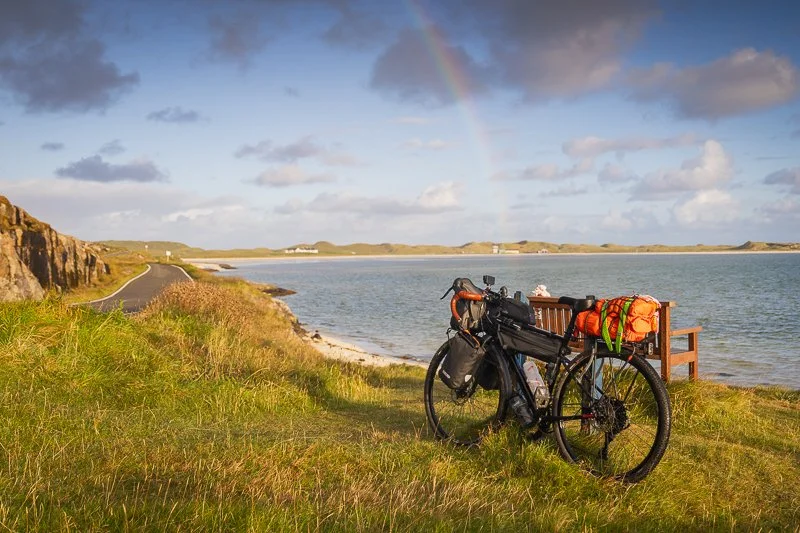
The Outer Hebrides, in the far reaches of Scotland’s Western Isles, are often described as one of the most beautiful places in the UK — and arguably, the world. So it is no surprise that Landscape photographers and those seeking adventure flock to the remote islands in search of beauty in this barren landscape.
✅ QUICK FACTS:
Route: The Hebridean Way — ~185 miles / 297km from Vatersay (south) to the Butt of Lewis (north) Outer Hebrides
Islands & links: 10 islands, 6 causeways, 2 ferries
Typical pace: Most riders take 5–8 days (longer if you’re prioritising photos + rest days)
When I rode: Late September 2025 (expect fast-changing weather and big winds)
Key realities: Remote stretches, limited resupply “pit stops”, and single-track roads with passing places
Camping: Scotland allows responsible camping where access rights apply — follow the Scottish Outdoor Access Code
This is my real-world itinerary + planning guide for cycling the 185-mile Hebridean Way (with a photographer’s priorities).
🚴♂️ The Hebridean Way - My Adventure…
In late September, 2025 - I attempted to combine these two things with a bIkepacking adventure taking in the Hebridean Way. However, not everything went to plan as this trip pushed me to breaking point!
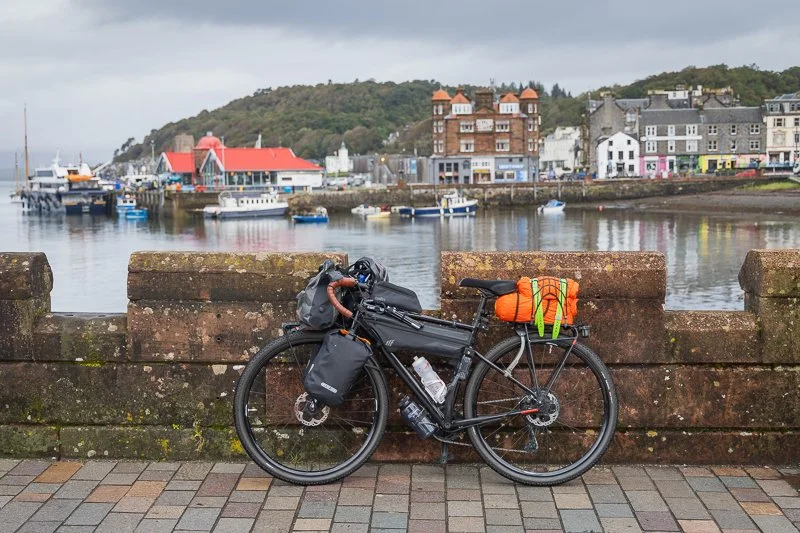
The Journey Begins - Oban Ferry Port before heading out to the Outer Hebrides
In this post, I will describe what my plan was, the journey itself and offer some tips and guidance for those looking to do a similar trip. This is going to be a long one with a lot of information so consider bookmarking it so you can easily return to it or skim through to the section you need. As always, please leave a comment below with your thoughts and questions and I will always get back to you. To be clear, I am not a bikepacking expert so do plenty of research before planning your own adventure!
❤️ Jump To:
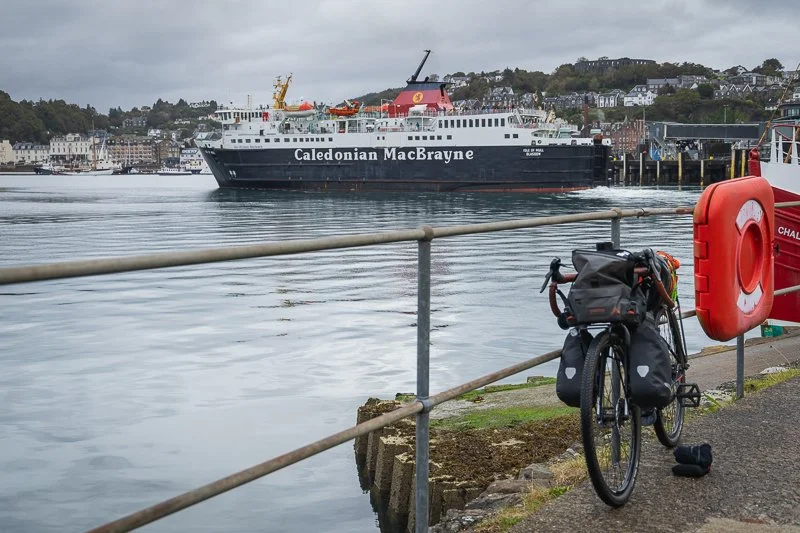
📝 The Plan - GO BIG AND THEN GO HOME!
By the start of 2025, I had got a few little bikepacking trips under my belt and felt the pull of a longer adventure. After a lot of time spent trawling YouTube and Reddit, I kept coming back to the Hebridean Way - a 185+ mile ‘Bucket List’ trip in the bikepacking community that just happened to have beautiful landscapes and reachable from my home location of Birmingham!
Planning started with working out how I would even get there! The islands are only accessible by ferry and even reaching the departure point for the ferry alone felt like an adventure. I would be taking a train to Glasgow before heading out to Oban. After an overnight stay, I would take the ferry crossing to Castlebay at the southerly tip of the route. This alone was a two day trip just to get to the islands.
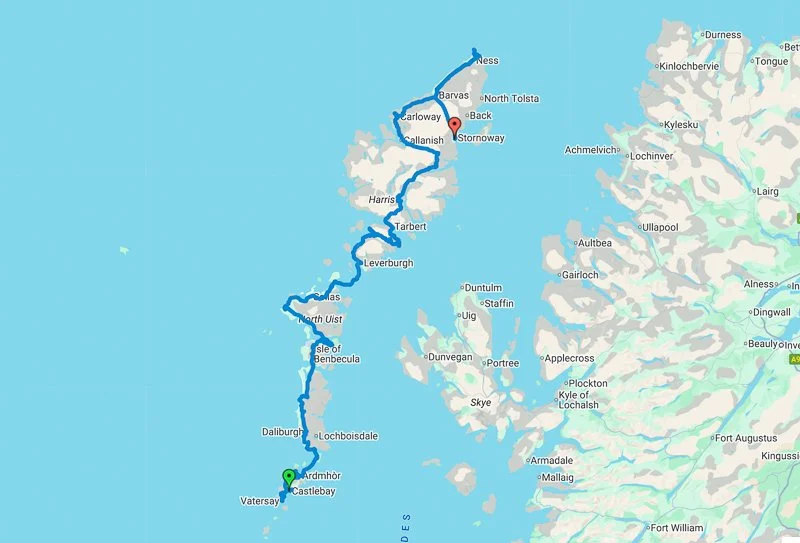
One of the quirks of the Hebridean Way is planning your return, with the most common route being a ferry crossing from Stornoway in Lewis, back to Ullapool on the Scottish mainland. This all sounded simple enough, even with nearly 200 miles to cover on the days in between. I furthered complicated things by initially planning to go to the Isle of Skye after completing the Hebridean Way - more on this later!
I set about booking all of the train travel, ferry bookings and a couple of nights of accommodation. Throughout my trip, the plan was to wild camp where possible - one of the joys of travelling in Scotland, where this is permitted under the right-to-roam laws. I felt confident that I could cover between 30-40 miles a day so booked all of my homeward travel - this would be my first major mistake
🚴♂️ The Trip - FEELING ALL AT SEA!
I’ll try to keep this brief as there is so much to cram into this post but the trip was obviously spectacular. Even the ferry crossing from Oban to Castlebay on the excellent CalMac Ferries felt like an adventure.
Rough seas battered the ferry and there was an eerie silence amongst the 50 or so passengers and more worryingly, the staff! It’s not something you can really capture on camera but things were already starting to feel very remote as we crept into Castlebay as the sun began to set.

I set foot on the island and was immediately battered by an unrelenting headwind. The wind would not show any signs of calming down for the next two days and as I desperately tried to cycle from the ferry port to the start of the Hebridean Way, with Google Maps setting an ambitious 30 minutes!
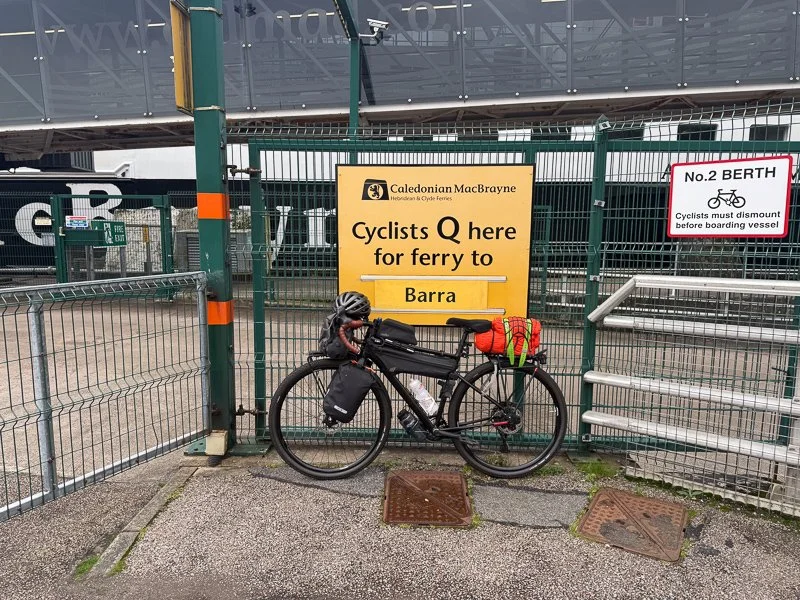

The sea was a bit rough!
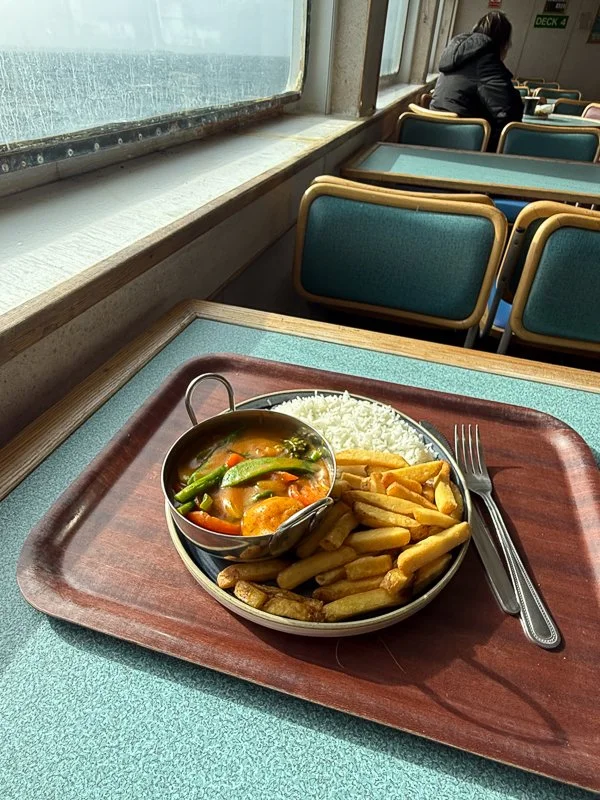
But the CalMac food was great!
I already felt like I had bitten off more than I could chew. I eventually made it to the start point at around 8pm as the sun began to set and a huge rain storm rolled in. A quick photo to prove I made it to the start point and then back into the wind and rain. Welcome to the Hebrides!
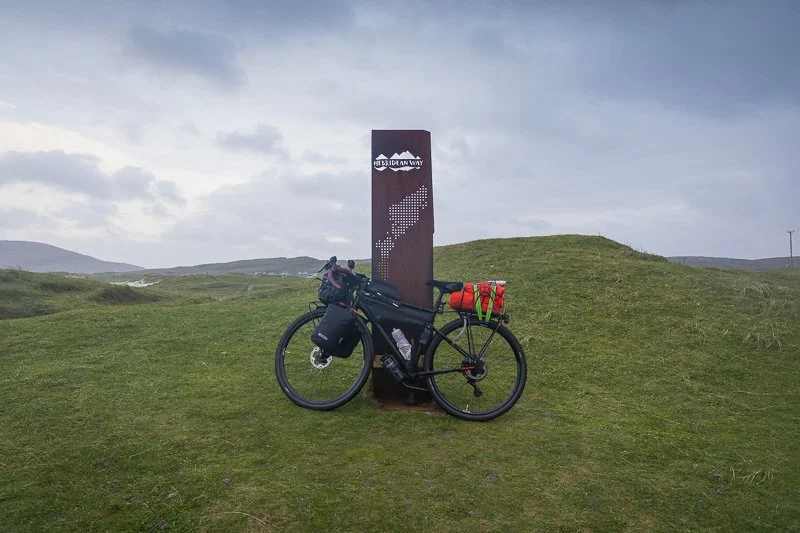
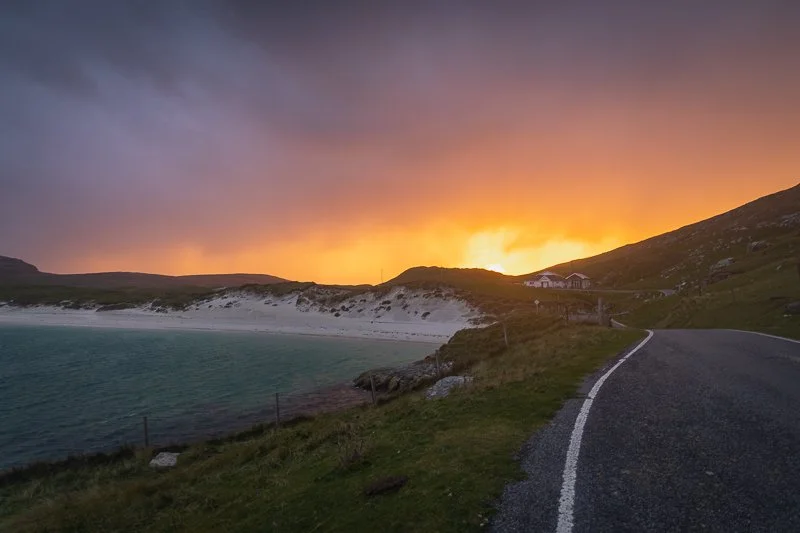
🌅 THE ADVENTURE BEGINS
After abandoning my wild camping romanticism and spending the night in a hostel, I woke up early the next morning to cycle to the top of Barra to get my first ferry to Eriskay. The morning was spectacular, a beautiful sunrise revealed countless rainbows as showers rolled across the island. I stopped several times to take photos with each passing mile revealing even more beauty.
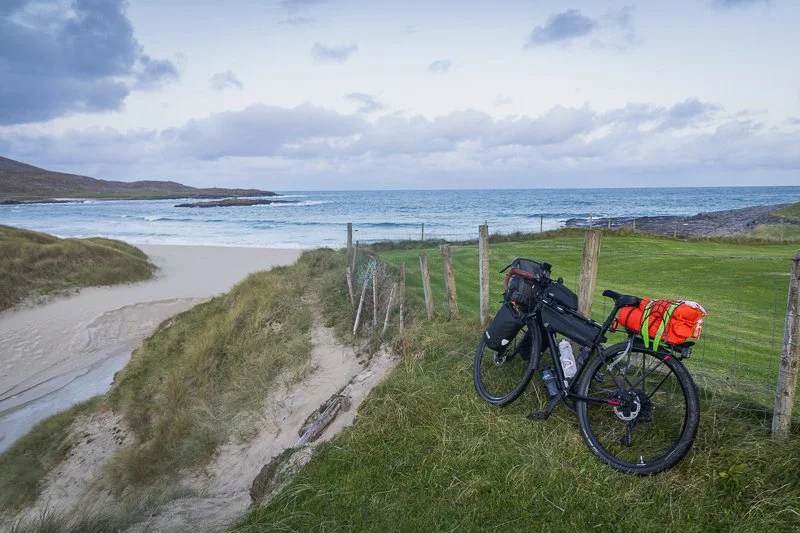
First day of ‘proper’ cycling and already in stunning landscapes…
It took me around 30 minutes to absolutely fall in love with Hebrides, a relationship that would be challenged shortly after crossing Eriskay and its spectacular causeway as the open lands of South Uist provided my first real challenge!

With 30 miles to cover, I was cycling into 40 mile per hour gusts that felt like they were pushing me backwards! With next to no cover from the terrain, the winds ripped through the island and made the cycling feel nearly impossible! My legs were burning by the end of the day and I decided to find a campsite where I could at least have a warm shower.

All hope of a slow, peaceful photography focussed trip seemed to be slipping away. As I attempted to put my tent up in the unrelenting wind, I could feel my will being tested - surely I can't quit after one day of cycling! I just about got the tent up and managed a total of about 3 hours sleep…

🏕️ CARRY ON CAMPING OR HOMEWARD BOUND?
With South Uist under my belt I was praying for better conditions on North Uist - but the Hebrides don't make anything that easy! More headwind but now the hills slowly got worse. “This is why you came here,” I told myself, huddled in a bus stop as rain lashed sideways.
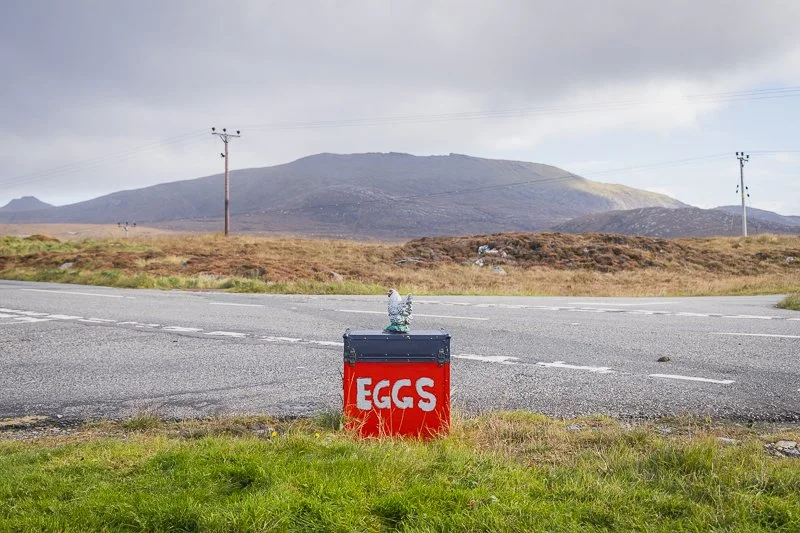
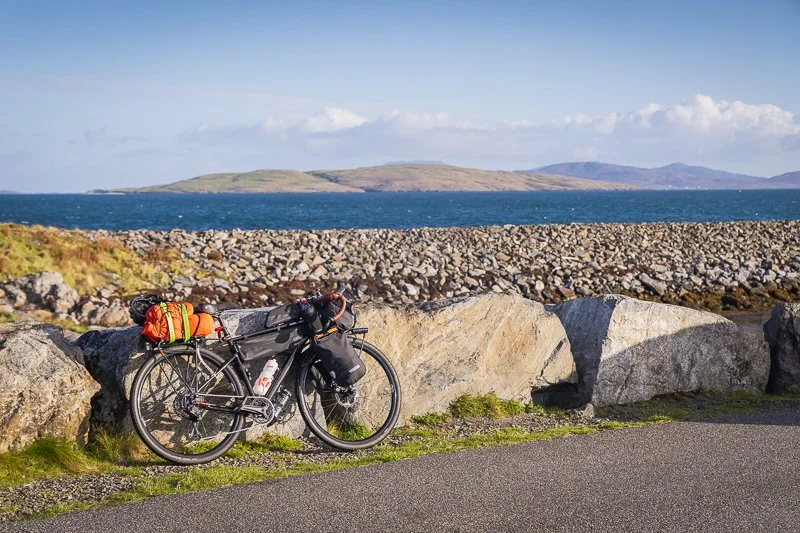
Adventure isn’t supposed to be comfortable - it’s supposed to test you. As one YouTube video sprang to mind, “You have to endure the ups to enjoy the downs” - not quite sage advice for life but certainly sound for the Hebrides - I pushed on!
Over the next few days, I battled my way through North Uist, Harris and Lewis. I stopped to try to take advantage of the scenery and grab some photos but in truth, the journey had felt like so much of a struggle that I just wanted to push on for fear that if I stopped, I might not start again!
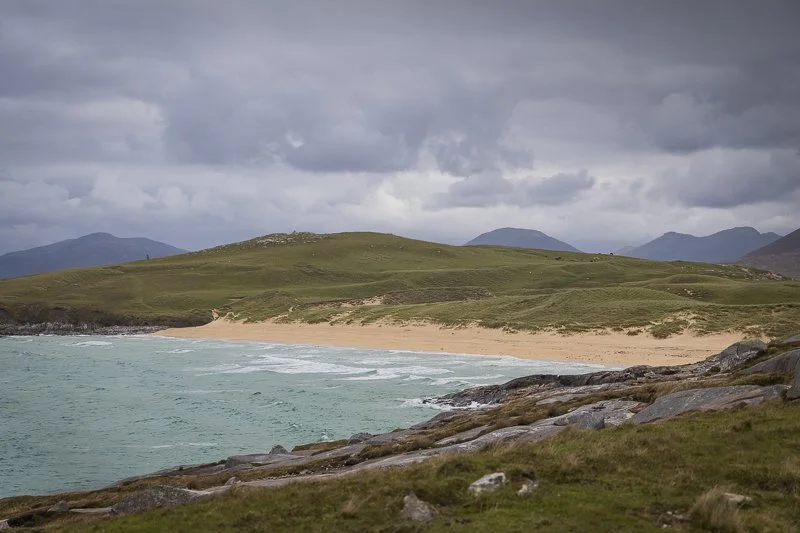
As I passed through Leverburgh and round to the beautiful Luskentyre Beach, I felt lifted as the spectacular beauty of the islands seemed to pull me further along the road, just waiting for what was around the next corner. It was just a shame that the grey skies didn’t open up for a few minutes but you can’t have it all!
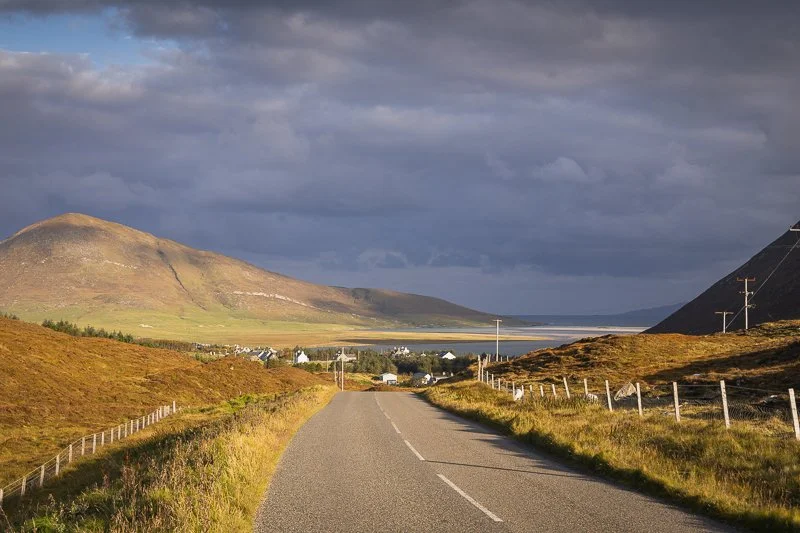
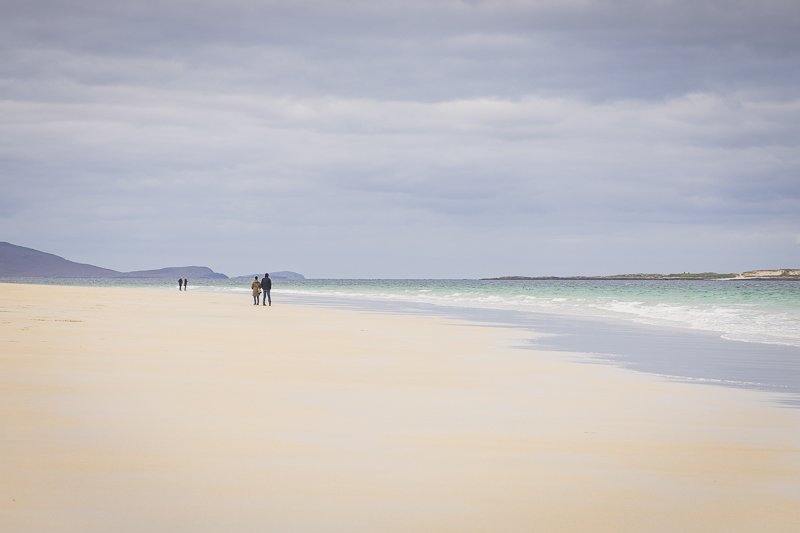
Luskentyre Beach is a real Landscape Photographers Dream!
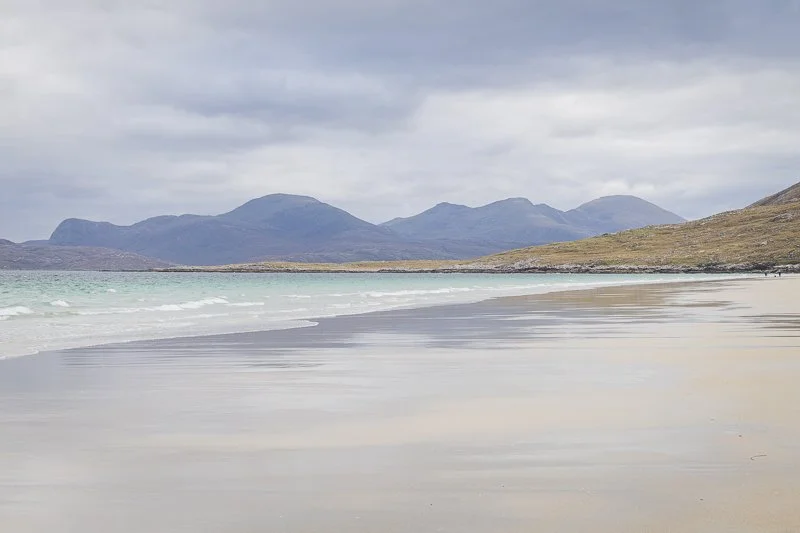
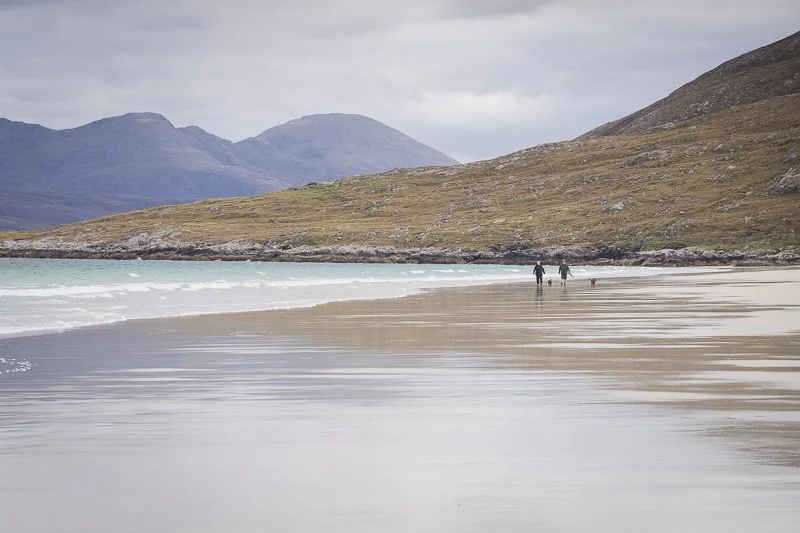
🥃 Whiskey Business!
The scenery was undoubtedly beautiful. Harsh, rugged landscapes gave way to the crashing waves of the North Atlantic Ocean. Wild birds fought against the winds in what felt like the onset of a storm - to the islanders, this was a calm day…
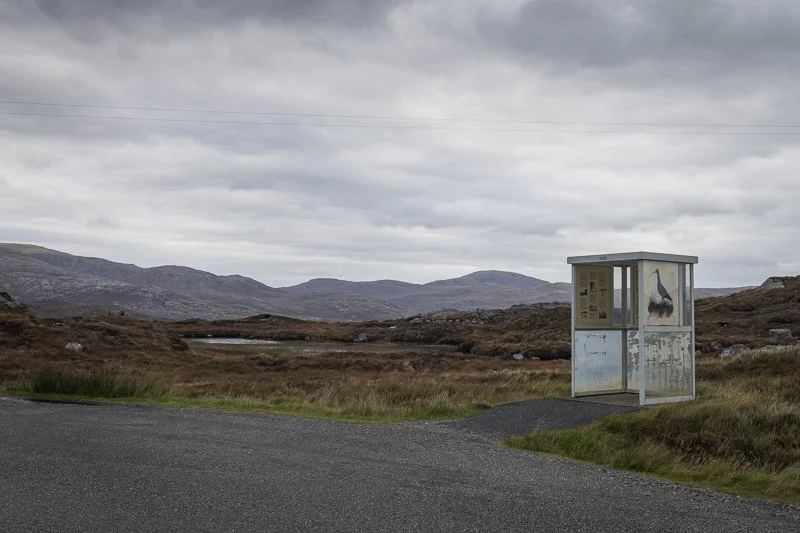
Showers rolled in and out without warning and any desire to stop and indulge in landscape photography was quickly replaced with the urge to get to the next rest point, or at least a shop and an opportunity to find a bit of food - as with everything here, they were few and far between.
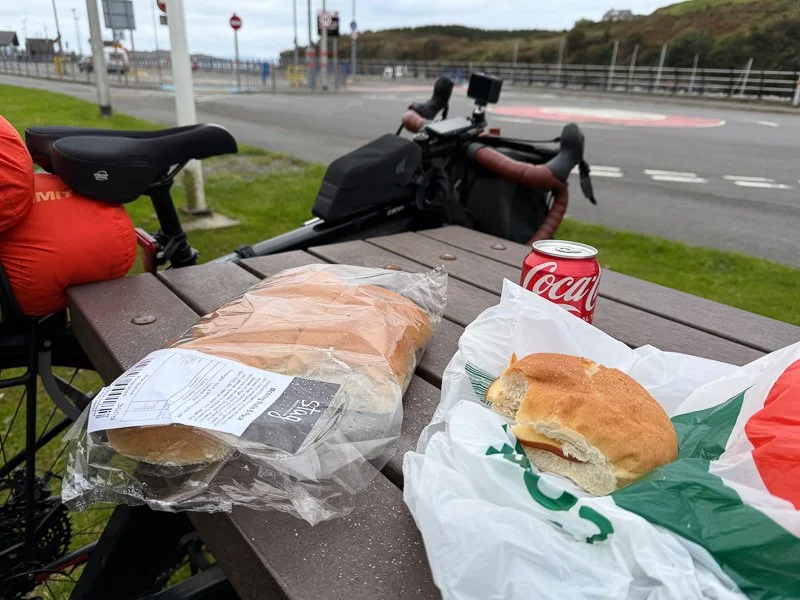
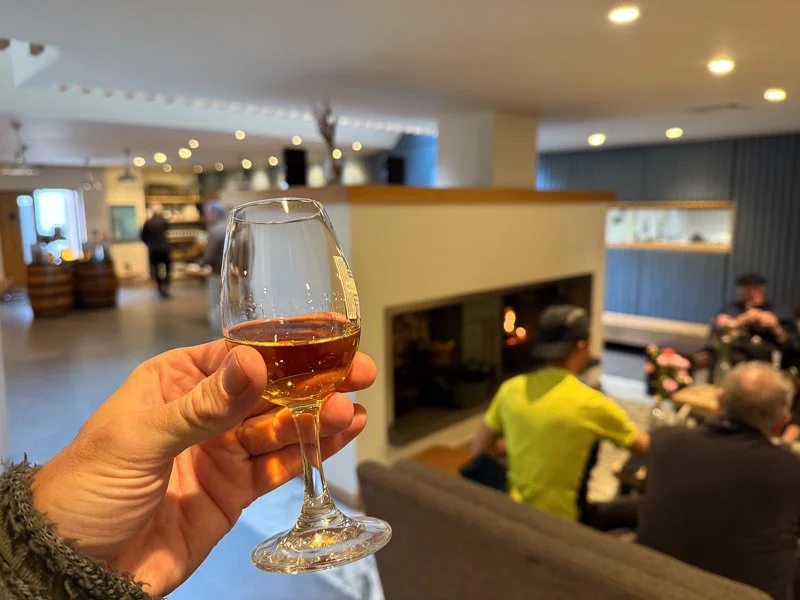
After paying a trip to the wonderful Harris Distillery I was immediately brought back down to earth, with the most challenging climb of the route - a big push over the top of Bunavoneader! I’m not too proud to admit that I did push the bike indeed, this had been another challenging day and there was no way to finish it! I treated myself to a night in another hostel, my legs at least would thank me.
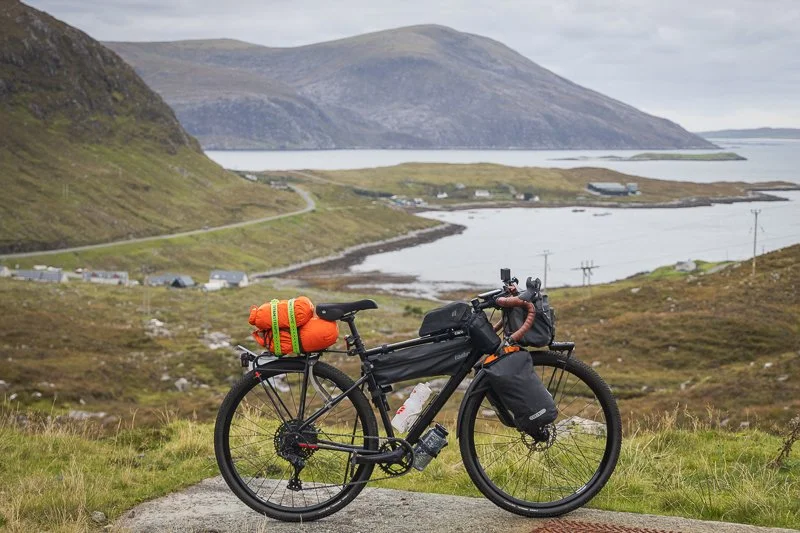
Expect some big climbs on the Hebridean Way!
🤦♂️ FEELING DEFLATED
I still had a couple of days travelling ahead of me but as I crawled my way towards Balallan, the worst finally happened - my first puncture! Well, my tubeless setup was miraculously leaking air. I couldn’t see any obvious problems so I pumped up the tyre and got on my way.
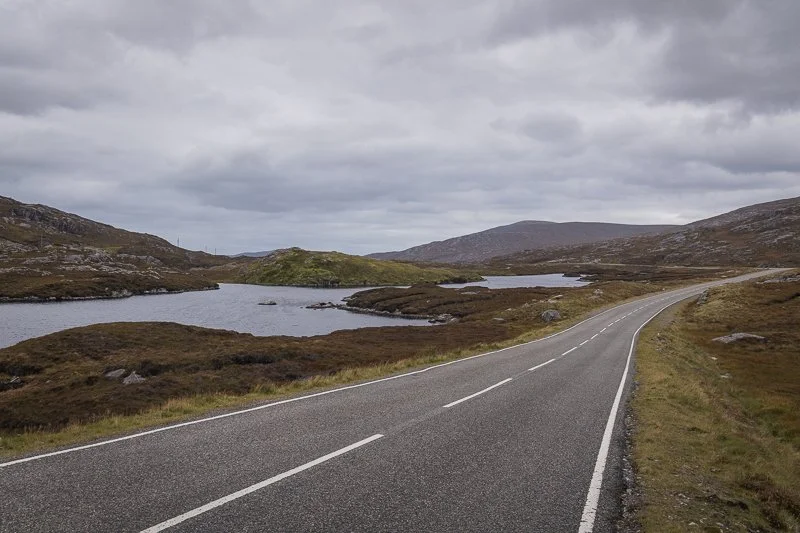
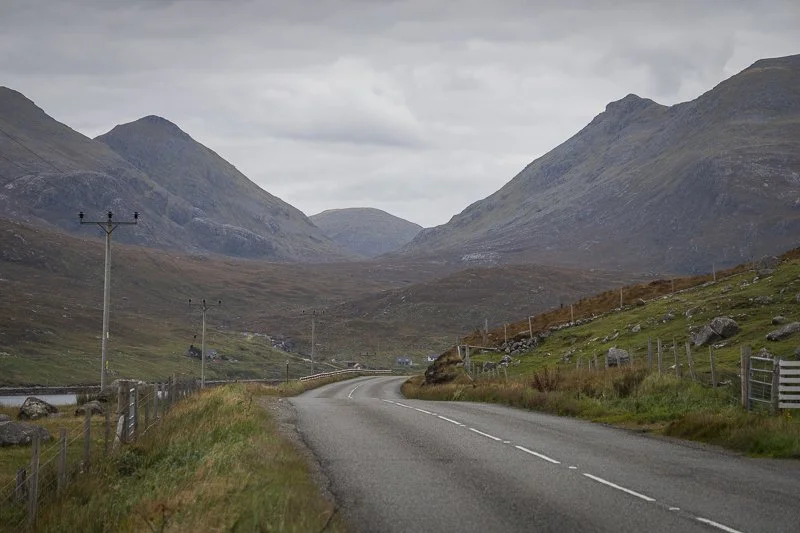
A few miles down the road and the same again, something was not right! Feeling dejected, I got to a crossing where if I wanted to bail on my trip, I could just shoot for Stornoway and civilisation. Or, I could stick to the plan and head along the remote route to the Calanais (Callanish) Standing Stones.


After another strong chat with myself, I did the latter… And I am so glad I did. Several more ‘pump’ stops later, I made it to the Callanish Stones, a spectacular site and reward for my efforts. However, after a 7am start, I only had another 40 miles to get to the end of the Hebridean Way! Seeing as it was only 11am, I made the (some would say) foolish decision to push on - despite my puncture predicament, I wanted to make it to the end!

❌ REACHING A CROSSROADS
To say the next few hours were a struggle would be an understatement - the bike felt like it was buckling under my weight, the tyre refusing to be normal! Worst of all, As I made it to Barvas, I was offered another opportunity to quit and head back to Stornoway!

No! I couldn’t travel all of this way just to give up now. As I got to around 10 miles from the end point, with legs burning and bags sagging, a spoke gave way making the rear of the bike feel like I was rolling on rocks! As I sat by the side of the road, feeling like I could cry - was this it, had I finally been broken?
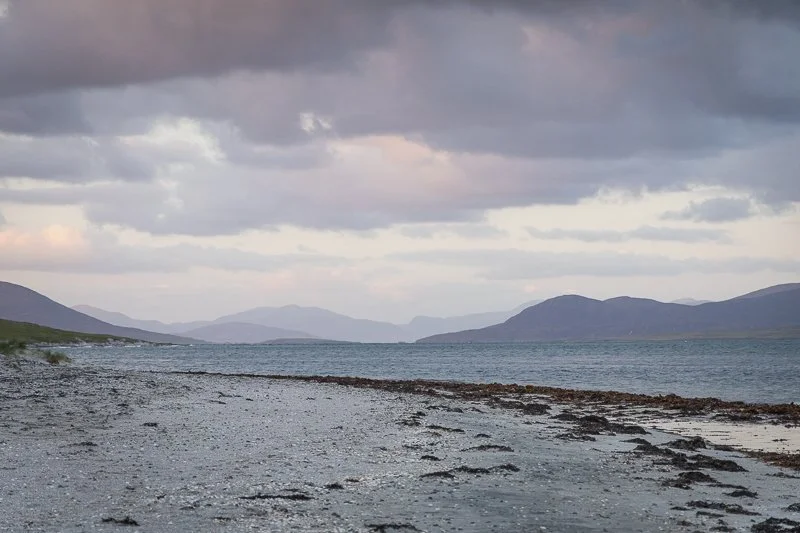
I felt a bit embarrassed as a car pulled up and a lovely lady (Anne) checked to see if I was OK, the outstanding Hebrides hospitality once again saving me when I needed it. After some strong words of advice, I picked myself up, strapped the bike together as best as I could and pushed on! I don’t think I’ve ever felt more challenged on a bike trip than this but as the Butt of Lewis came into view, the feeling of relief was enormous!
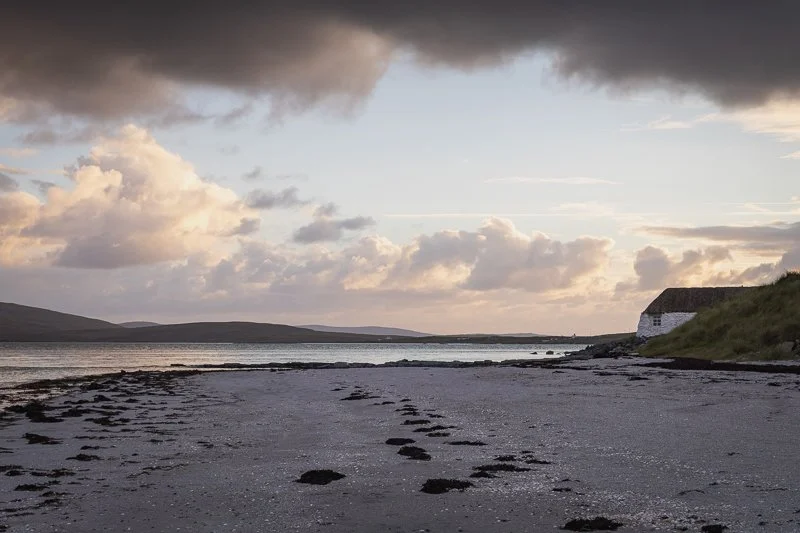
However, I was broken and needed an escape route. After yet more amazing hospitality (a roadside beer from more incredible locals!) I dashed for a bus heading back to Stornoway. I threw the bike in the luggage hold and bit my tongue as the driver said “I’ve seen you a few times today, usually pumping your tyre up”... Cheers mate!
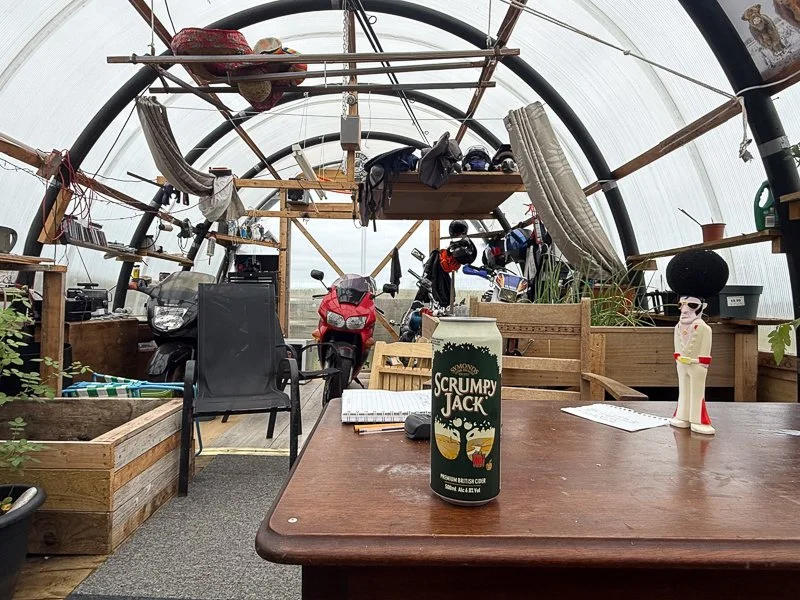
🚳 THE END HAD ONLY JUST BEGUN!
I sat on the bus back to Stornoway cursing my own cycle repair abilities, my eagerness to finish the route and my burning calves. As I flicked through the images on my camera I felt somewhat relieved that I had at least captured a taste of what the Hebrides is about.
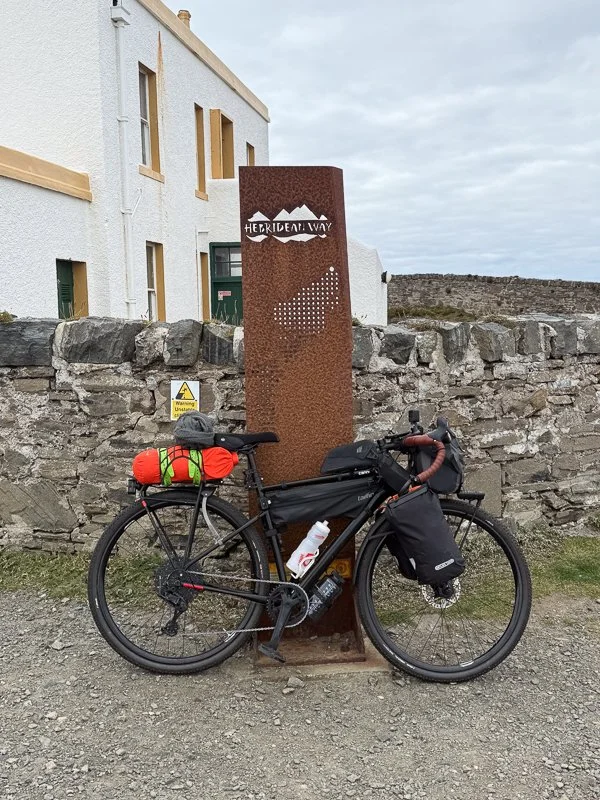
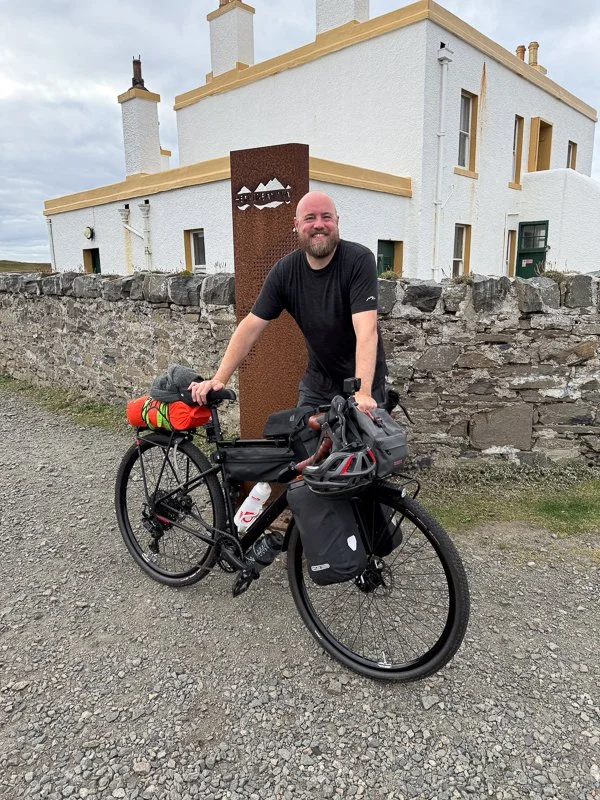
Would my photos win any landscape photography awards? Absolutely not. But they’ll always remind me of the grit, beauty, and sheer unpredictability of the Hebrides — and that’s worth every mile.
After finding a room for the night in Stornoway and a much needed hot meal, I looked back on a 70+ mile slog of a day. I was a mix of being amazed that I made it and disappointed in myself that I had rushed it! Something about the desire to ‘get to the end’ had completely taken over the actual reason I was there, to slow down, take some nice photos and enjoy the islands. Us city folk never change it seems and the desire to rush around just wouldn’t leave me.

Cutting the trip short meant that all of the hotels and trains that I had booked for my return leg were now wasted - not the best planning on my behalf! In truth, there were a couple of reasons why I needed to get home sooner but one thing I would definitely do in the future is to be a bit more flexible in how I planned my days. After all, the unexpected happening is about the most predictable part of doing a journey like this!
🥰 EVERY FAILURE IS A CHANCE TO LEARN!
From Stornoway, I had another decision to make. Do I head back to Tarbert, over to Skye and cycle back to Fort William - or get the ferry to Ullapool and head back on the train through Glasgow and back to Birmingham? I’m sure you could guess, my adventure was over and my broken bike (and broken feeling body) meant that any trip around Skye would have to wait for another day!

Looking back on the trip, it was incredible. I met some wonderful people, saw some of the most beautiful landscapes I have ever witnessed and most of all, learnt a lot about myself! I clearly struggle to slow down and I will always regret not spending more time in certain locations.
However, I also learnt that I can put up with a bit of adversity and can see some challenges through to the end. Even if it is the thought of a beer that really pulls me through!
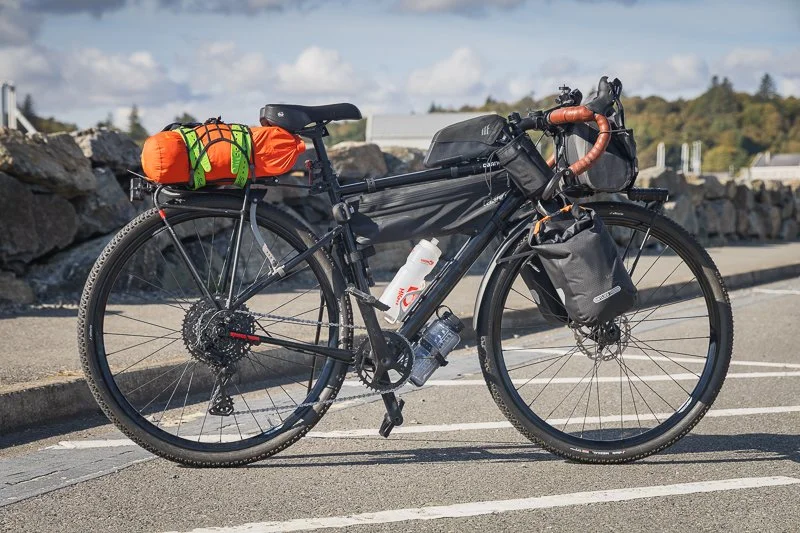
🚲 The Gear - WHAT I PACKED
If you are planning your own trip and are curious, here is a list of the gear I used. I will try to link to as many of the products as I can and some will be Amazon Affiliate links, but these will not cost you any extra.
Bike - Canondale Topstone 4
Front Bag - Altura Waterproof Handlebar Bag
Frame Bag - Tailfinn Medium
Panniers - Ortleib Gravel
Bike Computer - Coros Dura Solar
Handlebar Mirror (essential!) - Hafny Bar End Bike Mirror
Front Light - Magicshine RN 1200
Rear Light - SEEMEE 300
Front Rack - BLB Lite Rack
Rear Rack - Ortleib Quick Rack
Stand - Click Stand
Lock - Abus Bordo Lite Mini
Dry Bags - Sea to Summit Dry Bags 8L
Tent - Durston X-Mid
Sleeping Bag - NewDoar Ultralight
Sleeping Pad - Big Agnes Rapide XL
Cookware - MSR PocketRocket Deluxe
Water Filter - Katadyn BeFree 0.6l
Main Camera - Canon R6 MkII
Lens - Canon RF 24-105mm
GoPro - GoPro Hero 10
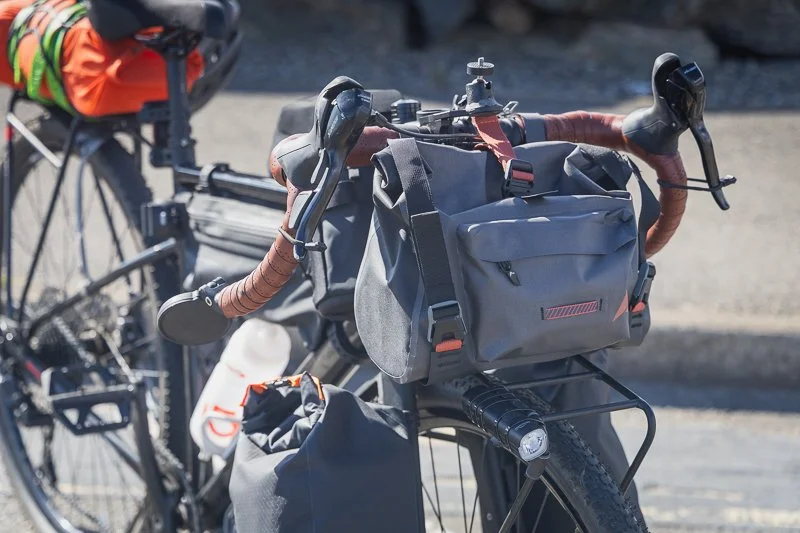

🔴 10 Quick Tips for Bikepacking the Hebridean Way
Whatever weather you think you’re going to get, plan for the exact opposite! To say the weather is unpredictable is a massive understatement!
Plan your food and drink properly! Although there are shops, it is easy to fall into the trap of being a long way from your next meal. Also, water is more difficult to come by than you would imagine, even if you are carrying a water filter.
Understand your equipment. It is quite possible to do this trip on older bikes or even bikes that might not feel that suitable, but having decent understanding of basic bike repairs could be a lifesaver!
Fail to plan… I won’t finish the quote but seriously, plan, plan and then plan some more! Having ‘escape routes’ and alternatives if you decide you can’t go on or if a proper storm rolls in is essential - in particular, having a warm shelter could make or break your trip.
It’s a different pace of life - shops are closed on Sundays and despite the locals being incredibly friendly, generally your are out there on your own, so be prepared to be a bit more resourceful than normal!
Phone signal is decent on all islands but the further south, the worse it gets. You may struggle to get internet connection in the south so make sure you save maps offline etc. and you know where you plan to stay each night and how to get there!
The roads are pretty safe but there is a lot of single-track roads with passing points every 100 metres or so. However, if the wind is particularly strong, you won't hear cars behind you! Get a mirror and use it! Oh, and look out for cattlegrids, they can be a nightmare!
Take a really good quality rain jacket, always have some dry socks and underwear to get into! Merino wool t-shirts etc. worked well for me and have some kind of hat/cap to wear with your helmet, those winds can feel brutally cold!
Plan your electronics accordingly - I always had two battery banks, one for daily use and another ‘emergency’ battery bank that I never planned to use, but was there for (you guessed it) emergencies!
Don’t sacrifice safety for weight-savings! I was massively concerned about weight but I’m glad I had a few emergency essentials and a decent toolset with me - if nothing else, the peace-of-mind it gives you is worth the extra grams!

✅ Final Thoughts…
If you are a photographer on the hunt for incredible landscapes, a bikepacker looking for a challenging adventure or both! The Hebridean Way is an incredible option that will certainly leave you feeling rewarded and will certainly give you a few stories to tell. If you catch the weather right, it will be spectacular, catch it wrong and you will feel the full force of these remote islands.
It’s not a trip for the faint-hearted and it certainly helps to have some experience, whether you are choosing to hike, cycle or drive the route. Proper planning is essential and having a Plan B, C and even D is highly recommended. All that aside, it is something I am keen to do again. I just need to lose weight, teach myself some basic bike repair skills and learn how to slow down a bit!
FAQS
-
The signed on-road Hebridean Way cycling route runs about 185 miles / 297km, starting at Vatersay and finishing at the Butt of Lewis. It’s way-marked, but you’ll still want offline maps for detours and planning.
-
A common timeframe is 5–8 days, depending on fitness, wind, and how often you stop for photos, food, and exploring. If you want a more photography-first pace, plan extra time so you can wait out weather and chase better light.
-
Late spring to early autumn usually gives the widest daylight window, but the Outer Hebrides can deliver all four seasons in a day. If you’re going for photos, build flexibility into your schedule so you can pause for conditions and light.
-
In many places, yes — if you do it responsibly. Use small tents, camp well away from buildings/roads, avoid enclosed fields with crops or livestock, and leave no trace. In busy areas, managed campsites can be the better option.
-
Strongly recommended. CalMac advises booking tickets online in advance (even foot passengers), and you should also keep an eye on service updates, especially in windier seasons. Check the CalMac guidance for taking bikes.
-
It’s often decent, but there are weaker areas—especially further south—so download offline maps and keep key notes (stops, ferry times, accommodation options) accessible without data.
-
Wind and weather can be brutally changeable, and remote stretches can leave you far from food, water, or shelter. Mechanical issues become “bigger” when you’re tired and exposed, so basic repair confidence is a genuine safety net.
-
Many roads are quiet, but you’ll encounter single-track sections with passing places. In strong wind you may not hear vehicles behind you, so a bar-end mirror can be a smart safety upgrade, and cattle grids deserve respect.
-
A flexible zoom (like a 24–105) is ideal when you’re prioritising momentum and changing conditions. Keep the camera accessible (not buried), and accept that “perfect light” won’t always align with your legs and the weather.
-
Build Plan B/C/D options: bailout points, indoor shelter options, and a buffer day. The route rewards patience — rushing to “finish” can steal the best photos and the best parts of the islands.
📸 Are you a photography/videography brand looking to showcase you products? Take a look at my Media Pack and Contact Me to discuss how we can collaborate on a sponsored review.
Posts you might also like…
About the Author - Ross Jukes is a professional Photographer and Videographer with over a decade of experience. Working in both Digital and Analogue formats, Ross has worked with international clients, had his work published numerous times and exhibited his work extensively. With a passion for all things photographic, Ross combines his experience, enthusiasm and dedication to his art form to create engaging and educational content for the photographic community.
Disclaimer: All links to Amazon UK/US are affiliated links - you will still pay the same price but I will receive a small commission for providing the link. All information provided in this blog is intended either for educational or entertainment purposes and is accurate to the best knowledge of the author. However, further research/professional advice should be sought before making purchases/implementing any advice given and no responsibility is taken by the author or parties mentioned here within.

REVIEW: Atomos Ninja TX Go: All Show and Go!
Atomos Ninja TX GO is a 5" 1500-nit monitor-recorder that adds CFexpress Type B, Wi-Fi/cloud workflows, and HDMI camera control + touch-to-focus (on supported cameras)—making it a meaningful upgrade for creators who want a brighter screen, faster media and tighter camera integration.

Atomos Ninja TX GO is a 5" 1500-nit monitor-recorder that adds CFexpress Type B, Wi-Fi/cloud workflows, and HDMI camera control + touch-to-focus (on supported cameras)—making it a meaningful upgrade for creators who want a brighter screen, faster media and tighter camera integration.
Buy it if: you record ProRes/ProRes RAW, shoot outdoors, want CFexpress + camera control
Skip it if: your camera isn’t supported for control / you don’t need external recording
Best for: weddings, doc, content creators, small crews

❤️ PLEASE NOTE - No AI was used to make this article. It is my own work based on my experiences and created in my own time. This item was purchased with my own money and is not in collaboration with Atomos. If you would like to support the blog, please consider making a small donation.
Some things simply can’t be improved upon. Take a perfectly worn-in mattress that feels like it was built for you, or a piece of toast, cooked to perfection, heaven! Sounds great, right? Well, swap that mattress for the latest Memory Foam with active cooling or spread a nice thick layer of Jam on that toast and tell me it isn’t ten times better! OK, I’m stretching a bit but you get the point - well that’s exactly where the TX GO comes in - they might seem like little tweaks, but they add up to a world of difference!
🔨 What is the Build Quality Like?
Straight out of the box, this feels like an Atomos product. It is sturdy with a reassuring weight to it. Although it is plastic, it feels sturdy and like it could take a knock or two. Atomos clearly understands its users and it is nice to see mounting points on the top and bottom of the monitor and well throughout additions like the new ‘locking’ cable clamps for the HDMI and USB-C. With the additional ‘Creator Accessory Kit’ you also receive a sunhood which is a nice add-on for those working in nicer climates than the UK!
There are some improvements to airflow and Atomos have changed the fan in the latest TX GO - it is still not silent, with a subtle whirring noise that ramps up on start-up and quickly calms down. This has never been an issue for me personally as even in interview scenarios, it is usually unnoticable. However, it is something to be conscious of if you work in exceptionally quiet environments, it may be irritating - but if you are using video lights etc. then you will be used to some subtle fan noise.
👍 What is the User Experience like?
I have used a ninja V for many years and it has always been a delight to use. The TX GO is no different to that. The improved screen brightness (1500nit) is a welcome addition and makes the screen more easily viewable in brighter lighting conditions. However, the included sun shade in the Creator Kit goes a long way to cut down on glare and reflections as well. Colours look fantastic and the screen generally gives you a lot of confidence in terms of setting exposure - though the additional exposure tools such as ‘False Colour’ basically eliminate any concerns anyway.
The touchscreen is fast and responsive and even with my sausage-like clumsy fingers, navigating the tools and menus is simple and rarely have I ever ‘clicked’ something I didn’t intend to. The menus are logical and well laid out, with monitoring tools and features all easily accessible. The Ninja range has certainly developed over my years of use and the menus and options now feel fully rounded with an absolute plethora of recording, monitoring and audio options and that’s before you get to the additional items that the TX brings.

📲 How do the new features work?
The TX GO feels like a more premium model than its midrange price would suggest and that is down to what Atomos has crammed into the new model. The standout feature for me is the new ‘Camera Control’ which allows compatible cameras to be controlled directly from the monitor. You can change aperture, ISO range and touch to focus which for me, is the real selling point. Unfortunately, my go-to video camera is the Canon R5C which is not currently supported, but having tried these features on my Canon R5 Mkii - they work great and I’m really hoping between Canon and Atomos - this is something that can eventually find its way to the R5C.
If you do have a camera that is compatible with Camera Control - one other big consideration is how the camera ‘talks’ to the monitor. Obviously, all visuals and audio are handled by HDMI but Camera Control is done over USB-C. This is fine for most users but if you are powering your camera with an external battery and use USB-C - you will need to free that port up. Most modern cameras will have multiple powering options so there will always be a solution, but if your current rig is already utilizing the USB-C port, it is something worth thinking about.
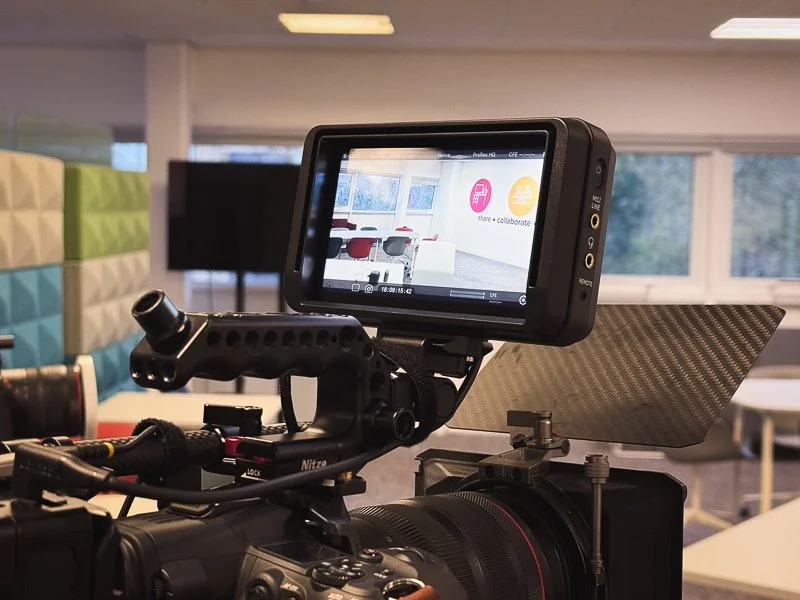
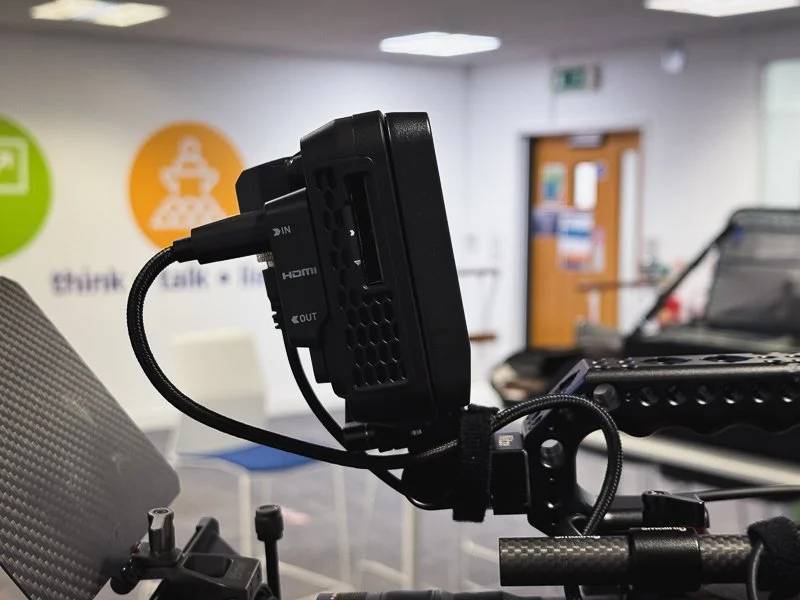
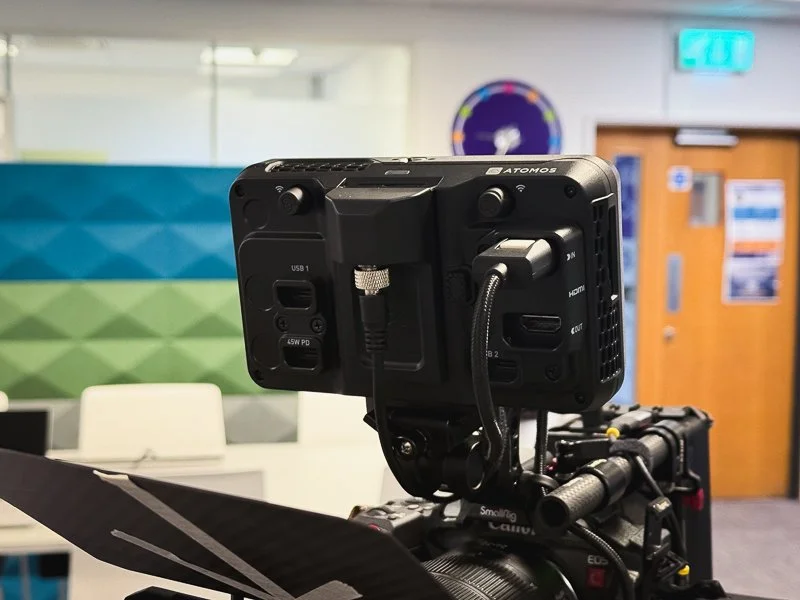
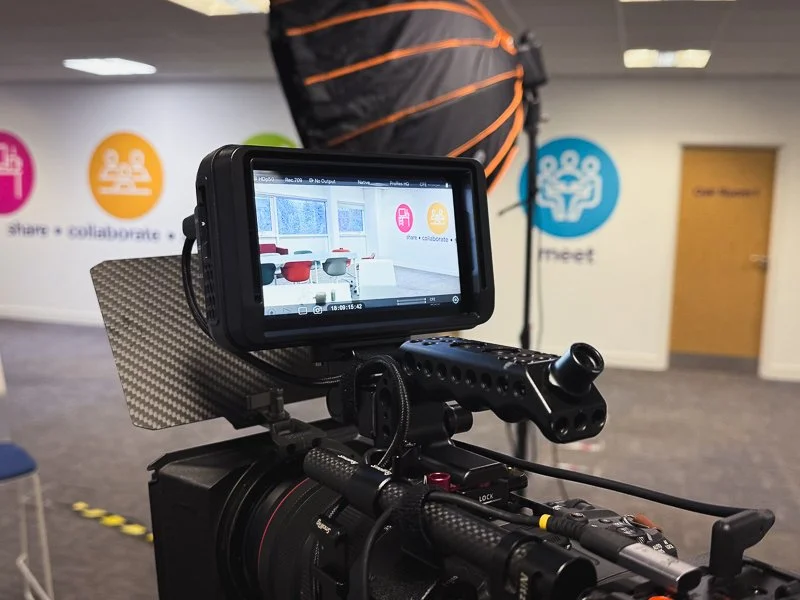
Another big selling point for me is the move away from SSD recording to CFexpress Type-B. The biggest reason I love the Ninja V range is the additional peace of mind that I get from recording to an external recorder. Most modern cameras will have some kind of ‘dual’ recording but there is just something about recording to a completely separate device. However, having to use a caddy and plugging onto an SSD always felt a bit cumbersome. The new CFexpress Type-B option not only reduces that hassle but it feels a bit more future-proof. Additionally, you can still record to an external SSD over USB-C if you desire.
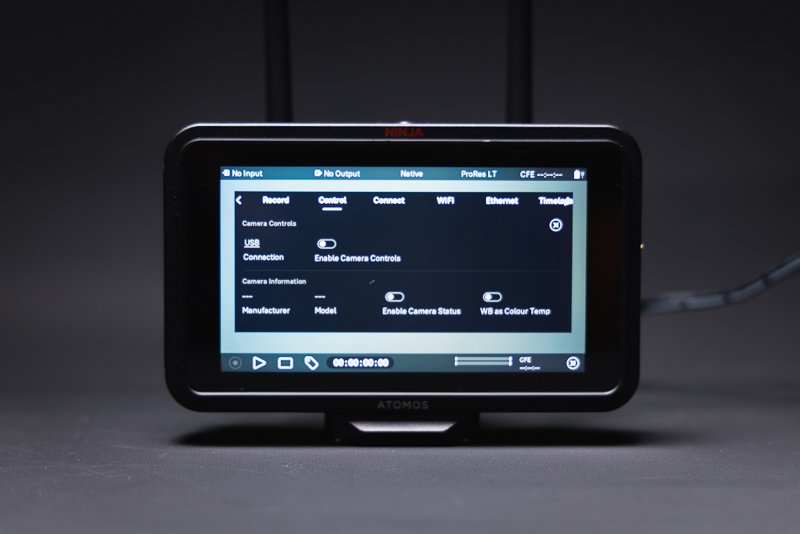
More professional based users will also love the range of Codecs on offer in the TX GO. As standard, it offers Apple ProRes/RAW up to 6Kp30, Avid DNx, H.265 and NDI 6 HX3 TX & RX - so you are basically covered for all but the most demanding of scenarios. Atomos have always offered user upgradable packages that can be purchased via their website - but for me and many other users, the included line-up of codecs is more than enough for most workflows.
Finally, the TX range offers the ability to utilize WiFi cloud compatibility for both streaming and back-up. You even get 20gb of cloud storage which is crazy when you think about it - I only really use a Ninja because of the ‘off-camera’ recording capabilities and now I can send files to the cloud for additional piece-of-mind. Depending on your personal use case, this is an amazing addition.
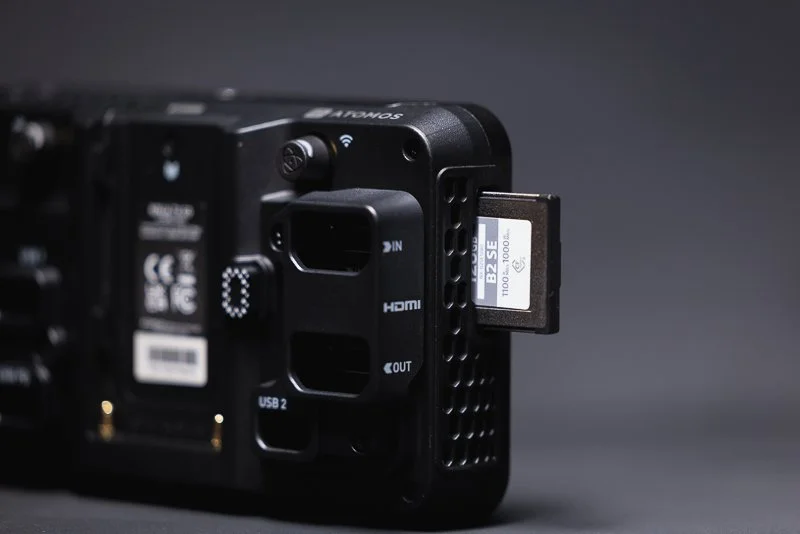
🔎 QUICK LOOK PRO’S AND CONS
PROs
Exceptionally good touchscreen responsiveness and accuracy
1500nit monitor brightness is great for outdoor use
Camera Control is a brilliant feature (with compatible cameras)
The addition of CFexpress Type-B is more than welcome
Atomos are generally very committed to firmware updates offering new features
CONS
Fan noise might be an issue to some users in extreme circumstances
Camera Control is not compatible with all cameras (not necessarily Atomos’ fault!)
Price point is certainly higher than other options if you don’t need/can’t use all of the features
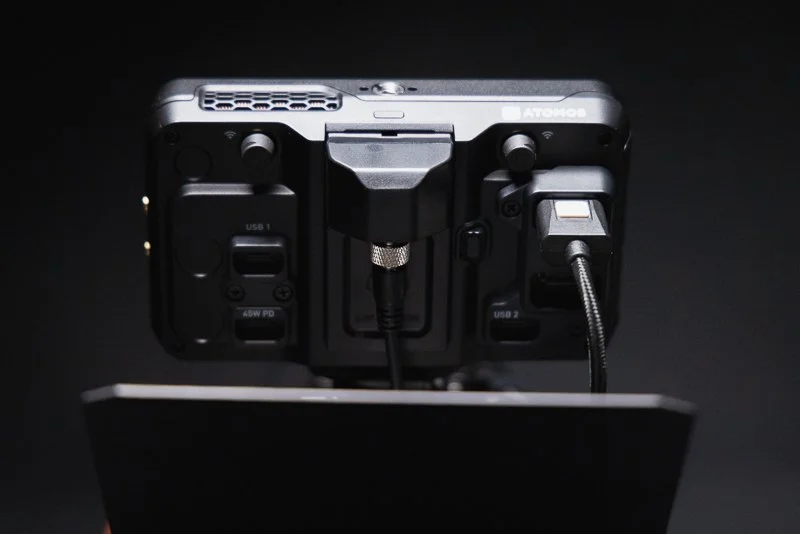
☝️ Is it worth the upgrade if I own a Ninja V?
For current owners of the Ninja V, the TX Go causes you a bit of headache. The TX GO is similar enough to previous generations that you might not see the point in upgrading. However, the addition of Camera Control (for compatible cameras), the additional connectivity features, improved brightness/fan and CFexpress Type-B - all make this a compelling option and one that I would class as a worthy upgrade.
Source: Pro Moviemaker via YouTube
One thing that I really admire with Atomos is their on-going commitment to firmware updates and a continual striving to improve their products. The difference with the TX range is that the physical upgrades make them a justifiable purchase. Knowing that Atomos are committed to the longevity of their products means that the TX range will be well supported for the next few years at least so investing now in those additional physical benefits, seems like a ‘no-brainer’.
✅ Final Thoughts…
I started this post by suggesting that some things just can’t be improved upon. However, Atomos clearly pay no attention to that idea and have strived to make an already great product range even better! Even though the price point of the TX range might be slightly out of reach for some, the value of what the TX GO delivers compared to some monitors more than double its price can not be understated - it really is a powerhouse of a portable monitor.
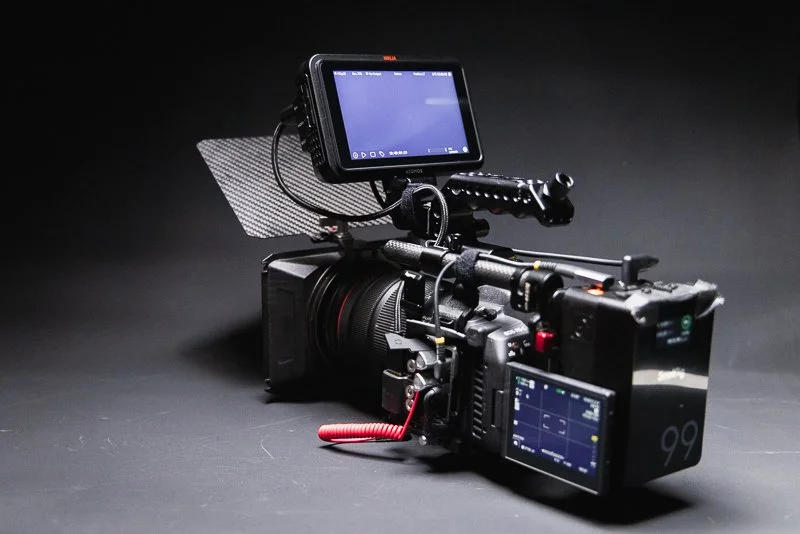
The Ninja V has been the go-to choice for many thousands of creatives over the years and with this latest refresh, it seems the TX GO will serve many thousands more, long into the future. With all that said, if you don’t need all of the bells & whistles, Atomos has such depth in their range of products, it’s difficult to believe that they wouldn’t have something that fits your needs. Leave a comment below if this little monitor does the job for you or if you think it’s missing something?
🔴 FAQ’s
-
There are multiple version in the TX range but the TX Go version that I tested was priced at £720 at the time of purchase. This included the additional ‘Creator Kit’.
-
This will completely depend on your own use case but if you can make use of the Camera Control feature, than I would say Yes! The additional upgrades are well worth the price but if you own a ninja V and it’s doing everything you need it too, then maybe hold out for a sale!
-
Honestly, I could see the TX Go being used on all but the most high-end of productions. You will know if it fits your needs but for the vast majority of users, it will get the job done.
-
For me, the price feels high but there are so many features here, it’s difficult to complain. I would love the fan to be silent and I wish the body was metal, but then there are always compromises. I’d also love to see the ‘frame’ of the body covered in mounting options so it feels a bit more adaptable.
-
There are certainly more expensive options out there and there are definitely users that will ‘need’ an alternative option (such as RED owners choosing to use RED monitors etc.) However, ‘better’ is very subjective in this case and I think you would be hard pushed to find a better value proposition for the features on offer.
📸 Are you a photography/videography brand looking to showcase you products? Take a look at my Media Pack and Contact Me to discuss how we can collaborate on a sponsored review.
Posts you might also like…
About the Author - Ross Jukes is a professional Photographer and Videographer with over a decade of experience. Working in both Digital and Analogue formats, Ross has worked with international clients, had his worked published numerous times and exhibited his work extensively. With a passion for all things photographic, Ross combines his experience, enthusiasm and dedication to his art form to create engaging and educational content for the photographic community.
Disclaimer: All links to Amazon UK/US are affiliated links - you will still pay the same price but I will receive a small commission for providing the link. All information provided in this blog is intended either for educational or entertainment purposes and is accurate to the best knowledge of the author. However, further research/professional advice should be sought before making purchases/implementing any advice given and no responsibility is taken by the author or parties mentioned here within.

Logitech MX Master 4 Mouse - the Porsche 911 of mice!
Writing product reviews is actually more difficult than most people think, in particular when that product is something that a lot of people use on a daily basis and tend not to make really in-depth purchasing decisions about, like buying a mouse for your computer. However, even the most mundane products can be exciting in the right hands and MX Master 4 is certainly one of those! Let me explain why it is so special and indulge me as I compare this little chunk of plastic to a Porsche 911!
Writing product reviews is actually more difficult than most people think, in particular when that product is something that a lot of people use on a daily basis and tend not to make really in-depth purchasing decisions about, like buying a mouse for your computer. However, even the most mundane products can be exciting in the right hands and MX Master 4 is certainly one of those! Let me explain why it is so special and indulge me as I compare this little chunk of plastic to a Porsche 911!
❤️ PLEASE NOTE - No AI was used to make this article. It is my own work based on my experiences and created in my own time. This item was purchased with my own money and is not in collaboration with Logitech. If you would like to support the blog, please consider making a small donation.
🔨 Build Quality
Out of the box, the MX Master 4 doesn’t feel a whole lot different to the previous iterations. I have been using the MX Master series for years, this being my fourth one now and instantly, your hand sculpts to the familiar layout - no new learning curve here. The mouse feels robust enough and is made from a healthy mix of recycled plastics. Like previous versions, longevity doesn’t feel like it will be an issue which is on par with what you would expect from a premium product like this.
Logitech have reformulated some of the ‘touch points’ of the mouse with improved stain resistance where your hand rests on the mouse and subtly transparent main buttons have a near silent click but feel incredibly satisfying to use. The attention to detail from Logitech on those touch points is very welcome. One of my main complaints of previous versions is that they develop a slightly greasy looking sheen on the main contact points. Logitech seems to have addressed this with their choice of new materials but in truth, time will tell how well it holds up.
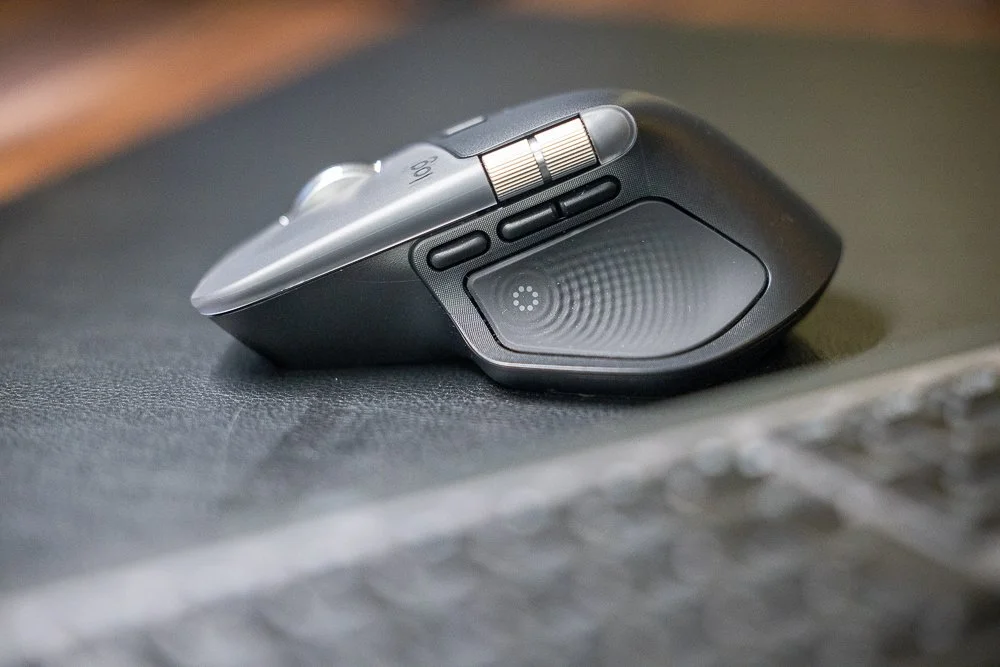
The additional customisable buttons and scroll wheels all feel very similar to the previous version which is actually great to see. Logitech’s ‘MagSpeed’ scroll wheel is probably the best in the business and as I will be repeating a lot throughout this review - if it isn’t broken, don’t fix it. Elsewhere, battery life and connectivity seem to be solid, most likely improved from previous versions but this obviously depends on personal usage. I am using the Mac version of the MX Master 4 and it connected quickly to my Mac and no issues since.
Source: Youtube - Oliur / Ultralinx
😎 Getting the most from the Master
OK, so this is where things get interesting (no, really!) but first let me cover a few basics. In it’s most fundamental use case, for connecting to devices and pointing at things - this mouse is already excellent. It is comfortable to use, feels great in the hand and does everything you would expect a mouse to do. Honestly, how much can ‘Mouse technology’ really change? Well, turns out, quite a bit… Logitech has added a few features that kind of make you think ‘why has nobody else done this before’... I’ll start with haptic feedback.

Ok, so in essence most mice have some kind of feedback - afterall, that satisfying click of the mouse button or scroll pad does indicate that a button has been pressed and therefore an action has been initiated. However, Logitech has taken this much further. The first time you turn the mouse you get a satisfying buzz - and no I’m really not that excited about using mice, you genuinely get a little buzz, similar to that of a mobile phone receiving a call. It feels a little odd to start but it very quickly becomes an incredibly sensory thing that just adds to the user experience.
I must admit, I turned the feedback down a little as I thought the original factory setting was a bit much but you very quickly get used to the subtle buzz of actions being taken. The haptics main purpose is to support Logitech’s new ‘Action Rings’, the second main feature of the mouse and one that I think will have most users excited about upgrading to this device.
🖥️ Customisation and Action Rings
If you are looking to buy this mouse for any particular feature, it really should be the Action Rings. In its most basic sense, the Action RIngs are just customisable shortcuts that reveal a beautifully designed onscreen overlay with popular actions. The Actions can be programmed to specific software with Photoshop and Lightroom being supported straight out of the box. However, the actions can be customised so most shortcuts can be assigned.
Even whilst navigating the general OS of your computer, a quick tap on the Action key reveals a set of thoughtful actions and the aforementioned haptic feedback makes scrolling the actions feel immersive and gives you a better sense of connection with your device - sounds weird but once you try it, it becomes a little addictive.
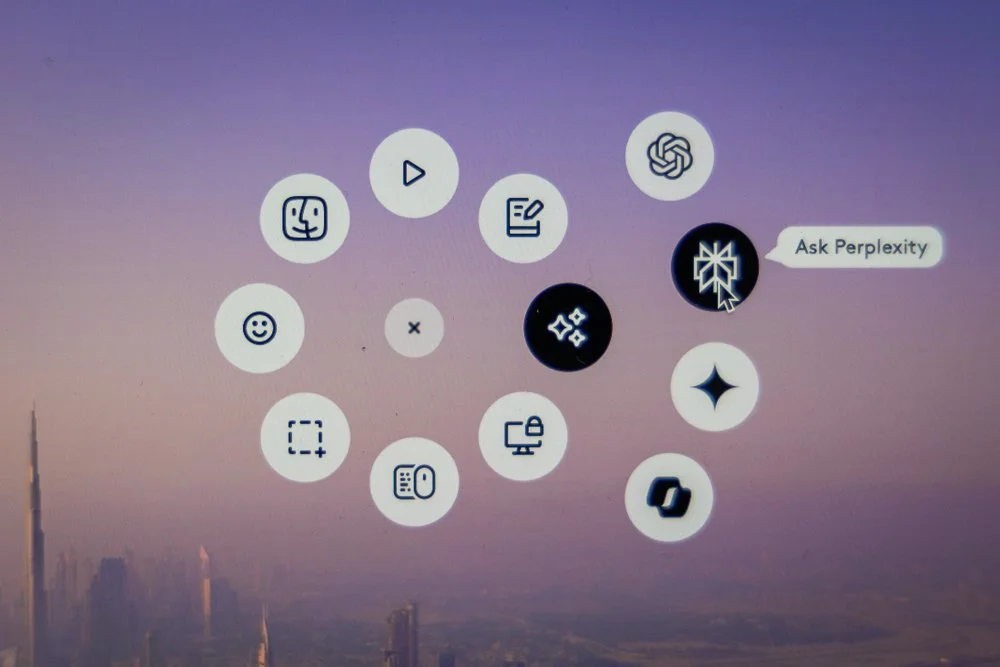
When I first saw this feature advertised, I thought it sounded a little gimmicky - in particular as I already have a lot of shortcuts set up on my Mac and for editing, I already use (and love) the TourBox - so why would I need to add even more confusion to my editing process? Well, it turns out that I can now pretty much edit anything I need to with one hand!
This might sound like a somewhat shallow win, but in truth, it is a timesaving masterpiece and even though I still insist on using the TourBox for some actions (who doesn’t like a ‘twiddly knob’!) I could easily carry out most actions on the MX Master 4 and when travelling, I really only need to carry the mouse now.
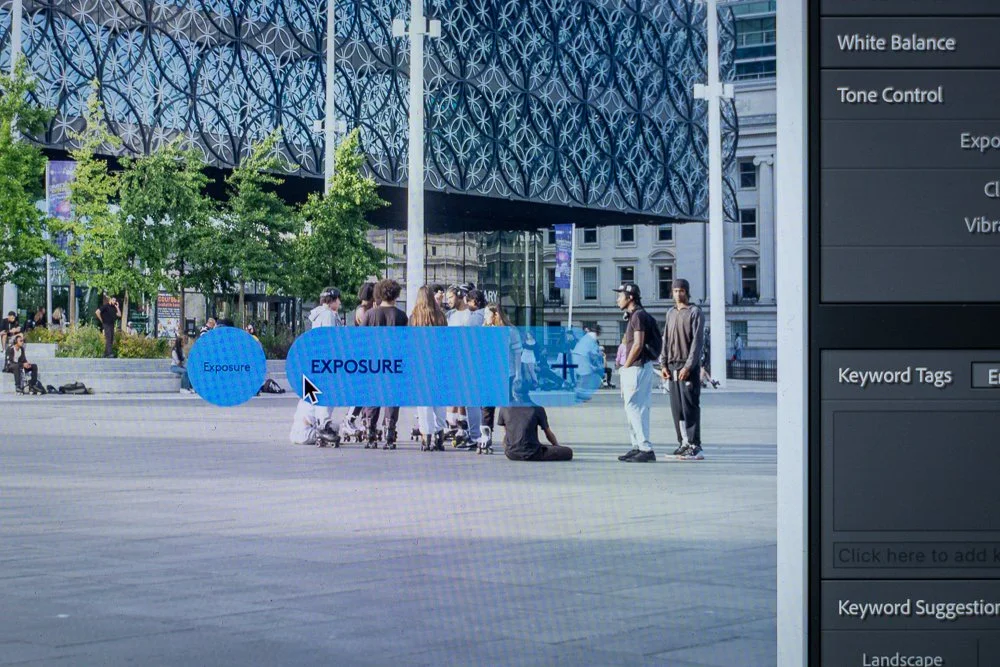
For both Lightroom and Final Cut - my two main pieces of editing software, a combination of customised buttons and the new Action Ring get me through 95% of my main editing actions. I only really use the keyboard or TourBox for very specific tasks that are so ingrained in my personal workflow that I can’t really seem to change. For most users (and photo and video editors, I’m really talking to you here!) the MX Master 4 is by far the most useful mouse… No actually, the most useful customisable user interface that I have ever used… I’m sure professional video editors using multiple thousands of pounds worth of editing desks might have a different experience - but for the rest of us, this little mouse is a brilliant addition!
🤔 upgrade from previous versions?
I would guess that the vast majority of photo/video editors already have a previous version of the MX Master series. So it begs the question, should you upgrade? In short, Yes! My personal experience is that the physical product feels very similar in most aspects to the previous version. This is a good thing, I love the Master 3 and if Logitech has decided to make massive changes, putting buttons in different places and changing the ergonomics - I genuinely wouldn’t even have considered changing my mouse - it’s only because it is so familiar that I thought about upgrading.

Where the real value lies is in the haptic feedback and the Action Rings. It’s clear that Logitech will be investing into this going forwards and with the additional software support and customisation options - I can see the Action Rings becoming a massively beneficial addition to most users - justifying the upgrade even from the most recent generations of this series. It really is one of those things that once you try it, you can't understand why it wasn’t there in the first place.
Source: Youtube - Cameron Dougherty Tech
🔎 QUICK LOOK PRO’S AND CONS
PRO’s
Excellent ergonomics and comfort
Haptic feedback feels like a genuine innovation and something we will see more of
Incredible customisation of buttons and the ‘Action Ring’
Solid battery life and connectivity
Top choice for both professional use and normal day-to-day opperations
CON’S
Definitely cheaper options out there…
The Action Rings usage in apps like Lightroom can be a bit fiddly
The MX Master 3/3S are both great choices if you don’t need the Action Rings

✅ Final THoughts
I started by comparing the MX Master 4 to the Porsche 911 - I’m sure a lot of you will have already worked out the relevance of this but let me explain… Porsche is often accused of being ‘lazy’ when it comes to design. The 911 shape hasn’t really changed that much in over 60 years! At first glance, the MX series is a lot like that - you might be scratching your head as to what has actually changed from the previous version! But like with iPhones, toasters, McDonald’s menu (yeah I’m clutching at straws!) Sometimes simplicity is the key to its success…

Continuing the 911 analogy, you can use the big Porsche to go to the shops and it will get you there and back just like any other car. What a lot of cars can’t do, is get you round the Nurburgring in lightning fast times and leave you with a smile on your face at the end of it! The MX Master 4 is the same… It can do all of the pointy clicky things any other mouse can do… But it also has the potential to save you hours of editing time and leave you with a smile on your face because now, you can spend that saved time on far more interesting things!
🔴 FAQ’s
-
The MX currently retails at around £120 (I’ve seen it at $110 in the US) but it does seem like there are fairly regular discounts and I would assume that this may also be a ‘Black Friday’ item when sales come around - check the latest prices on Amazon (affiliate link)
-
In short, Yes. The addition of the haptic feedback and action rings make it worth checking out and for the action rings alone, I would consider this worth the cost of the upgrade
-
Honestly, this is a very solid mouse for any user and the ActionRings make a lot of day-to-day actions very simple - but for photo and video editors, I think they will get he most additional benefits from this mouse.
-
I’m genuinely struggling to think of anything… It’s a great product that I can’t really see how it would be improved… But I said that about the previous product and Logitech proved me wrong with the MX4!
-
This is hugely down to personal preference - some may prefer a track pad or vertical mouse but that really is down to your own specific use case. For most people, I think the MX4 is probably the best mouse on the market right now though for photo/video editors, I’m still a big fan of the TourBox and the MX4 hasn’t completely replaced it… yet.
📸 Are you a photography/videography brand looking to showcase you products? Take a look at my Media Pack and Contact Me to discuss how we can collaborate on a sponsored review.
Posts you might also like…
About the Author - Ross Jukes is a professional Photographer and Videographer with over a decade of experience. Working in both Digital and Analogue formats, Ross has worked with international clients, had his worked published numerous times and exhibited his work extensively. With a passion for all things photographic, Ross combines his experience, enthusiasm and dedication to his art form to create engaging and educational content for the photographic community.
Disclaimer: All links to Amazon UK/US are affiliated links - you will still pay the same price but I will receive a small commission for providing the link. All information provided in this blog is intended either for educational or entertainment purposes and is accurate to the best knowledge of the author. However, further research/professional advice should be sought before making purchases/implementing any advice given and no responsibility is taken by the author or parties mentioned here within.