
DxO PhotoLab 3: The future of photo editing software?

The photography market moves quickly and innovation is at the heart of it. One company that is driving that change is DXO and with their latest offering - DxO PhotoLab 3 - they certainly mean business. The new software is feature rich and hosts a range of innovative updates.
Learning a new piece of software is always intimidating. However, DxO make it really simple as the layout is very intuitive and with two main working areas - ‘Photo Library’ & ‘Customise’ - it’s pretty easy to guess what each one does! The depth and the power of the tools on offer in PhotoLab 3 is pretty easy to understate - it certainly has you well catered for! Once again, all of the tools and controls are self-explanatory by their nature and allow you take full control over your edits.


So how did I find using the software and will I be switching from Lightroom? The software is fantastic and I really like the speed and the range of tools on offer! The optical corrections seems spot on, which is great as I am slowly moving over to the new Canon ‘RF’ glass. One of the clear highlights for me was the ‘U Point’ Local adjustment tools - they are super accurate and make local adjustments really simple and effective - a real joy to use.
The colour management tools are also excellent and for someone like me, that likes to really tweak colours, it has me well covered! The DxO ‘Smart Lighting’ tool is also very impressive. I usually like to take complete manual control over my editing but it was certainly fun to see the software do some of the ‘heavy lifting’ in terms of brightening dark patches etc.

So will I be switching from Lightroom - Honestly, if it wasn’t for the hundreds of thousands of images in multiple Lightroom catalogues, I would switch in a heartbeat! The DxO software just feels faster and more, well, modern. If I was starting out again or looking to improve on my software experience from a photography point-of-view, I really don’t think you can go fdar wrong with PhotoLab 3, go find out more at the link below!
VIDEO & REVIEW: DataColor Spyder X Elite - Monitor Calibrator

Buying a new Monitor Calibrator doesn’t have a particularly sexy ring to it - it’s probably not something that you are going to shout about all over social media. However, I honestly believe that it is one of the most important pieces of kit that a Photographer/Videographer can own.
Picture the scene, you’ve just landed your first gig with a huge international client, the shoot went well and you send the images off to their internal design house only to get laughed out of a job because the colours were ‘all over the place’! I know, I’ve been there and it’s not a place I want to go back to! Step in the ‘monitor calibrator’ - for the uninitiated, it is a device that reads varying hues, colours, tines etc. from your monitor and via the power of software, creates a new preset for your monitor that is absolutely spot on - no more laughy clients!
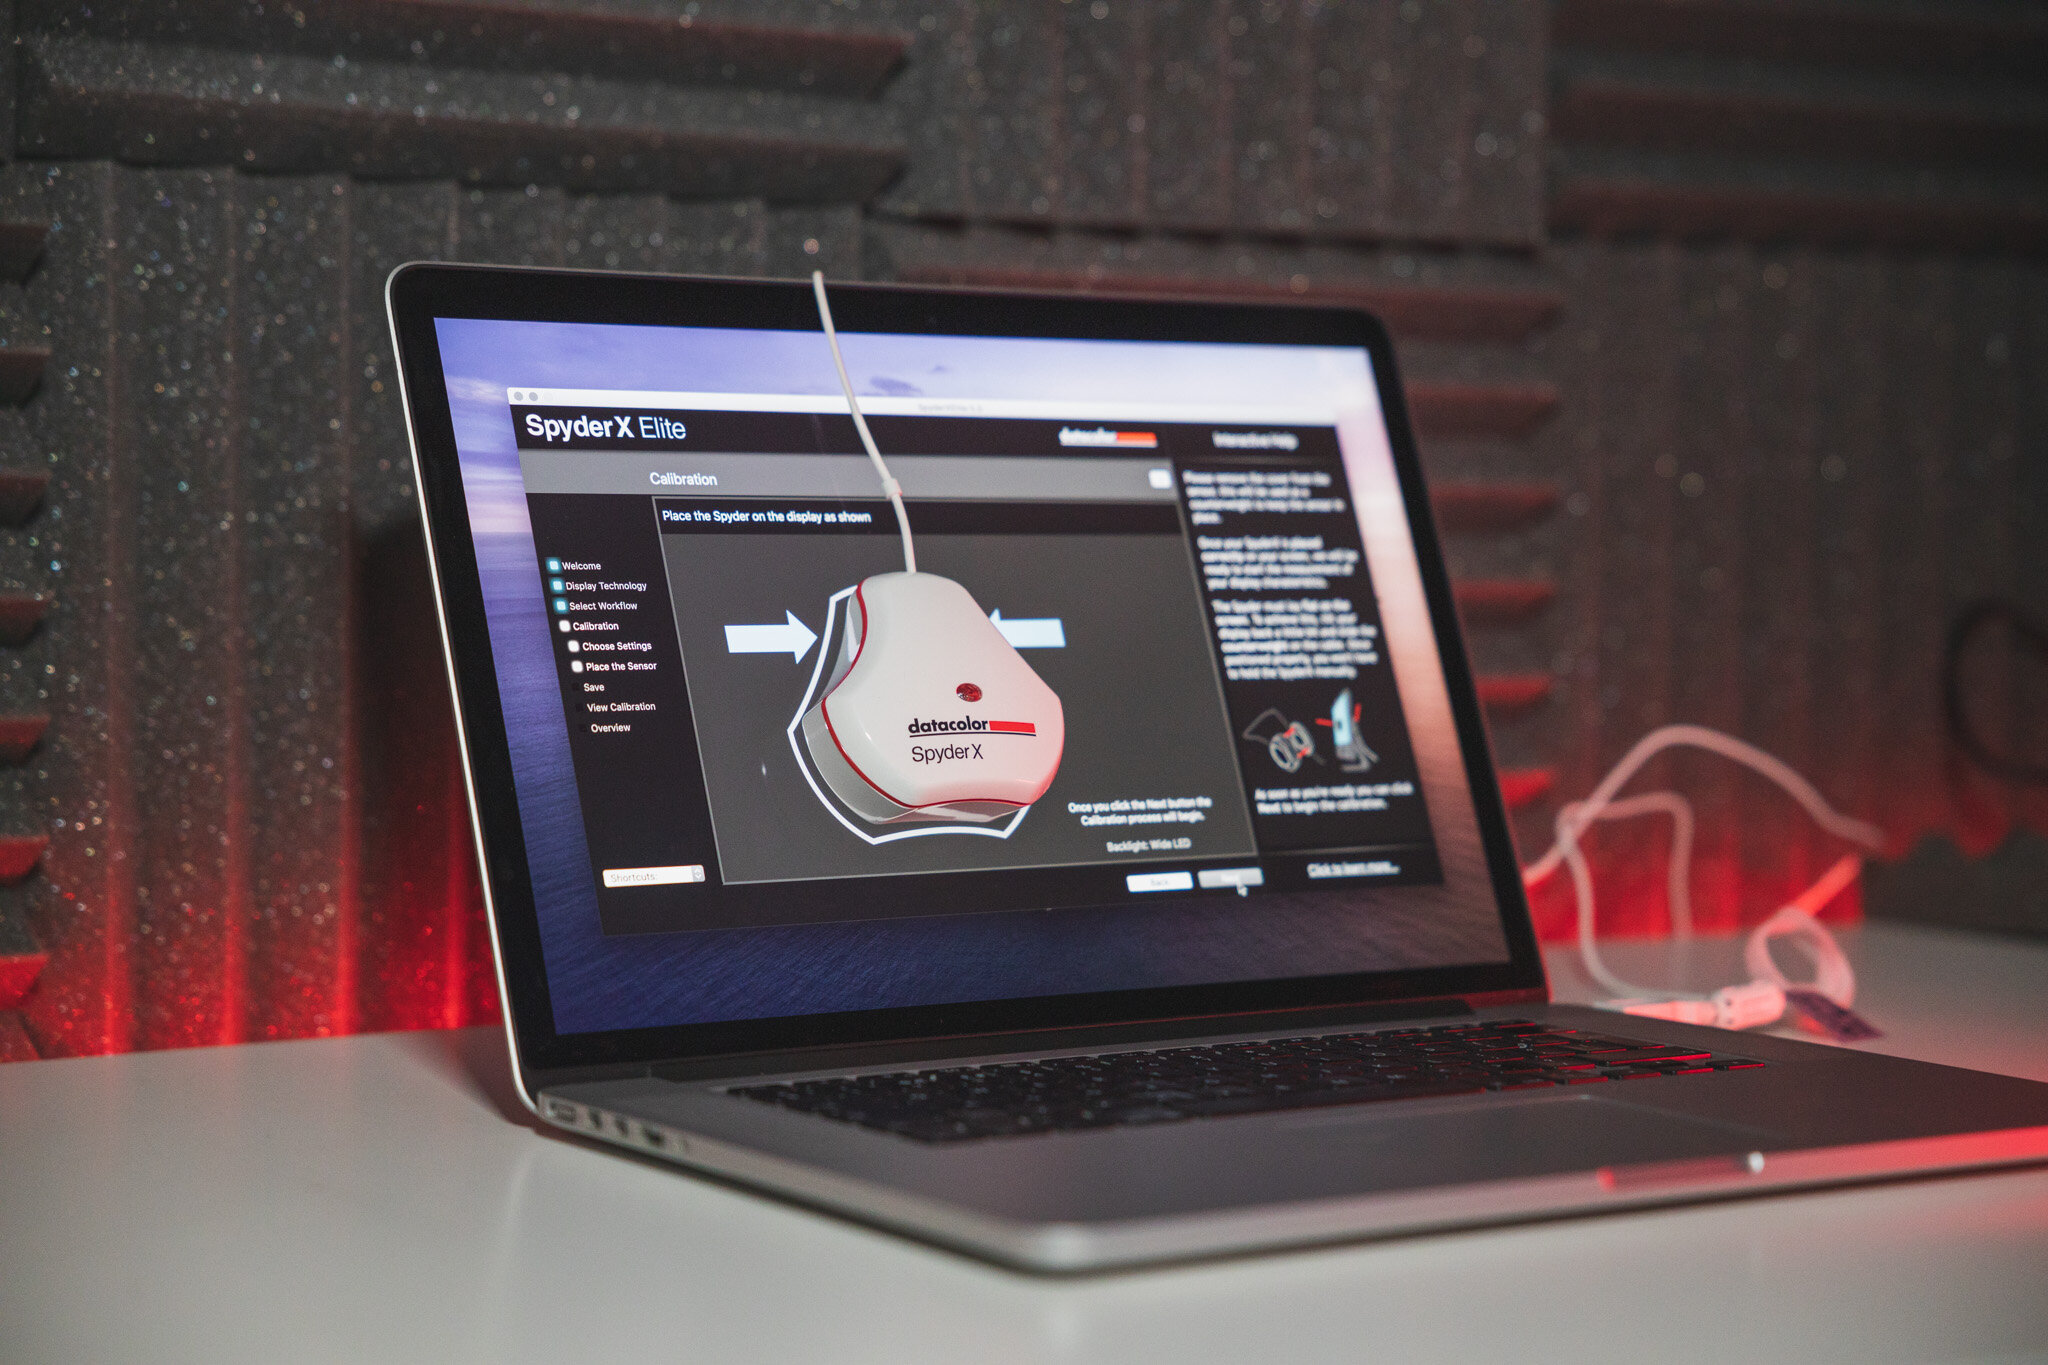
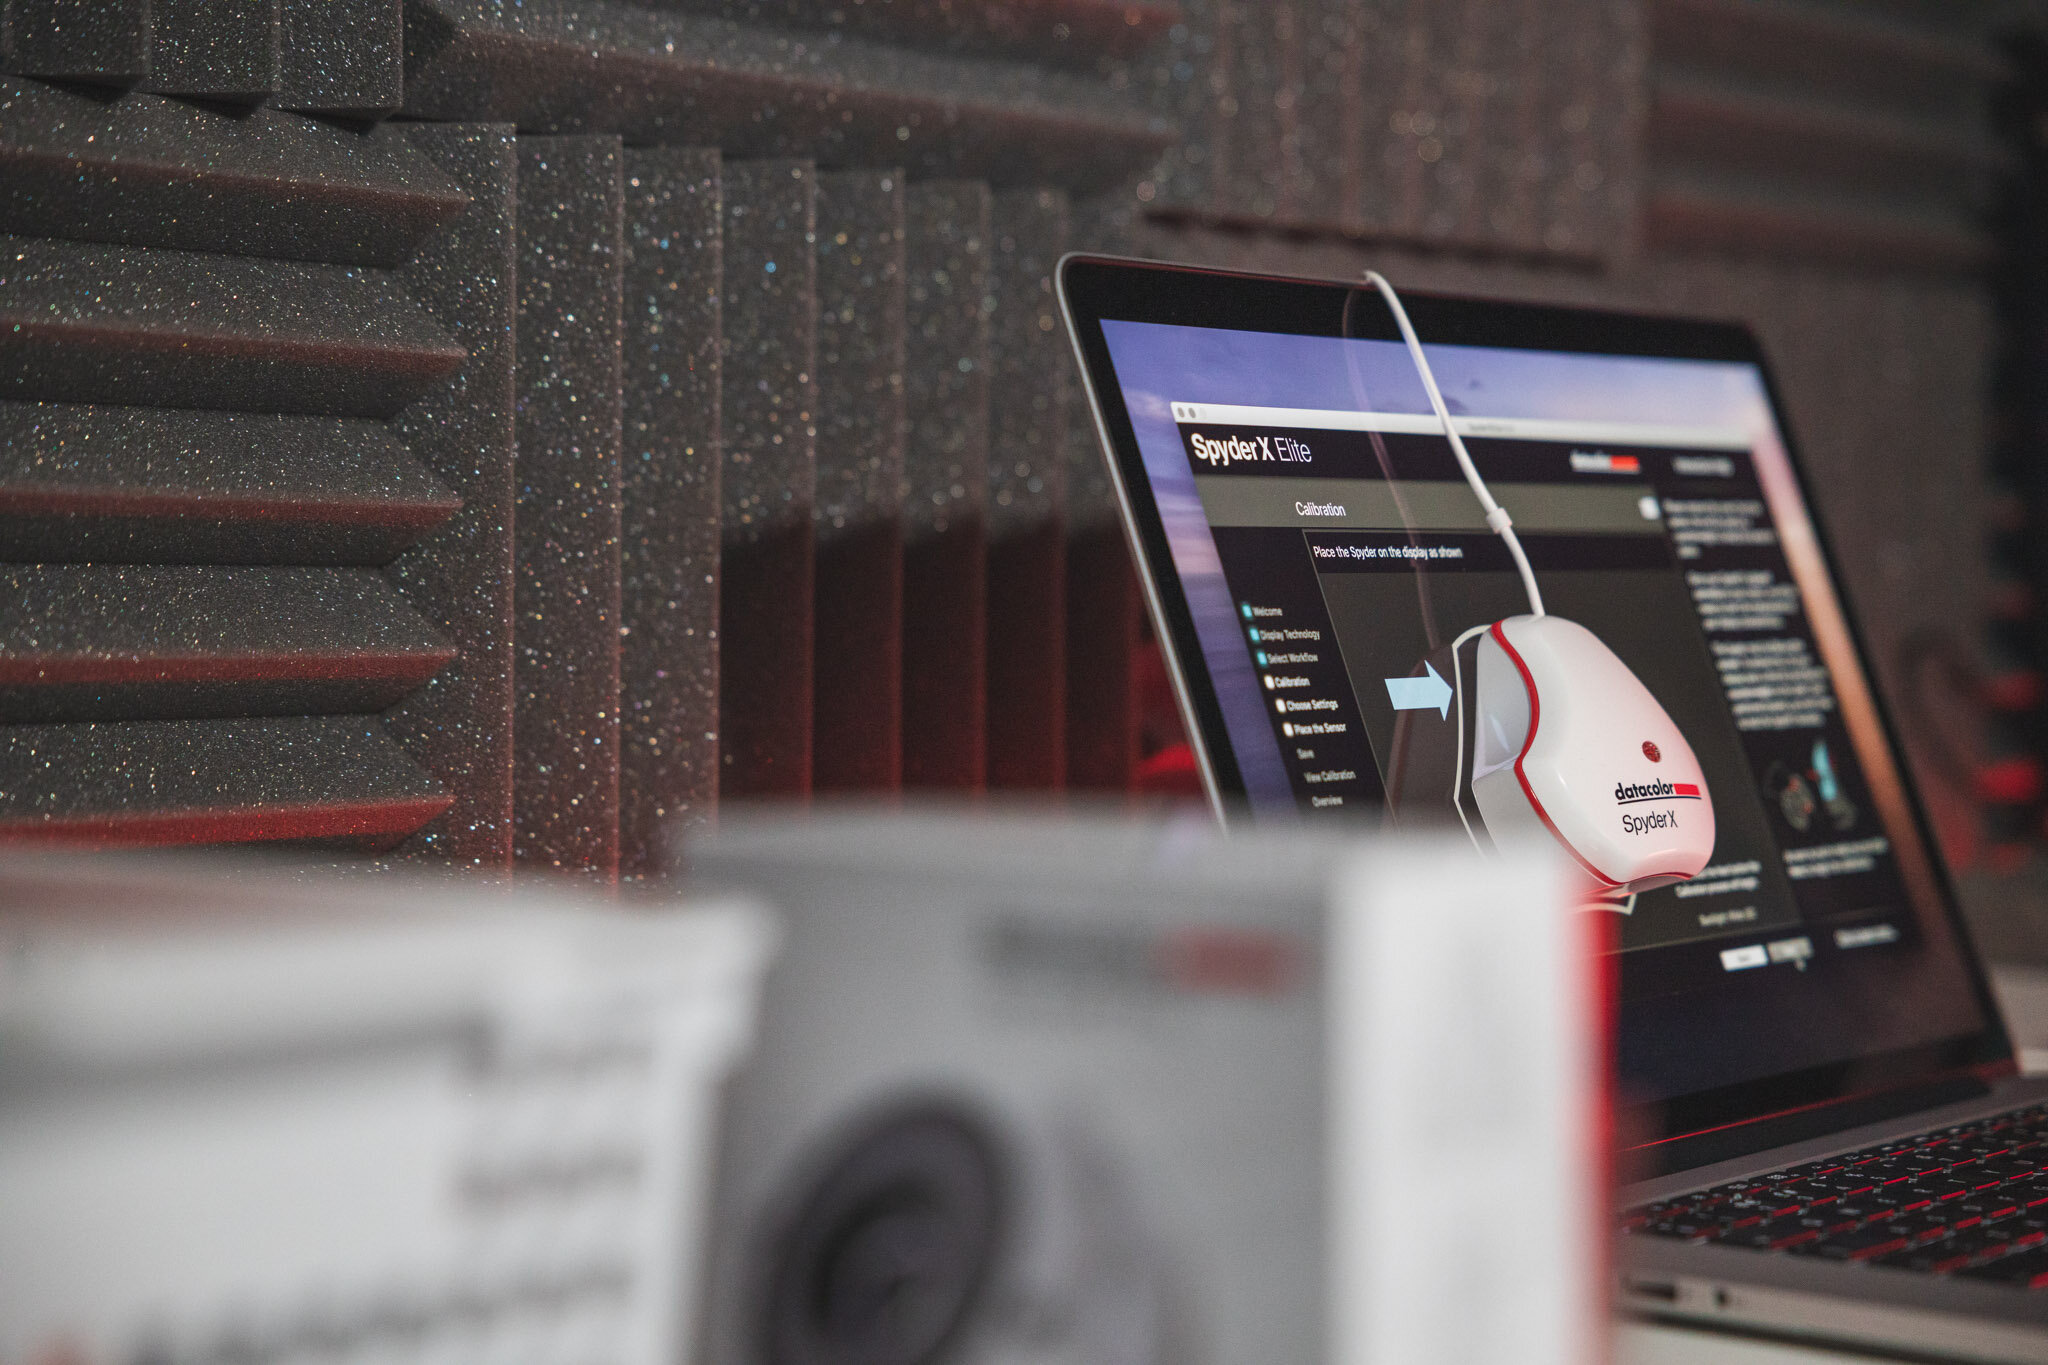


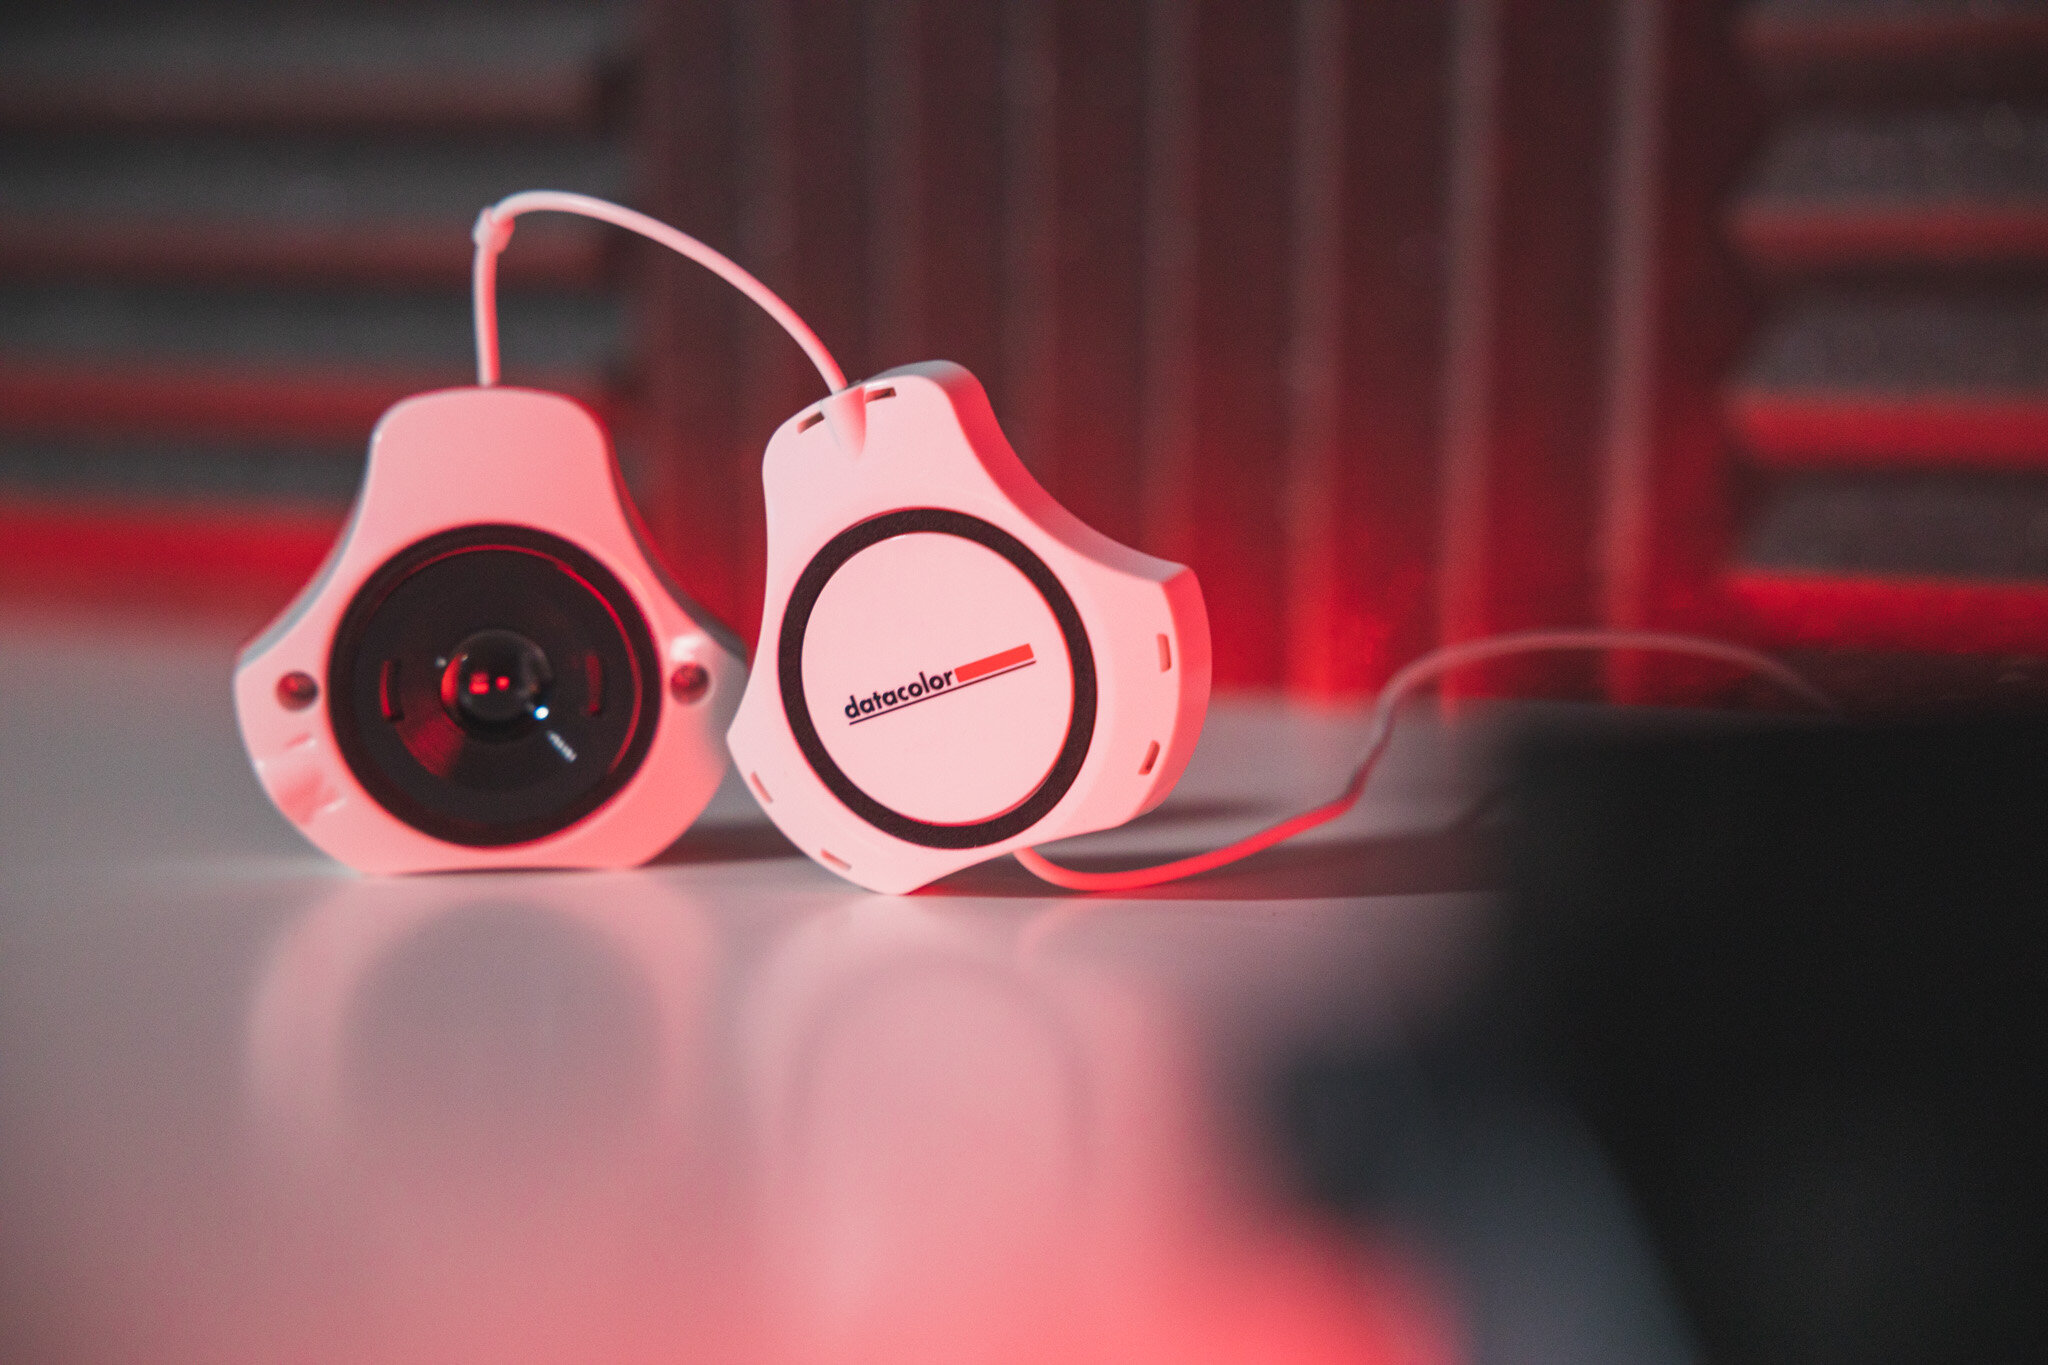
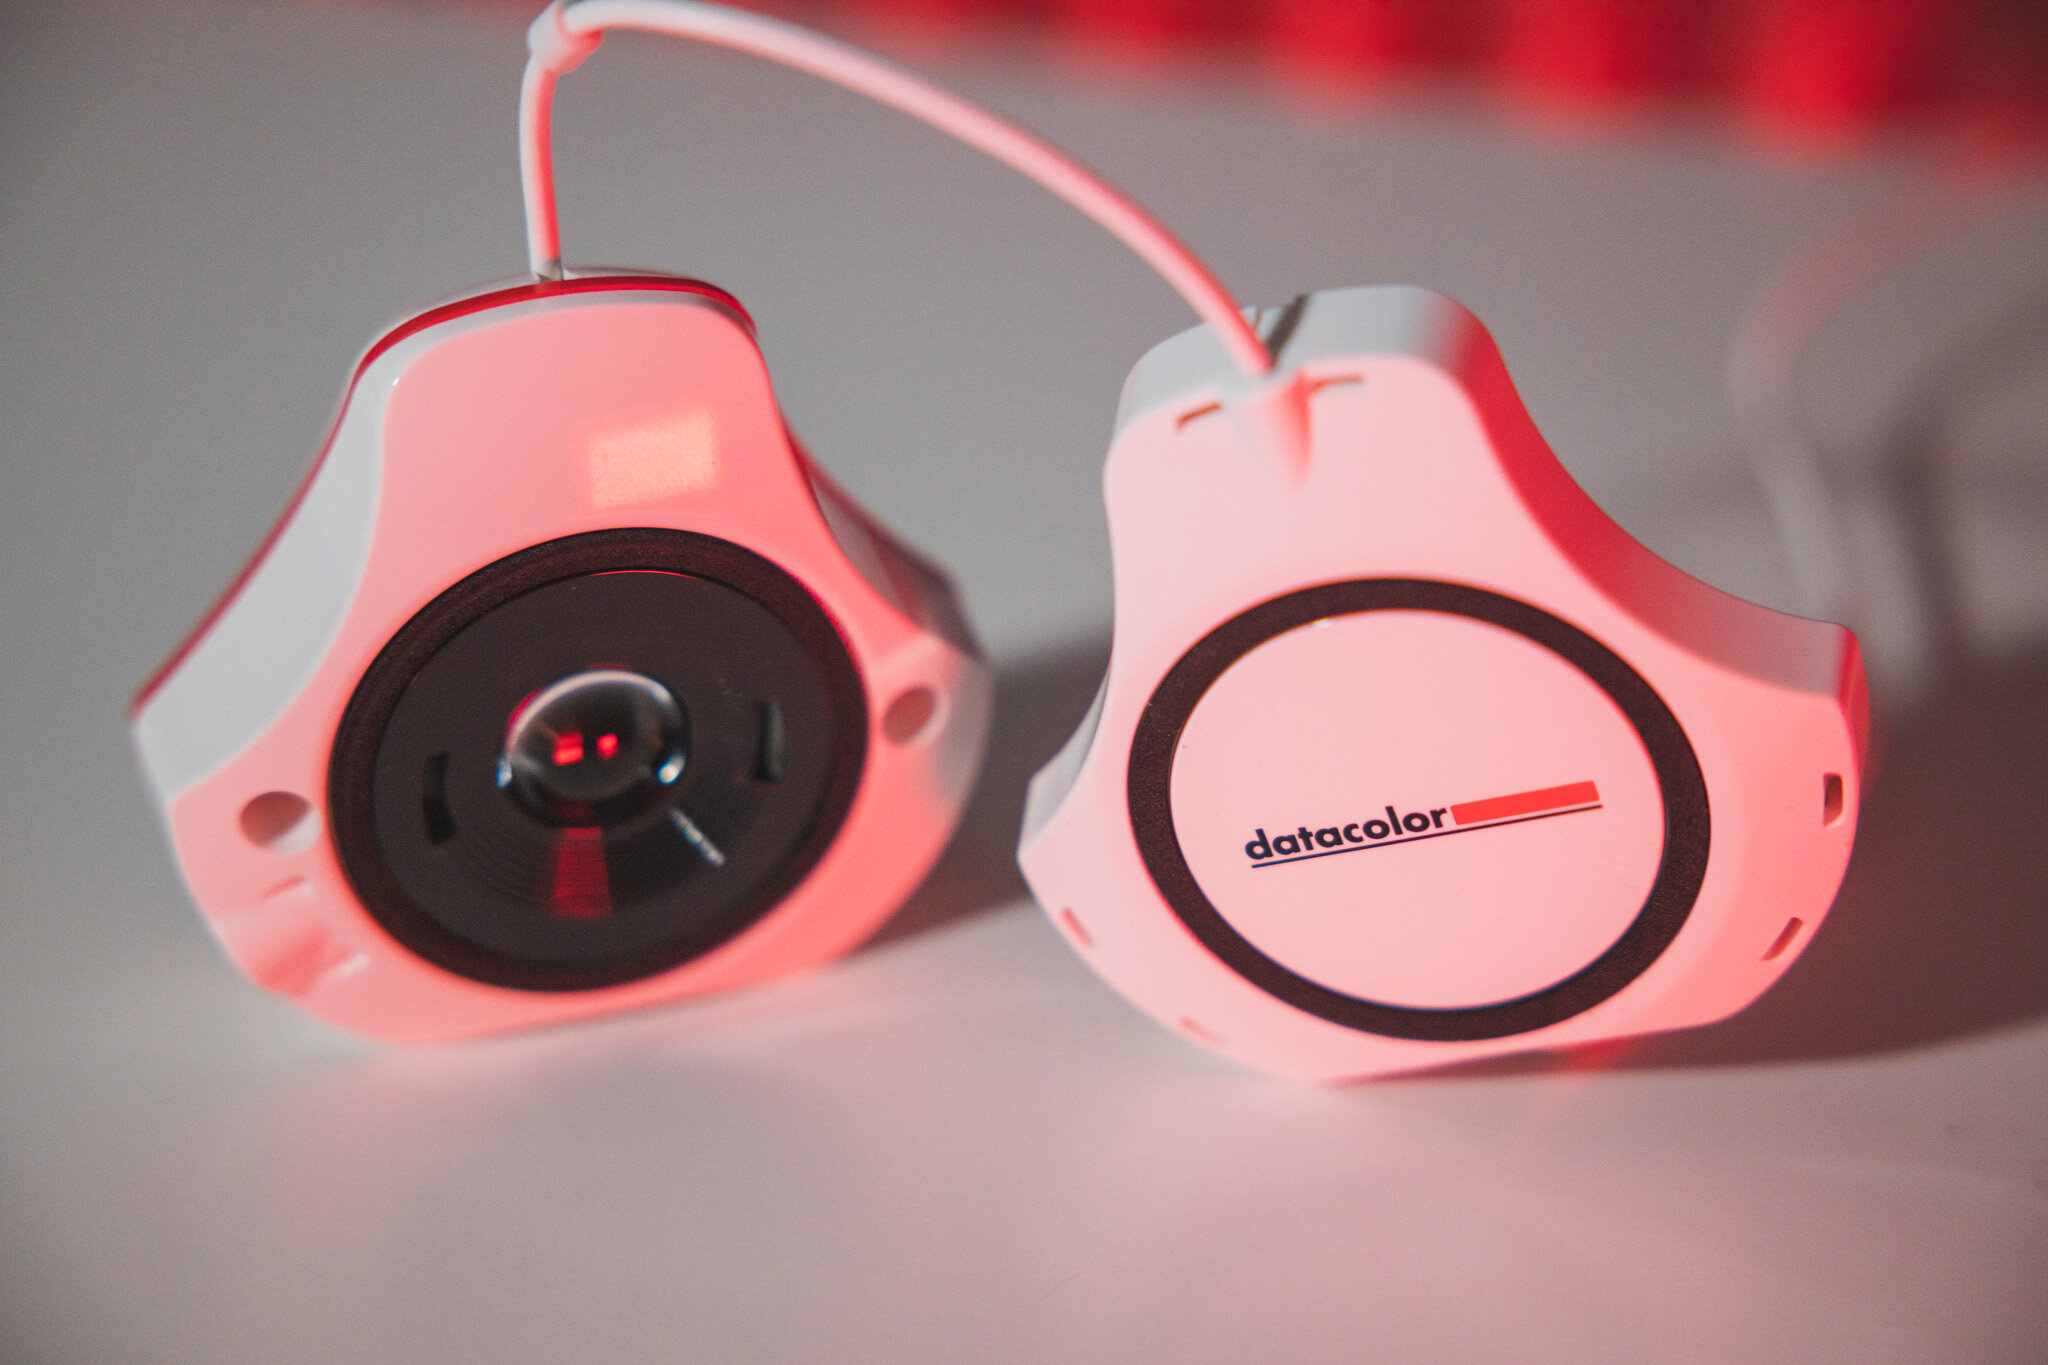
The Device
DataColor isn’t exactly new to this game, so you’d expect them to know how to build a decent device. I’m pleased to say, they certainly have! To anybody that has previously used a Spyder - the design will feel familiar. However, the beauty in the device lies in its speed, it is significantly faster than previous iterations which means there are now even fewer excuses for an uncalibrated monitor!
The unit is well made and feels like a quality product. I’m a fan of the white design with the red accent and as it is designed to sit by a monitor and take ambient light readings, it’s good that DataColor has taken their time with the design. The packaging is well made and the device comes with everything you need from a hardware point of view.


The Software
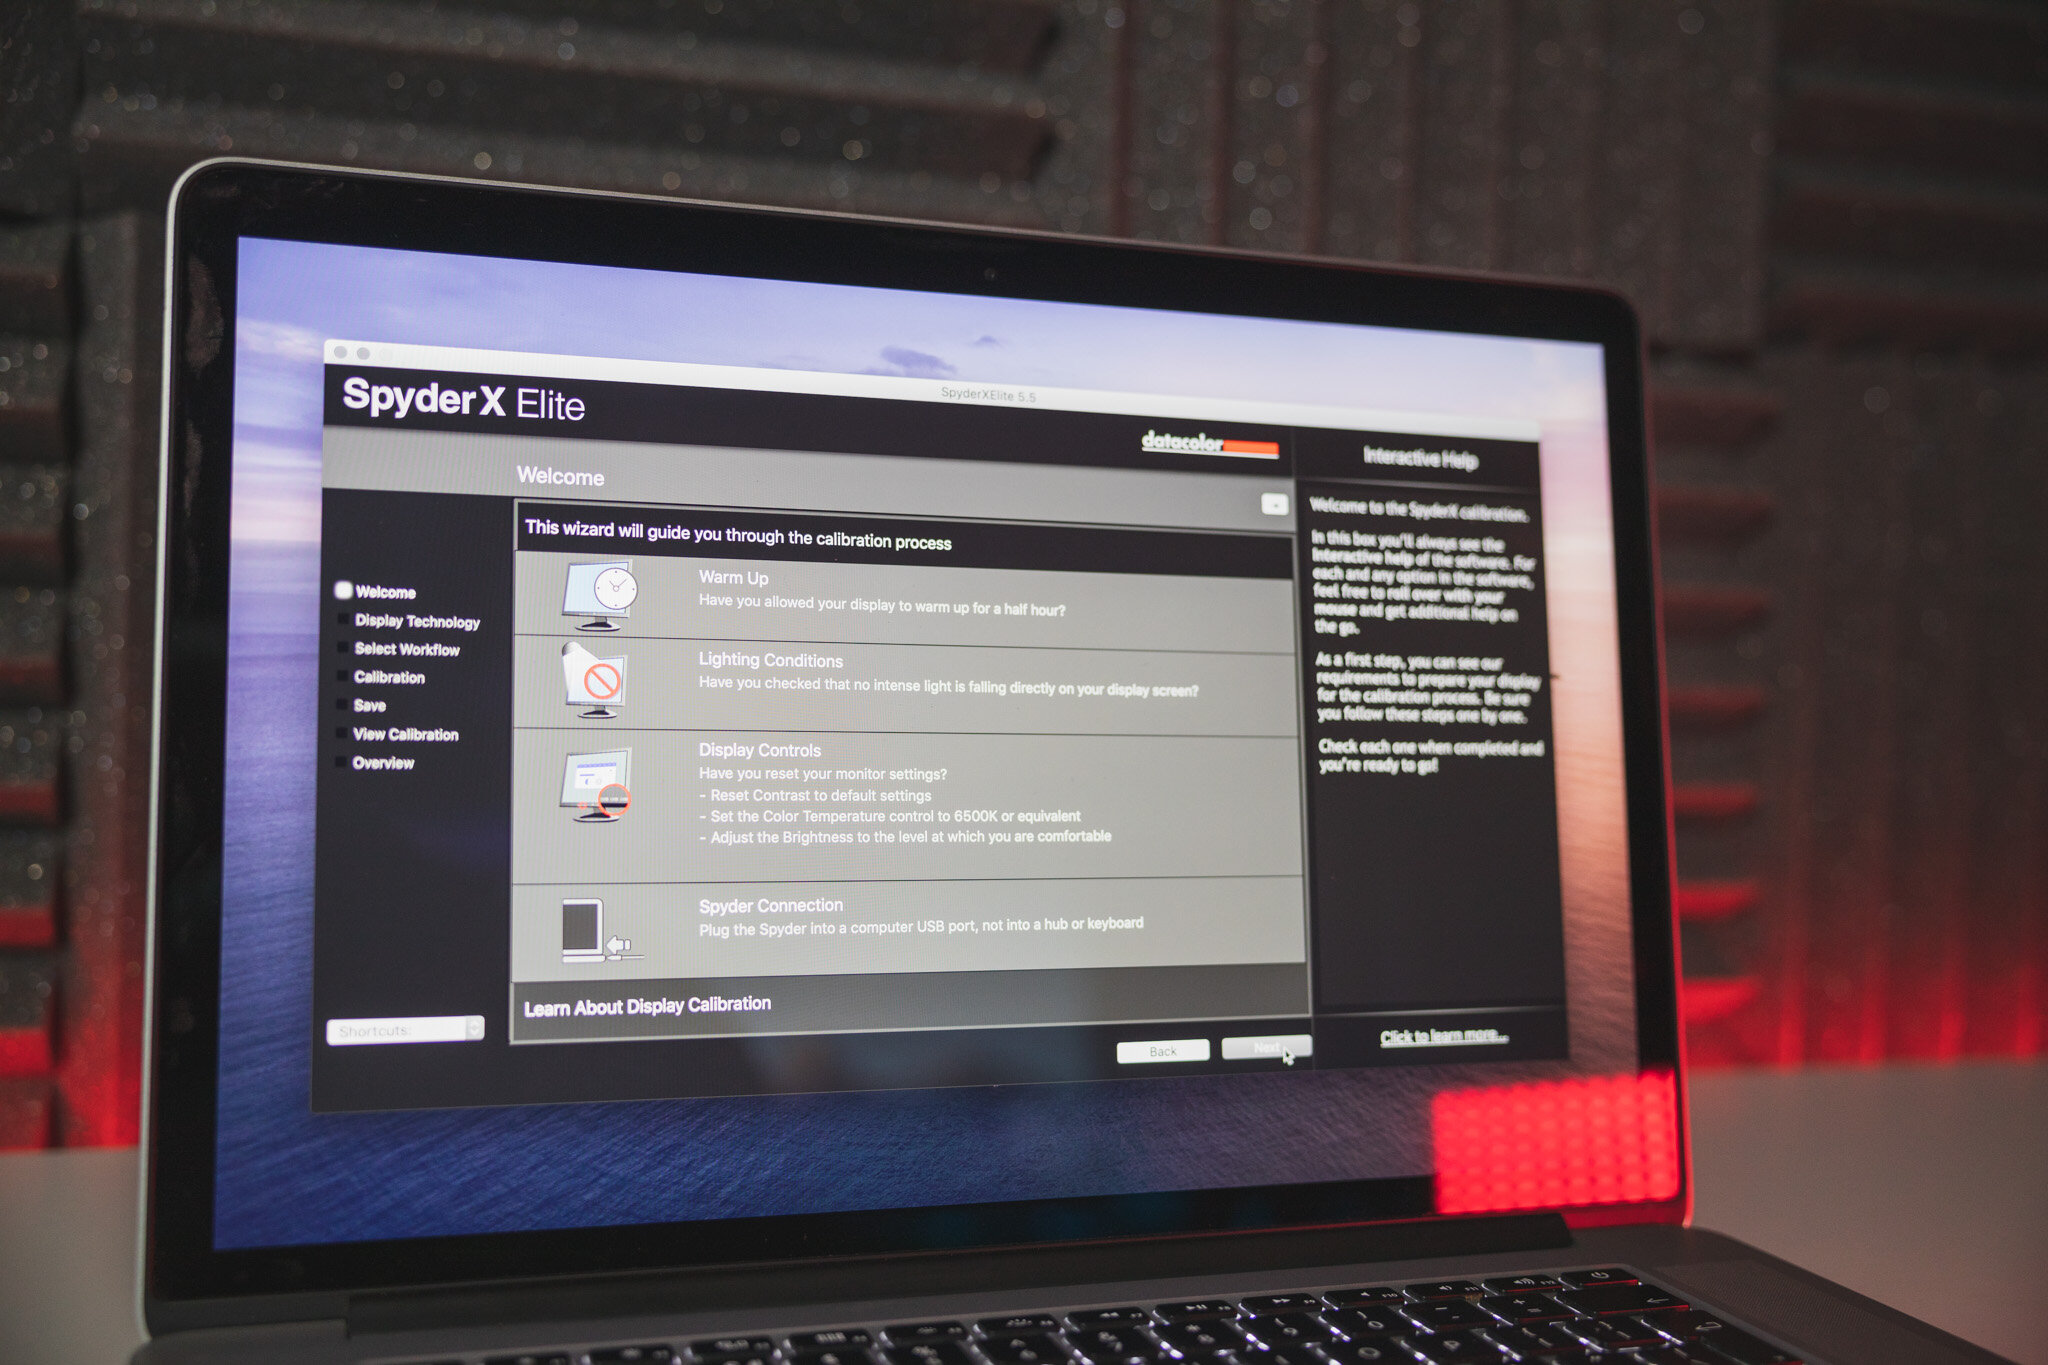
The hardware is only half the battle. DataColor’s software is really where the package comes into its own. I was using the ‘Elite’ version but having been a DataColor user for a number of years and I have always found their software to be intuitive and simple to follow - and there are no changes in that department!
The software is feature-packed and can cover everything from a basic calibration to a full, in-depth calibration, studio match for matching multiple monitors and can even calibrate other items such as projectors.
Using the software is so simple, I genuinely believe a child could do it. The software, even in ‘full’ calibration mode, has a simple walkthrough and regular prompts to explain what you need to do with both the software and the hardware. The on-screen prompts not only tell you when and where to place the calibrator - but it will also check you make and model of your monitor and to ask what controls you have over brightness and colour temperature.
Once you have followed the steps and the monitor has run its calibration process, you will be able to save a preset based on that current update. You will then be presented with a report based on the range of colour gamut the monitor has achieved - which is always useful. Finally, you get the option to see the difference the current calibration has made - which I personally find really useful.


The tip of the iceberg
To say that the Spyder X Elite can do more is an understatement! Depending on your needs, the options for calibration and the reporting that you receive at the end can go into way more detail. However, for the majority of us - the full calibration is simple yet deep enough to get great results.
The final verdict
The Spyder X Elite offers such a well-rounded set of calibration tools that there really is no excuse to have an un-calibrated monitor. It is not cheap at around £250 (prices will vary). However, I honestly think that if you are producing professional work for paying clients, it is essential that you are ensuring that you have highly accurate colours.
The improved speeds and ease of use make it a joy to use and calibrating your monitor is no longer an arduous task. Overall, I highly recommend the Spyder X Elite and believe it would make a great cornerstone of any amateur and professionals workflow.
Find out more at the DataColor website.
5 Tips for Photographers - Making the Most of Autumn

Ask any landscape photographer what their favourite season is and there is a pretty good chance they will say ‘autumn’. There is just something about the golden colours, the low sun (if we’re lucky) and the cool crisp mornings that makes everything better, and more importantly, more photogenic! So how can you make the most of autumn? Well, I have compiled five tips that will allow you to take your photography one step further this year.
1) Make the most of ‘Golden Hour’
Let me just get the most obvious tip out of the way first. By now, I’m sure most photographers understand the sense of shooting at ‘Golden Hour’ to make the most of either sunrise or sunset. During the summer months, sunrise in particular is a bit of a nightmare, as it can mean a 4.30am start or earlier. However, the sunrise times in autumn return to far more reasonable times making it much easier to be motivated to get out and shoot. It goes without saying that the thing we all love most about this time of year is the beautiful colours of the trees, but throw in the warm glow of sunrise/sunset and it can really elevate your images.
2) Get experimental!
Autumn is a fantastic time of year to shoot but many of the images can be lost in the crowd of very ‘similar’ images. This offers photographers a great opportunity to get experimental. Composition is one area that can be great to play with, shooting low to the ground and making the most of the blanket of leaves, for instance. One area that I will be looking to experiment with is ‘off-camera flash’. Having recently used the PocketWizard flash triggers, which I normally use for my automotive work, I see lots of potential for illuminating backlit subjects using off-camera flash whilst shooting into the sun. Hopefully, this will create some really unique images and offer a lot of versatility in terms of lighting subjects.

3) Make use of planning tools…
Planning at this time of year is essential, in particular as the weather can be very hit or miss so every opportunity needs to be grasped. There are several tools that I utilise to make sure I have planned ahead before going out to shoot. The most obvious is a decent weather app. I have used Yahoo Weather for years and found it to be fairly consistent. However, I have also used apps such as AccuWeather and Dark Sky. One particularly useful tool is the Photographers Ephemeris - which allows you to see the angle of sunlight at any particular time of day - essential for understanding what will be bathed in beautiful light and what will be in shade. Finally, I use Google Maps and in particular, Street View to explore different areas, especially if they are further afield so that I have a good idea what to expect when I get there!

4) Expand your editing skills
One of the best ways to take your images to the next level is to improve your editing skills. It’s always really important to capture a scene as well as possible ‘in camera’. However, it’s about what you do with it next that is equally important. Paying attention to the warmer hue’s and the saturation can really help your image ‘pop’. I do the majority of editing in Lightroom and will often make a few final adjustments in Photoshop. With regard to autumnal images in particular, I like to bring out the orange and red tones to make the most of the autumnal feeling. I also like to adjust the tone curve to add a softness to the image, but it is always better when Mother Nature adds a bit of mist! A great place to learn new skills is YouTube and I will be uploading new videos on my own YouTube channel soon.

5) Print your work…
This may not seem like the most obvious tip at first. However, by printing your photos, you are committing to an image and ensuring that you are producing your best possible work. I never feel that an image is complete until it is printed and you can see the fruits of your labour. It also helps you pre-visualise an image and make sure you are making the most of a scene and envisaging the final image, hanging on your wall. More importantly though, it is the warm fuzzy feeling you get weeks, months or years after taking an image you are particularly proud of and you happen to glance back at it and get that satisfied feeling. Autumnal images always feel the most sentimental to me and many others and therefore, make a great option for printing and hanging.

In conclusion, whether you’re experimenting with PocketWizards, planning a trip to the countryside using the Photographers Ephemeris or simply printing a few images you are particularly proud of -autumn is a great time of year to be out shooting! Good luck!
REVIEW: Skyreat ND/CPL Filters for DJI Osmo Pocket

The chances are, if you are reading a post like this, that you already know the importance of ND & CPL filters. However, if you’re still unsure, the common explanation of filters like this are ‘sunglasses for your camera’. Basically, they cut down the amount of light coming into your camera so that you can take more control over your settings. However, choosing the right filters can be a headache in itself, so hopefully, this review will take away some of that pain for you!

For a while now, I have been looking at filters for my DJI Osmo Pocket and I have been comparing many brands. However, Skyreat really appealed to me as they offer a great product and a fair price.The pack in particular that I decided on, covers all of the most common scenarios and as an added bonus, also contained the circular polarising filters (CPL) so it seemed like a no-brainer.

Starting with the ND filters, they come in ND4, ND8 and ND16, which should be great for all but the brightest of scenarios. The purpose of the ND filter in videography terms, is to cut down enough of the light coming into the camera so that you can match an appropriate shutter speed to your frame rate. The commonly used ‘180 degree rule’ means that if you have a frame rate of 25fps - your shutter speed should be 50, if you are shooting at 50fps, your shutter speed should be 100 - and so on.

As you will quickly ind, in particular when shooting at apertures such as f2 - like the Osmo Pocket, trying to bring that shutter speed down without and ND filter is almost impossible. However, the flexibility and range of these filters, has you covered. As an added bonus, they also come with the CPL equivalents, which allows you to cut glare from water and shiny surfaces and will make grass, trees, the sky all look more vibrant and add contrast in over-exposed scenarios. This is a huge bonus rather than having to go and buy a separate filter system.

Most important though, is the quality of the image when using filters such as these. I have not had any issues in this department and must add, that the build quality overall is excellent, in particular when considering the very reasonable price. I will be doing some demonstrations with the filters on my YouTube channel eventually, so you may wish to subscribe for more. Like I say though, the quality has been excellent and i have no complaints in that department.

The magnetic attachment is solid and Skyreat have thoughtfully provided a handy carry case and lens cloth, so you really have everything you need to take your pocket cinematography to the next level. Overall, it is a great kit to have and I highly recommend them.

if you wish to purchase a set, I have an affiliated link below which means I will recieve a tiny percentage of the sale price, but more importantly, it will not cost you anything additional!
Modern Nostalgia: A Backwards approach to Photography

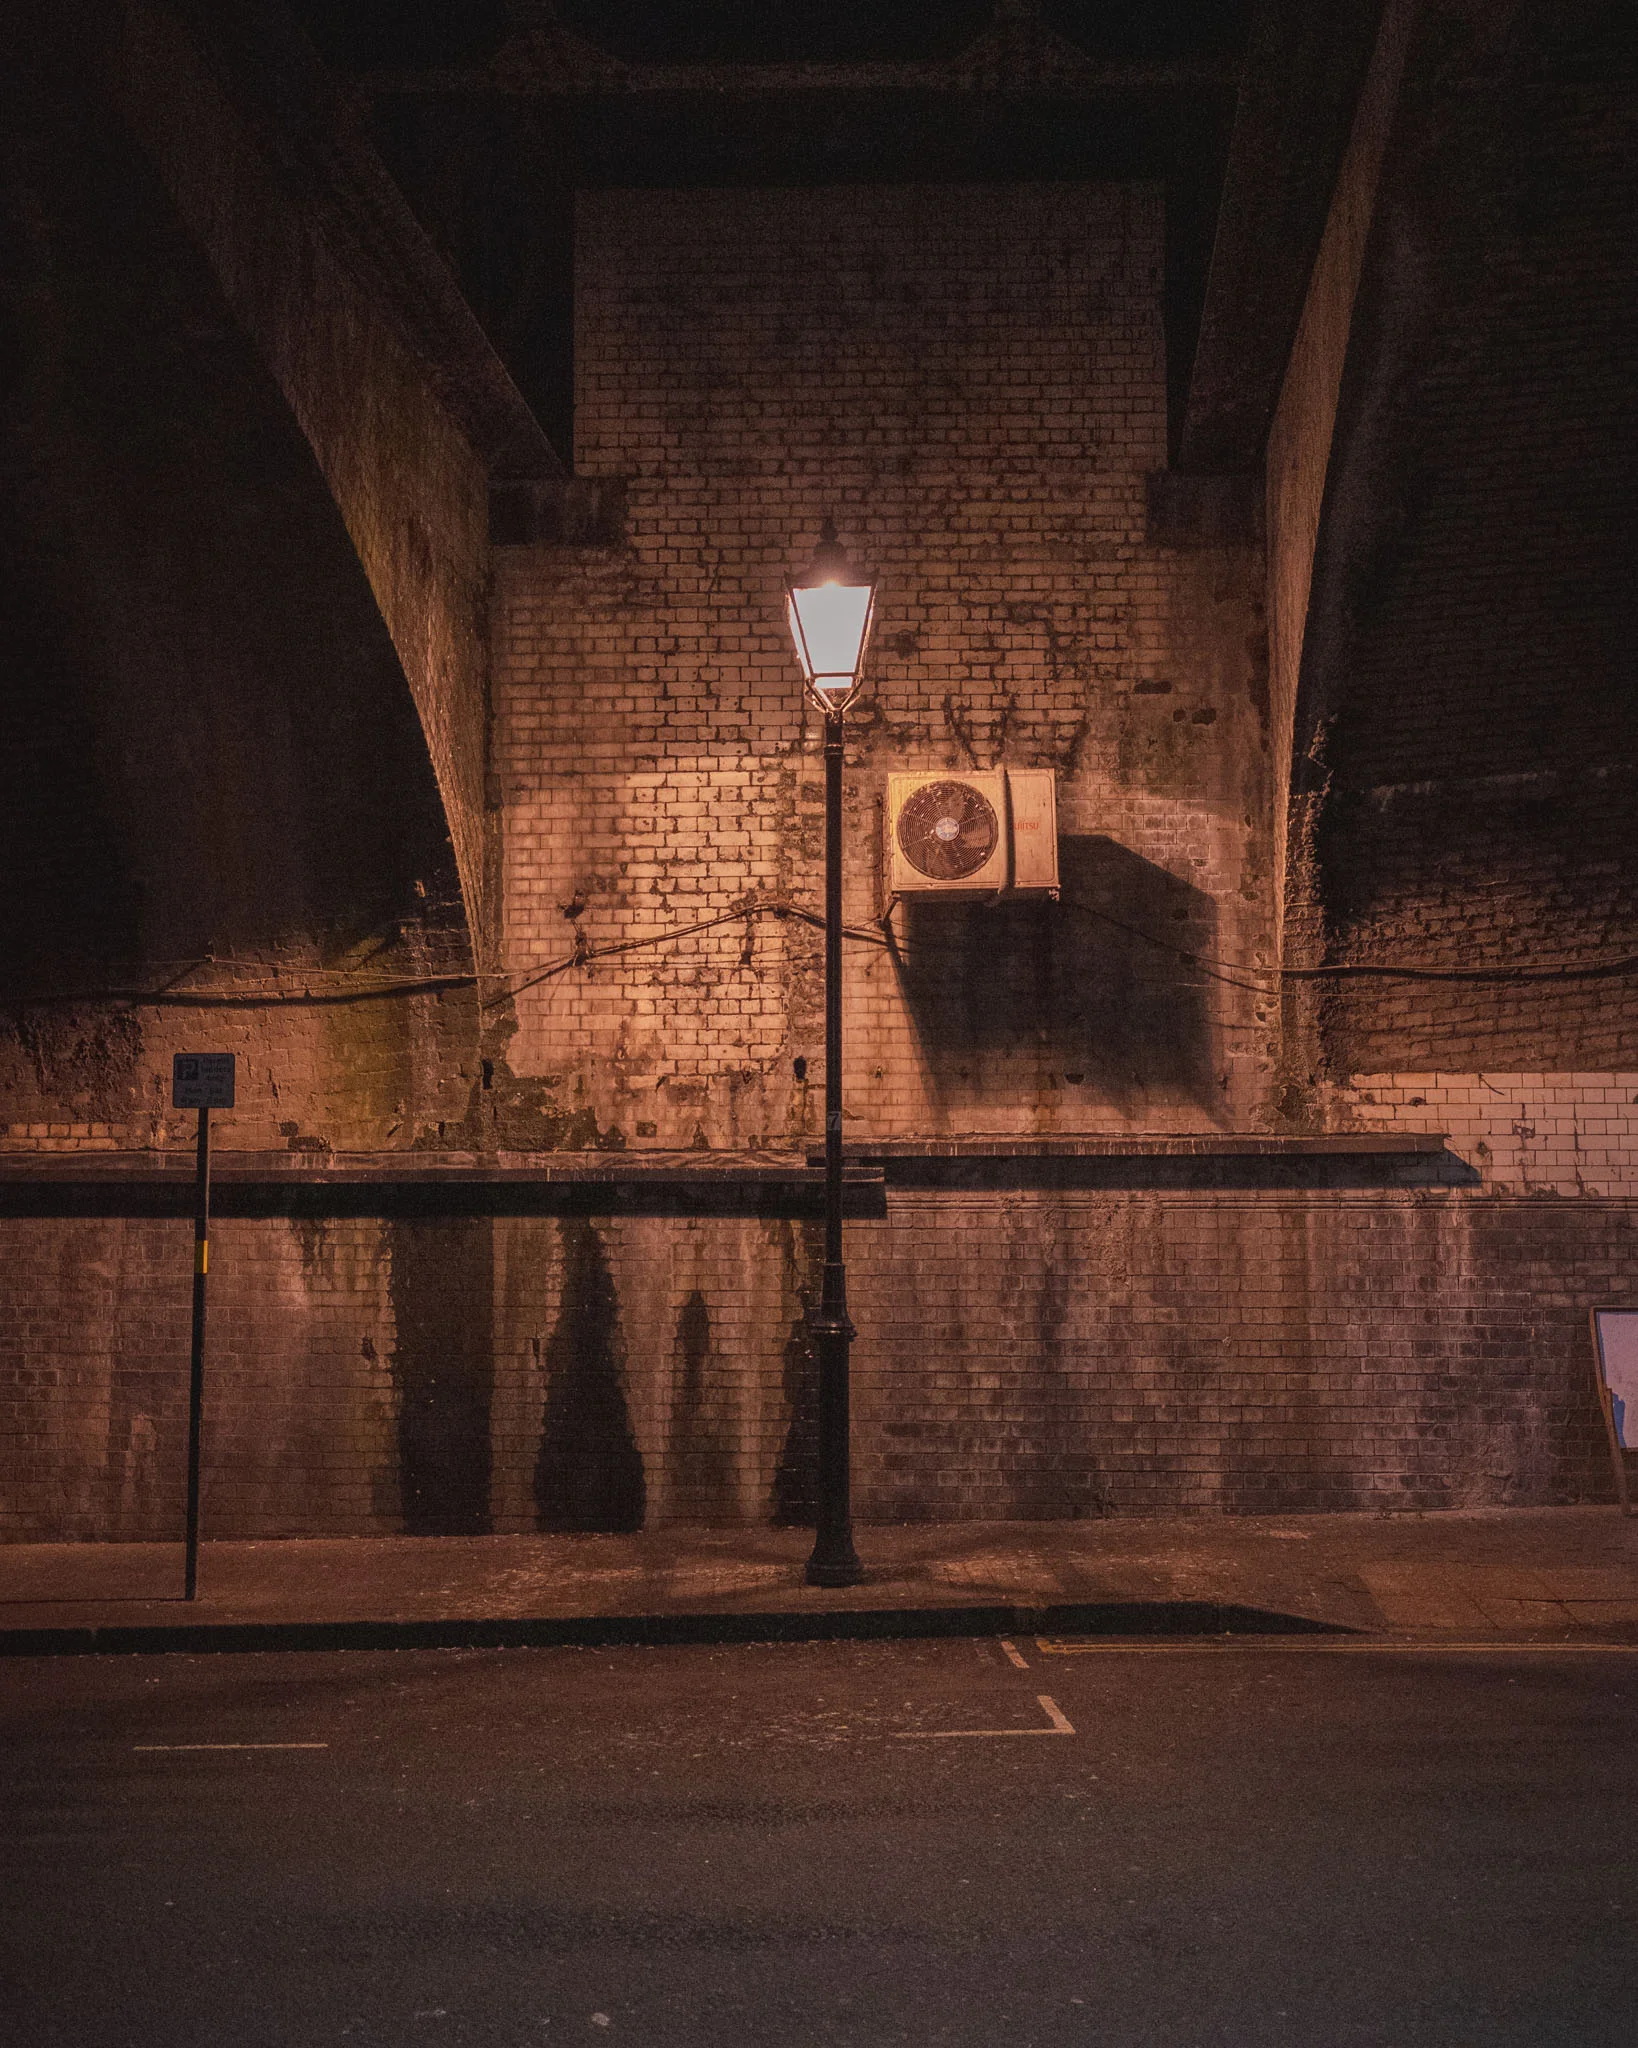
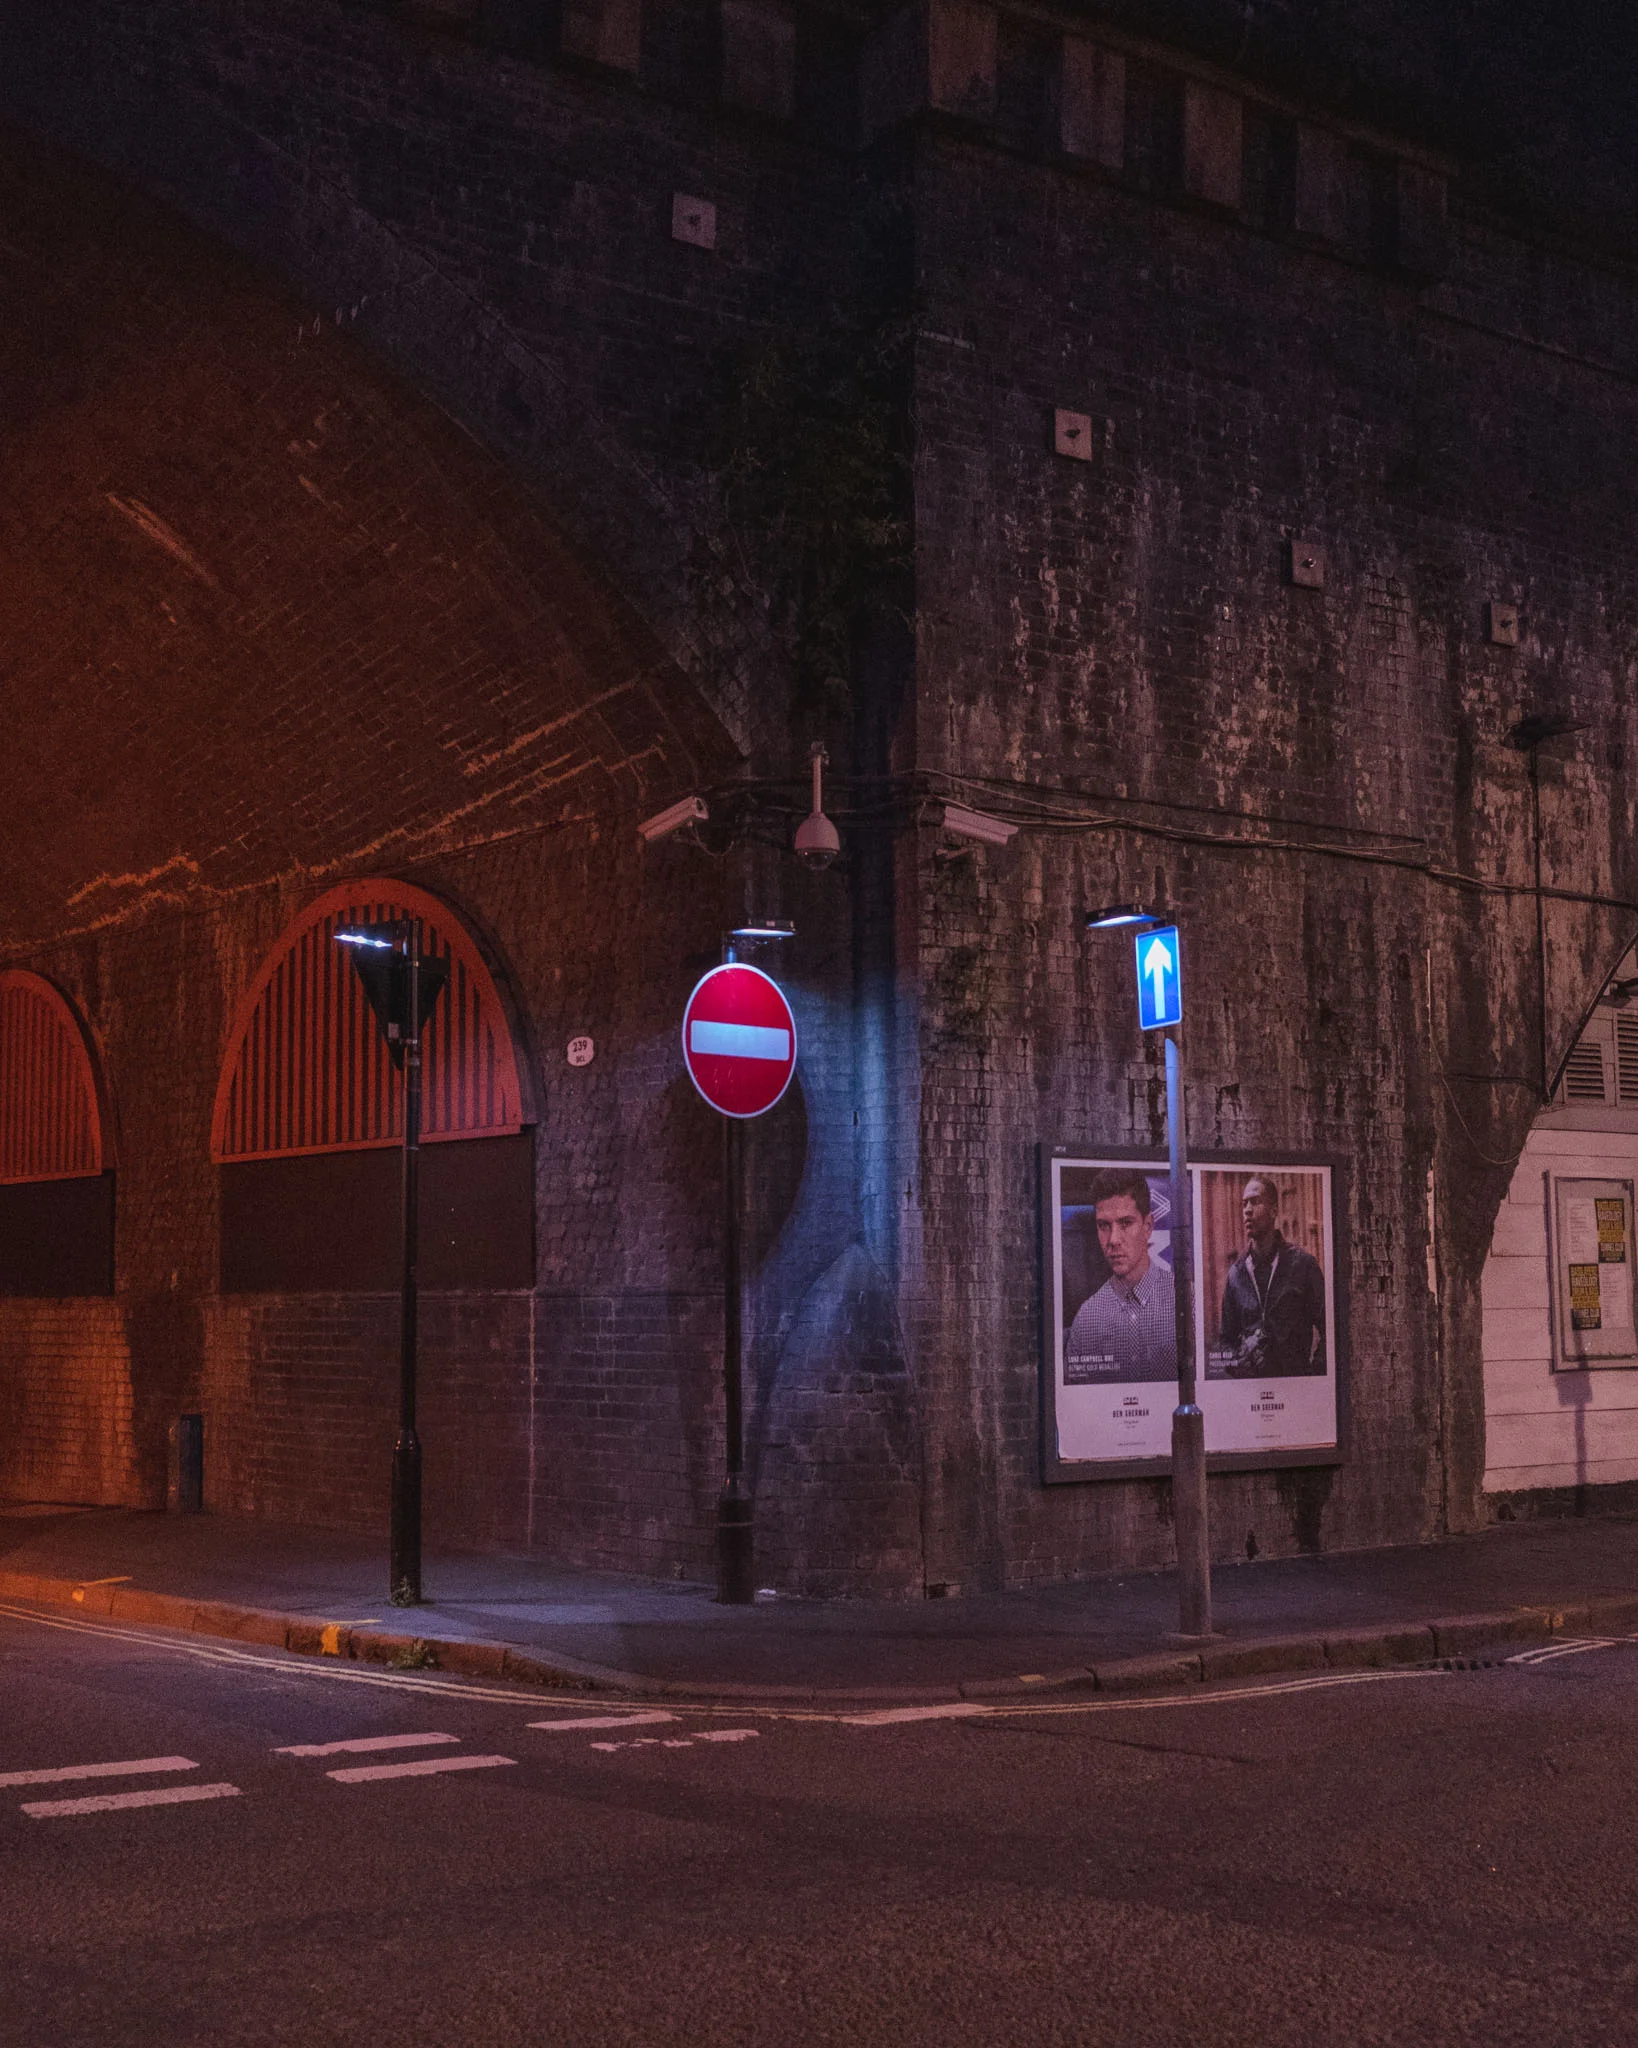
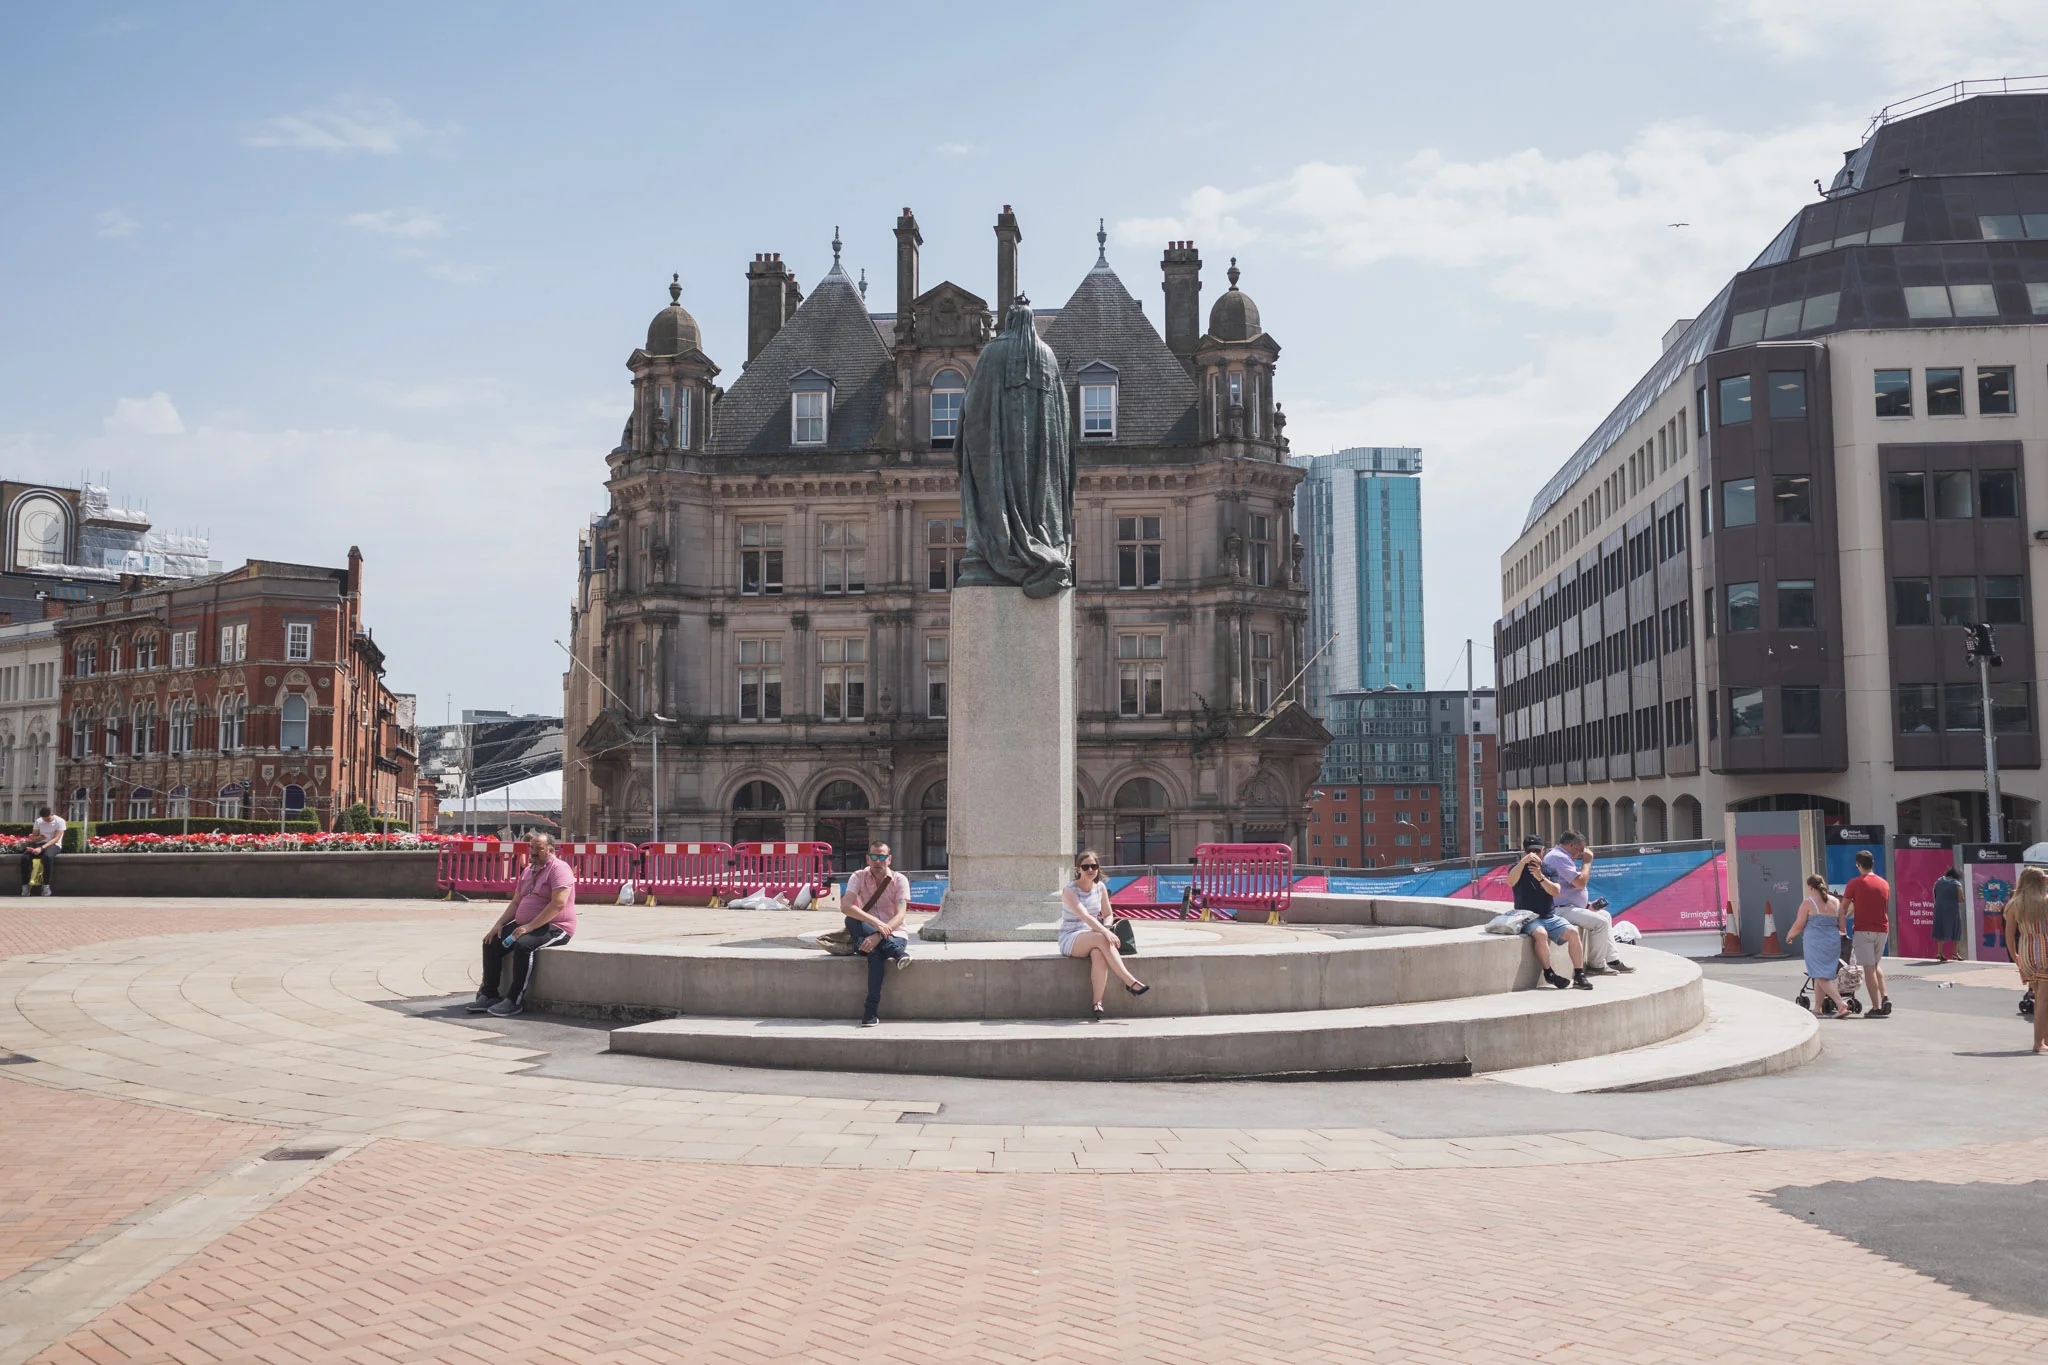
I have been struggling with my photography lately. Call it ‘Photographers Block’ or maybe actual apathy but either way, something just hasn’t gripped me like it use to. Recently, I went out for an evening stroll, mainly just to clear my head but with the intent of grabbing a few photos. I found myself drawn to the same old things, dereliction, grime, dirt and basically anything on the more run-down side of life. As I stared at the old shop frontages, the run down streets and pictured how they would look with my heavy-handed edits, it suddenly dawned on me, I am a nostalgia whore… I pimp myself out to anything that has even a remote whiff of sentimentality.


This is nothing new, I’ve pretty much spent my whole ‘photography life’ trying to make my images look like they are from another time. In fact, Birmingham itself has a weird duality of personality between being this historic relic that should be preserved for future generations and every available derelict space being knocked down to make way for the ‘latest in modern living’. In fact, there are people out there so attached to the past that they simply must live in converted old factory units, as long as they come with all of the trappings of modern life - even I couldn’t resist that level of ‘authenticity’.

However, having more than a subtle nod to the past seems to be the new craze in Photography, well not new, but certainly more prevalent than ever. I see images all over social media that could be plucked straight out of the back-catalogue of any 1970’s photographer worth their salt. Even more, I see people returning to shooting film to try to achieve that authentic feel, something than simply ‘can’t be recreated in Lightroom’ so instead they are returning to the darkroom. This got me thinking about why so many of us are so determined to add a feeling of Nostalgia to our images and why we would even waste thousands of pounds on modern equipment, only to apply filters to make the image quality, well, worse.


As I continued my walk, thinking deeper and deeper about why I am personally drawn to a whimsical sense of past, a thought crossed my mind and seemingly got stuck there and wouldn’t budge. Quite simply, maybe we just always associate the past as being better than the present. Now that may not ring true for everyone and it certainly isn’t intended to be so sweeping, but I do think that most people have a tendency to remember the past in a more favourable light. Music, food, sport, fashion.. everything was better when you were younger, right? Well the truth is, probably not… But that doesn’t mean that we don’t hark back to a time when our lives were less stressful and our fashion choices a little simpler.

However, there is one important person that we are missing out and that is the viewer. Why do nostalgic images appeal to the non-photographer viewer? Well, from what I see it is simply that, we like old things because they remind us of a better, simpler time… a time pre-Brexit. I love the work of Fred Herzog, but have no attachment to 1960’s Canada. I’m constantly amazed by the work of Saul Leiter but have no reason to feel sentimental about New York nearly 70 years ago. Even Gregory Crewsdon and Todd Hido have their enigmatic ‘can’t really place a time on them’ style of images beguile me and they are working very much in the present!


So what does it all mean… Well, for me personally, I doubt I will be changing my style anytime soon, though the more I see the same style of images, the more I know I need to do something different. Whereas I hugely enjoy the work of many photographers that shoot with film, find beautifully nostalgic scenes or even just apply film grains to give their images more ‘feels’, I do think the nostalgia bubble will eventually burst. The main reason for this? Well you can only fake authenticity so far.

However, these are just the ramblings of a photographer trying to cement a style and work out the ‘why’ - and I will continue to dream of living in my modern abandoned factory unit with just the right-level of ‘voice activated heating’ whilst looking at bare-brick walls with images of run down 1970’s American petrol stations in the desert… Maybe one day… What are your thoughts on this? Please leave a comment below.
Bullring & Grand Central After Dark - The Sequel!

Back in May 2017, I was very kindly invited to visit the iconic shopping centre along with a great group of photographers, to explore the site after closing hours. It was a fantastic experience (read about it HERE) so when I was recently invited to do it again, I simply couldn’t say no! However, it wasn’t just the potential of plodding through the centre away from the hustle & bustle of the daytime that drew me, I also wanted to see how my ‘eye’ had changed and see how the photographs would differ from my original visit.


Things started out the same as last time as I was accompanied by some of Birmingham’s best photographers, which always makes me feel slightly out-of-place but soon after, the Bullring’s team made us feel right at home and gave us pretty much free rein of the store. However, this time we had access to a pretty much empty Grand Central as well! An opportunity that none of us could resist, so that’s where we started!

I’ve never really appreciated the scale of Grand Central until seeing it pretty much empty. The huge voluminous atrium feels overwhelming with all of the daily commuters removed. Occasionally, a person would pass through the space and offer a stark contrast of scale, being dwarfed by the huge span of the Grand Central roof. However, it was the closed shops, restaurants and stands that really caught my eye. There is something almost eerie about a lifeless place that you are so use to being busy, it almost feels like being in a post-apocalyptic film, where you are the only survivor (along with a bunch photographers, a PR team and a security guard!).


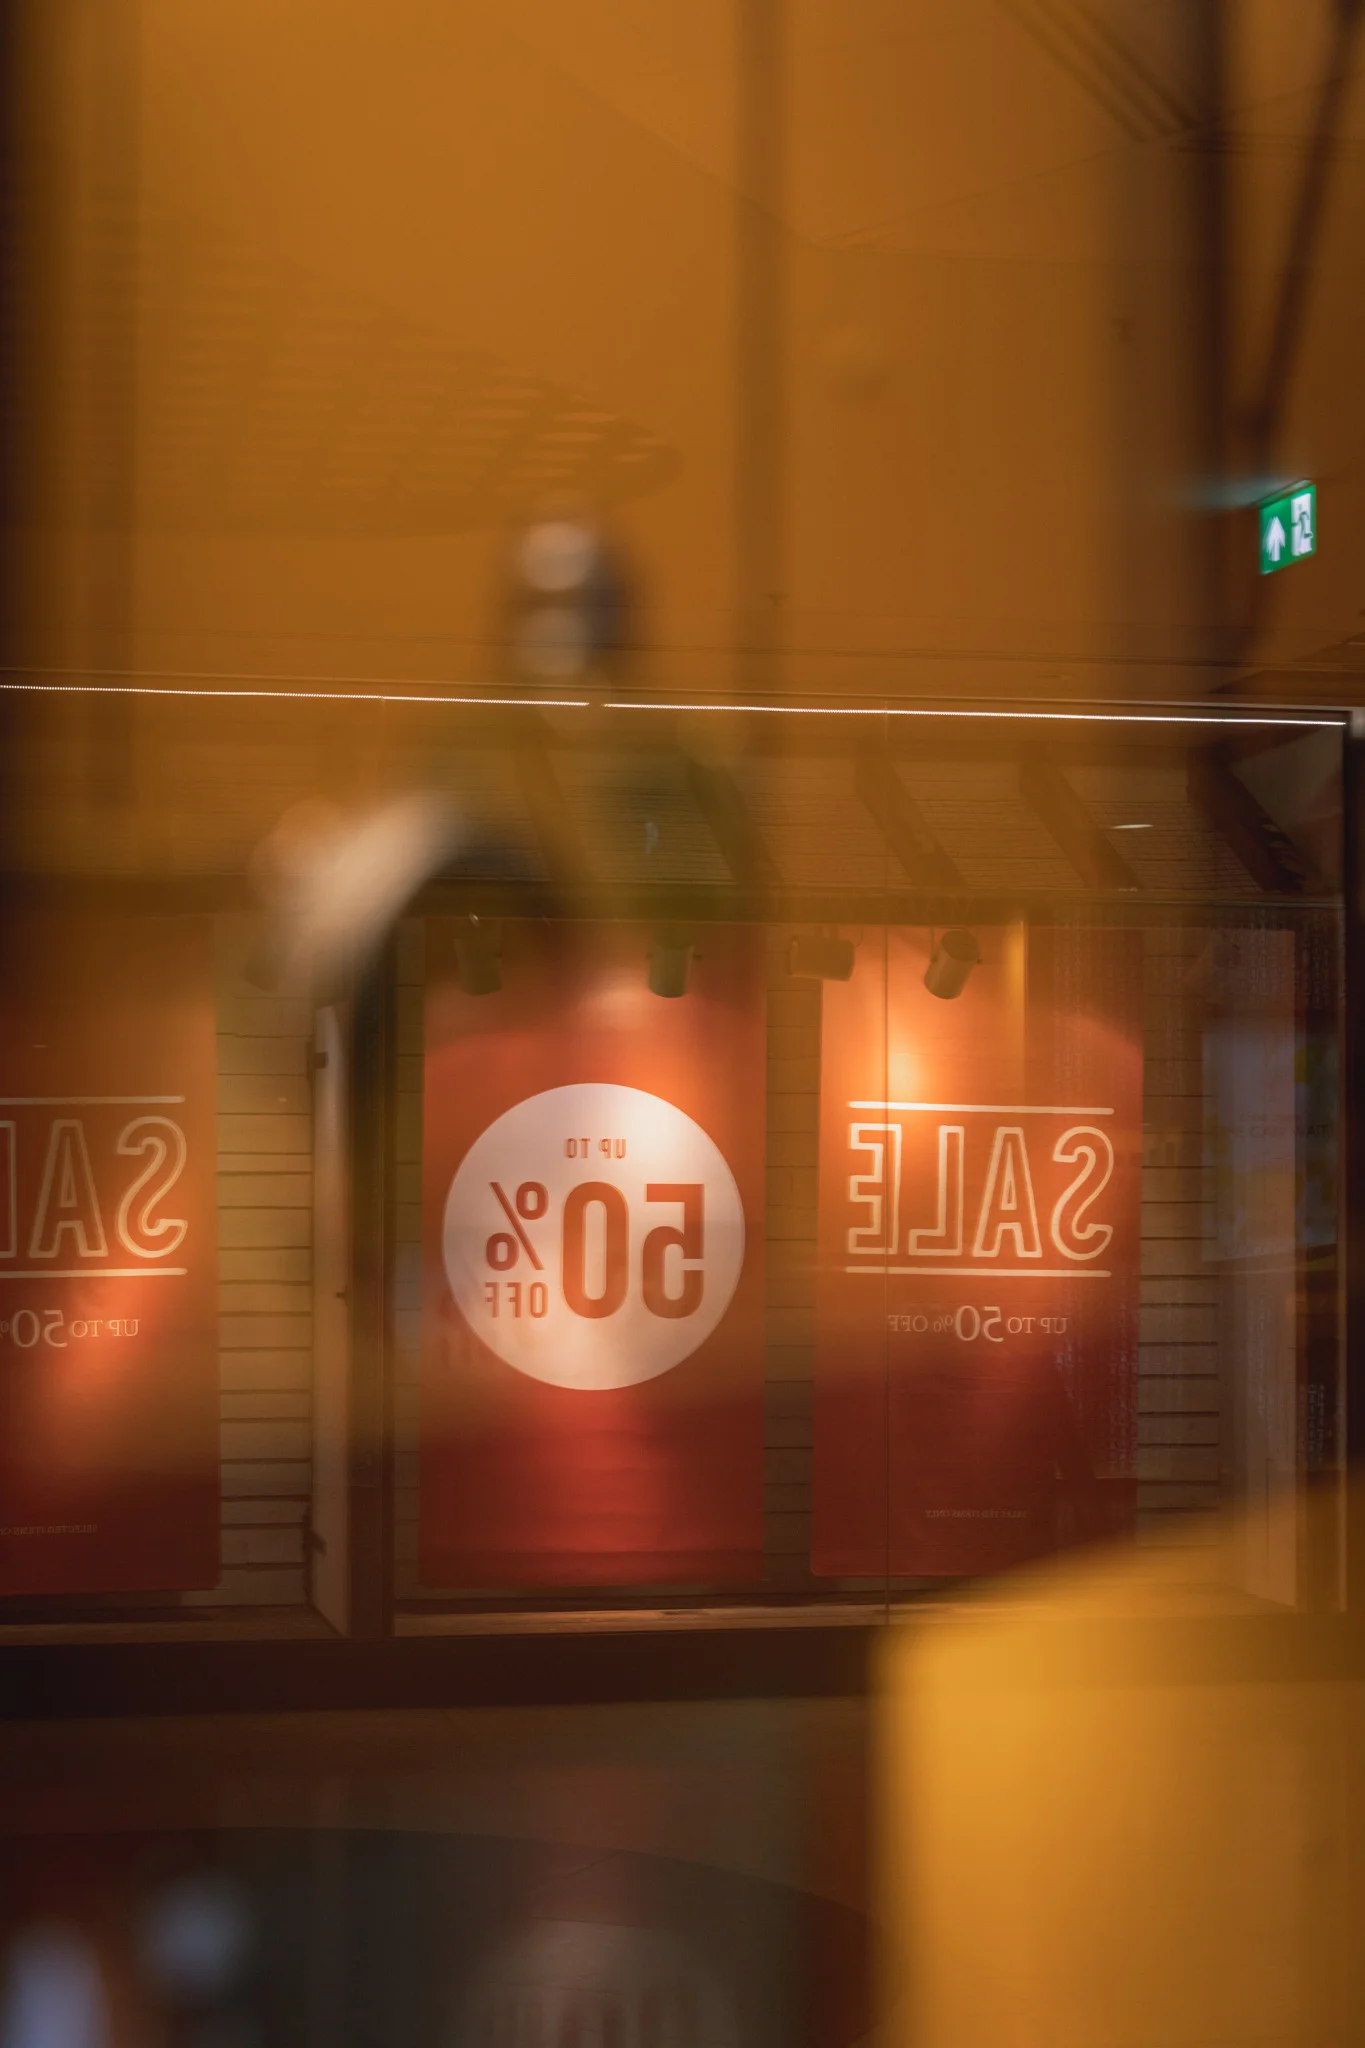


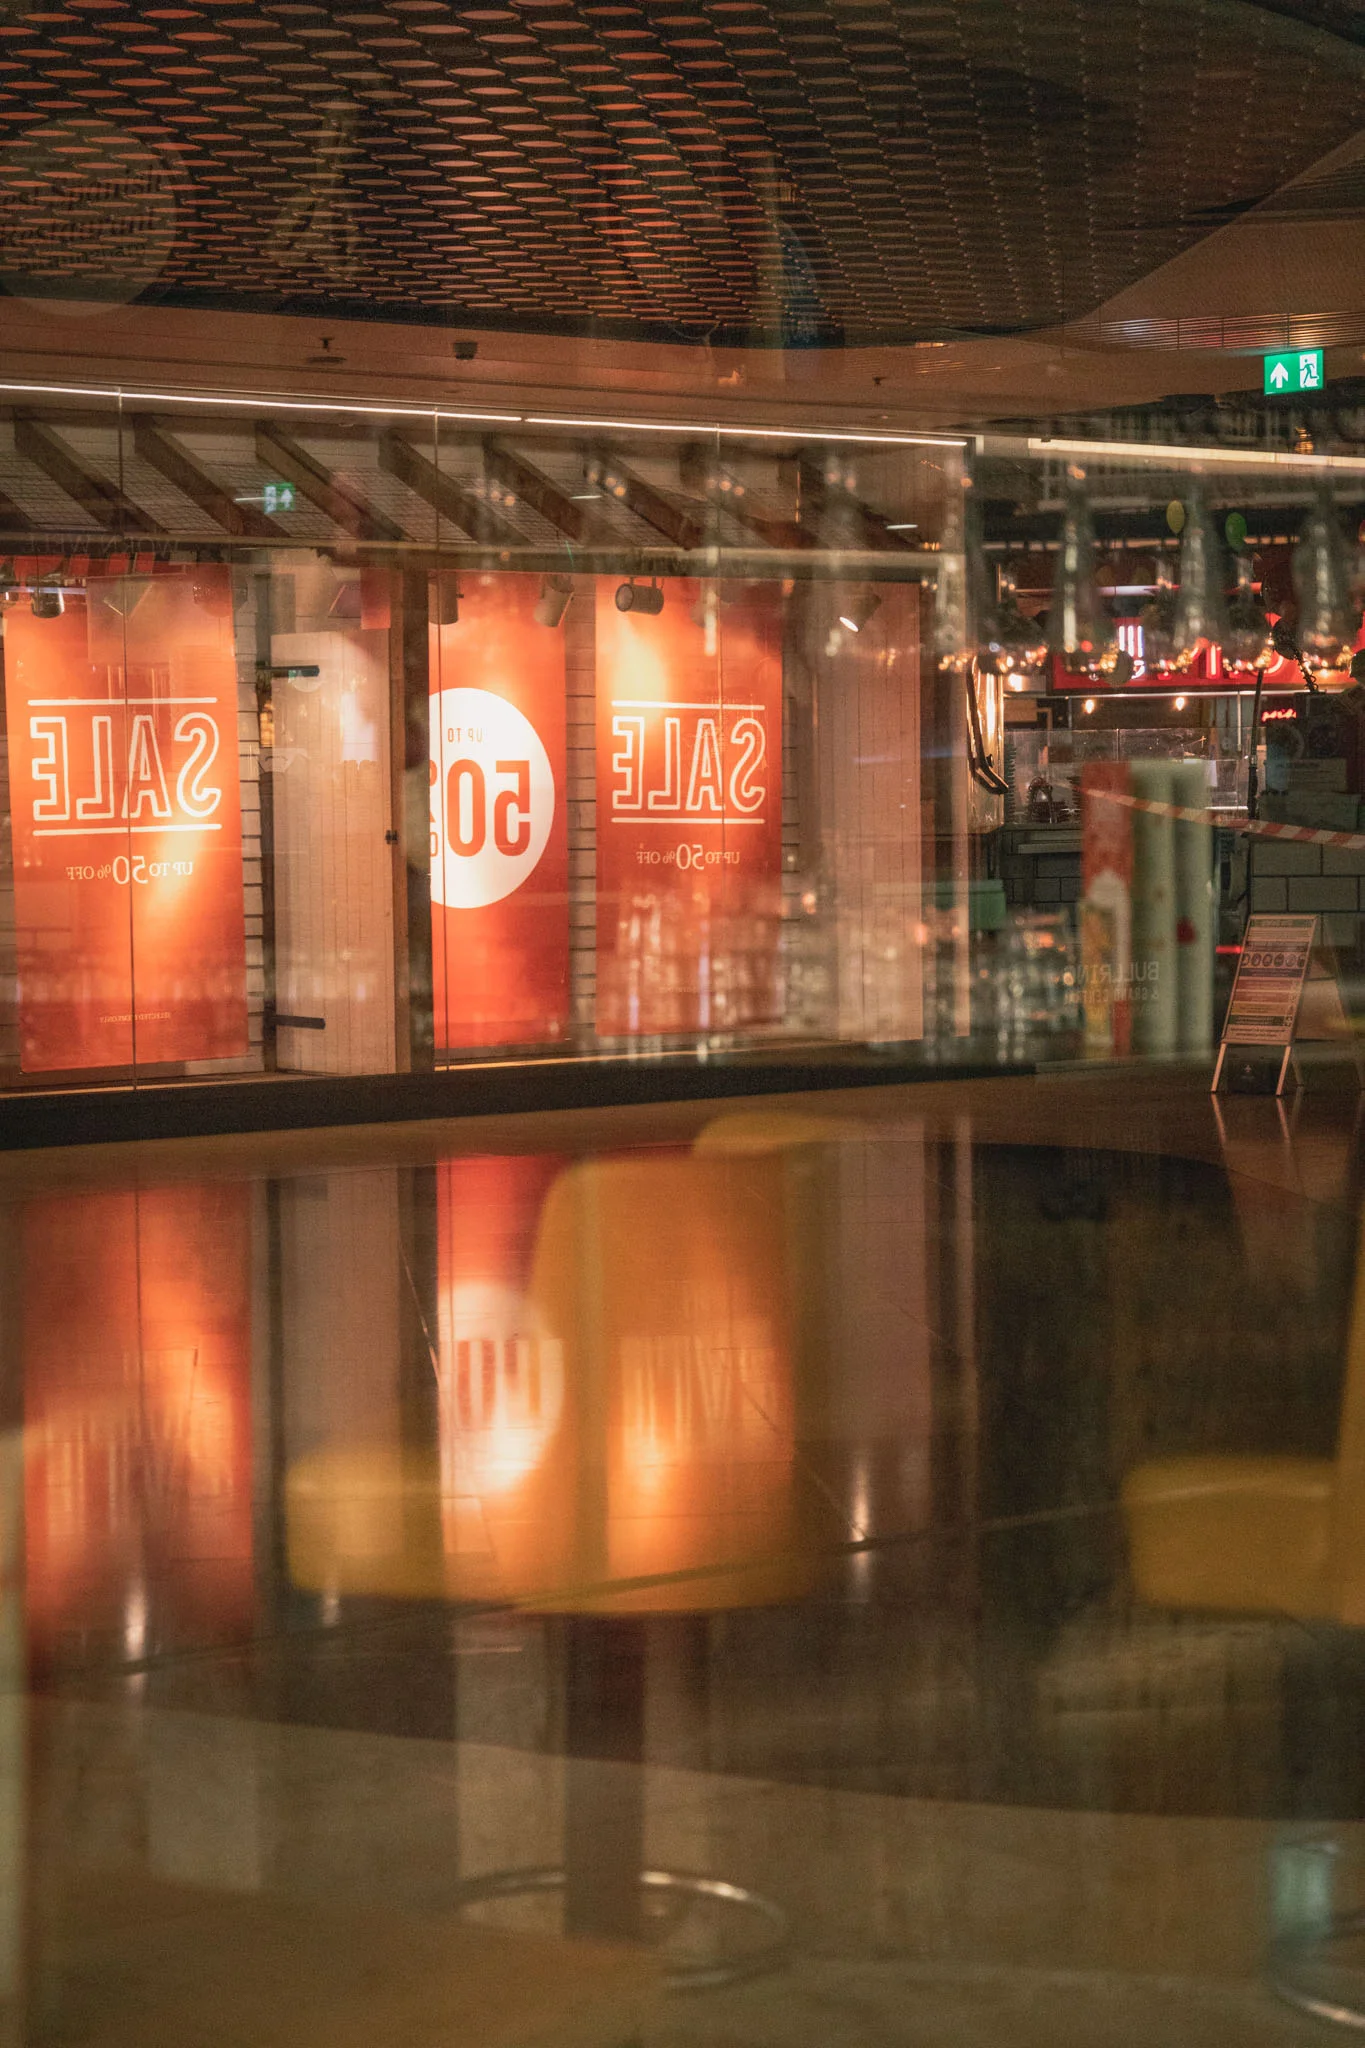


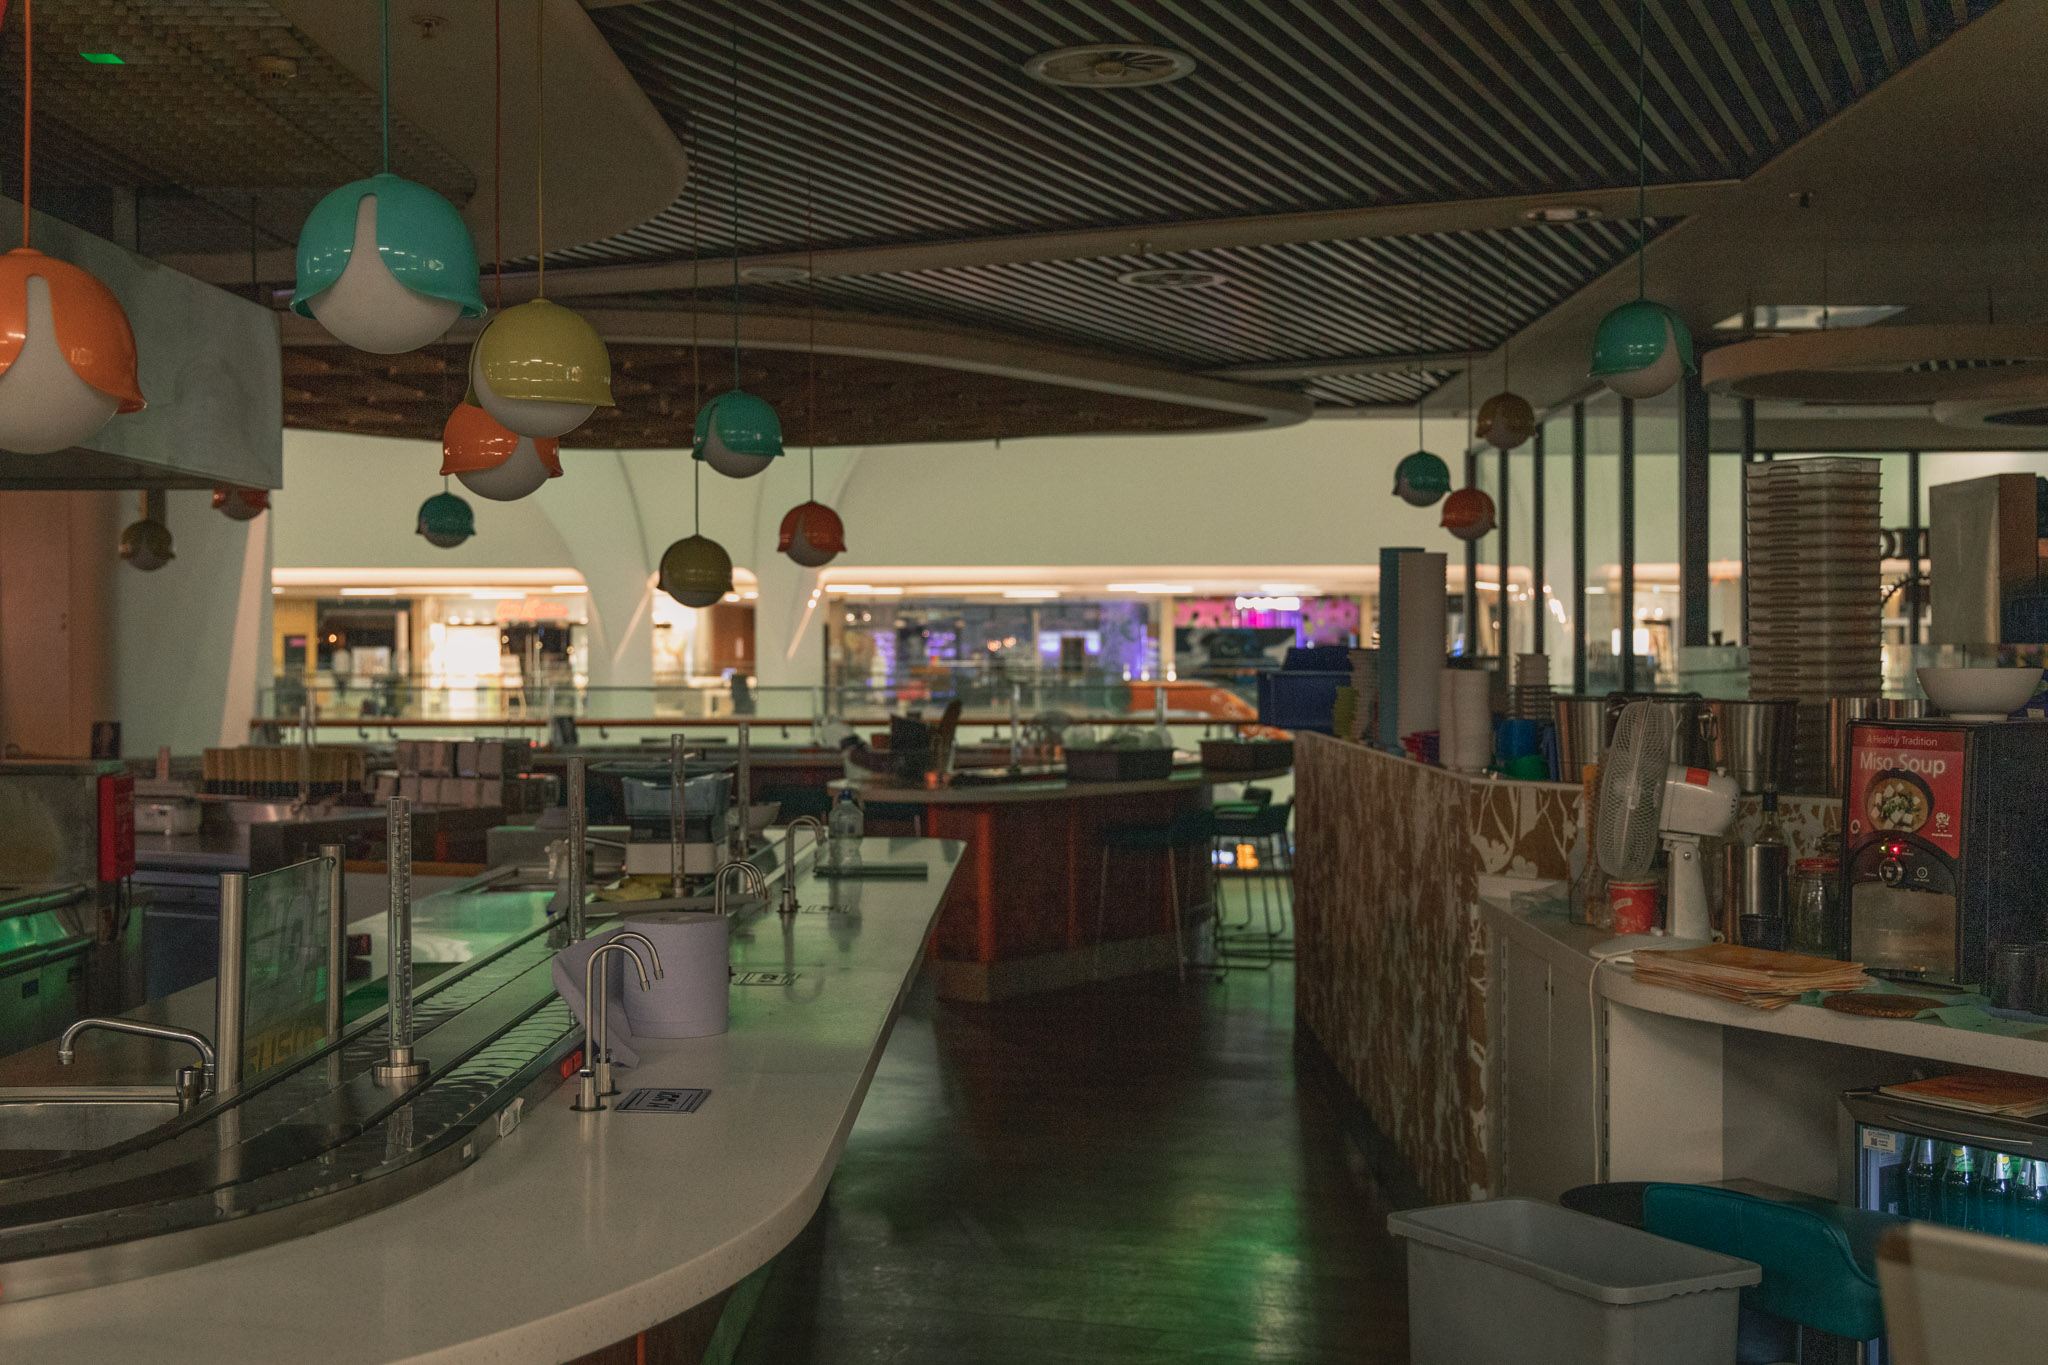

After exploring the space for a little while, it was time to turn to photography and I was quickly drawn to the abstract reflections in the store fronts. Something about the colours drew me in and I started to experiment with abstraction, layering reflections and colours on top of vaguely familiar items, such as chairs and tables. All too soon, our time in Grand Central was over and we passed through LinkStreet and back to the main event, the Bullring.


In contrast to my previous visit, I was drawn more to the details this time around (though I took my fair share of ‘wide’ shots - an opportunity not to be missed!). The dimly lit store created pools of light and shadows from the stores that had left lights on - which immediately drew me to the areas of contrast. In particular I was drawn to silhouettes of the often over-looked plants and foliage in the centre. We descended through one side of the centre and made our way towards the ‘Selfridges’ side of the Bullring.


As we neared the end of our adventure and made our way back up to ‘street’ level, again it was the scale that really caught my attention, it’s all too easy to overlook the sheer scale of the Bullring. As we said our goodbyes and I made my way home, it was clear that once again it had been a fantastic opportunity, but I also found it interesting that this time around, I’d been more drawn to the details and abstraction - maybe a reflection on my own growth as a photographer - or more probably just an attempt not to go for the ‘typical’ kind of shots. Either way, it was a fun way to spend a few hours photographing a hugely popular area with all of it’s inhabitants removed!

Thank you to The Bullring & Grand Central and thanks for putting up with me @veritymilligan, @alpha.brum, @ocuk and @frasermcgee
Ricoh GRIII - First Impressions...

Before we kick things off, I will be doing a full video review of the GRIII on my YouTube Channel - so be sure to Subscribe… So, I have had my GRIII for 24 hours now and thought I would share my initial thoughts and a few sample images…
I have been a massive GR fan for years, nothing quite feels like a GR and it is close on the ‘perfect’ street photography camera. Having owned previous iterations, I couldn’t wait to get my hands on the latest version. The new model is a very similar size and shape to the previous model (minus the flash!) but also has a much improved 24mp sensor and a touch-screen, along with many other refreshed items.
Straight out of the box, the camera feels familiar, with the basic layout being much the same as its ancestors. The sleek design and desecrate branding, make it a perfectly pocketable weapon for those looking to keep a low-profile whilst shooting ‘street’. Whereas, I’m not much of a street shooter, I do appreciate the form factor and ease of use for shooting city scenes whilst not having to carry around a backpack etc.
The fixed 28mm (equivalent) lens goes against my usually (lazy!) style of shooting, which normally incorporates a short telephoto lens. It will certainly be a learning curve to get use to this focal length again but one thing is for sure, I’m going to need to take my ‘brave pills’ and get closer to the action. The autofocus feels snappy and from what I have seen so far, accurate. The other great thing about this camera is the start-up time, pretty much as soon as you hit the power button, you’re ready to shoot - essential for those capture action whilst out-and-about.
Looking at the images coming out of the new sensor, I’m impressed enough, considering how use to shooting full-frame I am. The only area where I am still on-the-fence is the low light performance. Noise starts to appear at around 3200 ISO and whereas 6400 ISO is perfectly usable, I think there is a clear grain structure there and although, due to my editing style, I actually quite like this - It will remain to be seen whether low light shooting becomes an issue. One thing is for sure, it hasn’t ‘wowed’ me straight away like the Fuji X100F did…
All-in-all, my first impressions are very good and I’m so happy to have a GR in my pocket again, it will be a fantastic everyday carry. I will make a full review over the next few weeks to give more in-depth feedback.
Sample images - Edited, the full review will include a RAW image comparison.


Unfiltered Lives: A Project in Collaboration with Birmingham University

I am always up for a challenge, being self-employed, you learn to say ‘yes’ more than you say ‘no’. So when I was approached by University of Birmingham to take part in a very special project, the ‘yes’ had already slipped out, way before I knew the full details. However, the more I go to know, the more I was ready to do something a little different.


The commission itself was to portray the ‘unfiltered lives’ of recipients of a very special programme administered by the College of Social Sciences. The research focussed on the lives of black and ethnic minority businesses and received support via peer-to-peer mentoring, which was overseen by Professor of Leadership and Enterprise, Kiran Trehan.
However, for me, the project represented a chance to get out of my ‘comfort zone’ and create images a little different to my normal day-today work. Whilst taking headshots etc. is not new to me, creating specific environmental portraits and showing the business owners in their places of work, provided it’s own new challenges.


The project allowed me to not only explore the inner workings of some of these businesses, but also to experience first-hand, some of the challenges and pressures faced by them. Whilst creating the images, I got to hear the stories of how the research had helped the individuals overcome not only the pressures of running a business, but the incredible strain that it had put on personal relationships. Ultimately, the peer-to-peer mentoring and the support of Prof. Trehan and her team, had helped them through some very difficult times.
As a self-employed individual, I was amazed to hear how similar some of the businesses struggles had been to my own whilst ‘growing’ - including confidence issues, fear of failure and the obvious financial concerns. However, I was somewhat surprised and concerned to hear how there had been additional pressures for those coming from a black and ethnic minority background, including the fears of acceptance. This only cemented how important Prof. Trehan’s research and support had been to these individuals and how the University itself was working towards shining a light on these difficulties.


The project culminated in an exhibition of the images being displayed at the University’s new ‘Green Heart’ - and beautiful thoroughfare used by students and visitors alike - a fitting place for these ‘unfiltered lives’ to be showcased.
You can learn more about the business and the research at the University of Birmingham website.
Special Thanks to:
Broge Poles - How to get a Drone style shot without the Drone
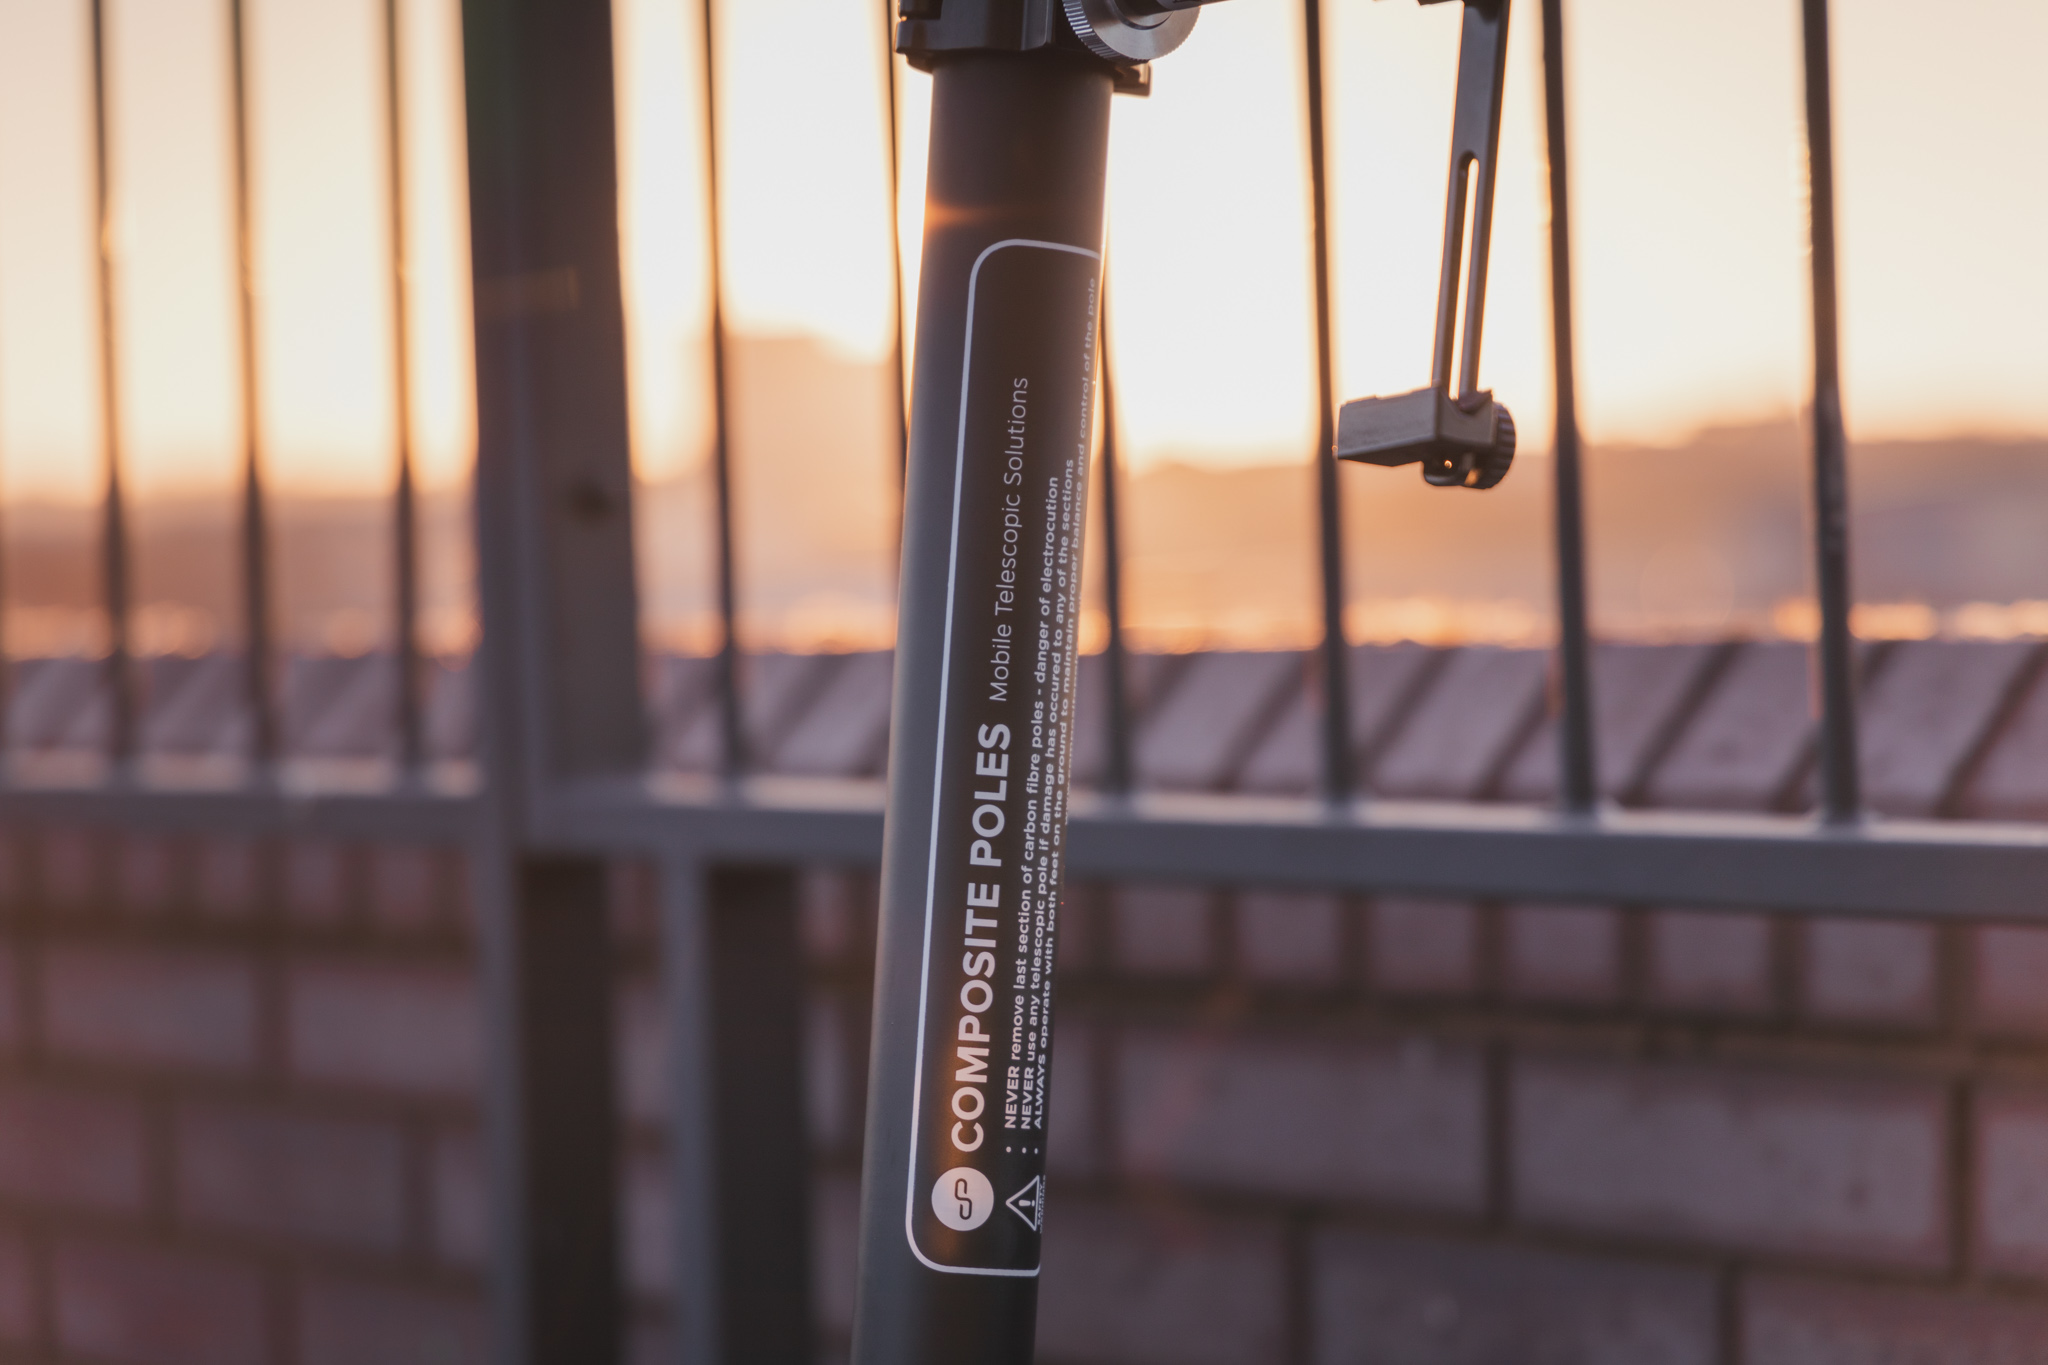
As a photographer, I am always looking for ways of creating images that are truly unique. One way of doing so is shooting from an angle that nobody else can access. The most common way of doing this, is to use a Drone. However, Drone use is not only prohibited in certain areas, they can be quite costly and difficult to use. Now though, it looks like there might be a safe, affordable and easy solution. I tested out one of Broge’s composite poles, to see how it stacked up.
Aerial Photography - the hidden problem
Aerial Photography is not a new thing. However, consumer Drones have opened up the market to anyone and everyone. I myself am a Drone user and I am regularly impressed by the quality of content produced by other Drone users. However, I also see many who fail to abide by the ‘Drone Code’ a series of rules set out by the Civil Aviation Authority to encourage safe Drone usage. One of the main issues being the use of Drones in built-up areas.
As a Drone user, I have also been tempted by the desire to use a Drone to get truly unique vantage points over some of the city’s best buildings. However, the potential risks (not only the potential fines) are a moral deterrent. I certainly see how easy it would be for a ‘run away’ drone to potentially cause a huge accident, in particular if it was to strike a vehicle on one of the city’s main roads.


A different view point
However, there is a much simpler alternative to getting a special view that not many others will have seen. Step in, Borge. When I found out about the composite poles, I was very keen to see whether they would honestly give a much different perspective. Without doubt, they would not be able to reach the hundreds of feet that a drone can, but could they be used to create striking images? I quickly found the answer…
From the moment I placed my Sony RX100V on the easy-to-use ball head and started to elevate the poles, I could see a whole new perspective open up. As I was shooting at a fairly wide field of view, around 24mm - the moment the camera got above two or three meters, completely new possibilities started opening up! The fact that the pole I was using could be escalated to 8 meters, I knew that this was going to be an interesting piece of kit!
Build Quality and Ease of Use…
Straight out of the box, I knew it was a quality piece of kit. The pole itself came in a very nice carry case, making the pole and attachments easy to transport. The pole is made from high-quality Carbon Fibre and comes in telescopic section. Each section has a clamping ring that is loosened as you raise each section and then tightened to secure it. Having been a tripod user for many years, I appreciated how robust the clamps were and the fact that they felt secure when the pole was at maximum height.
I was using a ball head to set the camera to a portrait perspective, as most of the shots that I post are set to portrait for better social media use. I was also using a Universal Phone Mount Clamp Kit to secure my iPhone. As I don’t have 8 meter arms, I was using my phone through the Wifi app so that I could control it whilst it was at the top of the pole and it all worked a treat. The phone holder was easy to adjust so that I could easily use the phone whilst holding the pole. However, the pole also had a Foot Plate at the base so it added an extra element of security.
The pole was simple to erect and even easier to take down and at no point did I feel that the camera was in danger of falling off. The only thing that I would recommend, it being mindful of strong winds and using anywhere near power lines etc. - but I really hope that is self-explanatory! Overall, both the build quality and ease of use were very impressive.
Final Thoughts - Does it Stack Up?
I was skeptical at first as I did not see how an 8 meter pole could compare to something that can actually ‘fly’. However, I have been very impressed by the results and my images have certainly gone down well on social media. I think the fact that it takes away all of the risks and dangers associated with Drone use, it makes this one a no-brainer.
In addition to this, I could also see how many alternative uses it could have outside of photography - such as for use in inspecting roofs, guttering etc. It also opens up other possibilities in terms of shooting over crowds, where access may be an issue or even elevate angles inside properties - something that Drones could not do. Overall, this is an excellent piece of kit and something I can see being very useful in a whole host of situations.
For more information and to purchase, visit: Broge Website
A Foggy Morning in Birmingham

Nothing drags us photographers out of bed quicker than the chance of a bit of fog and mist. After a few busy days, I was completely ready for a lazy Sunday morning until I popped my head out of the window and saw, well, nothing…I quickly got ready and pretty much ran into town. Conditions were perfect and a bit of fog mixed with patches of light, always makes for interesting images.
I was very pleased to see plenty of the local photography community hoovering up images so keep an eye out for those. Here are a quick selection of some of mine of Birmingham drizzled in a pleasant layer of fog…


