
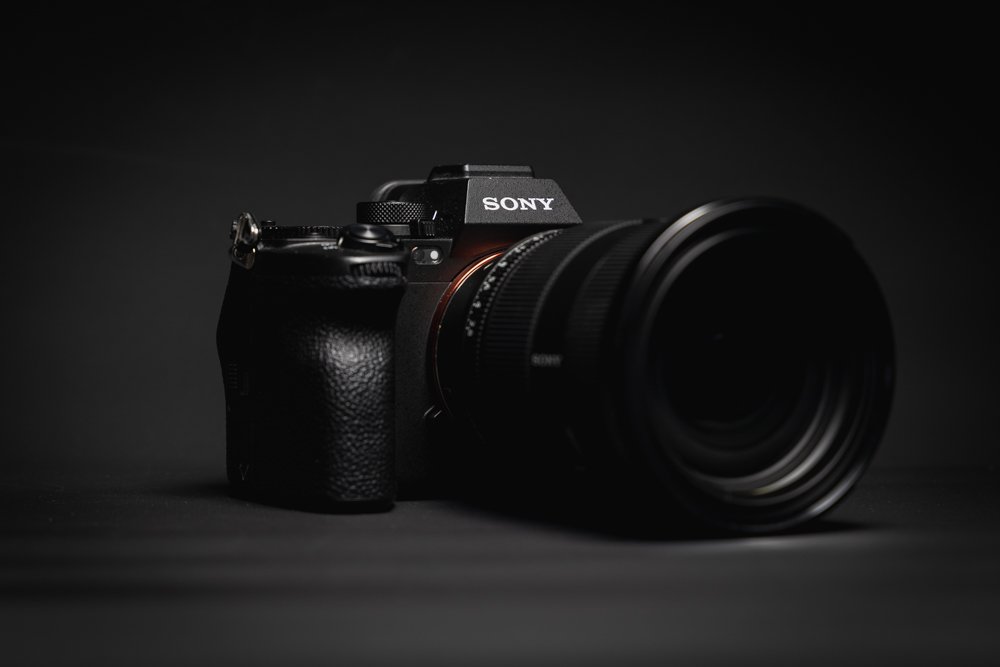
REVIEW: Sony A7RV - Good things come in Small Packages!
The Sony A7RV is a high-end mirrorless camera with impressive specs, including a 61-megapixel sensor, 4K video, and fast autofocus. It's an excellent choice for professional photographers who demand the best image quality and versatility.
Sony's place in the world of photography and cinematography has been well-established by now. They've made some of - if not, THE - best cameras on the market. Among their most popular line-up of cameras is the Alpha series, lauded by experienced professionals, as well as hobbyists and rookies alike. They're very versatile, yet remain rather approachable, and could take some fantastically great photos, to boot.
The Sony Alpha series is the camera equivalent of a Porsche 911 in the sports car world; it'll do everything just right, with no complaints. The latest addition to this long line of excellence is the Sony A7RV (or Mark V), as the successor to the much-respected Mark IV and Mark III. As with its predecessors, the A7RV has a full-frame, mirrorless format. However, Sony claims to have made certain iterative improvements.
PLEASE NOTE: I WAS SENT THIS ITEM FOR REVIEW BUT NO OTHER PAYMENT OR CONTROL WAS EXCHANGED FOR PUBLISHING THIS UNBIASED REVIEW
That is very much a case of evolution rather than revolution, as Sony's Mark VI and Mark III were already so close to perfection, but had some minor quirks that needed ironing out. So then, if you have a Mark IV or a Mark III, do you need to make the upgrade? Well, in a short summary, the A7RV is a brilliant camera that produces some amazing images with a healthy dose of dynamic range and superb crispness.
Yet, the A7RV could also hold its own when it comes to videos, with the same attention to depth, which is partly thanks to the Mark V's revised auto-focus tech. Admittedly, I didn't get as much time to shoot with it as much as I wanted to - this A7RV was a loaner from Sony for this review. Nevertheless, even with the limited amount of time that I've spent with it, it's quite noticeable that this is no ordinary camera.
Great For An Everyday Carry Camera
Despite how impressive the image quality and video recording features are, the Sony A7RV is surprisingly easy to lug around. This makes it rather comfortable as an everyday carry, whether you're always on the hunt for the next world-class shot. Or, if you have a busy schedule ferrying between one client to another on a photoshoot. Though it's not otherworldly rugged, the A7RV is robust enough for most people.
It has some water and dust resistance, so you don't have to baby it too much. Meanwhile, its ergonomics are interesting, to say the least. The grip, in particular, might not be for everyone. At times, it may feel as though your fingers are being squished between the grip and the lens. This was somewhat expected, as it is an evolution in design over the old Mark III and IV. Therefore, old users might find it familiar.
For better or worse, if you've handled a Mark III or IV beforehand, you'll get comfy with the A7RV quickly. This also means that you'll familiarise yourself right away with the button and dial placement, which is mostly the same as its predecessors. At least, the usability of the A7RV is made easier thanks to its decent battery life, courtesy of a 16.4 battery pack. Its endurance, of course, will vary from one user to another.
It's claimed to last anywhere between 530 shots to 440 shots on a full charge, depending on whether you use the rear display or the EVF more. Another neat physical inclusion of the A7RV is the speedy Wi-Fi that makes file sharing (even larger file sizes) much more seamless. For a wired connection, the upgraded USB 3.2 Gen 2 (type-C) would be able to offload videos and images more rapidly to your computer, too.
Video Source - DP Review TV via YouTube
Almost Mystical Auto-Focus Performance
The Sony A7RV adopts a seemingly similar (yet enhanced) 60MP BSI CMOS sensor that's evolved from the Mark III and IV. Among the highlights is the ability to shoot 10-bit video at 4k (60p) or 8K (24p) - more on that later. In addition, Sony's paired the Mark V with a beefier BIONZ XR processor. What I've found to be most fascinating is the processor's ability to compute and process some AI-trained algorithms.
That AI was mainly tasked with improving auto-focus on the A7RV, which must be said, is almost magical in how it performed. Even compared to the already-great Mark III and IV, the Sony A7RV's auto-focus can more accurately and quickly focus on human subjects. This not only covers focusing on their eyes and faces but also on entire human bodies, too. On top of that, the AF can readily track other subjects.

This includes animals, birds, insects, cars, planes, trains, and other similar animate or inanimate (but fast-moving) subjects. You could further fine-tune this even more in the menus, with an abundance of options. For example, do you want the auto-focus to aim at the (human) subject's eyes and head, or just the eyes? This speedy AF subject recognition is a boon to pictures and videos, even under very poor lighting.
Albeit, the plethora of settings may be rather perplexing and overwhelming to deal with when you're just getting into it. Then again, most of you - like myself - probably need to set one or two parameters, before being done with it and never going into the AF menus ever again. So, it's manageable. Otherwise, that AI does more than just upping the auto-focus performance to aid you in taking the best shots possible.
The Wonders Of Artificial Intelligence
Besides the auto-focus, even the Sony A7RV's white balancing has some AI assistance to it. It'll hence step in, with optimisations in the Mark V's colour science, to automate the consistency and exposure to all the lightning around you. As such, for instance, if you're shooting indoors with plenty of varying light sources beaming in the surroundings, the colour temperatures in the shot will remain fairly consistent.
I get that this is the sort of camera where, if mistakes are being made by the human photographer, the AI on the A7RV will compensate to reduce the side effects of those ‘oopsies’ as much as possible. Or, it would be able to automate or take over certain processes to ensure that those mistakes can't be made at all. Its computing capabilities are beyond awe-inspiring, no doubt. Yet, the AI does much more than that.
Between that powerful processor and the AI algorithms, this meant that you're getting further enhanced 8-stop image or video stabilisation. Specifically, in the case of the A7RV, we're looking at IBIS (or, in-body image stabilisation), which is sensor-based. Thus, it doesn't need to combine in-body and in-lens image stabilisation together, unlike some other cameras in its class. There are some benefits to that.
Primarily, this means that you could benefit from this improved image stabilisation feature, even if you're pairing the A7RV with a lens that's not capable of in-lens stabilisation. Other benefits of IBIS include your ability to shoot at pretty low shutter speeds, yet without any excessive softening in the image. Nor, would you need to deal with motion blur. The ‘techy’ quirks of the Sony A7RV don't stop there, either.
Video Source - DP Review TV via YouTube
Taking A Lot Of Photos With Ease
The A7RV then features Sony's Pixel Shift mode. That lets you shoot multiple photos of the same shot, but at the same time, shifting the sensor by one-half of a pixel in-between shots. This alone allows you to get an enormous amount of input and information from a single shot of each pixel. It's to the detriment of having to deal with big file sizes. But on the plus side, you get better colour accuracy and sharpness.
This multi-shot high-resolution Pixel Shift mode can be set in one of two configurations. There's the 4-shot mode, which captures RGB data from each output pixel. Thus, affording you better chroma resolution without any softening side effects due to the filter patterns. Additionally, there's the 16-shot mode, which captures 16 different shots - basically the same as the 4-shot mode, but done four times in total.
However, it does so at slight offsets that effectively boost the Sony A7RV's overall capture resolution to a whopping 240MP. That's up from its native resolution of 9,504 x 6,336 pixels to 19,008 x 12,672 pixels. An important caveat to note here is that the task of stitching together all 4 or 16 shots requires that one uses Sony's Imaging Edge desktop app. Unfortunately, it's not supported by any third-party software.
If you can get past that stumbling block, Pixel Shift is excellent at yielding impressively-sharp images with a supreme level of detail. That's assuming that the subject is mostly static, and you've mounted the A7RV onto a solid tripod. Although, some correction options are available, even with slight compromises in the picture quality. Therefore, this makes it ideal for something like architectural photography.
“Though this is as close as you can get to perfection in a camera.”
Many (File Format) Options Aplenty
Another welcomed change to the A7RV over the old Mark III and Mark IV is the ability to save the images in other file formats. In so doing, potentially saving some storage space. In the past, you'd have no choice but to shoot images and save them in the full 60MP resolution. Even for some professional photographers, it's a bit overkill, as not every shot requires 60MP. This time, 60MP fully uncompressed RAWs remain.
But on top of that, you can process and save the images in 26MP and 15MP RAW files, as well. These are essentially down-sampled and compressed shots from the full 60MP image. This will come in handy if the memory card's running low on bytes, or if you don't really need the full 60MP to work with. Nevertheless, the 26MP and 15MP compressed RAW files don't come with a significant loss in image quality.
In most cases, these compressed images still show better than some cameras that shoot natively in 26MP or 15MP, respectively. That also applies to the A7RV's continuous shooting at 10p with both auto-focus, as well as auto-exposure. Another upgrade over the Mark III and Mark IV, however, is the Mark V's much deeper buffer depth. It's now at a staggering 1,000+ images if you're saving your shots in JPEG.
The AR7V is tiny compared to the 51 Megapixel monster Pentax 645Z
Yet, even with the uncompressed RAW files, it could still manage 135 images. Or, around 547 to 583 with either lossless compressed or compressed RAW. These, altogether, should make it easier to manage your files, particularly with the aforementioned Pixel Shift mode turned on. In its fully uncompressed form, it's not uncommon to find singular images that are deep in the three-digit MBs, or even 1GB+ in size.
Video Source - Gerald Undone via YouTube
All The A7RV's Nice-To-Haves
Another thing that I've yet to mention in detail is the ISO and dynamic range. The latter is another strong point of the Mark V, and Sony's experience with making world-class sensors show just how much you'd get out of its dynamic range. It's arguably better than pretty much most other full-frame sensors out there, and only beaten by a meaty Medium Format camera. Its ISO performance is pretty good, too.
It's certainly a step up from the Mark III and Mark IV, though the latter are good enough on their own. In saying that, the Mark IV did have a bit more noise at the higher ISO values compared to the new Mark V. Even though, both the IV and V have the same ISO range between 100 to 32,000. But, you could extend it on either end from 50 to 102,400 - you really don't want it anywhere near that extreme, though.
I do think the 12,800 mark is the ideal ISO value that gets the most out of a shot's colours and contrast in the A7RV. But, without adding any noticeable noise to the shot. Also worth mentioning is the viewfinder (an EVF type), which is another big change from the Mark IV. It comes with a healthy 0.9x magnification and is mated to a super-sharp 9.44M dot OLED screen. It's worth getting the A7RV just for the EVF.
Moreover, it has automated brightness settings depending on the lighting and is made better with crisp optics. On that note, the A7RV comes with a rotating 3.2-inch touchscreen that can flip out, tilt, and pivot. It's a neat party trick that nonetheless makes it easier to manipulate the settings menu and preview your shot while you have the A7RV propped up at an awkward angle to view the display directly.
Wrapping Up The Sony A7RV
Though this is as close as you can get to perfection in a camera, the Sony A7RV is not without its faults. A big downside is the price, retailing at around £3,900 (some retailers may have offers!). I do think that, at the end of the day, it's ultimately worth the asking price given all that it offers and what it's capable of. Furthermore, this is more or less in line with the rest of the market for mirrorless, full-frame cameras, given how the economy's been.
Inflation and supply chain shortages are mostly to blame for the high RRP between the Mark V and the old Mark IV. Regardless, this will be undoubtedly cost-prohibitive unless you're willing to invest heavily in photography gear, be it a hobby or a profession. The other downside with the A7RV (and this applies to a bunch of other Sony cameras besides the Mark V) is the A7RV's menu system and user interface.
If you have some experience with older or other Sony cameras, you might not find the UI or menus to be as clunky. With that being said, the user experience of having to navigate through a myriad of menu sub-systems on the A7RV is definitely not as intuitive as what you might find in some other competing cameras. Still, it's at least improved a bit over the older Sony UI that plagued Mark III and Mark IV users.
In short, you can at least anticipate more logically as to where sub-menus would pop out of. Despite that, that pretty much covers it for the frankly minuscule number of downsides and compromises that you have to deal with in the A7RV... The initial cost of having to purchase one, and the peculiar UI. Besides this, the Sony A7RV really is close to being the perfect camera, versatile, compact, yet very capable.
Vide Source - Lee Zavitz via YouTube
Okay, But What About The Lens?
Before passing on a proper summary, I think it's also worth taking a bit of time to mention the lens that's fitted onto the A7RV during my review period. Specifically, it was a Sony FE 24-70mm f2.8 GM II lens. The lens in question features a short zoom, which is a versatile form factor to work with. That's especially for an everyday carry. Moreover, it's a good starting point if you need a capable lens to work with.
From then on, you can slowly build up your collection of lenses to include other specific focal lengths. For those who do have many lenses, the 24-70mm lens is nevertheless a great do-it-all general-purpose focal length. Particularly, if you only have room in your bag for one or two lenses. Anyway, back to that lens, it arrives as the latest addition to Sony's G-Master line of lenses, with the II succeeding the old I.
This GM II lens is a full-frame E-mount lens, and just like the A7RV, it brings to the table a series of overall refinements and all-around improvements. Dimensions-wise, it's smaller, shorter, and lighter. This makes it more carryable compared to its predecessor, the type I. That's despite the fact that you're dealing with a very wide aperture of f2.8 - a relative rarity for a 24-70mm lens, letting you snap sharp photos.
Speaking of, it performed excellently in my testing with the A7RV. The image quality is superb all-around, and the lens focuses accurately. That's a must for any lens if it's to work well with the amazing A7RV's AI-assisted auto-focus system. Granted, this updated Sony GM II lens is a tad on the pricey side - just like the A7RV. But, for a professional on the go, it's a cost worth paying for, given its exceptional performance.
Pairing The Camera And The Lens
The one potential downside to this lens is the lack of in-lens image stabilisation. As noted earlier, this may not matter if you're pairing it with the A7RV (or some other Sony cameras). Since they rely on in-body and sensor-based image stabilisation (or IBIS), you don't need that additional in-lens image stabilisation. Sony themselves always preferred in-body compared to in-lens or combining in-body and in-lens together.
This does yield some benefits, such as helping to reduce camera shake and netting you better accuracy or room to compose your shot more precisely. The one slight inconvenience with IBIS here is that it needs to be turned on and off in the settings menu. In practice, it's slower than being able to flick a switch on your lens, if it had in-lens image stabilisation. The latter point could be another problem down the line.
Since the GM II lens doesn't have any in-lens image stabilisation, you'd better be wary to not pair it with a camera that has no in-body image stabilisation. Thus, it's another thing to worry about. Overall, between the Sony A7RV camera and the Sony GM II lens, it made for a splendid pairing. As a package, there's very little that I could fault them for - mostly the high cost of entry, and the Mark V's unintuitive UI.
If you can look past that, they take great photos (and videos, too), and I'd highly recommend them. There could be only one reason for you to not get one... And that's for folks like myself, who've already invested into another ecosystem. But, if I would start from scratch, I'd be hard-pressed to find any other full-frame mirrorless camera at this price point that is as compelling as the Sony A7RV (and a GM II lens).


About the Author - Ross Jukes is a professional Photographer and Videographer with over a decade of experience. Working in both Digital and Analogue formats, Ross has worked with international clients, had his worked published numerous times and exhibited his work extensively. With a passion for all things photographic, Ross combines his experience, enthusiasm and dedication to his art form to create engaging and educational content for the photographic community.

Disclaimer: All links to Amazon UK are affiliated links - you will still pay the same price but I will receive a small commission for providing the link. All information provided in this blog is intended either for educational or entertainment purposes and is accurate to the best knowledge of the author. However, further research/professional advice should be sort before making purchases/implementing any advice given and no responsibility is taken by the author or parties mentioned here within.
A little trip to Wales but making some Big Plans!
I recently took a few days off after what feels like a very hectic 2023 so far! The idea was simple, a little bit of relaxation and maybe take a few photos if the opportunity presented itself. However, I also had a sneaky plan to try something out that may take my photography in a very different direction later in the year, but would it work out?
I recently took a few days off after what feels like a very hectic 2023 so far! The idea was simple, a little bit of relaxation and maybe take a few photos if the opportunity presented itself. However, I also had a sneaky plan to try something out that may take my photography in a very different direction later in the year, but would it work out?
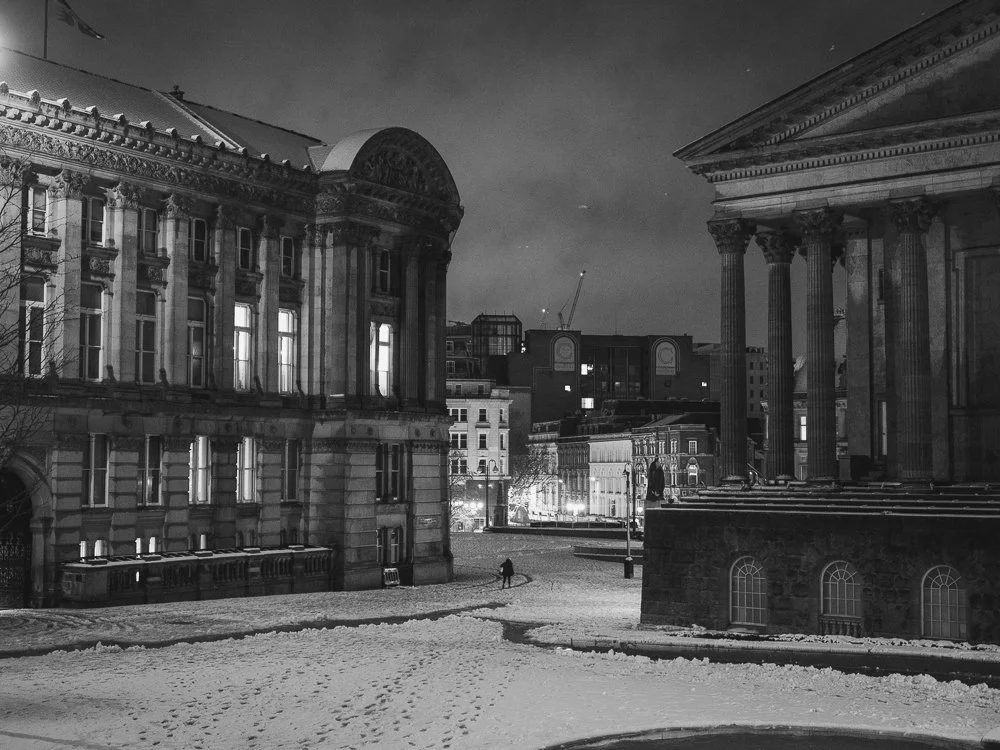
For a while now, I have wanted to get out into nature and do a bit of traditional landscape photography. I’ve always loved the idea of capturing some stunning landscapes but living in the middle of Birmingham and being a non-driver, I’ve never really had the opportunity to. However, I’ve been working on plans to change this and in my mind, a spot of ‘Wild Camping’ was going to help my dream become a reality, but more on that later…
After a three hour train journey, we arrived at Aberdovey (Aberdyfi) and almost as soon as we stepped onto the platform, the rain started and it looked like being a miserable weekend. As one of the locals explained though, if you don’t like the weather in Wales, wait 5 minutes… We had booked a hotel for a couple of nights and the first couple of days would be fairly simple, plenty of food, plenty of drinks and no real other plans.

However, the third day would be where things got interesting as I had brought my new Wild Camping set up with me to test out. Rather than trying out all of my new gear in a strange new environment, I decided to book onto a campsite to give everything a run out and see how it went. And what a campsite it would be too with stunning views and a very interesting experience in itself!
Before my girlfriend returned home and let me go off on my adventure, we decided to mix things up and have a day out to Barmouth. The 45 minute train journey was spectacular in itself, snaking along the coast and in a nice twist, providing me my first glimpse of where I would be camping. Arriving into Barmouth though, we had other things on our minds, most importantly a bit of seaside grub and a drink in the sun!
“I went bold and only brought a small digital camera, the Sony ZV-1 and one film camera”
I had decided to try and pack light, in particular as I would be carrying all of my camping gear so deciding which cameras to bring with me would be critical. I went bold and only brought a small digital camera, the Sony ZV-1 and one film camera, the Yashica Mat 124G. This might not sound like any kind of setup a landscape photographer would choose but weight was very much a consideration and well, it was meant to be a holiday after all…
Exploring Barmouth with the Yashica was actually quite a treat and I certainly feel these were the best images that I created whilst I was away. For once though, the photography was very much a secondary and this weekend was more importantly a test of the camping gear. On Sunday morning, my Girlfriend headed home and I made my way, camping gear on my back to the Cae Du Campsite.
I arrived at Tonfanau, a request train stop about two miles away from where I would be camping for the night and began trudging my way to my pitch for the night. As I followed the coastal path and made my way through fields of sheep, I suddenly felt a long way from home and very far from the busy streets of Birmingham. It was a literal breath of fresh air though as the sounds and smells of the countryside filled my head. After the long walk, I arrived at the site and was immediately blown away by the views.
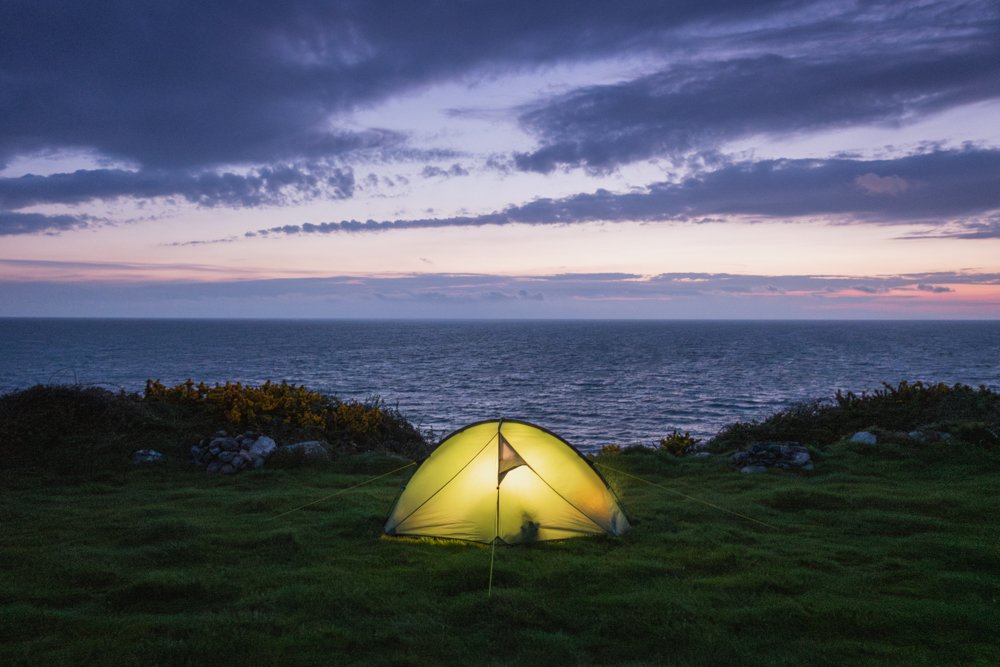
Cae Du is situated right on the coast and spread over two large fields that sit on jagged cliffs overlooking the sea. With only one other tent and one camper, I pretty much had the site to myself but immediately went to the far end of the field, a few hundred yards away from anyone else. Now was the moment I’d been waiting for, setting up all of my new gear for the first time!
The tent went up in minutes and was quickly followed by the sleeping pad and all the sleep system. With some dark clouds gathering further down the coast, I was glad that I at least had shelter sorted and decided it was time to cook my first meal - noodles and bread, this certainly wasn’t haute cuisine! The food was a welcome break but it was back to work setting up camp for the night and preparing for a little walk out.
With everything set up and the clouds seeming to be going away from camp, I went for a walk along the coast road with the idea to get up into the hills to take in the views. And what views they were, the hills were full of the signs of spring and it felt great to be out in the countryside, with the sun on my face and the Yashica in my hand. I strolled for a few miles before heading back to be back at camp for sunset.
The sunset was a beauty and as I hurriedly took a few photos, I could feel the temperature drop and the night starting to set in. It felt strange settling down on my own for the evening with just my distant neighbours being the only life for what felt like miles - apart from the cows in the next field. As darkness fell, I got my first sense for what wild camping on my own might feel like and I was totally in love. As I settled into my sleeping bag, the sounds of the waves crashing below me felt deafening with only the occasional rustle of wind on the tent breaking the rhythmic noise.
I slept OK, waking a few times to a few odd bumps and noises, but a shrill squeak of sea bird woke me around 5.00am which I wouldn’t really recover from. After some breakfast and a slow morning, I decided to pack down and make my way home. Packing down was a chore as there had clearly been a bit of a downpour in the night, so everything was soaked. With everything packed away, all of my rubbish collected and no trace left, I decided to walk back to Tywyn where I would get my train back to Birmingham.
The five mile walk went relatively quickly and the weight of my pack wasn’t too bad. The long walk on Tywyn’s pebble beach was a bit of a challenge on the legs and I couldn’t help thinking that if I was bringing any more camera gear, the weight would be a real challenge! However, with rain once again looming and working up a hunger, there was no time for daydreaming and there was a train home waiting for me.
The long train journey home gave me an opportunity to really assess whether wild camping was going to be a good option for me and it felt like a resounding yes! There would still be plenty of hurdles to overcome but the thought of being able to get out into some really remote areas was too much to resist! Plans were definitely forming for more adventures.
All-in-all, the gear had held up well (leave a comment below if you would like me to explain my setup in more detail) and I certainly think I will be doing it again soon! Even though it wasn’t ‘actual’ wild camping, I do think testing all of the gear out was a good idea and it has really whetted my appetite for more adventure. Though I would probably like to head to Scotland next and get out into some even more spectacular landscapes.
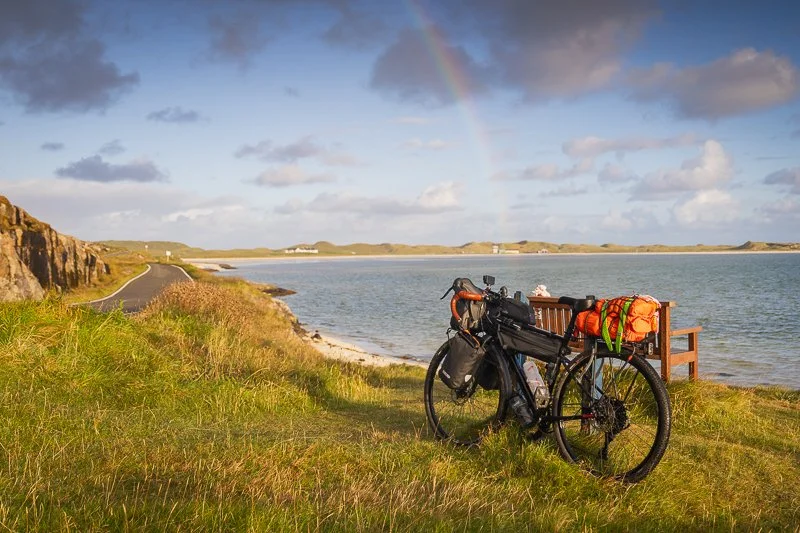
One option that I think I will be exploring is the idea of bike-packing - I cycle on a regular basis anyway so the idea of getting the weight off me and onto a bike combined with the ability to move a bit quicker and a bit further, certainly sounds like a good option! However, all of these plans are for another time and after getting home and a warm shower, I was certainly happy to be back in my own bed! Adventure can wait…
About the Author - Ross Jukes is a professional Photographer and Videographer with over a decade of experience. Working in both Digital and Analogue formats, Ross has worked with international clients, had his worked published numerous times and exhibited his work extensively. With a passion for all things photographic, Ross combines his experience, enthusiasm and dedication to his art form to create engaging and educational content for the photographic community.
Disclaimer: All links to Amazon UK are affiliated links - you will still pay the same price but I will receive a small commission for providing the link. All information provided in this blog is intended either for educational or entertainment purposes and is accurate to the best knowledge of the author. However, further research/professional advice should be sort before making purchases/implementing any advice given and no responsibility is taken by the author or parties mentioned here within.

REVIEW: Arca Swiss C1 Geared Panning Cube Head
Discover the Arca Swiss C1 Geared Cube Head tripod head, a precision-engineered tool for pro photographers. Experience ultimate stability, 3D micro-precision adjustments, and compatibility with most tripods. Elevate your shots with this revolutionary design that redefines performance in the field.
When shopping around for camera gear, or if you're packing up for a long photo shoot, the tripod head is among the hardware that some tend to cheap out on or forget entirely. Sure, it's not that big of an issue, if you're mostly shooting from the hip. However, if you rely heavily on mounting your camera on a tripod, be it for long exposure photography or taking panorama shots, a good tripod head is a must-have.
But even then, the landscape of tripod heads is a diverse one to explore, with a varying number of options, differing in design and price point. Nonetheless, if money is no object, or if you're willing to invest a huge sum into perfecting your photography arsenal, the top of the tripod head hierarchy remains uncontested by the mighty Arca-Swiss C1 Cube. So unique is the C1 Cube, that there's nothing else quite like it.
PLEASE NOTE: I WAS SENT THis ITEM FOR REVIEW BUT NO OTHER PAYMENT OR CONTROL WAS EXCHANGED FOR PUBLISHING THIS UNBIASED REVIEW
It's a high-end, incredibly specialised piece of equipment that most would no doubt find overkill. Or, more particularly, the C1 Cube is geared toward photographers that value a tripod head that enables them to make amazingly precise and refined adjustments. So, you can imagine its uses in instances such as architectural, macro or landscape photography, with buttery-smooth panning shots, and its numerous adjustments.

You can tilt or position your camera to very fine degrees and do so in small increments to help compose a shot. Yet, all this supreme functionality hides underneath a robust and solid shell, alongside quite a lot of mechanical trickery that's unlike any other tripod head that you've come across. If there's such a thing as the best of the best tripod head, the Arca Swiss C1 Cube might be the king of the hill (for now).
Built Like An Absolute Unit
As soon as you get physical with the C1 Cube, you'll notice right away that you're dealing with something quite special. Though most tripod heads are built like tanks anyway, Arca Swiss's attention to detail with industrial design and engineering appears second to none. There's a good reason why this is the case, of course. Mainly, the C1 Cube is designed to support even large format cameras up to 8x10.
Moreover, I'm quite surprised by easily it handles these heavier cameras, and without any significant loss in stability when it's mounted onto a tripod. Granted, this does come at the cost of added weight, as that Arca Swiss C1 Cube weighs more than 1kg. Or, specifically, around 1,032g. That's certainly heavier than a lot of other tripod heads on the market. You'll understand more once you take a closer look at it.
The heft of the C1 Cube is thanks to the robust, tank-like construction, as well as the technical marvel that goes on inside with its geared mechanisms. And yes, the C1 Cube adopts a geared head design instead of a ball head, which has its respective pros and cons. As we'll uncover later, a geared head does mean that I'll be able to get more precise adjustments and positioning when manipulating the tripod head.
Elsewhere, Arca Swiss is well-known for the build quality of its products, and the C1 Cube is no different. The exterior of the C1 Cube is smooth and has even polishing all around. Even the threading on the dials and knobs is easy to grip onto. Furthermore, it's hard to escape the solid feel of the C1 Cube. Besides, it was basically made out of a solid chunk of Aluminum, which also explains the excessive mass.
Video Source - Ben Horne via YouTube
Smoothest Knobs And Dials Around
Speaking of its build, the knobs and dials on the Arca Swiss C1 Cube are definitely worth a mention, too. The rotation of the knobs and dials is smooth, which can be very hard to replicate in some other tripod heads. They feel consistent yet with enough tension to ensure that you can make finer adjustments a bit more precisely. Even with hard use, I've not been able to feel any play or looseness at all.
Moreover, the C1 Cube includes a series of tension control dials, as well. You can thus use these to adjust the tension of the aforementioned knobs. So, you could either tighten the movement of the knobs, which can help to make it harder to turn by accident or if you're prone to over-adjusting. Alternatively, you can loosen up the knobs with those tension control dials, and make them easier to manipulate.
Even if you're used to ball heads, those tension adjustments on the C1 Cube are still more than enough to prevent accidental movements. In addition, avoiding heavy loads - such as having mounted a heavier and larger camera - from shifting your tripod around. Looking around, I've not found any specified load rating specs for the Arca Swiss C1 Cube. There are a bunch of figures online, but 88lbs sounds about right.
Regardless, if the testimonies from C1 Cube owners are anything to go by, it can take quite a bit - so long as you're loading it up reasonably. With that in mind, let's go back to those knobs, as you'll note a few of them around the C1 Cube's outer shell. These are, as with any tripod head, crucial to changing the angle of tilt, rotation, panning, or levelling. Even in this category, the C1 Cube runs away with it.
Maximal Adjustability At A Whim
The Arca Swiss C1 Cube could handle a maximum degree of rotation and tilting of 30-degrees. That's an improvement over some of its closest rivals, which could only handle barely double-digit degrees in their tilt and rotation angles. On top of that, the C1 Cube handily manages 360-degrees of panning - as noted earlier, these adjustments are precise and buttery-smooth, with no noticeable notches or play.
To use these knobs and dials is pretty easy enough, as they're logically placed and spaced out, which is also to the benefit of ergonomics, especially on a long shoot. Throughout the head, you'll find four knobs that specifically sets the tilting and levelling on the X- and Y-axis, respectively. There's then another knob on the bottom to flip up the C1 Cube and then use it in its 90-degree vertical position mode.
This means that your camera is pointing straight toward the ground, which is not something many other tripod heads can claim to do. Near the bottom of the Arca Swiss C1 Cube, you'll then find other knobs to help with the panning, too. To make sure that you're absolutely level, the C1 Cube features bubble spirit levels, one on either side of the head, so you can quickly check the angle that it's positioned over.
Altogether, these make the Arca Swiss C1 Cube a stunningly versatile tool, particularly when you look at other competing tripod heads. However, this might be a detriment in other aspects. With the gearing as well as the sheer number of adjustments that you have, it can take some time to get used to them. Thus, I'd argue that despite its slickness in adjustability, it may be slower to use than simpler tripod heads.
Video Source - John Magnoski via YouTube
“Arca-Swiss’s attention to detail with industrial design and engineering appears second to none.”
The PERFECT PLATFORM
Two other highlights of the Arca Swiss C1 Cube are its base plate compatibility and the locking mechanisms. However, do take note that it's only compatible with Arca Swiss plates and brackets, with either minimal or non-existent support for third-party options. Given how much money is at stake when you're investing this much into photography gear, it's worth checking for compatibility between your equipment.
Specs-wise, the C1 Cube's tripod mount thread size is 3/8"-16. If you have been around the photo or video industry for any time, you will know that there are two main base plate system - Arca Swiss and Manfrotto. The choice between which you prefer is a very personal one but if I tell you I have an Arca Swiss plate on the bottom of almost every camera I won, you can probably guess my preference.
However, this isn’t to say that one is necessarily better than the other, but from my personal experience, I have always preferred the Arca Swiss system. It is also a system that has been thoroughly adopted by many third party providers with a seemingly endless list of rails and L-brackets all design to be (mostly) compatible with Arca Swiss’s tripod heads.
In fact, the only very, very minor downside that I came across was I very nearly loosened the camera from the head because I mistook the locking know for an adjustment knob. This would be of some concern with thousands of pounds worth of camera teetering on top! The solution, just make sure the locking knob for the plate is point backwards (towards you) and be very careful to check what you are undoing!
Buttery Tilts And Rotations
Having tested it with a variety of weighty cameras, not all! Movements and adjustments on the C1 Cube are as tight as you can get, with no play. The latter has been a bit of a deal-breaker for some photographers that have been looking at the Arca Swiss C1 Cube's competitors, where some play or backlash in the gearing are to be expected to a degree. This, therefore, enables you to make smooth, sweeping adjustments.
And, doing so precisely, such as gentle panning from side to side, which makes this excellent if you want to combine panorama shots together. Or, if you prefer the C1 Cube's locked-down stability, it also makes for an ideal tripod head (with the right accompanying gear, naturally) for those long-exposure shots. The stability and rigidness of the C1 Cube, even when loaded up with bulky cameras, are also quite superb.
Even at the extreme ends, when you have it tilted, rotated, and panned, being top-heavy with a chunkier camera doesn't upset it. It also helps that you can trust on that secure locking mechanism to prevent an accidental movement or unintended adjustment. Now, if you're looking for a rival to compare against, it doesn't really have that many. But then again, there aren't many tripod heads like the C1 Cube.
Manfrotto has their popular 405 and 410 series of geared tripod heads. While they are excellent, in my opinion, they're not really made to the same ultra-high standards as the C1 Cube. The former two, for example, have a bit more play in the adjustments, as they don't lock down as securely from my experience. So, if you're interested to step it up a few notches, you won't find much else on the market right now that could rival the C1 Cube.
Video Source - Arca Swiss USA via YouTube
Is It Worth The Asking Price?
Now, here's the catch - the price. For all its capabilities and what you can get out of it, the Arca Swiss C1 Cube is rather expensive. It has a starting price just over £1300. For a tripod head, some might argue that it's a bit too much to spend. Then again, if you're a professional with thousands of pounds invested, another £1.5k for a quality tripod head might not put your accounts under too much strain.
Even with its pricey RRP, I still think it's well worth considering, given its immense versatility, solid build quality, and maximal functionality. It's maybe less of a mere tripod head and more of a specialised piece of machinery. Although, with limited availability and supply on the market, it could take a bit more effort to find one. Depending on the variation (such as the locking mechanism), it might cost more. But, as my Mom always said, ‘buy cheap, buy twice’.
Some of these C1 Cubes, such as those with a quick release or heavier load capacity, might cost you a bit more. In some cases, like C1 Cube models that feature geared panning and the classic clamps; maybe even more expensive. You also have a bunch of other C1 Cube iterations to choose from. The most common variations differ in the locking system - the classic, flip-lock, or Arca Swiss's MonoballFix.
Moreover, you have pickings between the panning - either lower or upper panorama being able to freely rotate, in addition to Arca Swiss's aforementioned gearedPan as well as clicPan. In short, I'd recommend doing a bit more research into which specific version best fits your needs and budget. Still, no matter the specific type that you get, I doubt anyone would be disappointed with an Arca-Swiss C1 Cube, it’s a beast!

SPECIFICATIONS

About the Author - Ross Jukes is a professional Photographer and Videographer with over a decade of experience. Working in both Digital and Analogue formats, Ross has worked with international clients, had his worked published numerous times and exhibited his work extensively. With a passion for all things photographic, Ross combines his experience, enthusiasm and dedication to his art form to create engaging and educational content for the photographic community.
Disclaimer: All links to Amazon UK are affiliated links - you will still pay the same price but I will receive a small commission for providing the link. All information provided in this blog is intended either for educational or entertainment purposes and is accurate to the best knowledge of the author. However, further research/professional advice should be sort before making purchases/implementing any advice given and no responsibility is taken by the author or parties mentioned here within.

BIRMINGHAMS BLOSSOM IS BLOOMIN' BEAUTIFUL, BAB!
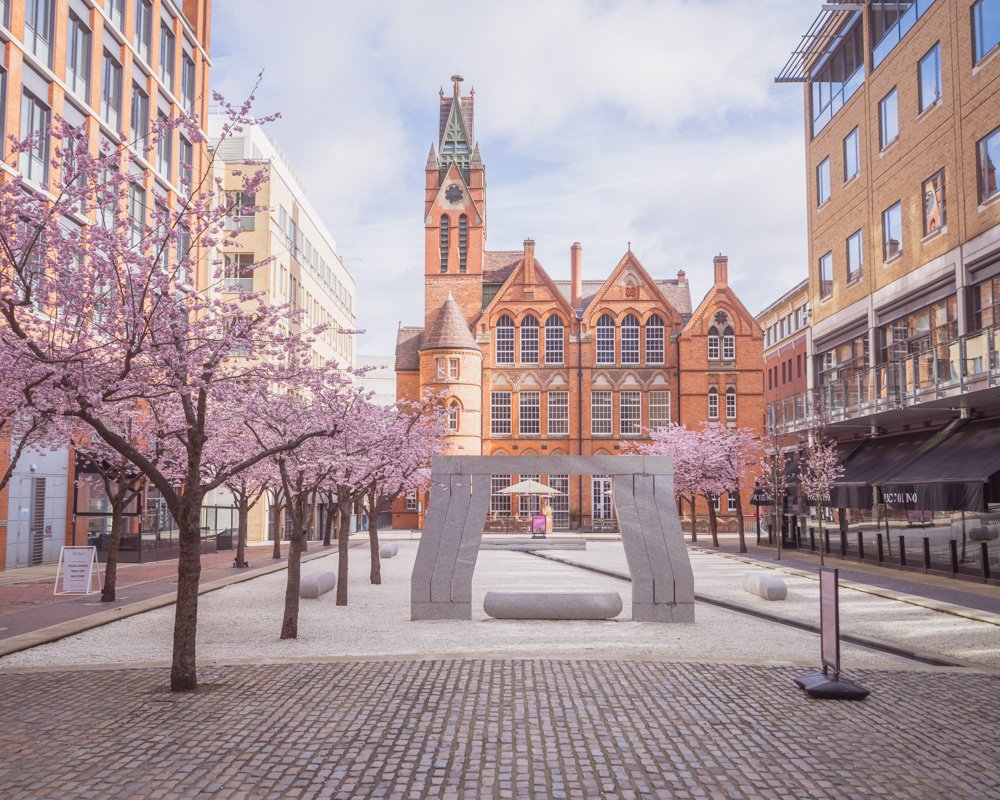
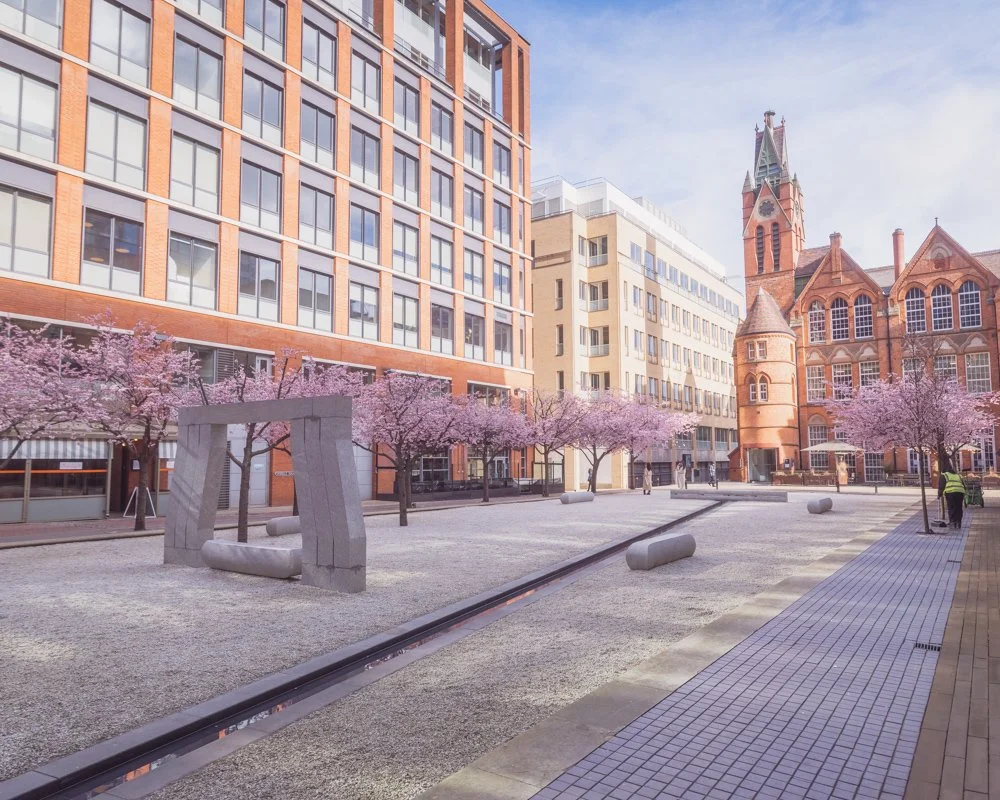
If you are a photographer in Birmingham then there is quite a high chance that you have photographed the Cherry Blossom at Oozells Square at some point. Guess what, it’s back! The beautiful sight is one of the highlights of Spring in the city and after having missed it in recent years, I couldn’t resist the urge to go and get my photographic fill of the flowery magic.
If you are a photographer in Birmingham then there is quite a high chance that you have photographed the Cherry Blossom at Oozells Square at some point. Guess what, it’s back! The beautiful sight is one of the highlights of Spring in the city and after having missed it in recent years, I couldn’t resist the urge to go and get my photographic fill of the flowery magic.
Though it might not be everyone’s favourite photographic subject, there is no denying that the blossom brings a little bit of beauty to Birmingham's city centre. Judging by the amount of people stopping to take pictures, it is certainly popular with both amateur and professional shooters - and copious amounts of passers by grabbing shots for their social feeds!


The blossom normally makes its appearance around early April. However, this year it has sprung a little early. Not that you would miss it, you only have to follow a handful of social media accounts in Birmingham and the iconic scene will soon be filling your feed! The bright pink spectacle is like a call-to-arms for local photographers and more than a few tourists, all attempting to capture the beauty of the blossom.
I was determined to capture it this year and as soon as weather conditions looked right (just enough sun to brighten the scene a little) and diary permitting (occasionally, clients cancelling jobs has its benefits!) - and I was off, multiple cameras around my neck and looking every bit a photography cliche! That didn’t bother me, I knew what my mission was and some cherry blossoms were about to be photographed!

“Small groups of locals and tourists were dotted around, carefully examining the view and precisely picking their angles”
As I arrived at Oozells Square, it was already apparent that many others had beaten me to it. Small groups of locals and tourists were dotted around, carefully examining the view and precisely picking their angles. I didn’t particularly want people in my shots, preferring to let the blossom do the talking. However, there was a more pressing issue, notably a huge bank of cloud and rain scheduled - I was going to need to work quickly.


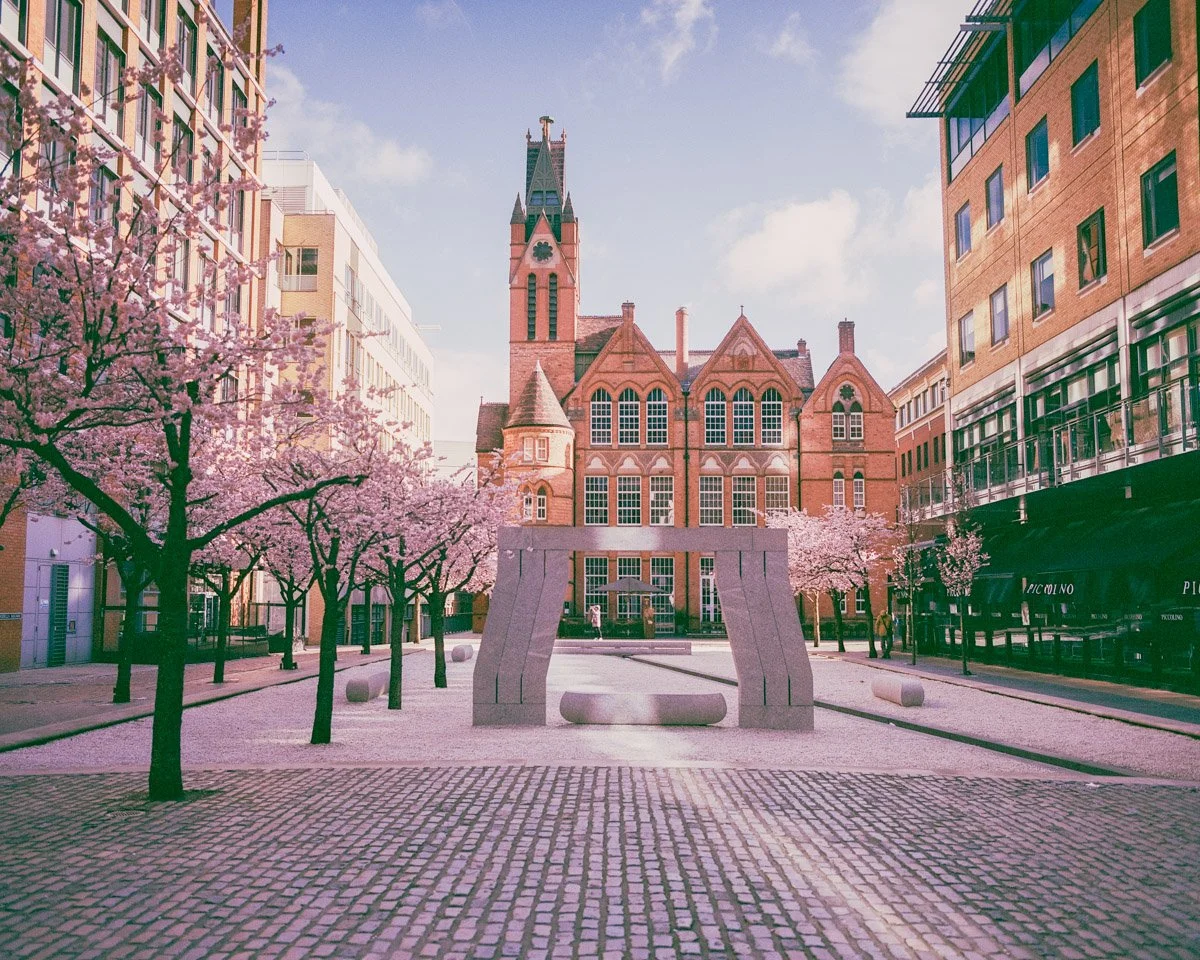
I went straight to the obvious shot. Running diagonally through the square is a thin channel of water - as pretty as it is, it also supplies a fantastic reflection of another icon - well, the actual Ikon Gallery! It’s been done a million times before but like photographing the Bullring Bull, the reflections at Gas Street Basin or pretty much any shot of The Rotunda - the classics are classics for a reason.
I was working with a pretty new (old) camera - a Pentax 645Z. It’s a big behemoth of a camera and in all honesty, I’m still getting used to the button layout. Hulking this huge camera around and fiddling with every button and setting whilst shooting the most obvious scene I could find - I was very conscious that I looked like a complete photography ‘newbie’. As soon as I got my settings dialled in and I started to see the images on the back of the camera, I didn’t care! The scene looked good and the camera was doing its job!

I mooched around for a while looking for different angles, being sure to do little ‘bro nods’ to fellow photographers as people came and went. I even managed to get stopped by security, this is nothing unusual when carrying a camera the size of a large cat (I’ve measured it against my own cat!). What was more unusual was that security just wanted to inform me that there is currently a photography competition running for the blossom - Security, encouraging me to take photographs, yes please! After having a very friendly chat, we went our separate ways and right on time, the rain started to land on my lens and the fun was over.
In truth, I know that the blossom might not be everyone's ‘cup-of-tea’. However, I thoroughly enjoyed the little break to capture the blossom before it inevitably makes way. In terms of a photographic calendar in Birmingham, it is definitely a highlight and the little pop of colour after the inevitably grey winter is always a welcome change!


A few tips if you are planning a visit
If you are planning a visit to Oozells Square to capture the blossom, I would recommend taking a zoom lens or a macro lens if you have one - something I failed to do! There are so many little details to capture, like the reflections in puddles and getting some blossom shots with plenty of bokeh goodness! Also be sure to put some time aside to have a look around the wonderful Ikon Gallery and grab a coffee while you’re there.
One other piece of advice I would give is to plan your visit around the weather but also the direction of the sun! There are a lot of tall buildings around the square which can leave the blossom in shade for much of the day. I found that around 9.00am is a good time to visit (and the time the shots you see in this post were taken). This allows a little bit of sunlight to fall on the Ikon which really brightens the scene - as long as it’s sunny that is!

Looking ahead, I think next year I’ll try to capture some video to accompany the shots and possibly even dust off the large format film camera to capture the scene. For now though, I’m just glad I got there before the blossom hit the floor!
A Little Update
After writing this, the next day the weather looked good in the morning so I decided to run out with the film camera (Bronica GS-1 and Kodak Portra 400 for those who are interested) and grab some shots before the blossom was gone.
The shots didn’t turn out quite as well as I’d hoped. I underexposed most of the shots and I think my chemicals may be going off as there was a bit of a weird colour cast to the shots - all that aside, I do think they have a bit of character to them, but I’m certainly glad I got the digital shots the day before. I would love to know which shot is your favourite so leave a comment below :)


Thanks for reading :)
About the Author - Ross Jukes is a professional Photographer and Videographer with over a decade of experience. Working in both Digital and Analogue formats, Ross has worked with international clients, had his worked published numerous times and exhibited his work extensively. With a passion for all things photographic, Ross combines his experience, enthusiasm and dedication to his art form to create engaging and educational content for the photographic community.
Disclaimer: All links to Amazon UK are affiliated links - you will still pay the same price but I will receive a small commission for providing the link. All information provided in this blog is intended either for educational or entertainment purposes and is accurate to the best knowledge of the author. However, further research/professional advice should be sort before making purchases/implementing any advice given and no responsibility is taken by the author or parties mentioned here within.

WELCOMING THE SPRING WITH THE BEST VIEW IN BIRMINGHAM!
I’m pretty sure I’m not alone when I say that I can’t wait for Spring! It feels like it’s been Winter for an eternity so when the amazing people at Orelle, Birmingham’s hottest spot for fine dining (and even better views!) got in touch and asked if I’d like to welcome the Spring in style, it was a resounding yes!!
I’m pretty sure I’m not alone when I say that I can’t wait for Spring! It feels like it’s been Winter for an eternity so when the amazing people at Orelle, Birmingham’s hottest spot for fine dining (and even better views!) got in touch and asked if I’d like to welcome the Spring in style, it was a resounding yes!!
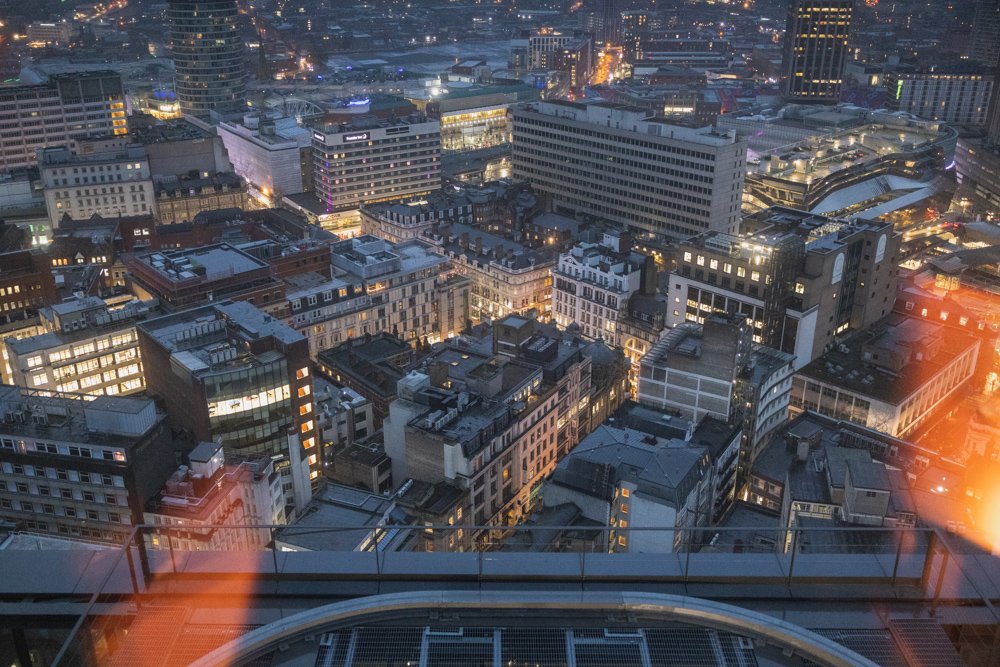
If you have any connection with the Birmingham food scene then Orelle will have been on your radar for quite a while. The awesome guys from D&D London had been planning something special for their first restaurant in Birmingham and they certainly found a great spot for it! The 24th floor of 103 Colmore Row offers 360 degree views of Birmingham. But as an additional treat, they also have a fantastic cocktail bar on the ground floor.
And it was a cocktail that was the main attraction and the perfect accompaniment for welcoming in the Spring! You see, I’m going to let you in on a little secret, Orelle are launching their own Speakeasy! A secret cocktail launched each month that can only be accessed by those with a special password! I obviously can’t tell you what it is but what I can say is that I happened to be at the bar and uttered the words ‘Golden Key’ and before I knew it, a kindly gentleman behind the bar nodded at me and said ‘Certainly, Sir’ and the magic commenced…
Please note: I received a cocktail for free for attending this event but no other payment or controls were in place, in exchange for publishing this content


The first cocktail to be launched is the ‘Equinox Sour’, a celebration of the changing season it’s a Pisco-base mixed with fresh Spring flavours including, Elderflower, Fresh Lemon and Butterfly Pea Flower.The highlight being the addition of lemon which turns the cocktail slightly pink from its deep purple colour, referencing the changing of the seasons and lighter days and evenings.


However, as much of a treat as the Equinox Sour was, there was something else that had piqued my interest, and that was the views! Even though the promise of a beautiful sunset to mark the changing of the season would have been the perfect way to say goodbye to the Winter - This is England, so of course it was raining! Nonetheless, the views are breathtaking no matter the time of day or night and regardless of the weather conditions!
“I can safely say, those views never lose their appeal and you certainly have to experience them in person to appreciate them.”
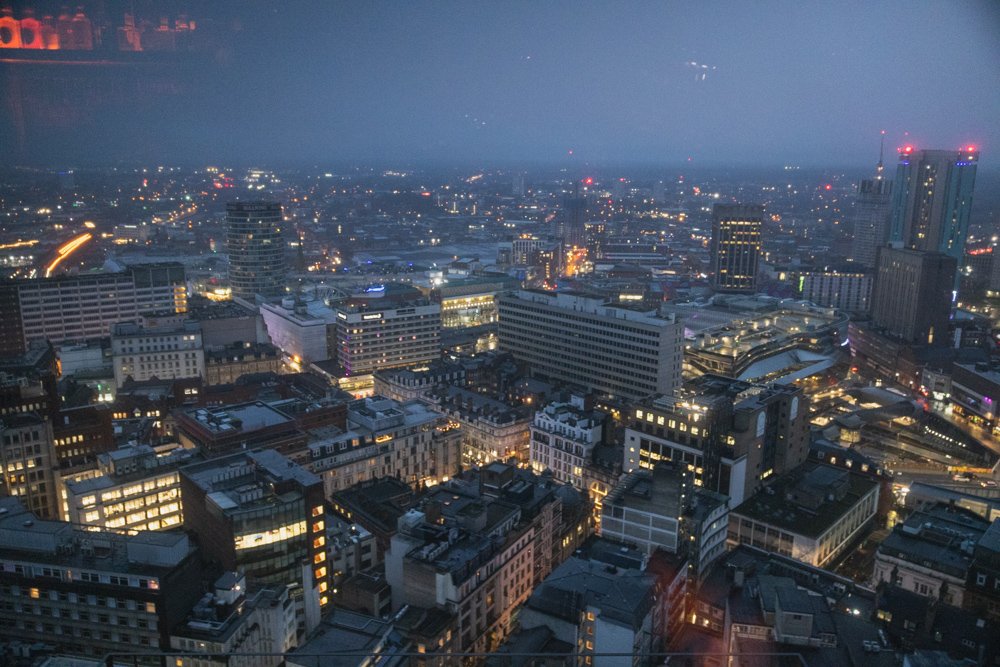


In truth, I’m no stranger to the building. In fact, my relationship with the site started many years ago when I joined a group of other photographers to photograph from the roof of the Natwest Tower, which stood on the site before being demolished and replaced by the new 103 Colmore Row.
I was very fortunate to photograph the building throughout its construction and was present at many of the key milestones. I even got to interview the guys from D&D when they first saw the new restaurant space before it was transformed into the beautiful environment you now see. So I have been fortunate to see the panoramic views on many, many occasions. I can safely say, those views never lose their appeal and you certainly have to experience them in person to appreciate them.

However, back to the fun stuff and after watching the Equinox Sour slowly transition from a deep violet to a beautifully layered mix of pinks and purples, it was time to taste it! Wow, is all I’ll say. I’m no cocktail connoisseur, but what I can say is it certainly got my attention! I can see why it’s creator, Tiago Bastos, Orelle’s bar manager thought that this would be the perfect accompaniment to bring in the fresh, bright new season! If only the weather had been a bit more fitting, but I’m not complaining…
After pretty much glugging the cocktail down, I couldn’t help but grab some shots of the views - regardless of how many times I see them, there is always something new to appreciate. In truth, these are far from my best images I’ve taken from this vantage point but I actually really liked the moody ‘Blade Runner’-esque vibes - I could even live with the warm reflections from inside the restaurant which almost felt like light leaks on an old roll of film - something I would know all about!


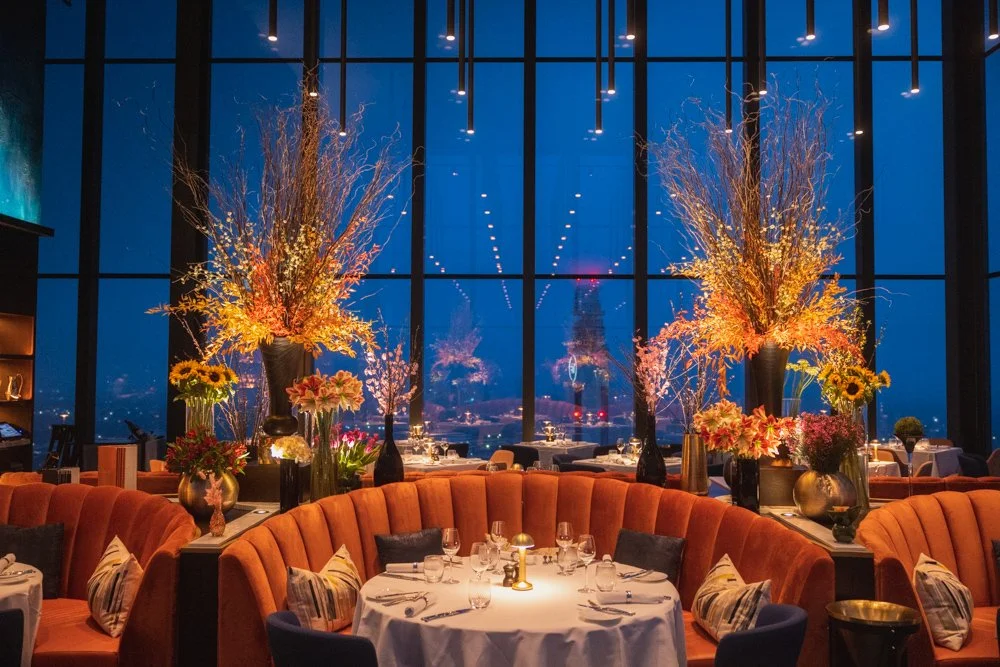
And while I’m at it, how amazing does the restaurant look?! I can’t say I’ve had the pleasure of trying the food yet but one thing is for sure, anything would taste better in these surroundings, possibly even my cooking! The warm, welcoming interior screams class with just enough of a hint of fun, and when combined with the ground floor cocktail bar, you can certainly tell that the guys at Orelle are offering something truly special for visitors from Birmingham and beyond.


Thank you again to the guys at Orelle and ReWired PR for the very special invite and complementary cocktail. If you get the chance to experience the bar and restaurant for yourself, don’t forget to utter the magic words (Golden Key!) to one of the bar staff for a very special treat - Oh, and grab some photos of that view!!
About the Author - Ross Jukes is a professional Photographer and Videographer with over a decade of experience. Working in both Digital and Analogue formats, Ross has worked with international clients, had his worked published numerous times and exhibited his work extensively. With a passion for all things photographic, Ross combines his experience, enthusiasm and dedication to his art form to create engaging and educational content for the photographic community.
Disclaimer: All links to Amazon UK are affiliated links - you will still pay the same price but I will receive a small commission for providing the link. All information provided in this blog is intended either for educational or entertainment purposes and is accurate to the best knowledge of the author. However, further research/professional advice should be sort before making purchases/implementing any advice given and no responsibility is taken by the author or parties mentioned here within.
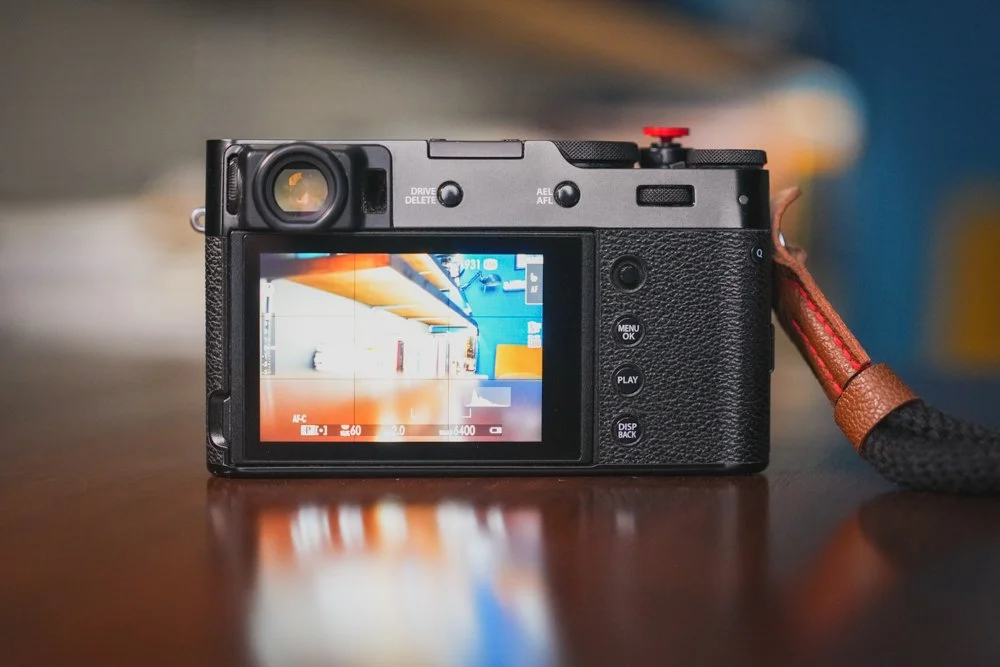
Fuji X100V - Amazing But Is It Worth The Hype?
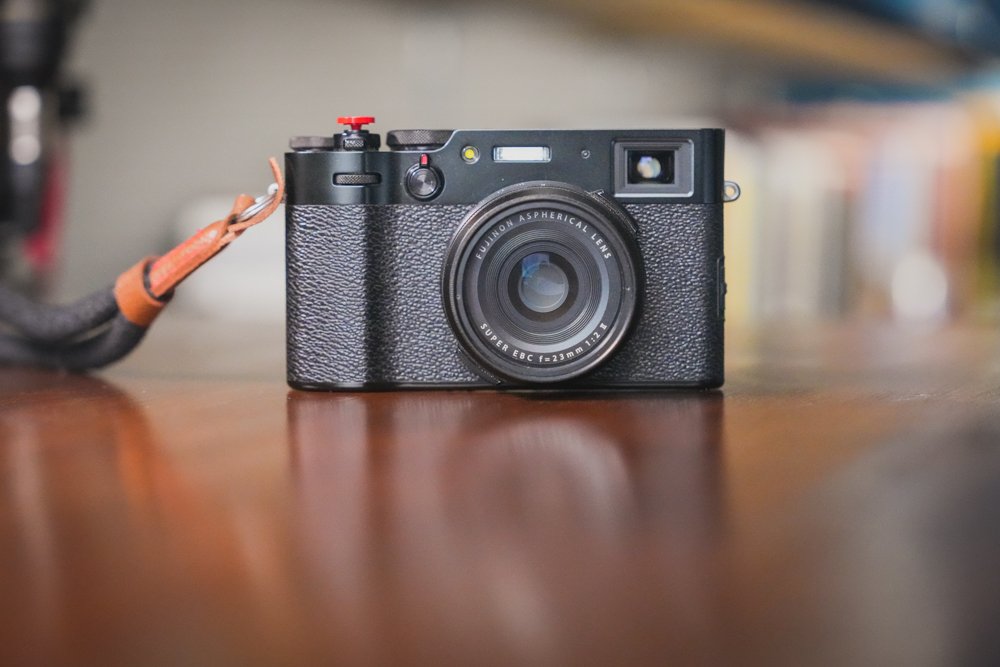
Through more than a decade of evolution and gradual refinement, Fuijfilm's X100 series of cameras has continually impressed, especially despite their small form factor, and in the case of their latest X100V, it's a seriously excellent little camera.
Fujifilm's popular X100 series can be described somewhat as the camera world's Porsche 911. For over a decade now, they've been slowly iterating and improving upon what was already a pretty good base. As time has passed, so too has the X100, gradually gaining new features, fixing earlier drawbacks, refining things here and there, and keeping up with the times. But, is Fujifilm's X100V worth the upgrade?
Though it's been a couple of years since its launch, the X100V has recently seen a surge in popularity. That's mostly thanks to the influences of their appearances amongst social media circles such as Instagram and TikTok, among others. Due to this, the Fujifilm X100V is becoming ever harder to get your hands on. With soaring prices, second-hand examples are even more expensive than their original MSRP price tag.


PLEASE NOTE: I PURCHASED THIS WITH MY OWN MOMEY AND NO PAYMENT OR CONTROL WAS EXCHANGED FOR PUBLISHING THIS UNBIASED REVIEW
Video Source - Andrew Ethan Zang via YouTube
So, assuming you already have the older X100F, currently own a similar compact prime-lens camera, or if you want to delve into it as a first-timer, should you go through the hassle of scouring about increasingly scarce stock? In my experience... Absolutely! It's a great little camera for an everyday carry. With its ease of use and intuitive operation, the Fujifilm X100V is a joyous machine to have a bit of fun with.
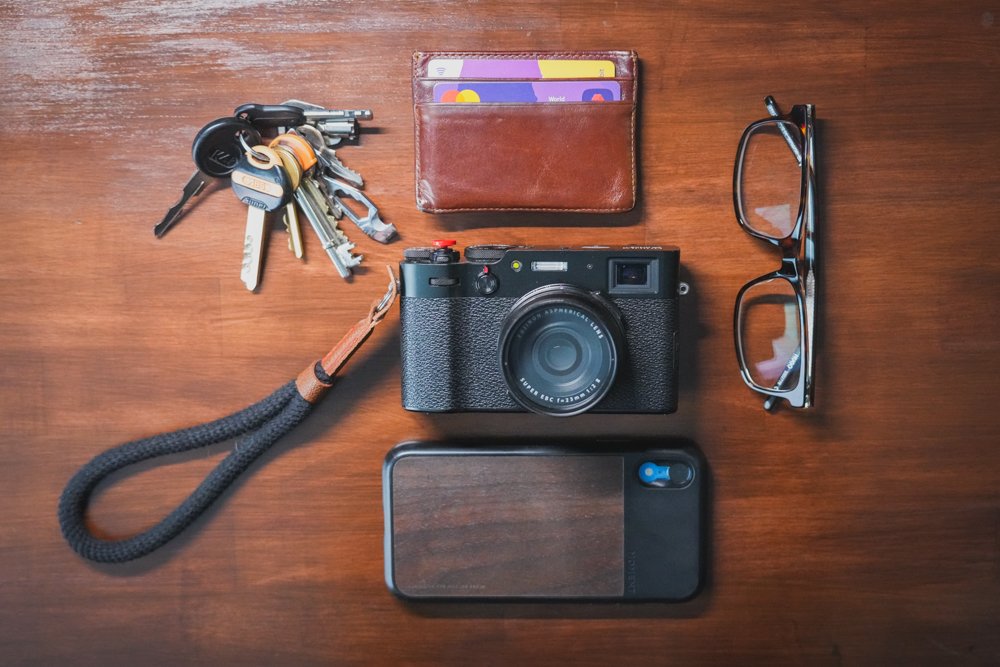

It takes great photos, with a noticeable improvement in all regards when compared to its predecessor. A robust build quality ensures that you needn't have to baby it too much. Furthermore, it'll now feature an abundance of upgrades and trickle-down benefits from Fujifilm's bigger, more professional-grade kit. It's a fine addition to the brand's venerated X100 series, so let's take a closer look at all this buzz...
🔨 Robust Build, Better Ergonomics
The old X100F wasn't really the most durable camera in the world. As an owner, you do have to be a tad cautious with how you use it, especially when it starts raining. But lucky for you and me, Fujifilm's latest X100V has the same-old solid build quality. And this time around, it's (almost) weather-sealed. Ideally, it might be a good idea to get a lens filter atop the built-in ND filter, for a bit more security.


While you're there, you could even shell out a bit more for their optional filter ring adapter for additional water resistance... Just to make doubly sure that water ingress is a tad harder. It's just another thing that you have to invest in, especially if you're typically using an X100V for something like street photography. Now, I'd still recommend avoiding any contact with heavy rain. Or, accidentally dropping it into a drain!
Video Source - DP Review TV via YouTube
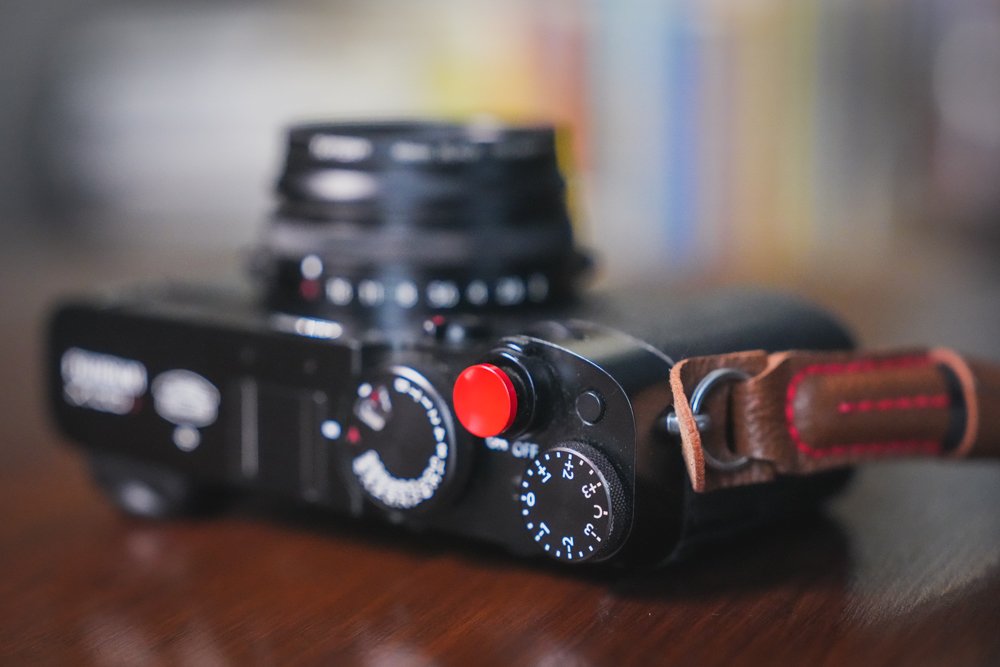
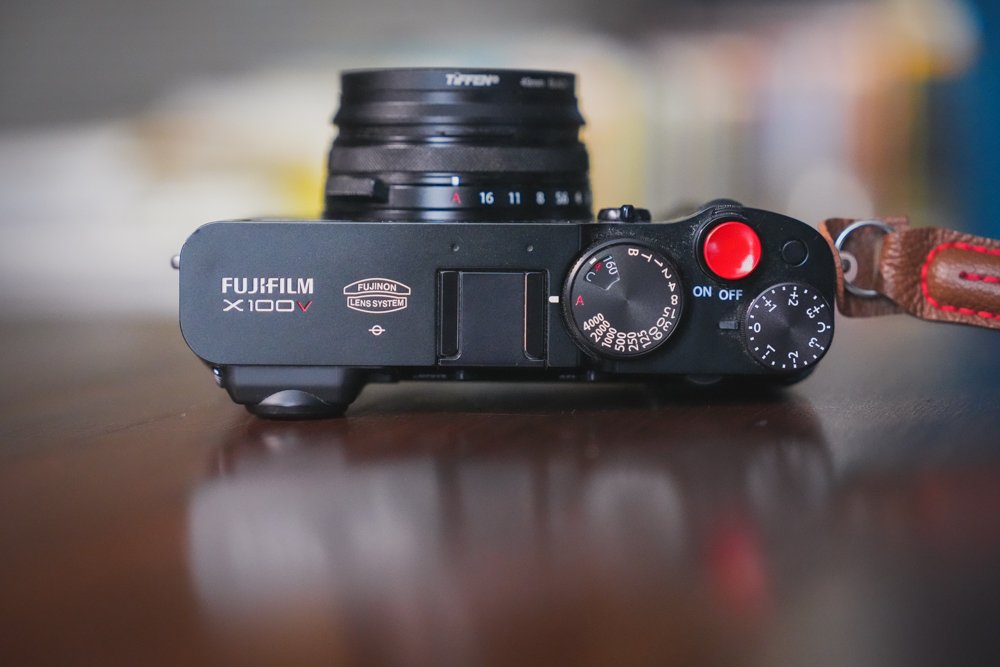
On top of the reinforced body, one noticeably major change between the old X100F and the new X100V is the ergonomics. There's a good feel and intuitiveness when using it. Even the little things, such as how the shutter speed dial has been reworked to allow better tactile feedback when adjusting the ISO, do make a difference. Not to mention, the added customisability of the dials, if you need custom controls.
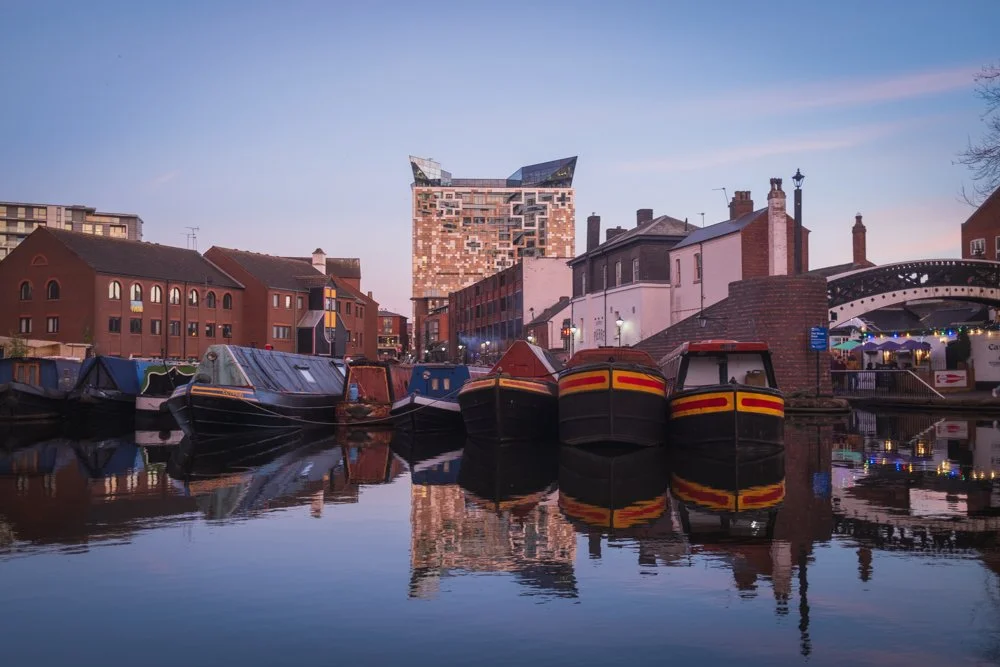
Image Quality is fantastic, see the gallery at the bottom of the page :)
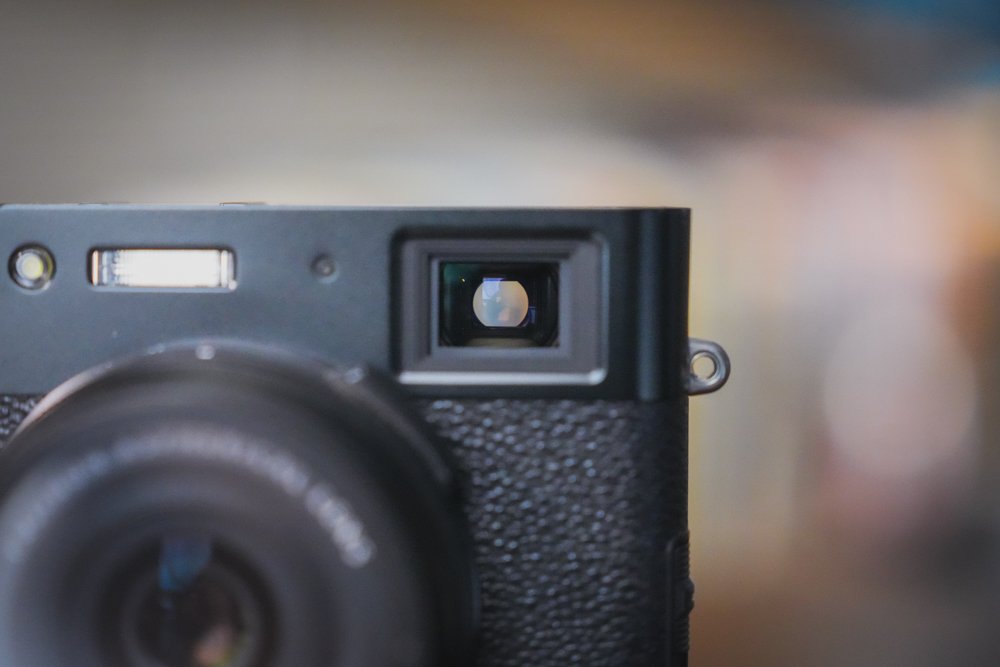
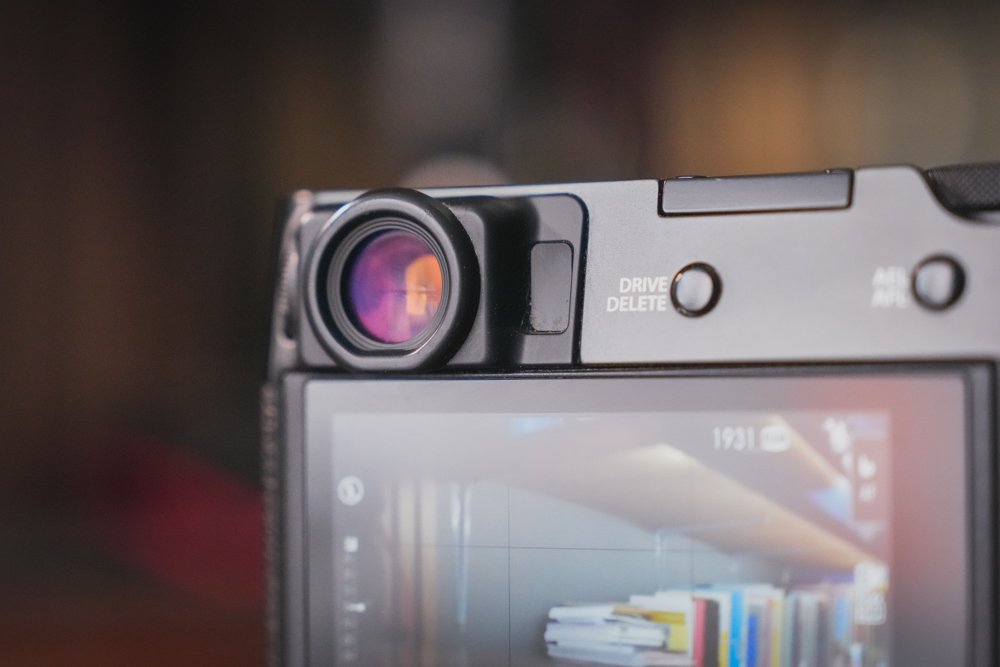
Elsewhere, the already good viewfinder has been redesigned. It's bigger now, and comfier to use during long, extended photoshoots. It's a similar optical-electronic hybrid to the one you'd get in the older models. Yet, it still goes to show that even the most minute iterations matter. All in all, the Fujifilm X100V is nearly the ideal and perfect choice if you need a day-to-day camera. Then, there's the subject of the rear display.
“The X100V is the sort of camera that’ll make you fall in love with photography, all over again”
🔍 Attention To Detail That Matters
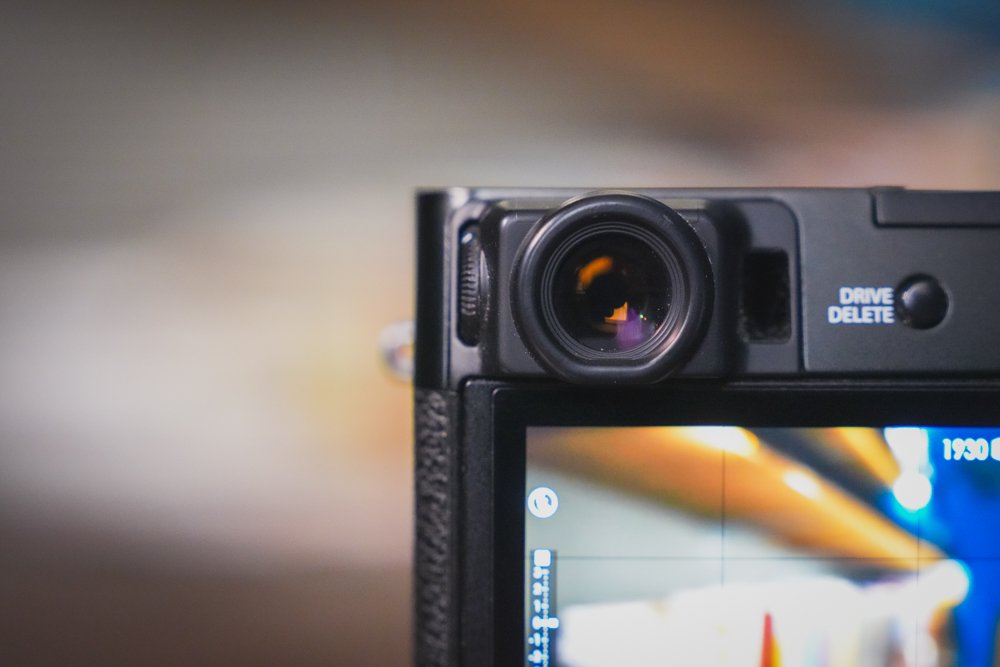
A noteworthy highlight in the long list of new stuff that came with the X100V is the screen. it now comes with tilting (which otherwise sits neatly flushed against the frame) and it's a touchscreen. Its touchscreen can be quite handy if you're trying to manually focus and navigate the menus with a simple swipe. While some might be hesitant to get rid of the old physical 4-button layout, it actually works pretty well.
No doubt, some of you might still prefer actual, clickable, tactile buttons. But, give yourself some time to get used to the touch functions, and it's surprisingly well-integrated. Additionally, the display now comes with a brighter backlight. So, glancing at the overlay under bright sunlight is a bit easier on the eyes. One other element of the Fujifilm X100V that's a big step forward is the new lens that it's packing.
Video Source - Benj Haisch via YouTube
The 23mm F2 lens might, at first, appear identical to its predecessor. Nevertheless, its innards have been slightly rejigged - though it remains a fixed focal length unit. On the plus side, images are sharper than it was before with the older models, especially at shorter distances or focusing in more closely. However, it does have a new bokeh signature that fans of the prior X100 series cameras may have to get used to.
Moreover, I noticed that the lens can be a bit slow to react to what you and the camera are seeing. It's nothing deal-breaking, but when you consider how well the autofocus performs (more on that later), you do need to account for it. As such, it can lead to some missed shots if you don't time them right. Hence, if you're trying to capture fast-moving objects, like passing cars, it can be a bit of a challenge.
📸 Small In Size, Mighty In Image Quality
Oh, and have I mentioned just how good the image quality is from the Fujifilm X100V is? In particular, given a relatively compact form factor. This is mostly thanks to Fujifilm's newest 26MP X-Trans APS-C sensor and processor combination. Which, if you're taking notes, is homologated from the brand's larger X-T3 and X-Pro3 cameras. In short, it features a BSI-CMOS sensor and Fujifilm's X-Trans colour filtering.

Low Light performance is excellent for such a small camera!
In addition, it has a lower native ISO value of only 160. Albeit, its maximum ISO value remains at 12,800. What you can expect are vibrant colours, with respectable noise suppression at higher ISO values. And, a smoother bokeh, though the effect is a tad distinct from older X100 series cameras. More specifically, it's got that onion ring effect, which does make images pop more, with a softer bokeh, overall.
Video Source - GxAce via Youtube
Using the X100V, I noticed that there's less of a haze effect at longer distances and greater improvement in image clarity and sharpness. Ah, and if you adore Fujifilm's film simulation modes, the X100V has you covered. You'll be able to choose between Provia, Astia, Classic Chrome, Pro Neg, Std Neg, Classic Neg, B&W, Eterna, and Velvia, among others. Plus, a variety of other custom effects that you can add to a shot.

While some might think these are gimmicky, they're actually a lot of fun to play around with. Now, aside from taking crisp images, the X100V also does so pretty speedily thanks to its electronic shutter. It allows you to take burst pics at speeds of up to 20fps when using the whole sensor. Or, up to 30fps with a 1.25x digital crop. Another interesting surprise with the X100V is its videography performance.
👀 Focusing On The X100V's Autofocus
Video is an unexpected (more or less) strong point of the Fujifilm X100V, especially given its size as well as physical constraints. You get neat highlights such as recording at 4k/30fps or 1080p/120fps. Or, you may like its F-log recording function, though it's only in 8-bit. Granted, the X100V isn't, by any means, an ideal Vlogging camera. For example, the camera lacks any sort of stabilisation, digital or otherwise.

As such, video-related work should ideally be done atop a tripod or gimbal, unless you're okay with shaky recordings. But, if you are using it for a bit of video capture every once in a while, it's pretty decent. You'd be able to easily bolt on a microphone into the 2.5mm jack. Or, you could instead use the USB-C port and adapt to a more conventional 3.5mm jack. While we're here, let's rejoice for the inclusion of USB-C.
No more micro-USB... Only USB 3.1 Type-C for charging the battery, or transferring files. Oh, and another bonus for videophiles; the X100V includes continuous autofocus with face detection. Speaking of, among the biggest inclusions for the X100V is a revised on-sensor phase detection autofocus. In practice, that'll translate to its ability to focus on key subjects a bit better, with improved facial and eye tracking.

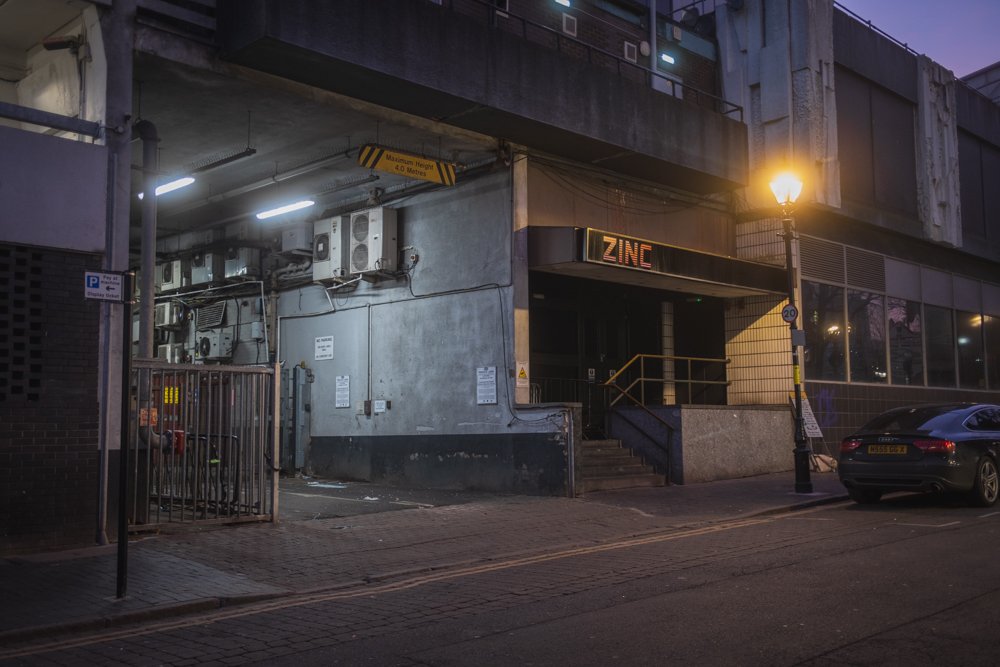
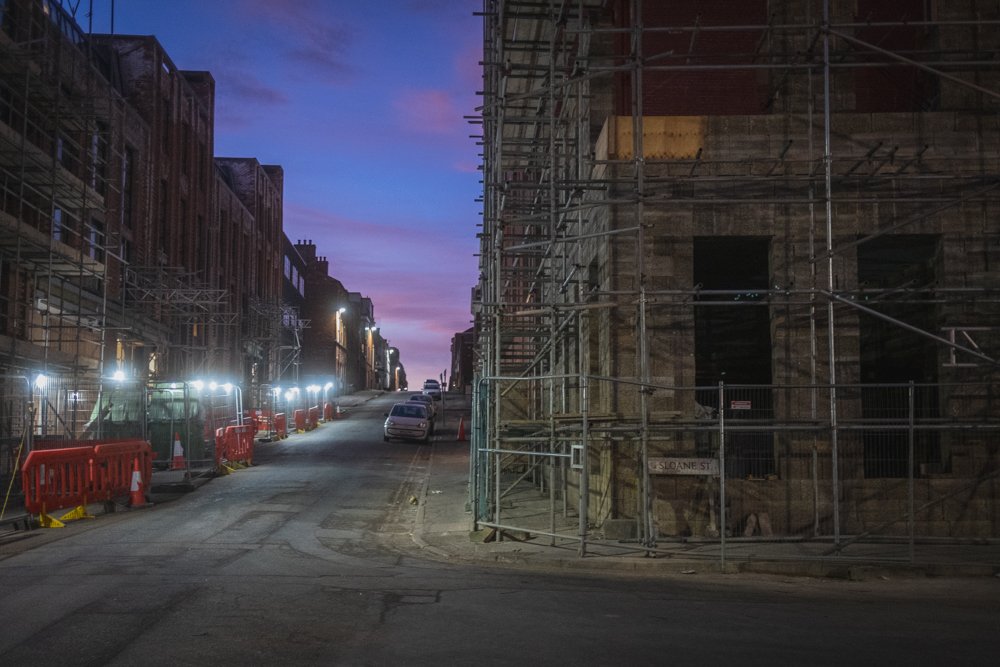
The X100V is amazing for a bit of urban exploration!
It now has 425 autofocus points across the entire frame - up 100 points compared to the X100F. And, it's paired with a customisable focus range limiter. I found the autofocus to be really good, and it's a big step forward in the right direction. It'll focus in onto a subject quickly - slightly faster than the old ones. That's even in low-light settings, with good accuracy. Still, there are certain mentionable cons to the X100V.
❌ Some Of The Downsides To Account For
I mentioned earlier that the Fujifilm X100V comes with a fixed focal length. It's not bad, by any means. Yet, it does deprive you of some adjustability in a shot. In so doing, you ought to be prepared to crop that final image afterwards. All the while, simply needs to get used to the singular focal length that it offers. It's made more challenging given the fact that it's a fixed lens, so you can't interchange it.
Of course, that's not a major strike against the X100V, as fixed lenses are a mainstay among many other compact cameras, anyway. Another disadvantage of the X100V, and it's one that I noticed personally, is that it's not entirely pocketable. It's small enough that you can stuff it into a jacket pocket. Although, it's definitely not going to fit into a jeans pocket, forcing you to carry a bag to lug it around with you.

It's in that awkward middle ground where it's pretty tiny. Yet, too large to a point where you're not really able to discreetly bring it with you. And if I'm going to carry a bag, I might as well bring with me some of the bigger, more capable cameras, instead... Ones with interchangeable lenses, and could yield better photos. That's me being nit-picky, but it's still a bit of an unforeseen inconvenience, nonetheless.
As for how the market is right now, I suppose another slight catch for the X100V is its availability and cost. It was a fairly-priced compact camera, given its capabilities and feature set, when it came out. But nowadays, you might find trouble even sourcing one for anywhere close to MSRP. Your options include... Waiting until the market stabilises, paying the high markup, or simply opting to get the older X100F.
✅ Should You Upgrade To The X100V?... Some Closing Thoughts
Having mentioned the X100F, do check out my other review on that, if you need a more in-depth look at how it differs from the X100V. TL;DR, while it's an older model, it's still a pretty good camera. That does beg the question... If you already have the X100F, would it be worth upgrading? I mean, if you're happy with it, then there's not really anything here that'll make you rush out to get the later X100V.
With that being said, I simply adore the improvements that Fujifilm has put in place when updating their beloved X100 series. The Fuji X100V is an engaging, intuitive, easy-going camera that takes great photos in a pinch. Yet, offers a whole host of features... From a speedy and accurate autofocus system... To that capable sensor-processor combo, in addition to its enhanced video-recording functionality.
Video Source - YHMA via YouTube
The lens is sharper, the build quality is more durable, and the tech is more up-to-date. So, you might see why it's such a desirable little camera. There's a good reason why the X100V's market value has risen to levels where they're no longer as attainable as they once were. As a result, they're becoming tougher to find. But, should you locate one for a good price and in good condition, it's tempting to go for it.

I absolutely love mine, and it'll forever remain a part of my collection. Despite the high prices that it now commands, the X100V isn't one that I'll be selling off anytime soon. With smartphone cameras becoming ever smarter, and pro-grade cameras becoming more feature-packed, it's nice to go back to those simpler times. The X100V is the sort of camera that'll make you fall in love with photography, all over again.
FAQ (UPDATED IN 2026!)
-
Yes — if you want a genuinely enjoyable everyday camera that encourages you to shoot more. The X100V still delivers lovely files, great colour, and that “grab it and go” experience that phones and bigger systems don’t really replicate. The only time it becomes a harder sell is when the used price creeps too close to newer alternatives.
-
If you’re buying fresh (or the prices are close), the newer model is the sensible choice. But if you can get a fairly priced X100V, the shooting experience is extremely similar: same general vibe, same fixed-lens approach, same “take it everywhere” appeal. The real decision usually comes down to whether the newer upgrades matter to your style of shooting.
-
The fair price is the one that doesn’t make you feel slightly annoyed every time you pick it up. My rule: compare it to the cost of a newer alternative, then decide what you’re willing to pay for the X100V specifically (the experience, the form factor, the look). If the price feels inflated purely because of hype, be patient — there are always more used listings.
-
A quick checklist that’ll save you a headache:
Overall condition (dents near the lens, sticky dials, worn buttons)
Sensor dust / lens dust (shoot a bright wall at f/16 and check)
Focus performance (try close focus and mid-distance, see if it hunts)
Viewfinder and rear screen (dead pixels, odd behaviour)
Battery/charging and USB-C port (wiggle-test the cable gently)
If you can: ask for a few real sample images straight out of camera
-
It’s “weather resistant” in practice once you’ve sealed the front of the lens properly (without that, you’re leaving a weak point). I still treat it like any camera I actually like: fine for drizzle and real-world use, but I’m not giving it a bath, and I’m definitely not testing my luck in heavy rain.
-
For most people doing street, travel, family moments, and general “life stuff”, yes — it’s quick, accurate, and easy to work with once you understand how it behaves. Where you’ll notice limitations is fast, unpredictable action (kids sprinting at you, sports, dogs doing dog things). If you mainly shoot that kind of subject, you’ll want to be realistic about hit rate.
-
If you bought the X100V for the Fuji look, I’d say shoot RAW + JPEG. Use the JPEGs when you’ve nailed a look you love and want speed, and keep RAW there for the shots that need extra rescue (mixed lighting, tricky exposure, once-in-a-lifetime moments). The camera’s strength is that it can be both a “fun JPEG camera” and a serious file-maker.
-
The “boring” stuff is the best stuff:
A proper way to protect the lens (especially if you’re out in all weather)
A comfortable strap (you’ll carry it more if it feels good)
Spare battery (because you will get carried away)
A small bag/pouch that stops it getting bashed around
Everything else is optional and depends on how you shoot.
-
It can do lovely-looking video, but it’s not a “point it at yourself and walk around” vlogging setup. If video is a big part of your plan, you’ll want to stabilise it properly and think about audio. I treat the X100V as a stills camera first, with video as a bonus when I fancy capturing a few clips.
-
Two reasons come up again and again:
They realise a fixed lens isn’t for them (they miss zoom / flexibility)
The hype wears off, and they want something more practical for their specific needs
If you already know you enjoy a 35mm-ish field of view and you like a simple, distraction-free camera… you’re exactly the kind of person the X100V makes sense for.
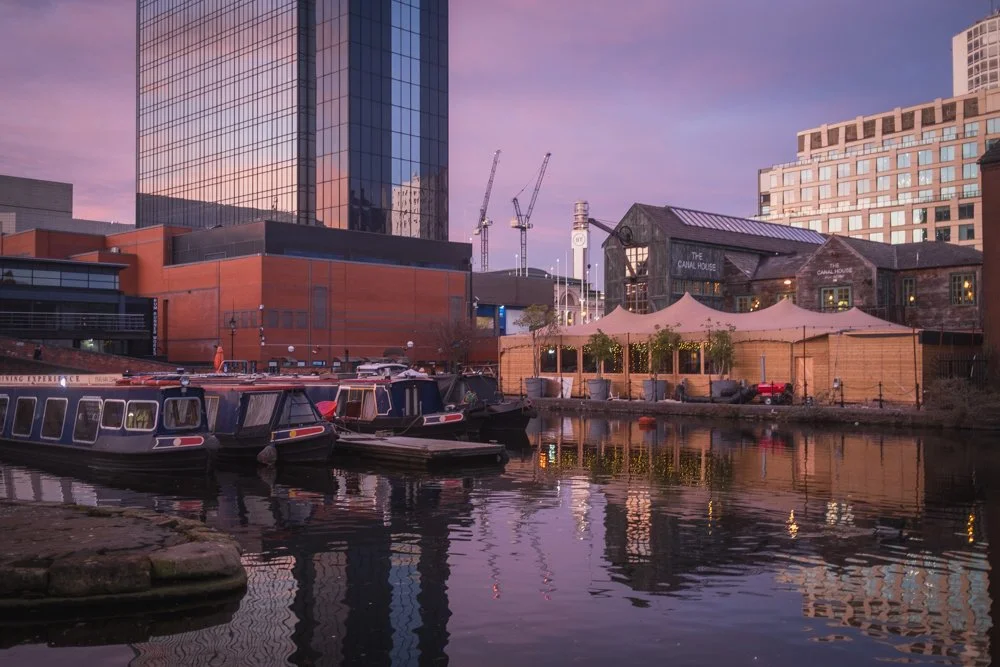
📸 IMAGE GALLERY
These images are intended to give you an idea of what the Fuji X100V can achieve. You might not like my particular brand of ‘urban’ imagery but it will give you a taste for what this camera is about. You will also notice, I took particular advantage of one amazing sunset! I shoot with a Black Pro Mist filter on the X100V to add to the cinematic/film like (ish) feel - but for me, this camera really comes alive in low light situations and is amazing as a ‘carry everywhere’ camera!


Specs And Details


About the Author - Ross Jukes is a professional Photographer and Videographer with over a decade of experience. Working in both Digital and Analogue formats, Ross has worked with international clients, had his worked published numerous times and exhibited his work extensively. With a passion for all things photographic, Ross combines his experience, enthusiasm and dedication to his art form to create engaging and educational content for the photographic community.
Disclaimer: All links to Amazon UK/US are affiliated links - you will still pay the same price but I will receive a small commission. All information provided in this blog is intended either for educational or entertainment purposes and is accurate to the best knowledge of the author. However, further research/professional advice should be sort before making purchases/implementing any advice given and no responsibility is taken by the author or parties mentioned here within.

Bronica GS-1 - The Most Underrated Medium Format Camera Ever?
I've been searching, yearning for a medium-format film camera like this for a long time. It wasn't easy to get my hands on it, and for some reason, its mere mention is but a hushed whisper floating from one forum post to another. Not a lot of people know about it, and one might argue that it's criminally underrated. In that sense, it's a good time to now introduce you to a new piece in my collection, the Bronica GS-1.

I've been searching, yearning for a medium-format film camera like this for a long time. It wasn't easy to get my hands on it, and for some reason, its mere mention is but a hushed whisper floating from one forum post to another. Not a lot of people know about it, and one might argue that it's criminally underrated. In that sense, it's a good time to now introduce you to a new piece in my collection, the Bronica GS-1.
Now, if you know anything about 6x7 format cameras, you may've heard of the Mamiya RZ67 and RB67, as well as the Pentax 67. So, why not the Bronica GS-1? Why was it side-lined in the pages of history? On top of that, why did I get the GS-1 instead of its more popular rivals? For starters, the GS-1 perfectly matched a set of criteria that I set out when I was on the prowl for a medium-format film camera.
PLEASE NOTE: I PURCHASED THIS WITH MY OWN MOMEY AND NO PAYMENT OR CONTROL WAS EXCHANGED FOR PUBLISHING THIS UNBIASED REVIEW


This being... a 6x7 aspect ratio, (relatively) compact sizing, good ergonomics, great image quality, good lenses and it could be had for a bargain price. The 6x7 format was, in particular, very desirable among other formats that I planned on shooting. Moreover, Bronica's GS-1 is smaller than either the Mamiya or Pentax cameras. The latter two are quite hefty and cumbersome to operate, which would be quite a hassle for day-to-day use.

Having previously experienced both the Mamiya and Pentax offerings before and now handling the GS-1 - I found the latter to suit my needs the best. For a camera that's no longer in production, and one that's been left under-appreciated and under-mentioned amongst photographer and mainstream circles, was choosing Bronica and its GS-1 a mistake? Not at all. In fact, it's time that the GS-1 gets its own, silent revolution.
The Ideal Ergonomics For A Comfy Experience
So, about my particular GS-1... I bought it with a pop-up waist-level viewfinder. I consider it a bonus find for me since it’s my preferred way of shooting! Otherwise, the Bronica GS-1 could be coupled with other finders. That includes a 90-degree rotary prism (more on that later), as well as a metered and non-metered prism. The customisability is thanks in no small part to the GS-1's incredibly modular body.
That is further improved thanks to the excellent ergonomics when handling the GS-1. Therefore, most of the controls that you need... Be it the flash sync, lens disconnect switch, shutter speed, and the film back release button... Are all positioned within easy reach. This litany of switches and knobs also includes the mirror lock-up (MLU) button and double-exposure settings. These two are crucial for night-time and experimental shots.

You'll usually have to fiddle around with the exposure and MLU switches when the sun goes down if you want the best low-light experience possible. It's not the most intuitive system in the world. But, once you get used to it, night photography with the Bronica GS-1 can yield great results (be sure to source the correct shutter release cable for it!). Meanwhile, there's the other key talking point of the GS-1 over its period contemporaries - the build quality and packaging.


The body of the GS-1 itself feels solid, robust, and well-built. Granted, while it's slightly smaller than the Mamiya or Pentax that we mentioned earlier, Bronica's entry into the field is still rather large and heavy. As such, you'd better be prepared to lug about that excess mass with you wherever you go. On the plus side, you do have an interchangeable film back system, and Bronica even sold a Polaroid film back for it.
Video Source - Worldwide Camera Exchange via YouTube
“Has the heart and soul of a film camera, but paired with the conveniences and aspirations that bring it up to par with modern digital cameras”
Modular And Customisable To Your Heart's Content
Speaking of, the modularity of the GS-1 means that exchanging an accessory for another is a breeze. One great example would be the lenses. Personally, the lens that I gravitate to the most with it, and given my use case, is a 100mm lens. From time to time, I will vary between it and a 50mm or 65mm lens. This does bring us to the first significant point of consideration (and downside), if you're thinking of getting one.
Bronica themselves only made 9 different lenses for the GS-1... A 50mm, 65mm, 80mm, 100mm, 110mm micro, 150mm, 200mm, 250mm, and a 500mm super-telephoto lens. Given limited aftermarket support, this does limit your usability quite a bit, seeing that there are only so "many" lenses to choose from. It's not something that I need to worry about with how I intend to use my GS-1, but you may feel otherwise.
Video Source - Brae Hunziker via YouTube
Still, the native lenses are pretty good. So good, in fact, that Bronica later re-used the lens formula and coatings from the GS-1 lenses, and adapted them to the rest of their camera line-up. Elsewhere, it has a healthy mixture of both mechanical and electronic elements. For instance, the GS-1's shutter speeds are electronically-controlled. Hence, allowing you to vary from 16 seconds to 1/500 seconds (and Bulb mode).
Additionally, you get a flash sync across all available shutter speeds - another huge plus point! Moreover, the GS-1 can be had with two teleconverters, a 1.4x and a 2.0x. And, two extension tubes, an 18mm and its 36mm counterpart. Some may say that the Bronica GS-1 has the heart and soul of a film camera but paired with the conveniences and aspirations that bring it up to par with modern digital cameras.
Some Good, Some Bad, And Some Ugly
Although, those very same electronics which distinguish the GS-1 are also a double-edged sword. It's worth mentioning, as well, that the GS-1 is battery-powered. In other words, you'll have to rely on its battery for everything from the shutter and even the cable release. With that in mind, if that singular PX28 battery is on the verge of dying, or if the electronics go kaput, you'll be deprived of using your GS-1 entirely.
When put side-by-side with other comparable older cameras, they at least have a few mechanical tricks and functions that could still work without electrical support. Meaning that even if their electronics give way, you can technically still use them, unlike the GS-1. To be fair though, many owners of the GS-1 can agree that thus far (given its old age), the electric circuitry is somewhat comparatively reliable.
Video Source - Brae Hunziker via YouTube
Still, you ought to be cautious if you're buying an old GS-1. I'd recommend checking the electronics more diligently than you'd otherwise do. Regardless, with all this talk of the GS-1's build, how well does it take actual photos? Well, it turns out, really fantastically so! The images that come out of it are very crisp and clear. I personally have no issues with the image quality at all - it's a silver lining with all big cameras.
A larger frame means more image. The large 6x7 negative means I'm able to extract more detail out of a typical shot. Furthermore, it emphasises the shallow depth of field, and is similar in quality to many digital cameras of today (with the right technique), but inside the form factor of a film camera. Overall, this makes the Bronica GS-1 a very satisfying hardware to shoot with.
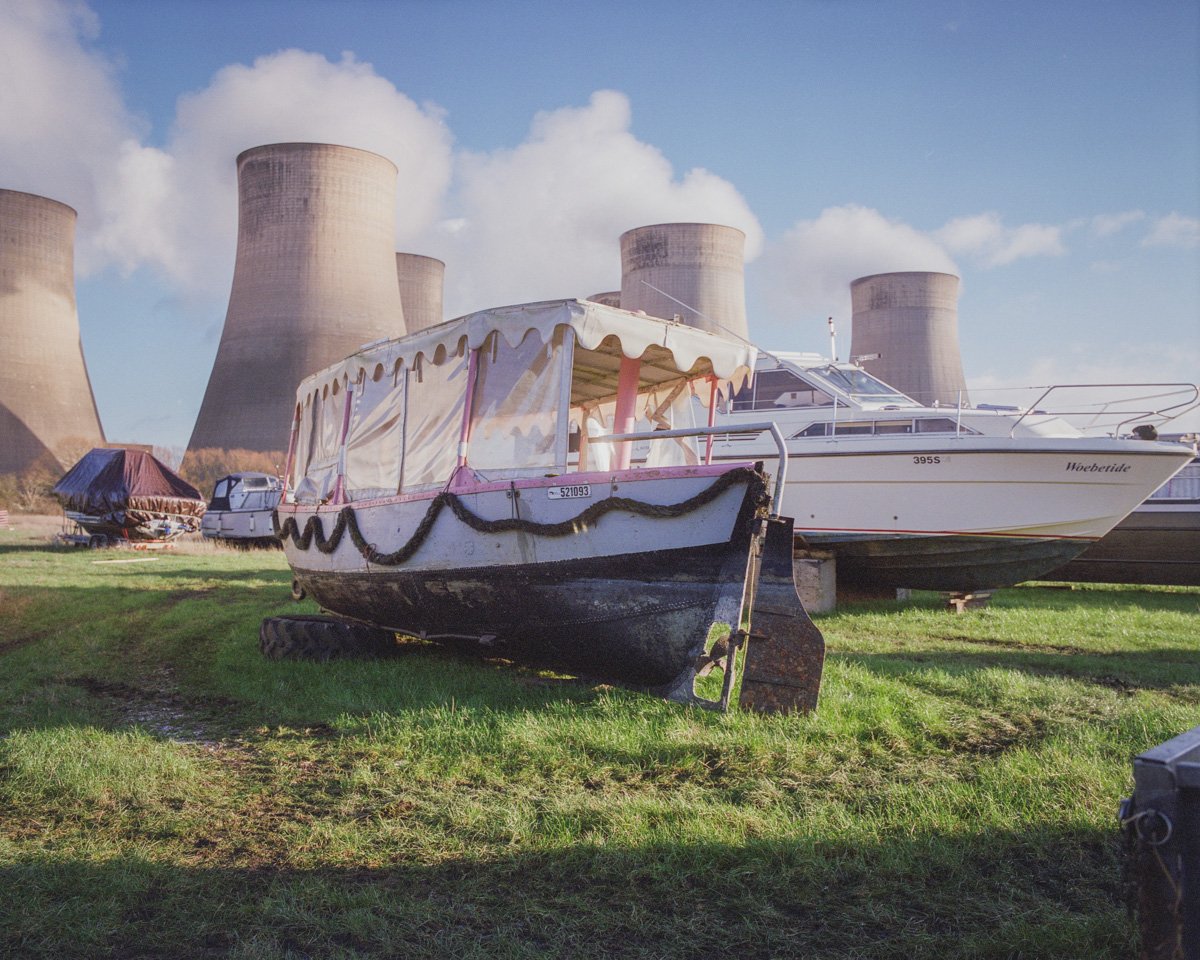


Some Of The Compromises To Look Out For
The experience is even better if you're willing to shop around a bit harder and find the optional AE (auto-exposure) prism viewfinder, mind. However, it's not all sunshine and rainbows, as there is one aspect of operating the GS-1 that's less than ideal. More specifically, you'll need to use a bit of elbow grease when you're shooting in portrait. This is because Bronica made one small oversight compared to its rivals.
Mamiya, on the other hand, had rotating film backs (That’s the ‘RB’!) that let you switch from landscape to portrait in a pinch. Meanwhile, the GS-1 doesn't have this. So, you'll either have to manually rotate your camera 90 degrees anytime you're shooting in portrait, which is no doubt a pain if you've mounted it onto a tripod. Or, you could shell out a bit more to get one of Bronica's rotating tripod adapter accessories.

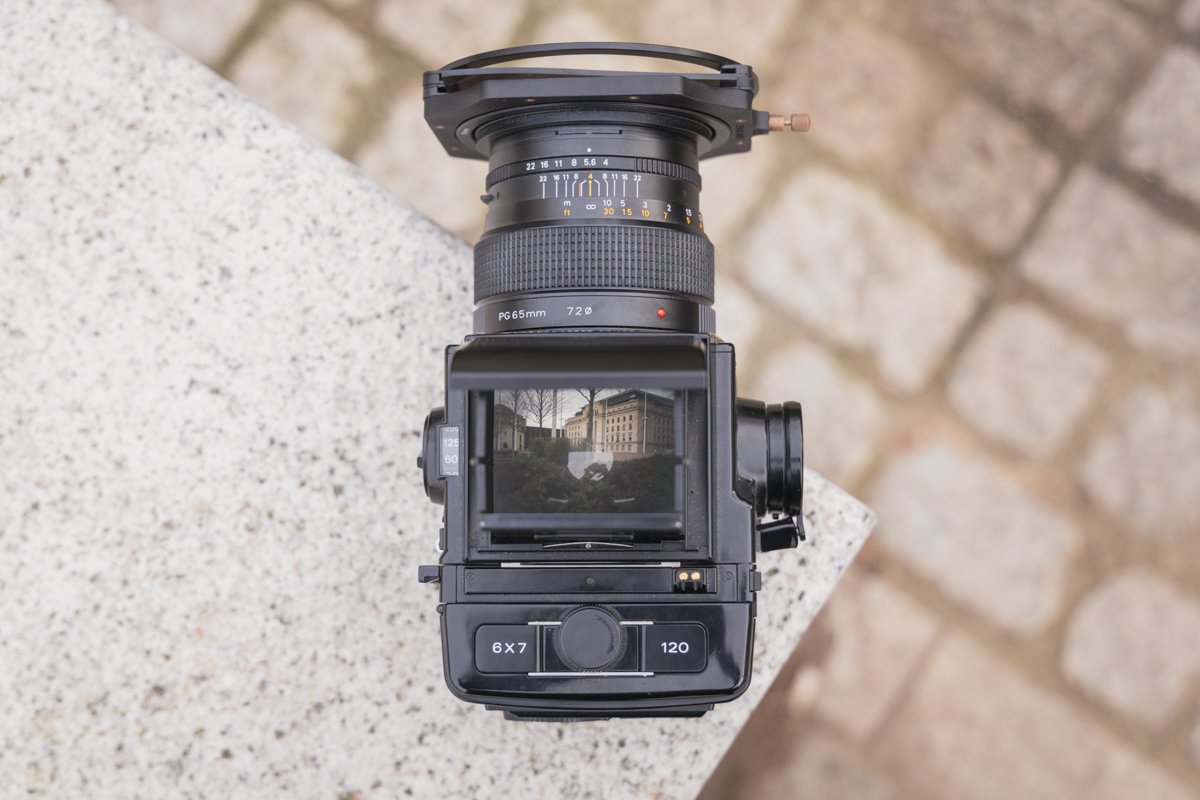


In short, it's probably better to keep the GS-1 as a handheld camera rather than one that you'd regularly pair with a tripod or fixed mount. Another huge downside with the GS-1, as with all older cameras, is the accessibility to spare parts. The older it gets, the tougher it'll be to source spares, should they break. And, it's just as challenging to find shops or people who know how to work on it, if you need repairs done.
It's something that you have to live with once you delve into the rabbit hole of owning and using any old, out-of-production photography gear. Then, going back to those electronics, the GS-1, remember, isn't an all-mechanical being. Having experienced how iffy electrics can be with these older cameras, if they ever go awry, it's likely a lot easier to simply replace the entire camera, rather than trying to fix it up.
Is The Bronica GS-1 Worth It?... Some Closing Thoughts
Not too long ago, the arrival and incredible growth of digital cameras brought and end to the dynasty of film. It meant having to say goodbye to the Bronica GS-1, as well as its compatriots. It's a shame too, since that bulky hunk of metal and plastic is one that I very much enjoy using. Every time I go out, I try to bring the Bronica GS-1 with me as often as I can. For a medium-format camera, it's a perfect package.

In summary, it's a great choice for either rookie photographers, or even experienced veterans like myself, who are looking to get the perfect medium-format camera. In terms of maximal ‘bang-for-buck’ it’s difficult to look beyond the GS-1. When compared to those Mamiya and Pentax 6x7 pickings, the GS-1 is relatively more ergonomic and compact for those busy shoot-and-scoot sort of days. If that's not convincing enough, the GS-1 is also a steal!
With a bit of searching, you could walk away with a good GS-1 for around £500 or so. I suppose that's the prime benefit of being so underrated for so long, yet delivering a great camera that'll capably ro capture amazing images. By contrast, you'd need to spend a couple hundred more at least (if not thousands!) on an equivalent Mamiya or Pentax. In which case, you might as well spend that on accessories.

Though, trying to source the GS-1 body, lenses, and the rest of the optional kits from used marketplaces can be a bit of a challenge. In some cases, you may even be able to walk away with 6x7 lenses for under £150 apiece. But, looking for intact and reliable ones is akin to finding a needle in a haystack. Most GS-1 owners seem to have much better luck shopping for mint GS-1s and their accessories from Japan - which can have it’s own problems, as well as import taxes.
For me though, the GS-1 is as close to the perfect medium format camera as I’ve come so far. Considering, it doesn’t look like there will be any ‘new’ film cameras for a while (outside of toy cameras and technical offerings) it seems that the GS-1 will be my ‘go-to’ for quite some time, and I am perfectly fine with that…
Specs And Details


About the Author - Ross Jukes is a professional Photographer and Videographer with over a decade of experience. Working in both Digital and Analogue formats, Ross has worked with international clients, had his worked published numerous times and exhibited his work extensively. With a passion for all things photographic, Ross combines his experience, enthusiasm and dedication to his art form to create engaging and educational content for the photographic community.
Disclaimer: All links to Amazon UK are affiliated links - you will still pay the same price but I will receive a small commission for providing the link. All information provided in this blog is intended either for educational or entertainment purposes and is accurate to the best knowledge of the author. However, further research/professional advice should be sort before making purchases/implementing any advice given and no responsibility is taken by the author or parties mentioned here within.

Trying Three Lomography Films!
When it comes to film, I have a pretty simple palette. My ‘go-to’ film of choice has always been Portra 400. Recently, I’ve had a brief love affair with Fuji Pro 400H but falling in love with a discontinued film is a bad idea!

When it comes to film, I have a pretty simple palette. My ‘go-to’ film of choice has always been Portra 400. Recently, I’ve had a brief love affair with Fuji Pro 400H but falling in love with a discontinued film is a bad idea!
As you can probably tell from my Vanilla film choices (and Vanilla happens to be my favourite Ice Cream - my middle name is definitely not ‘Danger’!) I tend to keep things simple. Every now and then I might experiment with an expired film if I’m feeling particularly adventurous! However, in my instant hunt for reasonably priced film, I stumbled across Lomography.
If you’ve even stepped foot in the film world, you will have come across Lomography. Their dedication to analogue photography and commitment to quit is pretty much unmatched! Despite having a great range of affordable cameras to explore (I myself had a Dianna-F for many years and in part, it was that camera that got me back into shooting film!) they also have an amazing range of film!
PLEASE NOTE: I WAS SENT THESE ITEMS FOR REVIEW BUT NO OTHER PAYMENT OR CONTROL WAS EXCHANGED FOR PUBLISHING THIS UNBIASED REVIEW

My ‘typical’ film look and feel…
It was their more experimental offerings that got me interested though and after exploring the options, it was time for me to ‘Break Bad’ and ditch the Portra for something a. Little more exciting - I was going full Rum Raisin!
There were a couple of caveats, I pretty much only shoot Medium Format and it must be C41 development so that I could develop the film myself. Fortunately, Lomography had me covered with a great range of 120 colour negative film. The three I would be shooting with were Metropolis, Lomo Purple and Lomo 800.
“If you’ve even stepped foot in the film world, you will have come across Lomography.”
The only real stipulation that I put on myself was that I was going to shoot all of the films on the same camera and lens setup. It’s not that I would be drawing a direct comparison between the films, we’’re dealing with three very different beasts here! It was more to keep the process straightforward. So the Bronica GS-1 and 65mm lens were my weapons of choice!
My developing would all be done at home so your results with these films may very, but I tried to be as consistent in my approach as possible! That included editing the images - all images have only had a very light edit and I have tried to keep the colours/tones somewhat representative of how the film looks. The only slight caveat being the Lomo 800 were I did use a Black Pro Mist ¼ filter - just to soften the lights at night.
LOMOGRAPHY METROPOLIS
Metropolis is probably most famous for its muted, desaturated look with a good kick of contrast. As a Portra shooter, the desaturated look sounds like it should be right up my street. However, this was probably the film I was most suspicious of. I tend to go for warmer, more wholesome tones and this felt like it might be a little, dystopian…
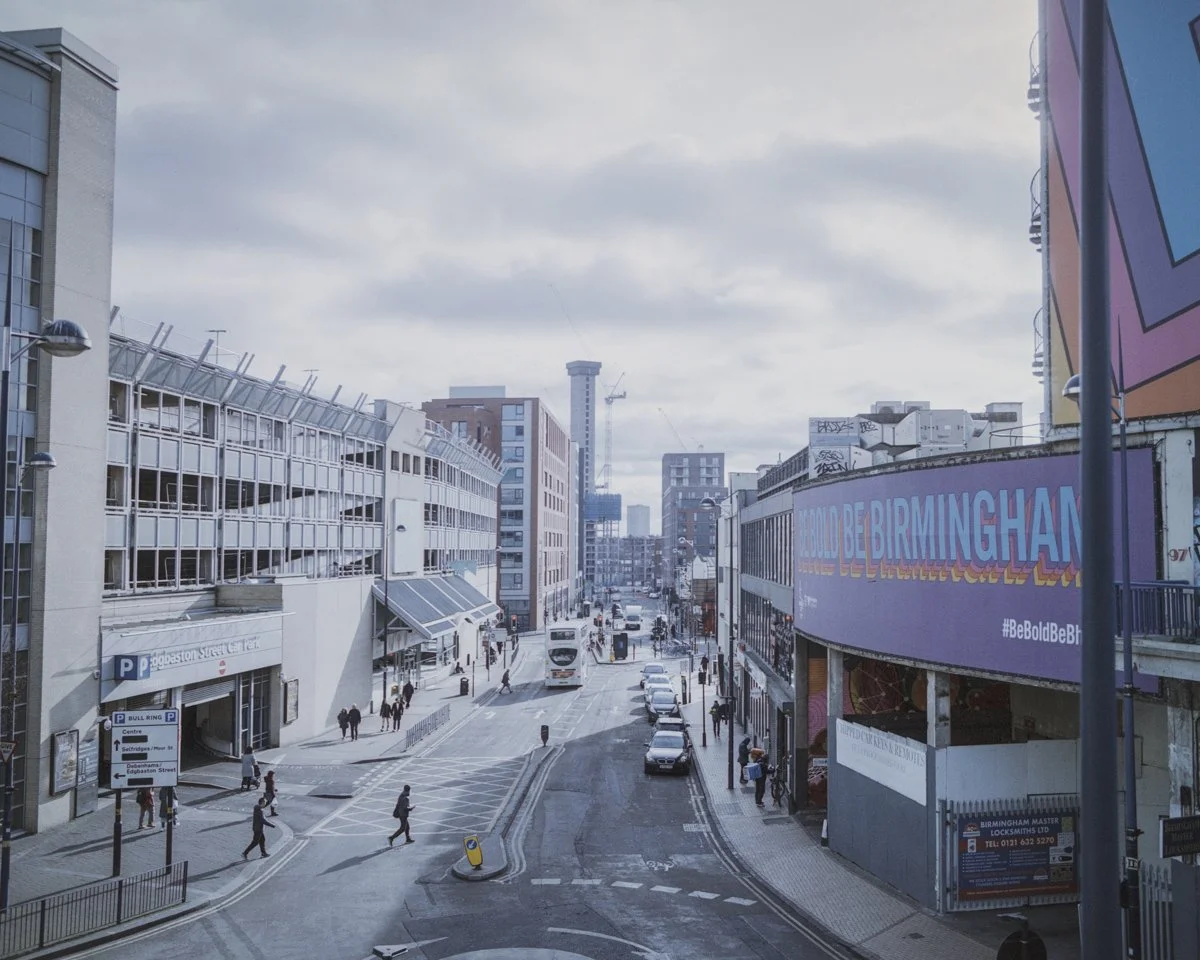
However, when I saw the results, I was pretty impressed! This is probably more a reflection of my shooting style but the film renders a lot different to what I would normally go for. But it was a pleasant surprise and I could certainly see myself using it more often and certainly the kind of film that would be useful for certain projects or even entering photography competitions with a more urban feel!

I personally think it looks better when you have a bit of strong, directional light. If you shoot more urban scenes then this is certainly a great film for you. It has a little punch of colour that pops through and draws the viewer into the image. The contrast is great and gives it a gritty feel, without being too overdone.
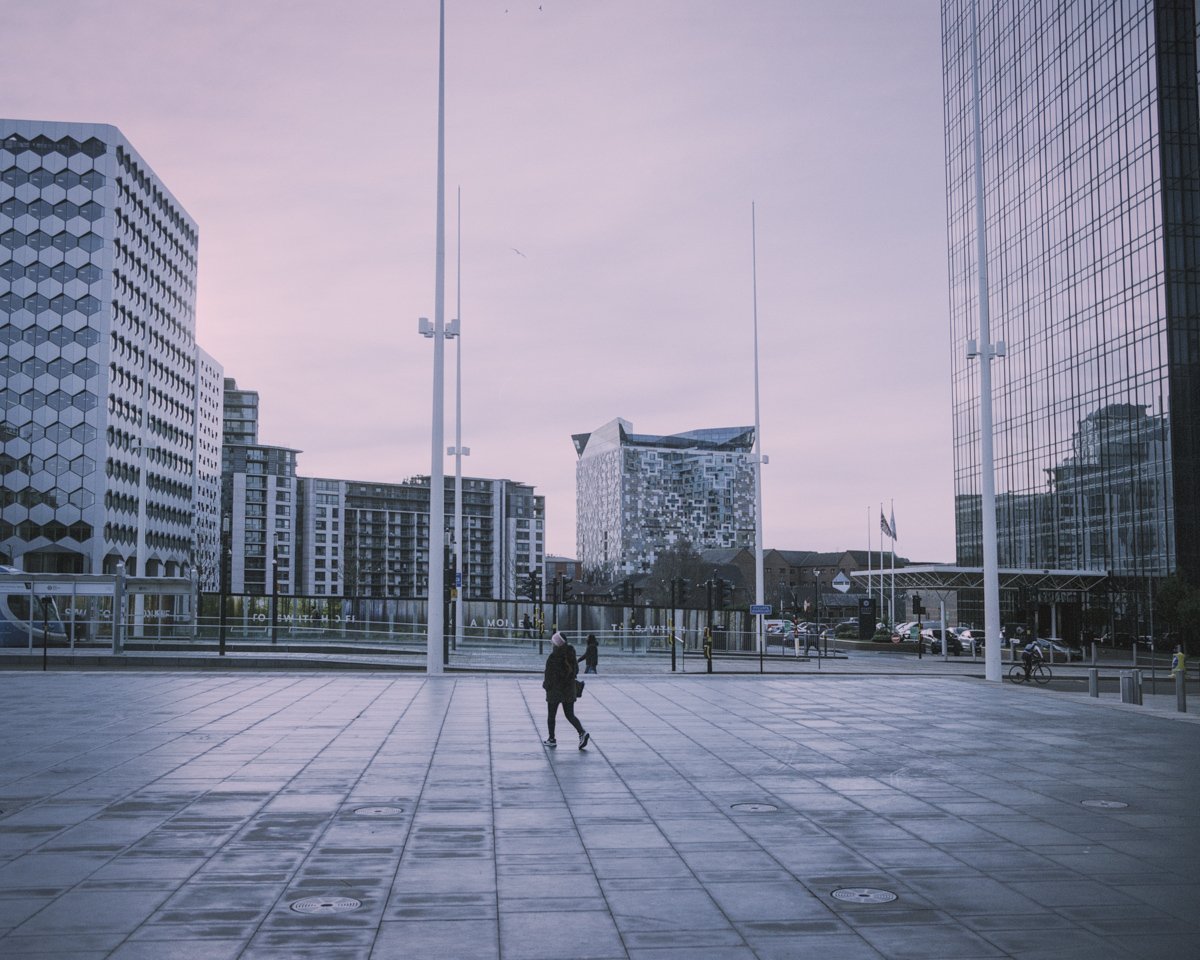


As with all films, choosing what speed to shoot it at is really a personal choice. I shot this film at 200 to give the film a little extra light and I’m glad I did. That said, I also think this film would look cool and underexposed a little, it would certainly render shadows deep and black thanks to that strong, contrasty look.

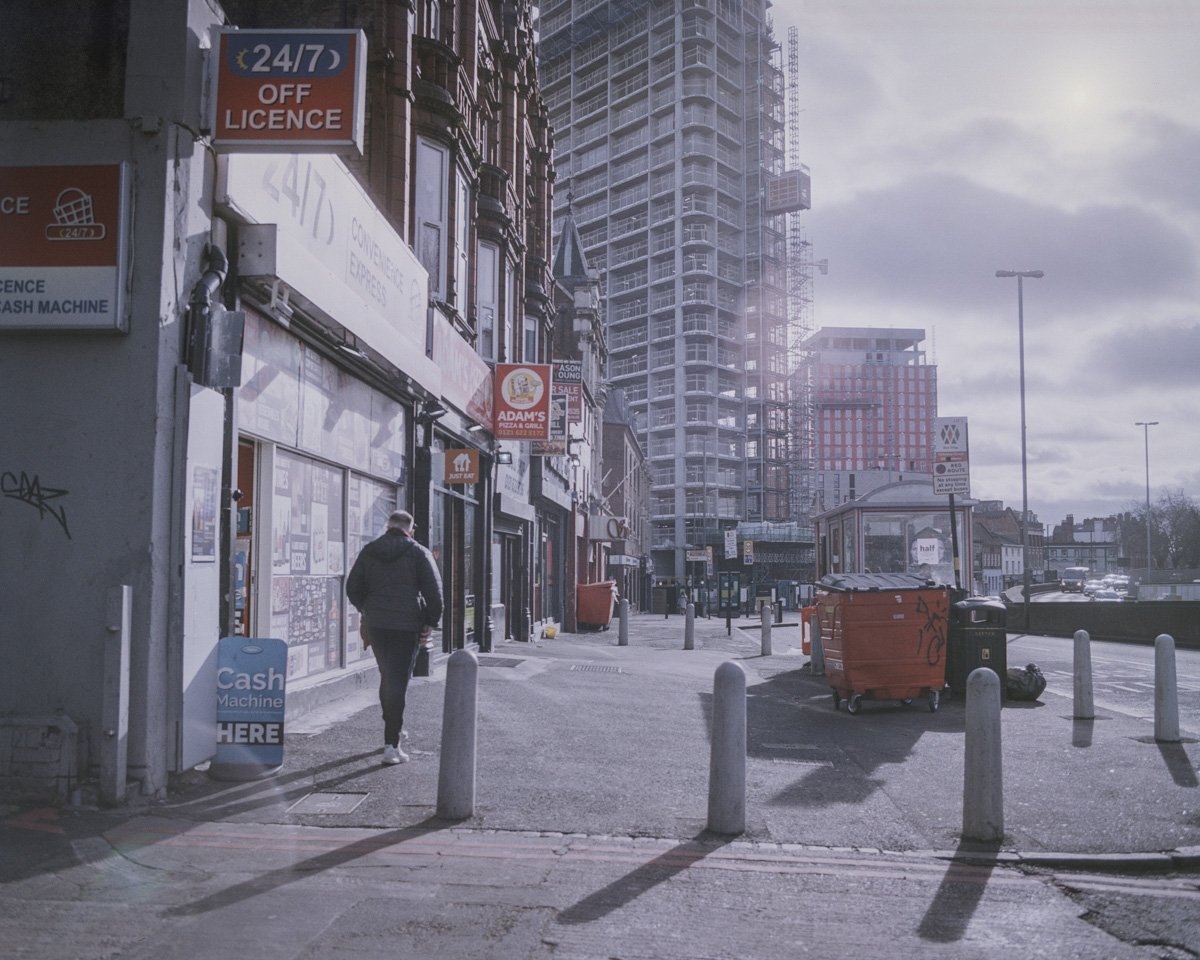
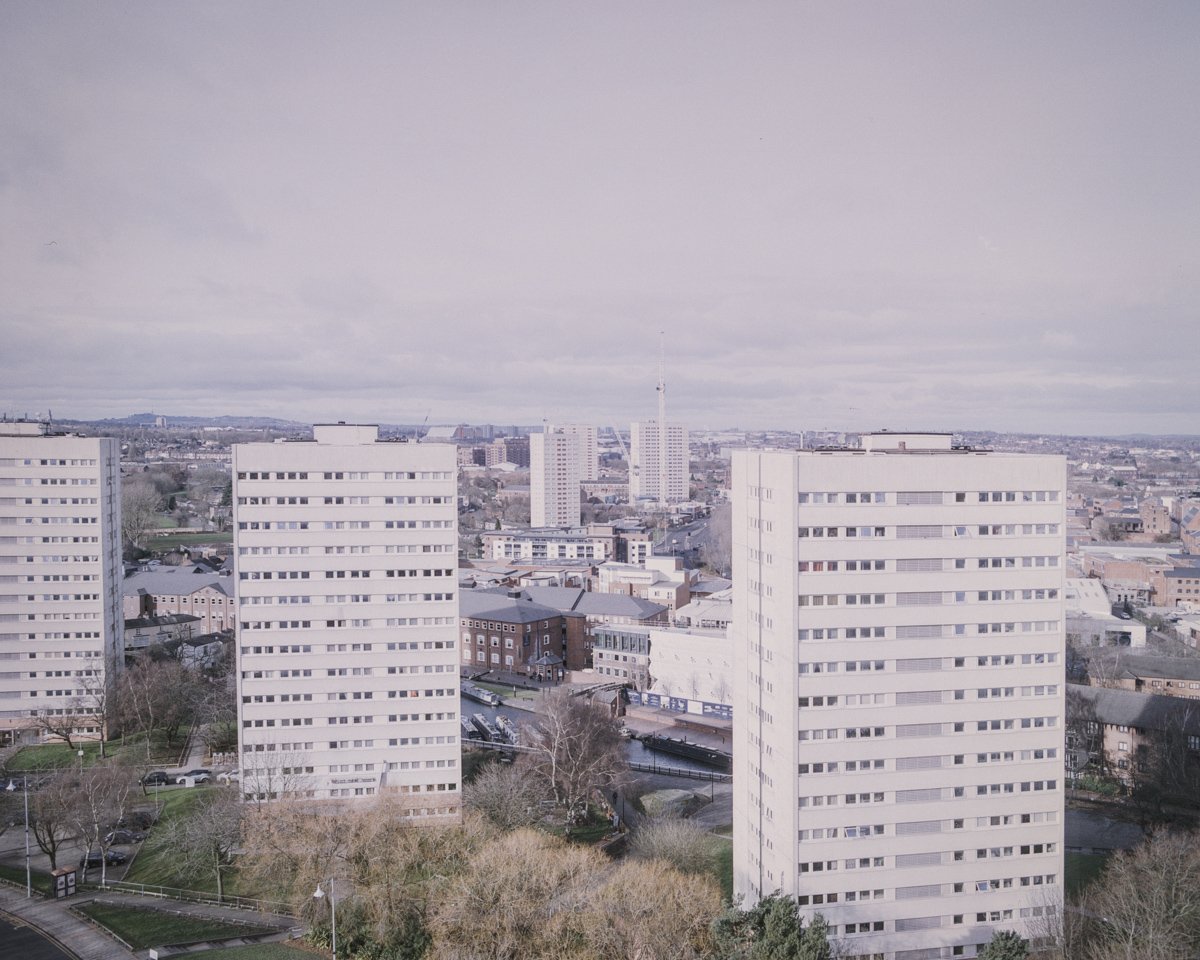
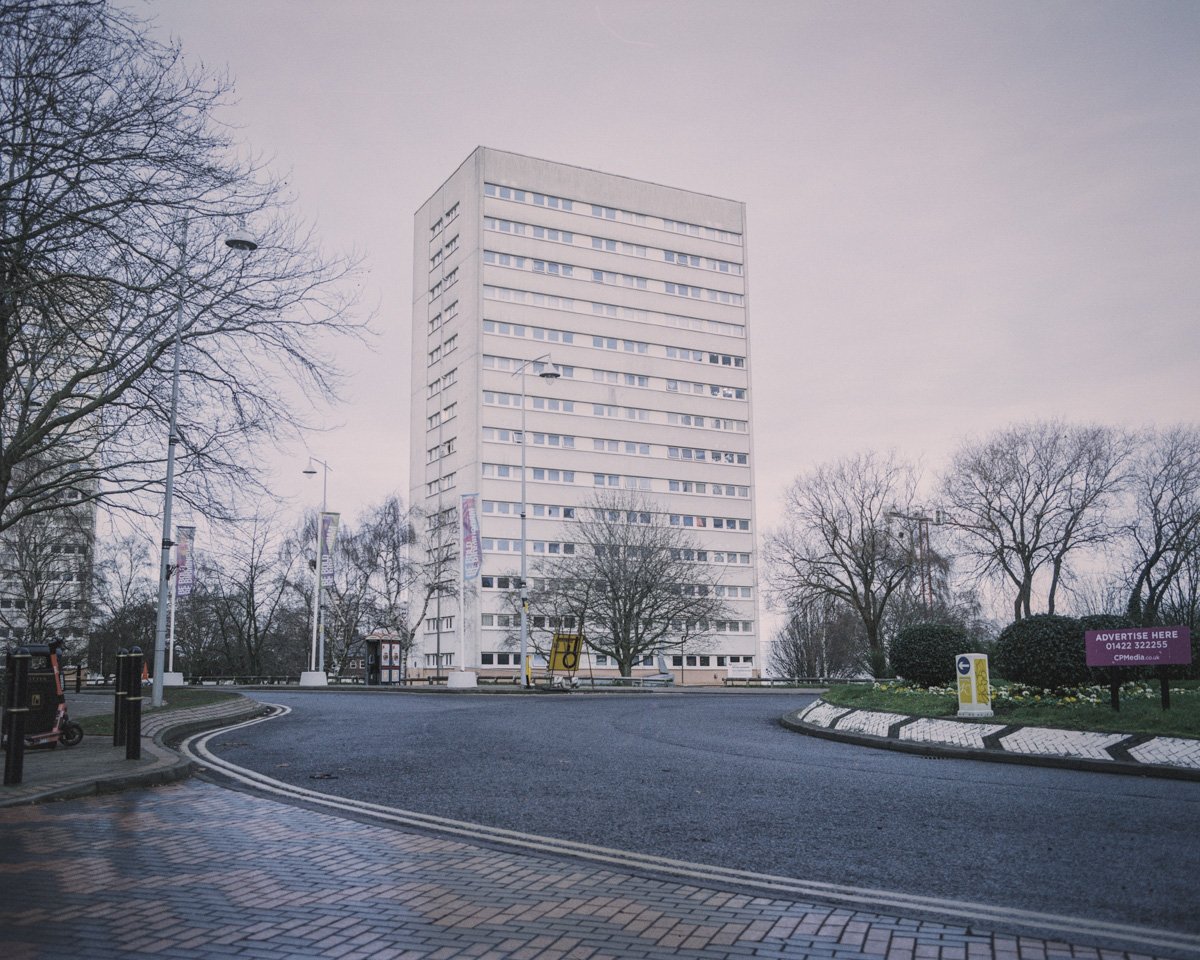
LOMOGRAPHY LOMOCHROME PURPLE
OK, I’ll admit I had no idea what to expect from this film! I’d done a little bit of Googling to see what it was all about but didn’t think it would be my cup-o-tea! I was wrong, I loved how these images came out! But there was one big problem with this roll of film, me… Let me explain.
I used the same camera/lens combo for all the films I tried - the Bronica GS-1. Whilst I was loading the Purple - I noticed the film leader and distance to the ‘Start’ markers on the backing paper was quite short. As I wound the film on to get to ‘shot 1’ - I was convinced the film was not being collected by the pick-up spool!

I hastily opened the back of the camera (believing the film would still be unwound) only to find the film had been collected correctly and I’d just exposed the first shot - what an idiot… but it gets worse. When I close the film back, it obviously resets the shot counter as if it’s loading a new film!

I quickly applied a bit of logic and switched to multiple exposure mode (thinking this would move the film counter on but not advance the film) - again, I managed to mess that up and what’s the result of all this stupidity - I wasted about half the roll of I’ll! There is a price to pay for this level of stupidity and when you shoot film, that price can quickly add up!

However, I did manage to get a few shots on the roll and I’m glad I did because I love how this film looks! This is the answer to all of my 'Vanilla’ Portra shooting and is so far removed from my normal style! It really did put a smile on my face as I was scanning the negatives and seeing those bright, bold colours shine through!

I’ll admit, I’m sure this film won’t be for everybody and I certainly preferred the way it renders vegetation/sky rather than what it does in urban environments. However, it was great fun to shoot with and I wouldn’t hesitate in shooting with it again! Sure, you can adjust hue in Lightroom to get a similar look but where’s the fun in that and the one thing this film stuck is, is fun!
LOMOGRAPHY LOMO 800
So on a more serious level, this film is one that I was very excited to shoot with. Not because it has any weird or wonderful quirks but because it is probably most similar to a ‘standard’ colour negative film - albeit an 800 speed film. This film wouldn’t give me anything strange or peculiar, but if it was a decent alternative to Portra 800 then I’m here for it, as the kids say…

Shooting the film raised one important question - do I shoot in the day, or in the night. Obviously, ISO 800 lends itself to slightly lower light conditions but I thought I’d fire off at least one late afternoon shot, just to see how it does. I wish I’d shot a lot more in the daylight! I think this film looks awesome in a sunset/soft light scenario! The soft pastel tones, beautiful grain structure and slightly warm feel make this film ideal for these kinds of scenarios!

However, I’d banked on it being a film I could use at night and guess what, it excelled in that department too! The 800 speed meant that my exposures didn’t need to be super long! I overexposed by about a stop and the longest exposure I was getting (in normal shooting conditions) was around two seconds. For a couple of shots, I did choose intentionally to stop down a little and get a bit more movement in the light trails.


This film worked wonderfully in the dark and I’m very impressed by the results. My only slight concern is the warmer base tone that comes through - but this is obviously easily corrected in post. If I was to have another, very mild criticism of the film it’s that the negatives themselves felt a little bit thinner than normal and therefore, were prone to curling. I honestly don’t know if this is me being super sensitive or if most 800 speed films are like this, but it’s something to be mindful of.


That said, I would have no problem buying a whole bunch of this film as my go to low light option. More so, I would also buy a load to shoot in the day/dusk as I think this would be a fantastic option. I’ve often heard good things about Lomo 800 and I can say that I am a well paid-up, ticket holding member on that particular band-wagon!
MY FINAL THOUGHTS…
I had so much fun shooting these films. I have felt for a while that I need a change of speed with my film photography and shooting these stocks has highlighted that there is so much more to film photography than the old favourites! Would I use these films on a daily basis, possibly not but I can argue a good case for projects shot in each of these films and that is something that I’m sure I will do!

Lomography is more than just a retailer though and this is the message that I really wanted to get across. Brands like Lomography are at the heart of film photography and are opening up a world of possibilities to people like me and hopefully, you. From their cameras and films to their absolute enthusiasm about the community, it’s great to see brands not just trying to ‘sell’ us something, but genuinely caring about the people that matter, the creative process and the end results! Long live Lomography…
About the Author - Ross Jukes is a professional Photographer and Videographer with over a decade of experience. Working in both Digital and Analogue formats, Ross has worked with international clients, had his worked published numerous times and exhibited his work extensively. With a passion for all things photographic, Ross combines his experience, enthusiasm and dedication to his art form to create engaging and educational content for the photographic community.
Disclaimer: All links to Amazon UK are affiliated links - you will still pay the same price but I will receive a small commission for providing the link. All information provided in this blog is intended either for educational or entertainment purposes and is accurate to the best knowledge of the author. However, further research/professional advice should be sort before making purchases/implementing any advice given and no responsibility is taken by the author or parties mentioned here within.

2022 in Review - Looking back at a crazy year!
To say that 2022 has been an odd year would be a bit of understatement. Everybody knows that the last few years have been a challenge. The 2020 Pandemic ruined lives, businesses and the economy and things were not too much rosier in 2021! So I think we were all hoping that 2022 might finally be the year where things felt a bit more normal.


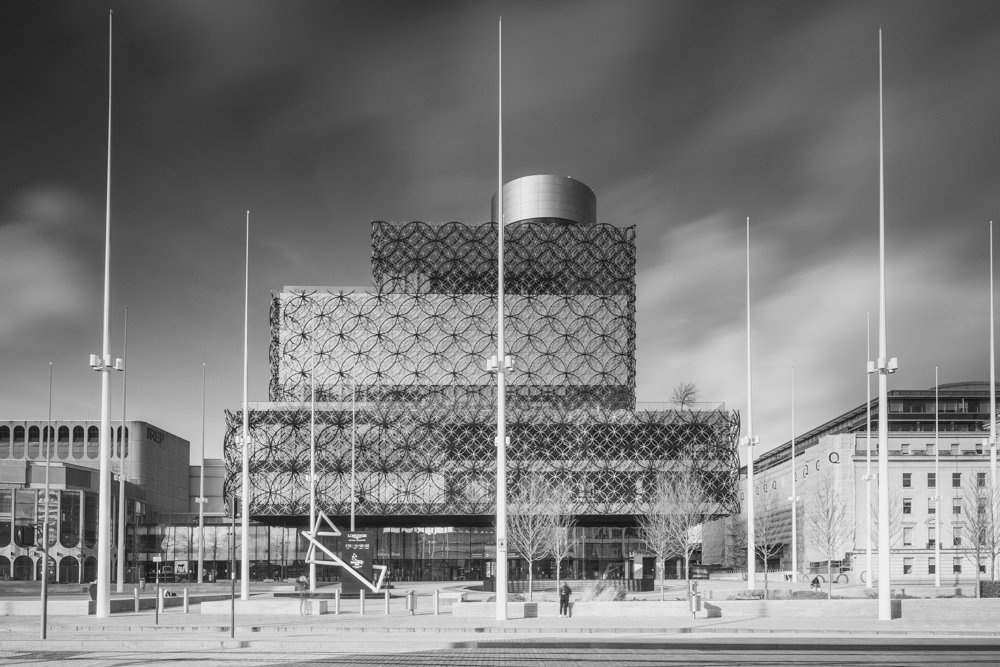

Well, if financial uncertainty, global events and a sense of impending doom were the overarching feelings of the previous couple of years, 2022 was pretty much standard in that case. However, I don’t want to look back on a year and just complain about the doom and gloom. I just think it’s important to acknowledge that this has been a very testing time for everyone and 2023 is likely to be just as difficult!
Slow Beginnings
Being self employed has taught me one thing and that is that it’s a very unpredictable lifestyle. One week you can be run off your feet and the next it's Crickets and you start panicking that you’ll be out of business by the weekend! Well that is how January felt for me. Although there were a few interesting little jobs, there is always a bit of a delay as clients and business get back into their own rhythm.


By February and March, things were getting much more into a steady routine and work was coming through from regular clients again. Two in particular were Aston Villa Football Club who were updating some of their hospitality offerings and Tom White Waste, who need to rebrand their website and took the chance to capture new imagery.
Both clients required multiple day shoots and as with every late Winter/early Spring shoot - the weather would have a big impact on both jobs. Planning is essential but also being completely up front and honest with clients is strongly advised. Having a ‘Plan B’ if the weather is too bad to shoot is pretty much essential at that time of year.


Interestingly, a lot of my clients throughout 2022 required a lot more video in addition to traditional photography and this allowed me to really stretch myself both in terms of learning new techniques and in the gear I use. Throughout the Spring I had to update my main camera, I plumped for the Canon R5C for those that are interested - as well as buying a lot of additional lighting and sound recording gear.
The additional investment was fully justified as the work continued to come in and having the peace-of-mind knowing that the equipment could handle all of the clients requirements was worth the outlay alone.
Things were heating up!
Going into the Summer, I was more than aware that it was going to be a big one as Birmingham was due to host the Commonwealth Games. This was massive for the city when I was asked to help capture certain events, I was completely over-the-moon. I’ll be writing a post in more detail about the experience but it was two weeks of utter madness with long days, huge amounts of editing and physical exhaustion by the end of it! I loved every second though and our amazing city completely smashed it!

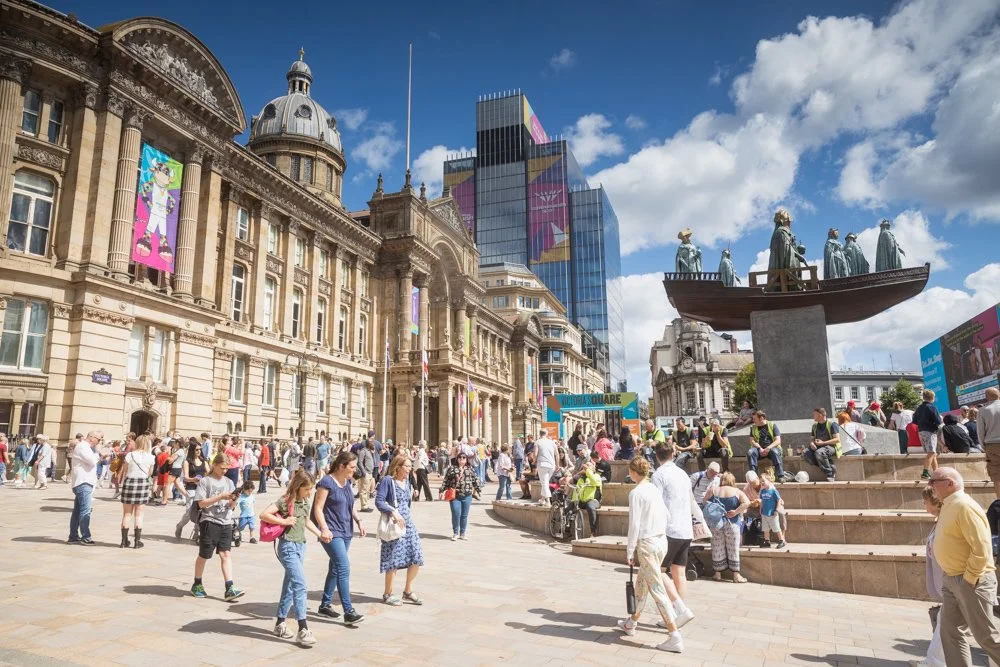


By this point, the weather was also going into overdrive with the UK recording record breaking temperatures and for the first time ever, I had to adjust a shooting schedule because it was too hot to work! I’m used to dragging myself out in the depths of Winter but I couldn’t quite believe we had to reschedule shoots because of the risk of heatstroke and worse - a wise decision though and one that I’m glad the clients agreed with!
Birmingham’s incredible Summer continued as Unboxxed brought their ‘Polinations’ event to Victoria Square. In the space just a couple of weeks, the square had been transformed from the hub of the Commonwealth Games (outside of Alexandra Stadium!) and into a mystical forest complete with evening light shows. It was a complete spectacle and one that I was once again, very proud to be part of.


I went on to shoot several more events with Unboxxed which involved exploring a converted oil rig in Weston Super-Mare, complete with plants, a huge cascading waterfall and eyes! However, that was just the tip of the iceberg they also had me photograph the solar system! No telescope needed though, this was a scale model laid out across Liverpool! Though it spanned some 10km so after walking to Pluto multiple times, I was ready for some time off!


That wasn’t a possibility though as between regular clients and huge events, I was having my busiest year ever! It’s not uncommon to work seven days a week when you’re self-employed and this was certainly the case for me. Regular shoots and huge amounts of editing were slowly but surely taking their toll. I never complain about being busy, it’s a privilege to be in this position - but self-care is equally, if not more important than work!
Finding a balance…
By the late Summer/early Autumn, I need to reset a little and find a bit of time to decompress after a very hectic few months. I don’t have too many means of escape, I like a drink but have to stay level headed, I like football but I’m commonly working on match-days. So I turned to the one thing that gives me a huge amount of pleasure and that is film photography.
I had purchased a new camera in particular that I was really excited to use and set about finding time wherever I could to get out with it. The camera in question was a Bronica GS-1. It’s a medium format beast that is commonly overlooked in favour of the Mamiya RB/Z67 or the Pentax 67 systems.


When I first picked it up, I knew it was the right choice for me though. It is slightly smaller than its competition (but in no way a small camera!) but still produces a huge 6x7 negative and had a beautiful waist-level viewfinder that makes everything look amazing. It was a pleasure to be out shooting film but the work kept coming in.
By mid-Autumn, I’d already worked with around 15 new clients in addition to my regulars. This was quite mind blowing to me as I was already passing work over to fellow photographers - something I love to do if I get the opportunity. This did mean that there wasn’t going to be any big holidays or adventures this year - not too much of a problem in a cost of living crisis!
Gearing up for Christmas…
Going into the final few months of the year, I was very conscious that I would start getting enquiries about prints etc. for presents. This is brilliant as it’s always special for me to see my work in print. I decided not to push this too much as I am really aware that lot’s of people have been struggling financially this year.


Being completely honest, this year has been a struggle for me as well, regardless of being incredibly busy. Personal situations and living conditions have been a huge strain and being financially conscientious is a must! This all lead me to think that this really isn’t the year to be encouraging any unnecessary ‘gifting’ for gifts sake - though I always appreciate anyone who likes my work enough to hang it on their walls!
Throughout the year another issue cropped up that I had never seen coming. I was working more & more in other cities from Brighton to Edinburgh and many place in between! However, rail strikes had a big impact on getting too and from many of those jobs and having good ‘Plan B’s’ were essential.
Looking ahead…
I often have to pinch myself and I still find it amazing that people pay me to do something that I get so much pleasure from. I’ve already start booking jobs for January & February and can’t wait to get stuck into next year.


I have a few more personal plans next year and need to take a bit of personal time out to make sure I’m in a good place mentally & physically. 2022 threw up and few nasty surprises and more than ever, I’m realising that taking care of myself is a huge priority!
I’m also looking forward to getting out with the film camera more and actually sharing some of the results! I pretty much didn’t post to any social media for the entirety of 2022! Again, I will be writing a post sharing a bit more detail about this but all-in-all, I feel ready to start engaging a little more next year.


Finally, I am always looking forward to working with existing clients and get very excited about working with new people. I love meeting new people and can’t wait to see who I get to meet in 2023 and what experiences that might lead too!
A huge thank you…
More importantly than anything, I want to say a huge ‘thank you’ to anyone that I’ve worked with, anyone that has asked me to do more than one job! Anyone who has been on a 1-2-1 with me or purchased a print! Also, anyone that has simply dropped me a message or left a comment on social media - I’m truly thankful for any kind of support that I receive!
I can’t wait to get stuck into 2023 and wish you all an amazing Christmas and New Year! :)
About the Author - Ross Jukes is a professional Photographer and Videographer with over a decade of experience. Working in both Digital and Analogue formats, Ross has worked with international clients, had his worked published numerous times and exhibited his work extensively. With a passion for all things photographic, Ross combines his experience, enthusiasm and dedication to his art form to create engaging and educational content for the photographic community.
Disclaimer: All links to Amazon UK are affiliated links - you will still pay the same price but I will receive a small commission for providing the link. All information provided in this blog is intended either for educational or entertainment purposes and is accurate to the best knowledge of the author. However, further research/professional advice should be sort before making purchases/implementing any advice given and no responsibility is taken by the author or parties mentioned here within.

My Top 10 Cameras of 2022!
As the year comes to an end, I thought it would be interesting to take a look at some of my favourite cameras that I have used in the last 12 months. I use a camera every day for work, but I also take a huge amount of pleasure from just picking up a camera and going for a walk.
my favourite cameras in 2022
As the year comes to an end, I thought it would be interesting to take a look at some of my favourite cameras that I have used in the last 12 months. I use a camera every day for work, but I also take a huge amount of pleasure from just picking up a camera and going for a walk. This means that cameras do different things for me, some are work horses for specific jobs, some are purely for the user experience!
As I shoot more and more film, I’ve learnt that I really enjoy the slower process. Taking time to compose images, check exposure and the mystery of how it will come out is thrilling. With this in mind, you can probably guess that if I could only use one camera, it would probably be film (and medium format at that!).
That said, I have had to upgrade my camera this year and the new ‘daily driver’ has been interesting to say the least! However, I have also found myself exploring digital cameras for everyday use and have been really enjoying the journey. Film prices have made it difficult to justify taking an analogue camera out every time so finding a digital camera with an analogue feel was essential! Let’s get into the list…
PLEASE NOTE: I PURCHASED ALL OF THESE ITEMS WITH MY OWN MOMEY AND NO PAYMENT OR CONTROL WAS EXCHANGED FOR PUBLISHING THIS UNBIASED REVIEW

10 - Koni Omega Rapid M
Coming in at ten but by no means a bad camera os the Koni Omega Rapid M. This was a bit of a random purchase for me and not really something I had spent a lot of time researching. The only thing that really stood out to me was the 6x7 aspect ratio. I knew that I was never going to afford a Mamya 7ii or the like so when I found out about the Koni, I was intrigued.

The Koni Omega Rapid M is capable of some really sharp images
However, when I saw the prices, I was immediately sold on the idea. Coming in at a fraction of the prices of the trendy Mamiya, it almost seemed silly not to at least give it a go. My major concern was finding a decent example. My eBay searches were mainly bringing up cameras located in Japan. I wasn’t concerned about importing one but as luck would have it, one popped up in the UK and I quickly snapped it up!
The camera is simple to use (with one of the coolest shutter advances I’ve ever seen - imagine cocking some kind of vintage gun!). The ergonomics of the camera are not great, it’s bulky, heavy and a bit of a pain to carry around. However, the results are fantastic and certainly make me wonder why anyone would spend more for the Mamiya (apart form maybe the weight and user experience!).

9 - Fuji X10
Next up is a very recent purchase and I’ve recently posted a review about this camera, so I won’t go into too much detail here. The more I use it though, the more I enjoy it. This little camera fits so well in a pocket and for me, the results are certainly good enough that it justifies living in my pocket.

Need I say more about the little Fuji X10?
Possibly my biggest wish for this camera would be the low light performance. Whereas it is perfectly capable of getting a good image in darker conditions, it takes work. Given the age of the camera though, I really am nitpicking and this is a great little camera to use in most other circumstances.

8 - Fuji X100V
For many, seeing the mighty X100V languishing down in eighth might seem completely foolish. However, I have really had to try to love this camera. It is probably the closest thing to the perfect pocket camera out there in 2022. However, my main gripe is it’s barely pocketable!

The Fuji X100V can produced super rich and vibrant images
I love the images that can be had from this camera and the looks, ergonomics and user experience are all fantastic. Trying to fit it in a pocket is not such a good experience. In the winter months, when big coats are a must, it’s a great camera to carry. In the summer though, if you’re going out in jeans and a T-shirt, you’re going to need to bring a bag!

7 - Canon Eos R
Many people may assume I’ve completely lost my mind to see the Eos R even on the list, let alone ahead of the X100V. However, this camera has been a complete workhorse for me and even though it may not be my ‘main’ camera anymore, it still makes for a fantastic second camera.

The Canon Eos R once again proving why I can’t let it go…
When it was released, the ‘R’ got a lukewarm reception to say the least. For me, the ergonomics are great, it’s reliable in most circumstances and my style of work, the results are more than acceptable. With decent video quality and a pretty snappy autofocus system, this camera has been rocksolid and still earns a place in my camera bag.

6 - Yashica Mat 124 G
The Yashica Mat 124 G is a pretty legendary camera. An affordable alternative to the Rollei counterparts, this is a common starting point for the entry to the world of TLR’s. I picked up a very clean example at auction and even at the time, I knew I was paying over the odds but I’m glad I did!

The Yashica Mat 124 G is a much loved camera for a reason…
It’s a super simple camera to use and TLR’s by their very nature are just a joy to use! I’ve had so much fun using this camera and produced some of my favourite images from this year on it. If you’re in the market for a TLR and find a good example at the right prices, I wouldn’t think twice about grabbing one!

5 - Canon P Rangefinder
The Canon P was probably the 35mm camera that really got me interested in analogue photography, I think the camera is beautiful and is an absolute joy to use! I can’t really compare this to the Leica alternatives but considering you’ll be paying over ten times more for a Leica, I’m certainly happy with the P!

The Canon P Rangefinder is such a funny camera to carry…
The biggest downside of the P for me personally is that it’s not medium format. I simply prefer the image quality and detail from the larger negative and I would almost always pick up one of the bigger cameras over the P every time. It’s such a shame though as this is a beautiful camera and I would absolutely recommend it if you’re not interested in film size!

4 - Mamiya 645 Pro TL
Ok, so this camera being so high up on the list is quite a surprise to me! It’s a great camera and having owned the ‘Pro’ - I picked up a ‘Pro TL’ as it was such a good deal! However, the 645 negative size never really did it for me and I found myself leaning towards other cameras.

The Mamiya 645 Pro TL can produce images to rival almost any medium format camera…
That was until film prices went through the roof in 2022 and I have to admit, I’ve found myself using this camera more and more. It’s a fantastically versatile camera and produces great results. I always class it as more of an ‘entry level’ medium format camera but I admit, that’s complete rubbish - this is a very capable camera one that I will be shooting with more next year!

3 - Leica M8
OK, so I admit that this camera was a complete indulgence and you can find out more about it in my first impressions. That said, I absolutely love this camera and once you get past the price tag, it actually suits many of my wishes from a camera! The shooting experience is great, it feels solid in the hand and the results that you can get from it are incredible.
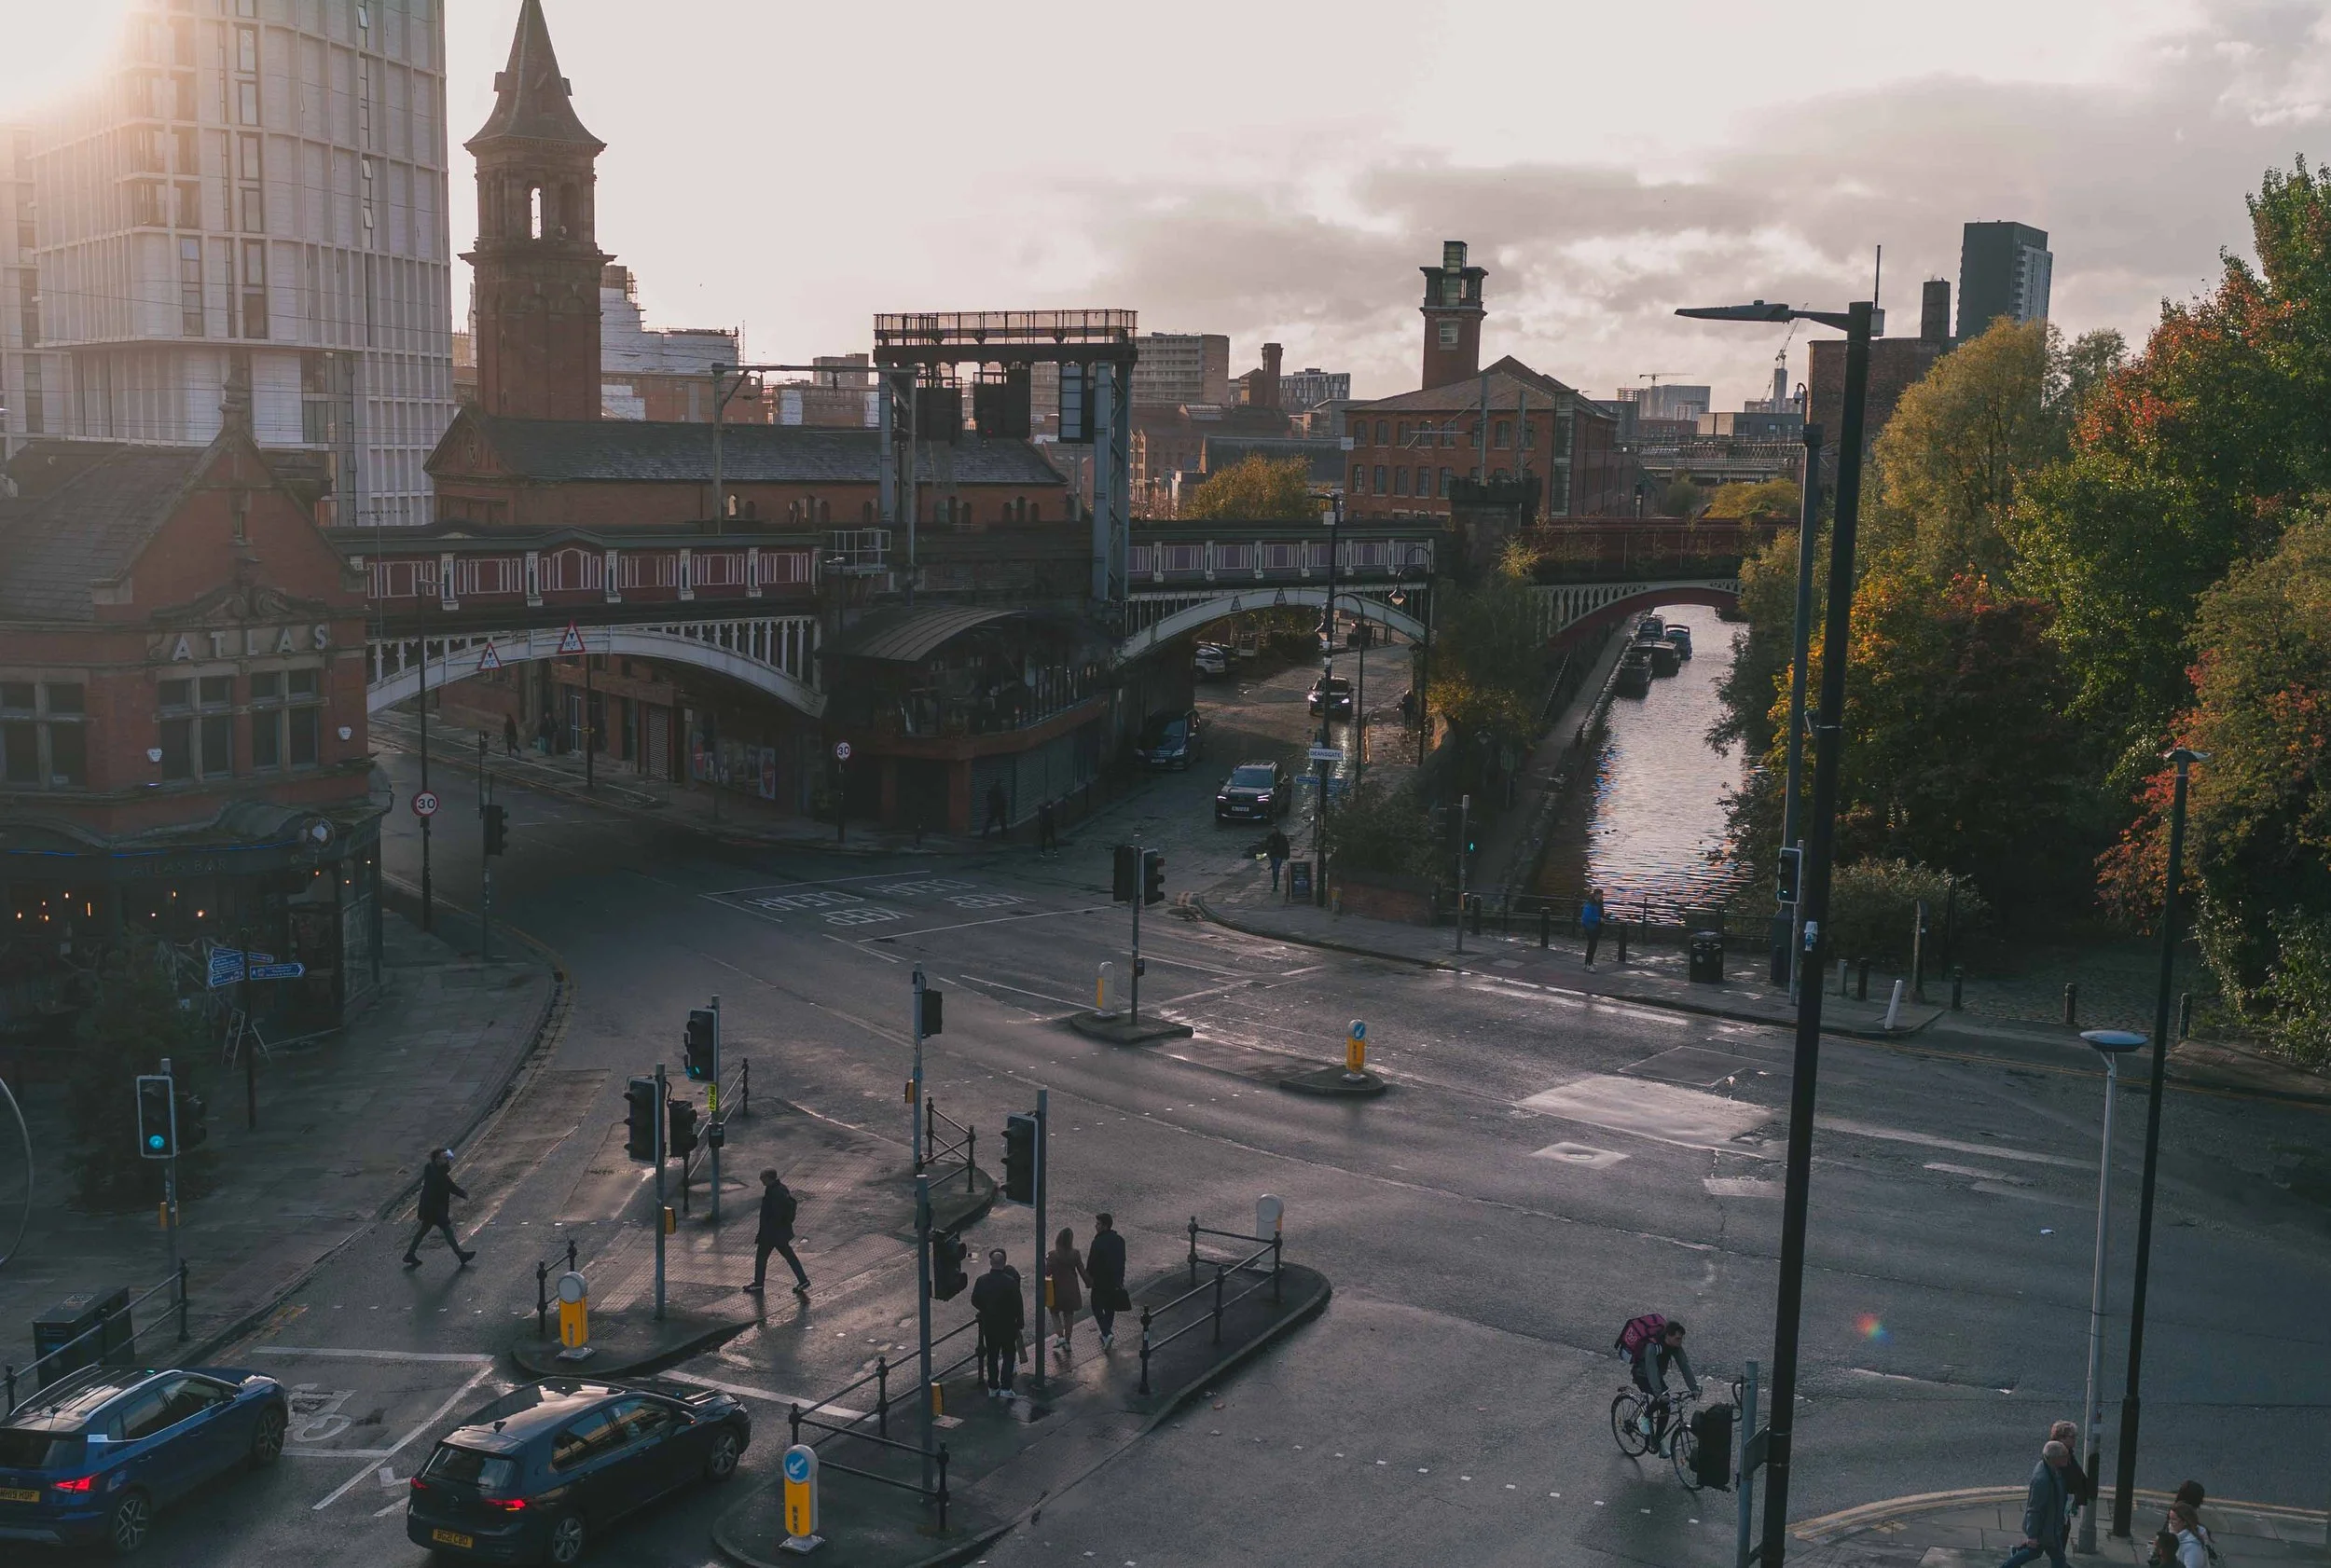
The Leica M8 has a truly ‘film’ camera feel with most of the benefits of digital…
Obviously, it’s completely perfect. It’s practically useless in anything other than good light and can feel a bit chunky at times (though that is the ‘classic’ Leica feel). More concerning though is the potential for weird artifacts in the image and knowing that the M9 had a bit of a sensor issue, it’s always nagging in the back of my mind that it could just die!

2 - Canon R5C
Right, so this is the big one! This is the camera that I upgraded too and I’m so glad that I did. I will be doing a review of it but needless to say, I love this camera. The results that you can achieve from this thing (both in photo and video) completely justify the hefty price tag!

The Canon R5C is a remarkable camera and I will do a full review soon…
However, this is a complete ‘tool’ and it is only used that way. In fact, I don’t think I’ve take it out once to shoot for pleasure. The main reason being that this camera is not one camera, it’s two! It has two separate operating systems for photo and video. The ergonomics for a photo camera are not the greatest and there are a few cameras I would rather pick up ahead of this.
With all that said though, this is a fantastic camera though and hasn’t missed a beat when it comes to commercial work. In an ideal world, I would probably have separate photo and video cameras but with all the features this camera packs in, I’d be spending a lot more money for that privilege!

1 - Bronica GS-1
Well, this is quite the turn up for the books… I spent a long time looking at the Mamiya RB67 and the Pentax 67 to fulfill my six by seven desires. The more research I did, I kept coming across the ‘underrated’ Bronica GS-1. According to all of the reviews, the size, weight and usability of the ‘Bronnie’ were all better than the aforementioned options!

The Bronica GS-1 is a special camera and I will do a full write up very soon!
However, having now used all three, I can honestly say I am happy with my choice and I absolutely love this camera! The waist level viewfinder is beautifully clear, the shooting experience is a pleasure and I can walk around with this camera all day and not feel too concerned about weight!
The thing that really got me though are the results that can be had with this camera! I have picked up a few lenses and keep finding myself gravitating back to the 100mm. Given the choice of all the cameras I own, this is the one that I would be picking up if I could only use one camera!
So there you have it, that’s pretty much my year in cameras and unless anything major happens, these are the ones I will be using the most in 2023 as well! I’d love to hear your thoughts on the list though and what would you pick? Happy shooting in 2023!
Disclaimer: All links to Amazon UK are affiliated links - you will still pay the same price but I will receive a small commission for providing the link. All information provided in this blog is intended either for educational or entertainment purposes and is accurate to the best knowledge of the author. However, further research/professional advice should be sort before making purchases/implementing any advice given and no responsibility is taken by the author or parties mentioned here within.