
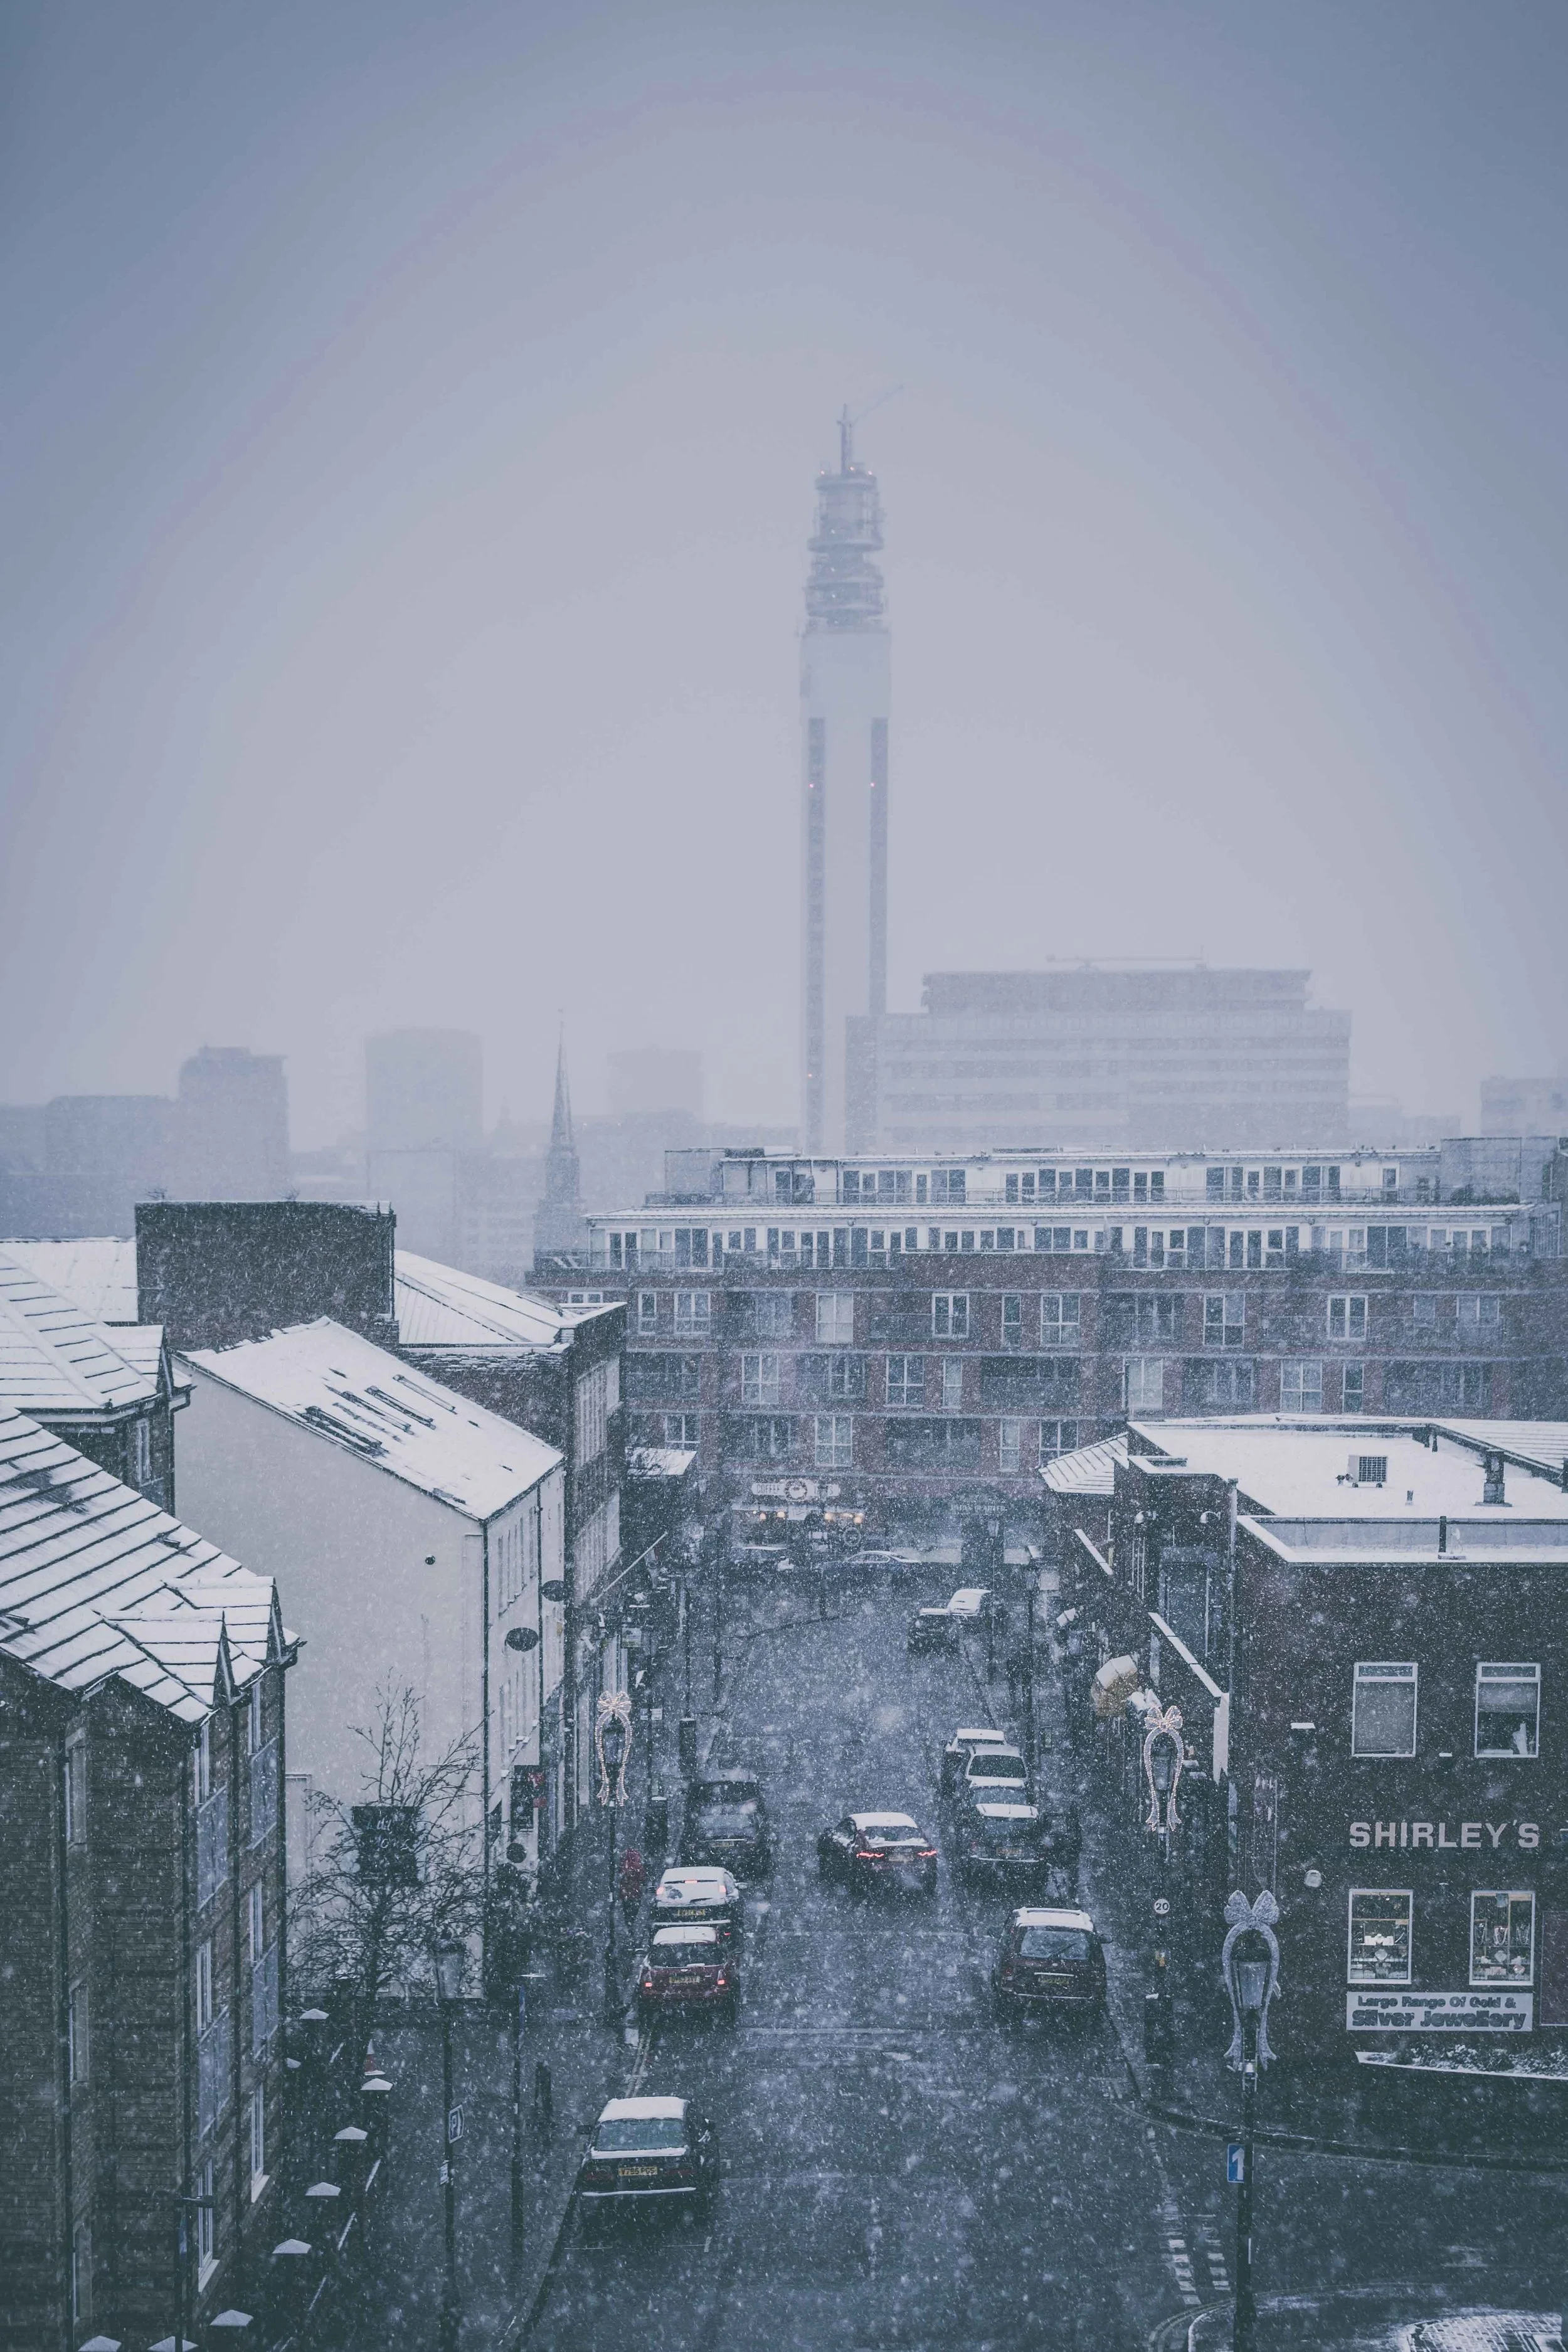
The Birmingham Blizzard! it's Snow beautiful...

I feel like when I was a kid, it always snowed around Christmas time. However, in recent years, you're about as likely to get snow in April as we are December. So when it actually does snow during the 'correct' time of year, it's like some sort of Christmas miracle! For us photographers, it is an extra special little gift as it gives us a chance to take pictures of all the same streets and scenes that we've shot a million times before, but looking completely different!

The snow certainly brings a few problems with it, notably the impact the freezing temperatures have on your ability to get out of bed and not being able to feel your fingers five minutes after leaving the house! On a series note though, it leaves thousands of people vulnerable and makes the simple task of walking to the shop a potentially life-threatening journey! (EDIT - It really is grim out there, cars getting stuck and all sorts) So going out just to get some pictures is not as pleasurable as it may seem!

However, the results are always worth the extra effort! Seeing Birmingham bathed in a blanket of the white stuff is a rare and enjoyable treat, albeit in small measures before the Hypothermia sets in! By the time this is posted (sometime on Sunday morning - EDIT - I'm back, it was too cold!) I will be out again on a shoot and will be doing my best to take advantage of 'Ski-Sunday'! If you are venturing out, please be careful! For those lucky enough to be staying in the warm, here are a few images of (what I am unofficially calling) the Great Birmingham Blizzard! Have a click through the gallery below and keep an eye on my social media for more soon... (Find me on Facebook, Twitter & Instagram)


The end of an era...

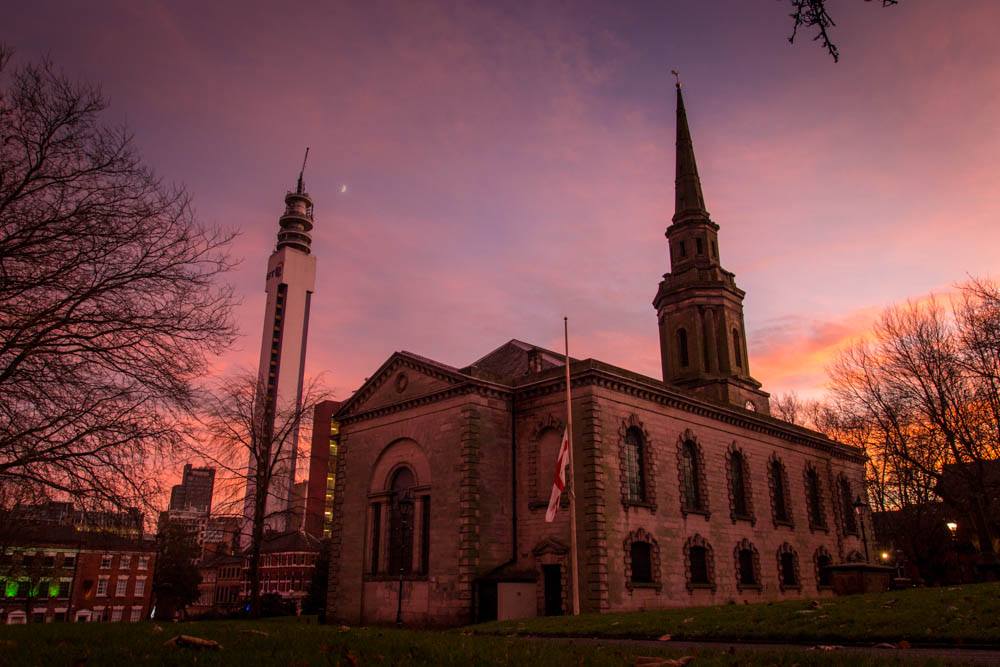
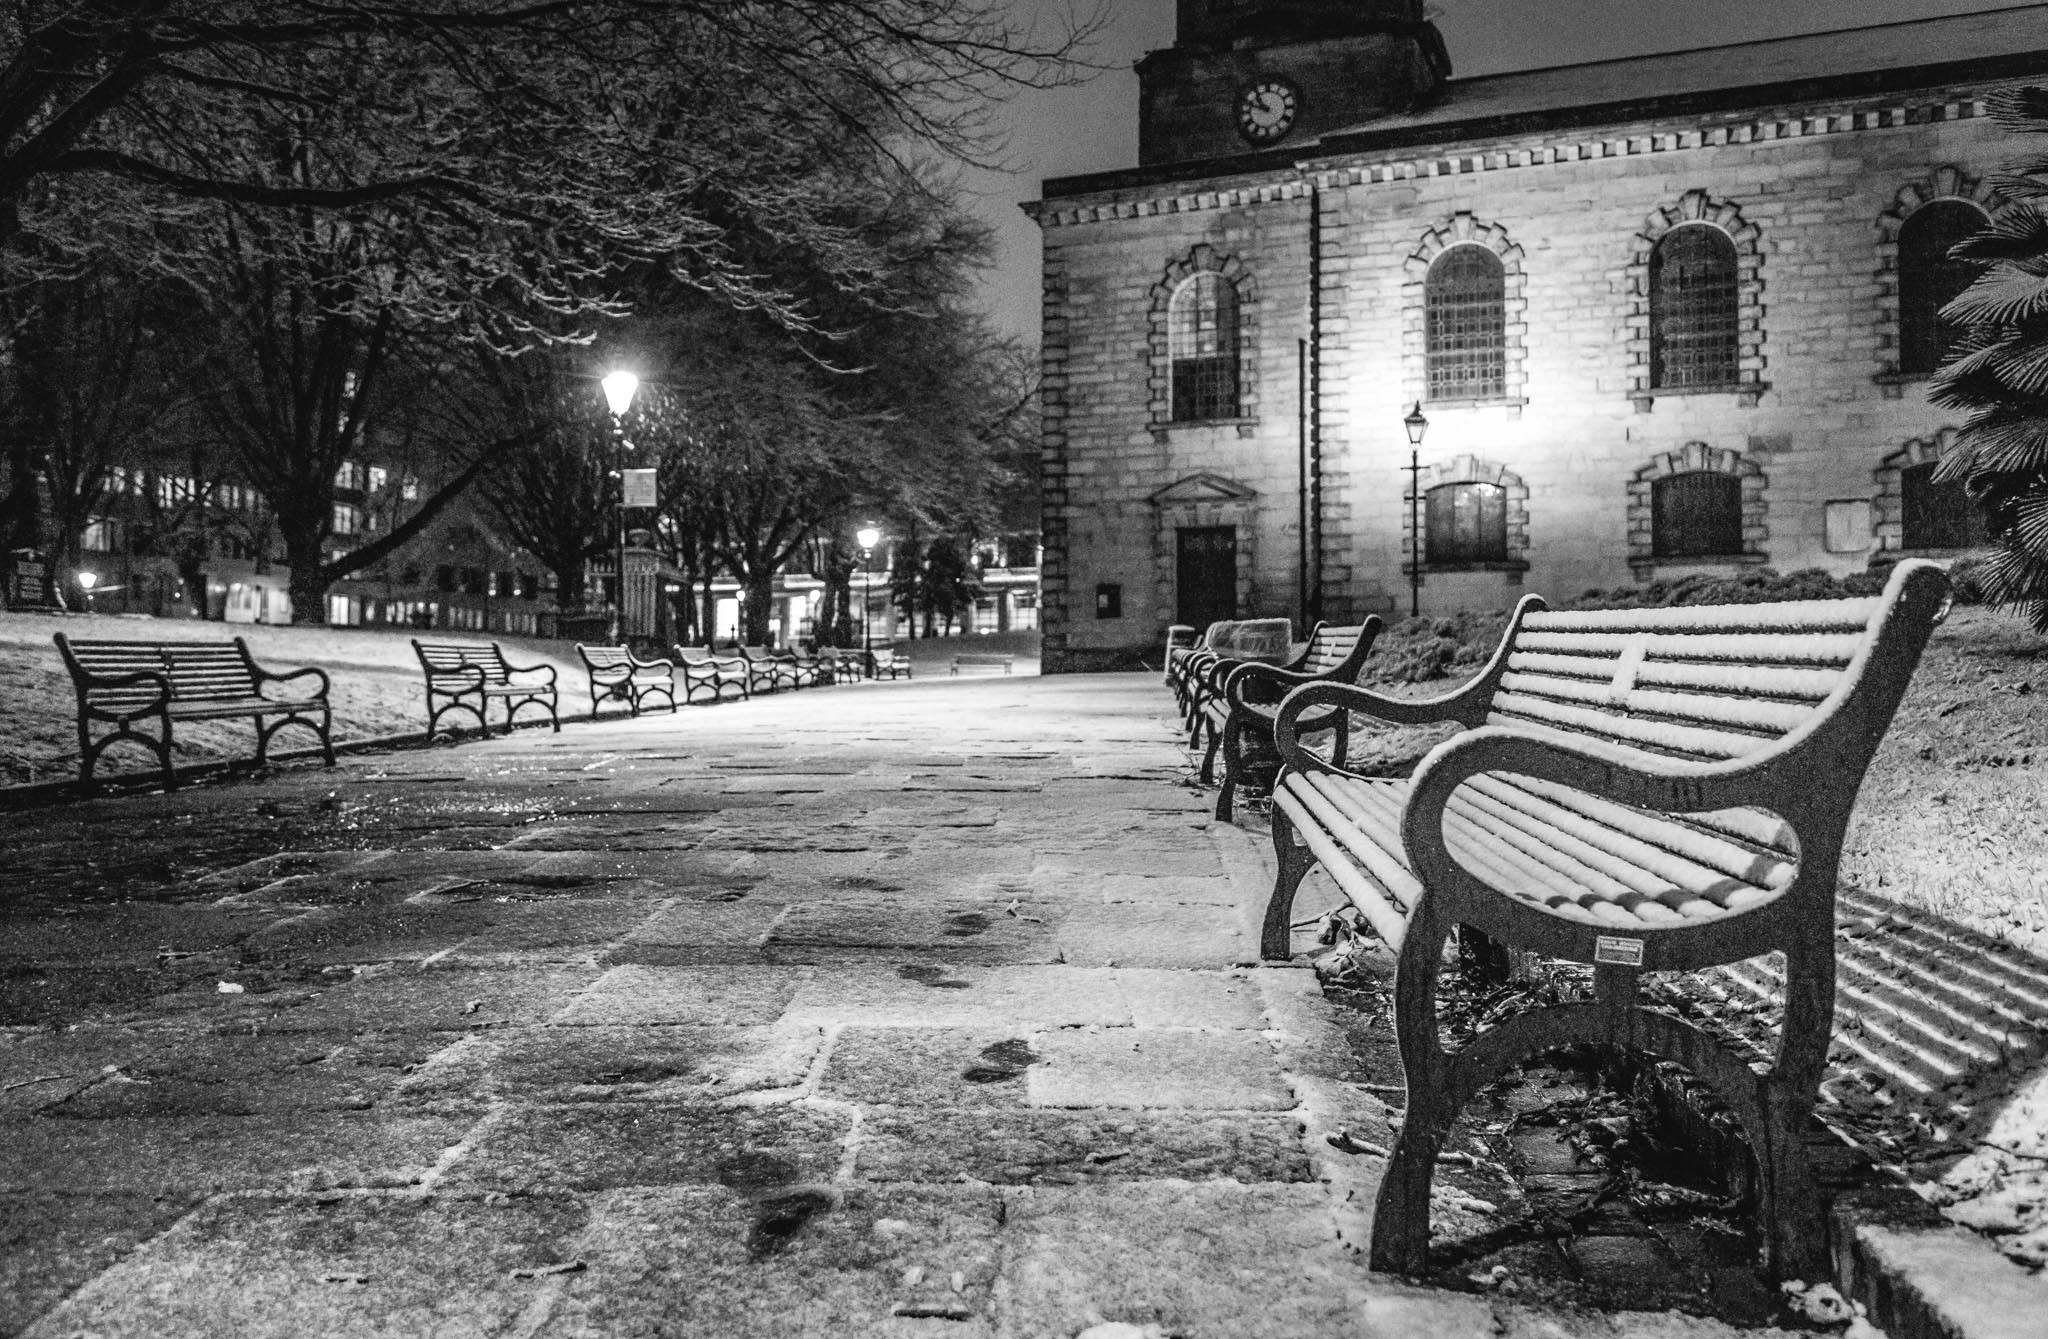
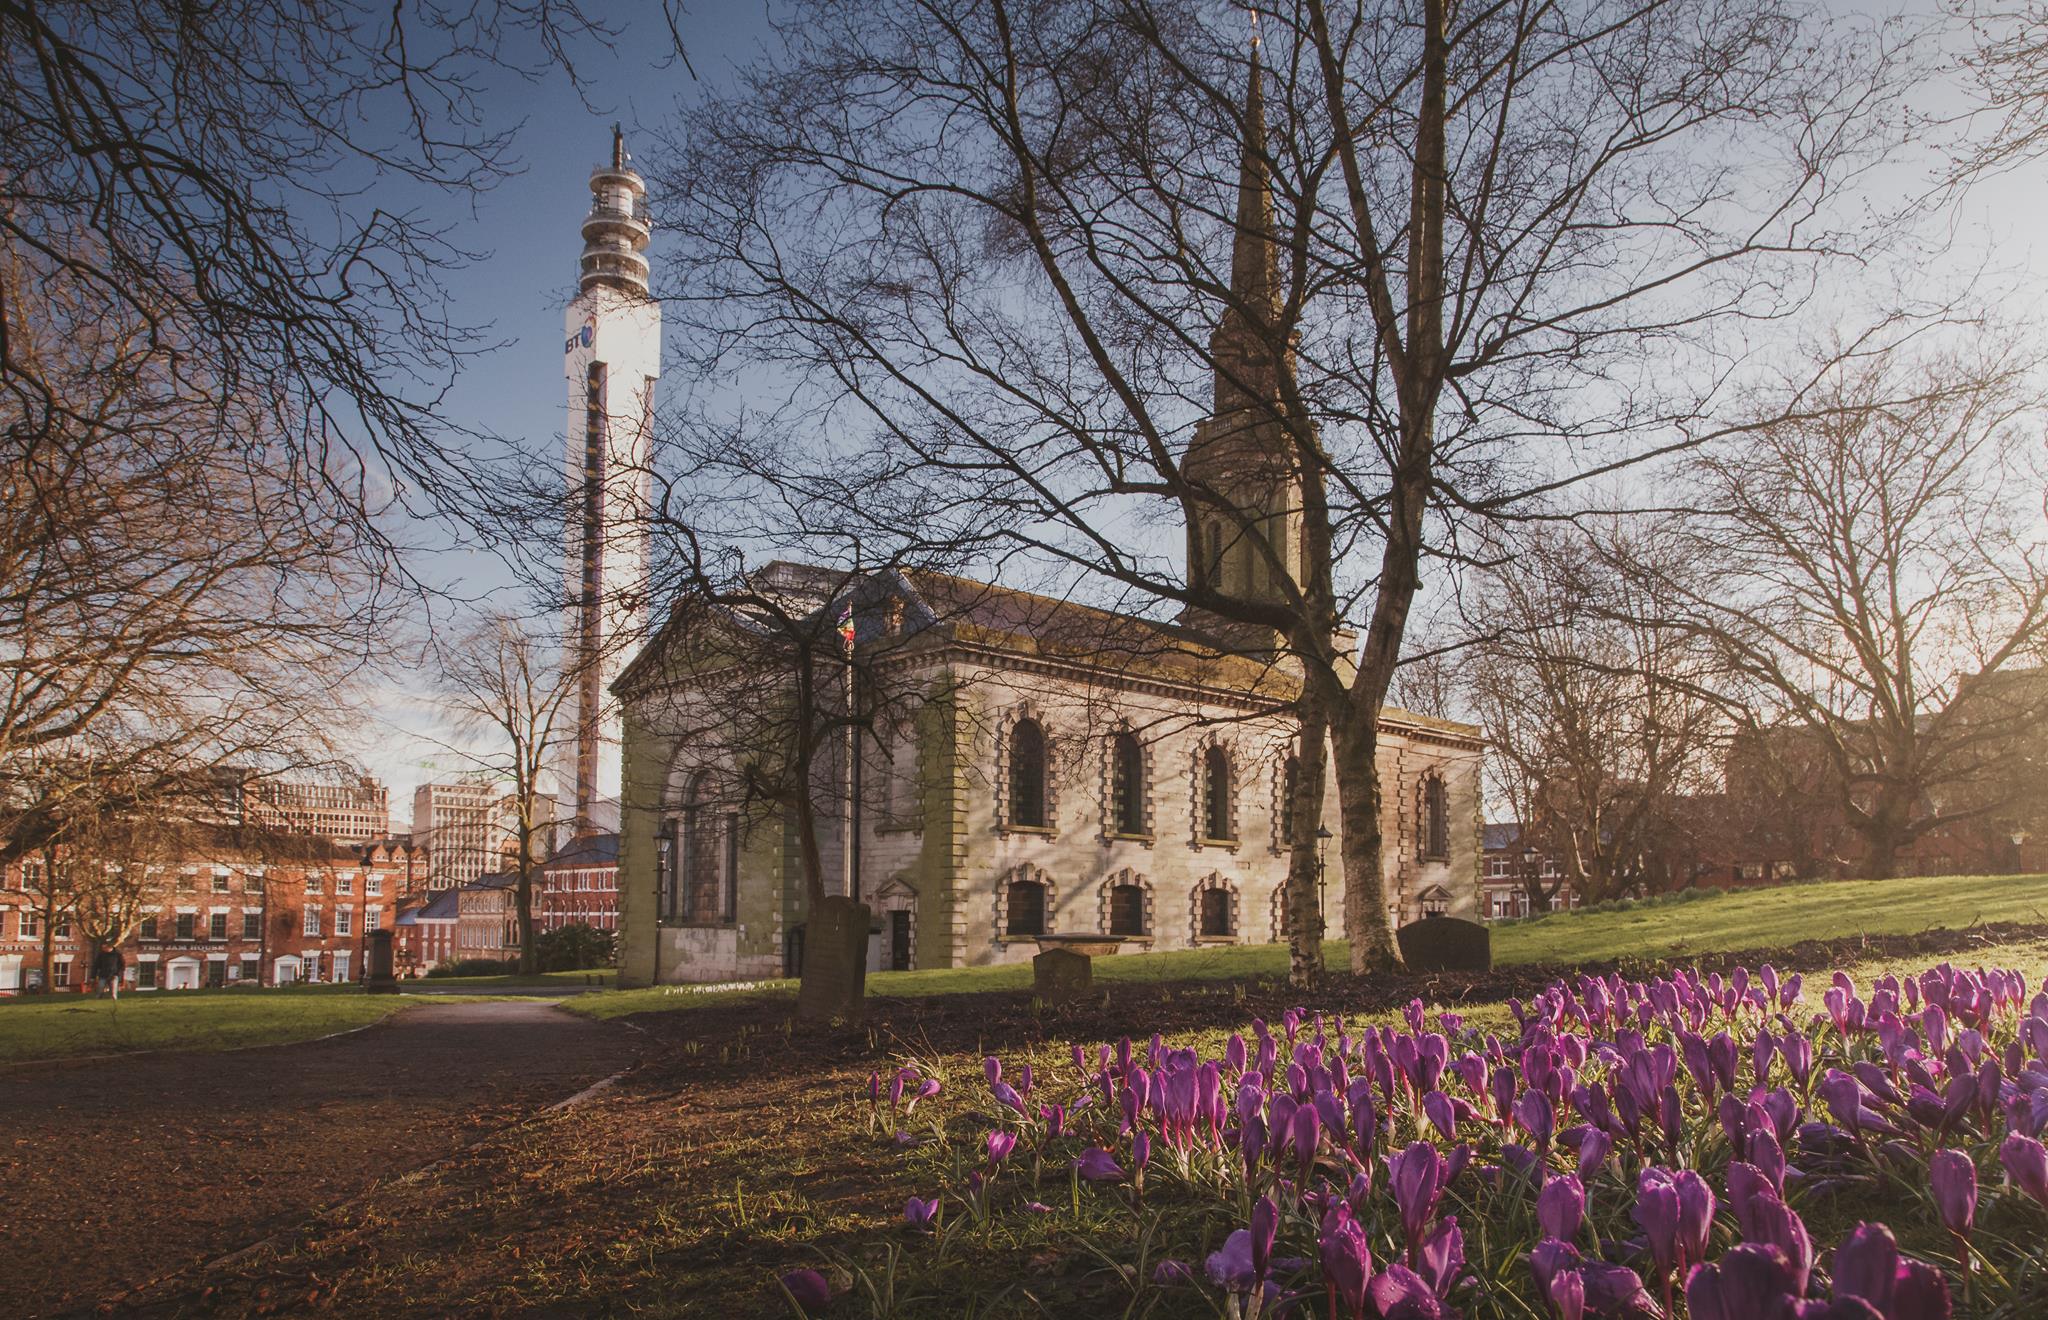
St Paul's Square is, for me at least, one of the most beautiful parts of Birmingham and I have been very fortunate to call it home! However, this weekend that all came to an end as Laura (my girlfriend) and I moved out. We haven't gone far, less than a five-minute walk, but for me, it may as well be a hundred miles away.
Six years ago (almost to the day) Laura and I got the keys to our first home together a little less than a year after meeting. As soon as the apartment came on the market, we snapped it up and have been enjoying the views over St Paul's Square ever since. The place was almost perfect for us. However, it wasn't ours and we wanted somewhere of our own.
So why is all of this important? Well, for the last few days I've felt really down about the move and the more I started thinking about it, the more I understood why. We had been through so much there, good and bad. We had made a home for ourselves and it was the impetus for me to get a new job and certainly made me take my finances more seriously! It was like a security blanket for me after losing my Mom and is possibly the only place that has ever felt like 'home' since leaving my childhood home.
Most importantly though, it was one of the main reasons I ever picked up a camera! Many people probably know by now that I started out a little over four years ago as a car photographer. Yet it was my 'practice' shots of Birmingham that really got me motivated to push my photography further. Many of my first images were of St Paul's and are still some of my most popular.
So needless to say, I am going to miss the old place. I am going to miss the views and waking up in the morning, looking out of the bedroom to see 'what the sky is doing' and deciding whether to go out and take pictures! However, the new place may not have the same views or the character, but it sees us move deeper into the heart of Jewellery Quarter and is undoubtedly a great move for us and one we are very fortunate to be doing! Obviously, I will still be taking pictures of St Paul's Square, but it will always have a certain special place in my heart... Here are just a few of my favourite images...


REVIEW - Benro TSLO8AN Tripod

The Benro TSL08AN is an affordable, lightweight, portable tripod that is a fantastic companion to any photographer’s gear. Whether you’re a travel, cityscape or landscape photographer, this tripod is small enough to fit on the side of almost any bags with a length of 51cm as well as not weighing your pack down at just 1.2 Kilograms it’s not much heavier than your average Full Frame DSLR with a lens!


With the tripod being folded to such a small size you’d think it would lack in quality, well think again. Fully extended the tripod offers a working height of 146cm which is the same as most other travel tripods. The legs can each lock into three different angled positions providing flexibility whilst shooting, the leg sections also use aluminium twist locks instead of the usual plastics that are found at this price point, this will provide durability to the locking mechanisms, twist locks are quick to set up and most importantly will ensure you can’t accidentally knock them loose during a shoot.
This tripod also includes four quite big features that are all hard to come across on one tripod at this price point. Firstly, the tripod has two bull’s eye spirit levels, one on the ball head and another on top of the spider legs frame so you can level both sections of the tripod for a level shot or panoramic shot. Working on from panoramic shots, the tripod also features degrees’ markings on the ball head to make your panoramic shots that bit easier.


At the bottom of the centre column is a hook, this is extremely useful because the tripod is extremely light and so anchoring it down with you bag allows you to get sharp images even with quite strong winds. (The tripods maximum carrying weight is 4 kilograms, due to the head, the legs can take a lot more, allowing you to add balast). Lastly, one of the best features I found when using this tripod was that you can invert the centre column by just unscrewing the hook, allowing you to get those super low shots still with the stability of a tripod.

This is a fantastic little tripod that has many great features packed into a small form factor travel tripod and the best thing about this tripod the Benro have produced is that there are two variants, Aluminium and Carbon Fibre both priced at £74.99 and £109.00 respectively; so if you wish to shed even more weight off of your gear then maybe the extra £34.01 might be worth it.
Building Brum: Westside meets Eastside

It's not every day that you get the opportunity to stand on one of Birmingham's tallest buildings, let alone two of them! So when I was asked by Steve Townsend and Ben McPhee from Associated Architects (and all-round badass photographers) if I would care to join them for a spot of 'rooftopping' - I said 'Yes Please!'.

The event would see a group of Birmingham's most talented photographers... and me... scale the McLaren Building and Alpha Tower, two landmarks of the city skyline, to capture the dramatic transformation that both sides of the city are going through. Judging by the sheer amount of cranes littering the horizon, there is a lot of development going on!

Associated Architects play host to 'Building Brum' a series of networking events exploring the built environment and celebrating our great city. This particular project, as you have probably guessed by the title, aims to bring together the two sides of the city and look at how each site has evolved and how they will continue to progress in the future.

The event culminates in a photographic exhibition featuring work from a plethora of local photographers including Kris Askey @krisaskey, Tim Cornbill @timcornbill, Ben McPhee @benmcphee, Fay Loewy @Faylouiseloewy, Fraser McGee @frasermcgeefoto, Beth Astington @bethastington, Martin O’Callaghan @ocuk, Jon Crampton @joncrampton, Rachel Mason @heyrachelmason, Matt Beach @matt_beach_photography and Verity Milligan @veritymilligan (all of which are well worth a 'follow' on Instagram!)

As for the views, well they were amazing and I don't think my images do them justice! However, Instagram has been awash with brilliant images from fellow photographers - so be sure to search the hashtag #westsidemeetseastide_bham for more! I'm always inspired by how many great photographers there are in Birmingham and to watch them battle through the wind and the rain on top of Alpha Tower in the dark, was a testament to how great they all are (and embarrassingly, I had packed up a long time before them!).
A huge thank you goes out to Steve Townsend, Ben McPhee, all at Associated Architects, Bruntwood, Alpha Works, McLaren Building, Alpha Tower and anyone else that played a part in making this happen, thank you!
REVIEW: Samsung EVO Plus microSD Card
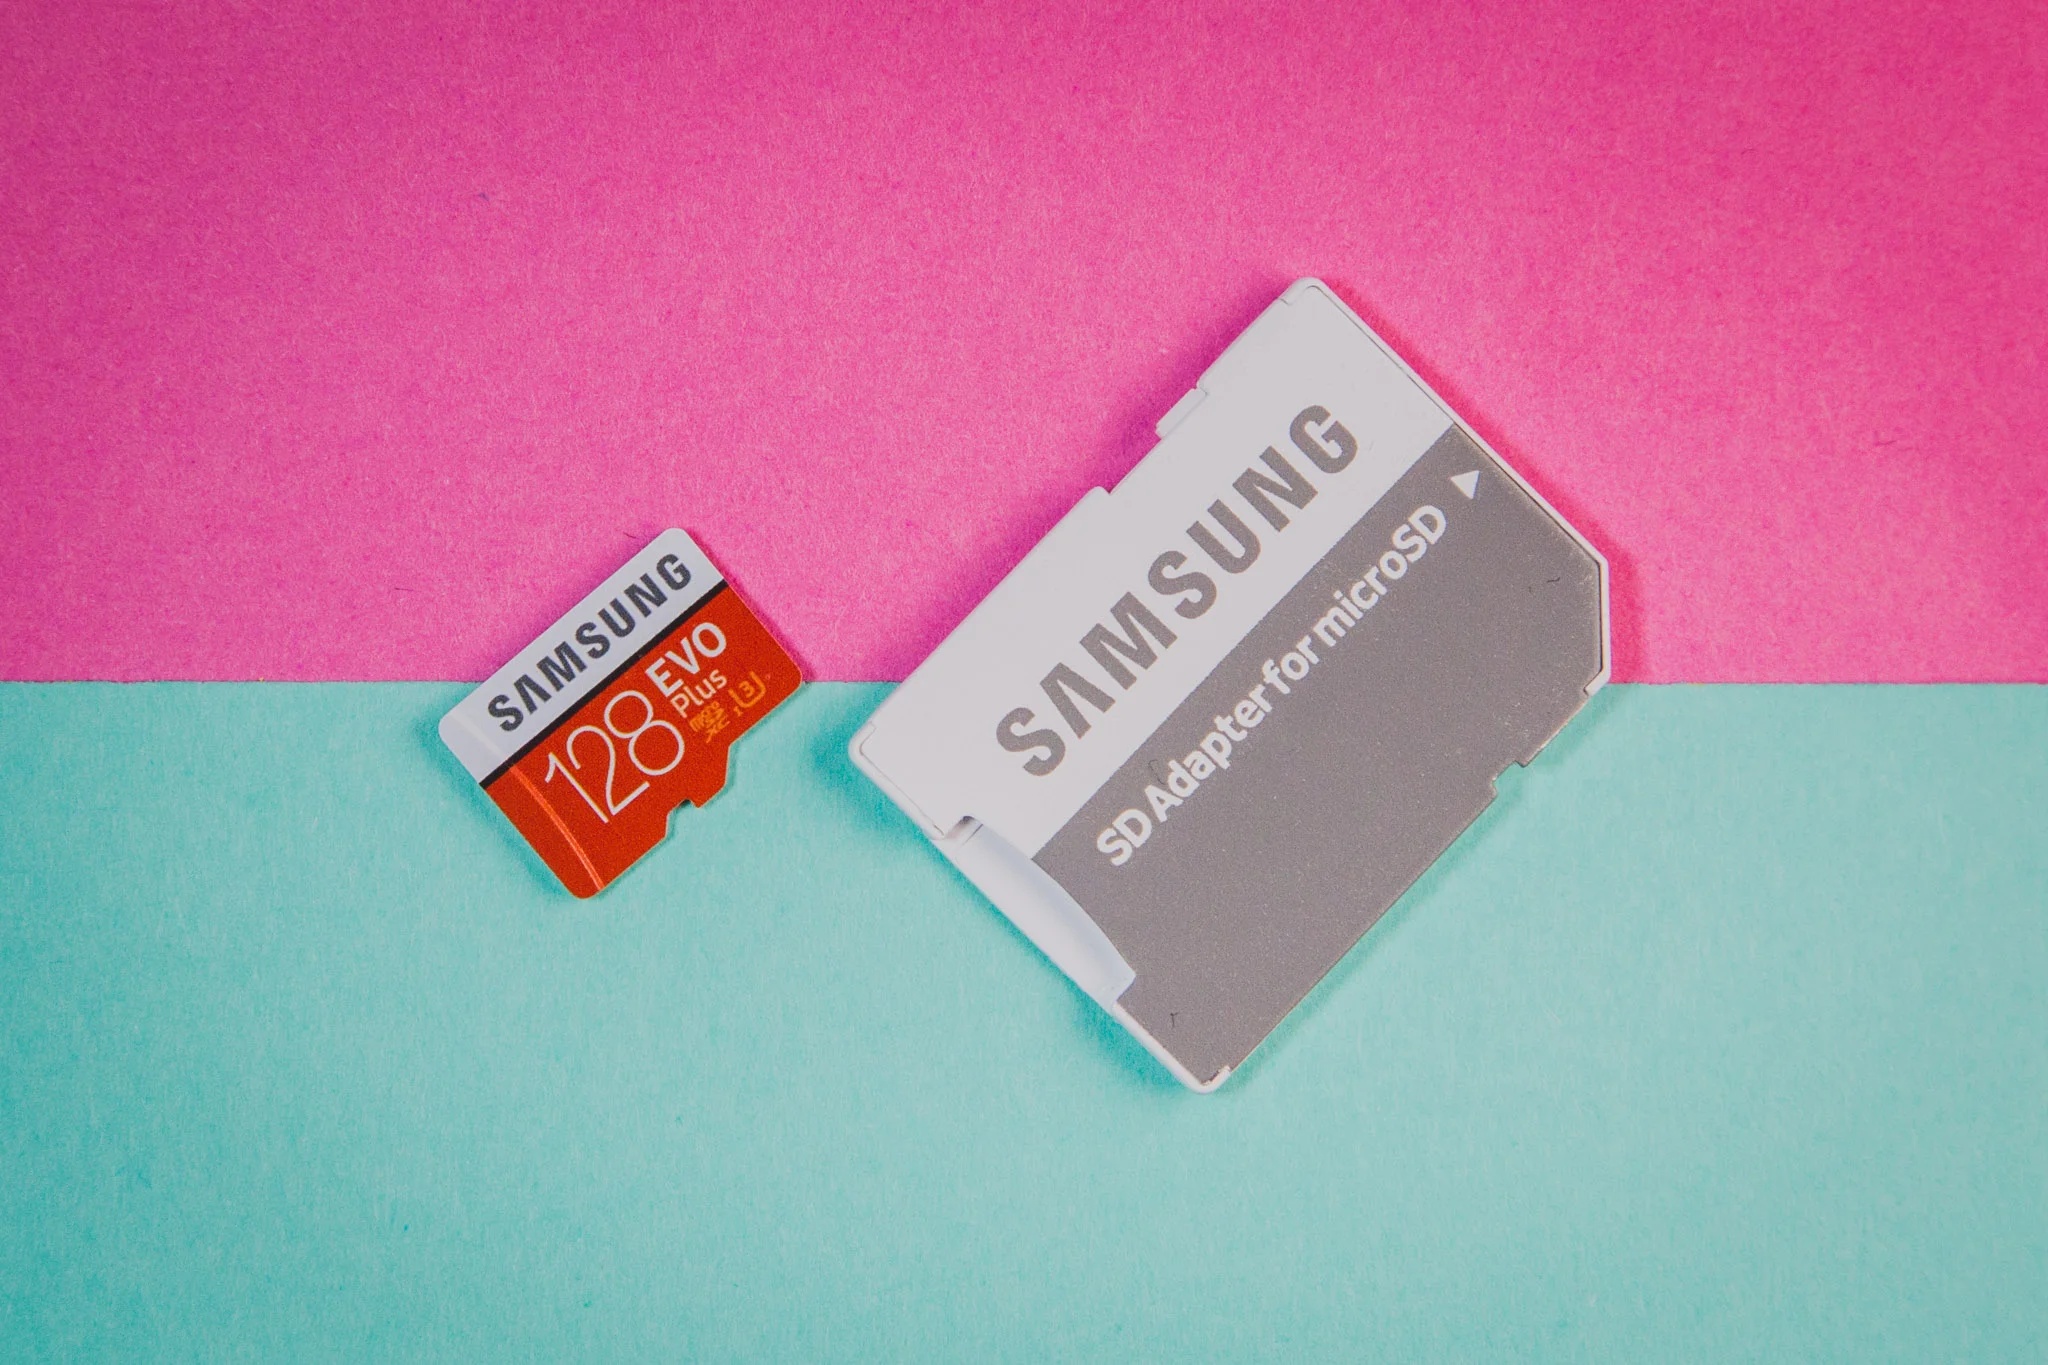
Good things come in small packages and they don't get much smaller than the new Samsung EVO Plus microSD. Storage makes up the cornerstone of any digital photographers workflow and it's no surprise that when it comes to memory cards, there are a lot of choices! The daddy of the lot (and my personal go-to-card) has always been the Sandisk Extreme Pro, with blisteringly fast speeds and great reliability, so could the Samsung stack up against the king?
Samsung certainly has a great reputation when it comes to storage, so I was keen to see what kind of a punch the little card packed and right out of the gate, I was stunned by the 128gb, which amazingly is only the 'middle' of the range, that includes a 32gb, 64gb and a whopping 256gb! That's a lot of storage to carry around and certainly gave me the peace of mind that I wasn't going to fill a card on a shoot.
The new range boasts extensive performance improvements, including the advanced NAND technology and UHS-1 read speeds of 100 MB/s - which is good! With speed class of '10' and grade of 'U3' - it is certainly a quick card! So data transfer, shooting in burst modes etc. are all very rapid. The all-important write speed is 90 MB/s - which certainly gives the Sandisk a run for its money!


Performance
In short, it's excellent! Having used the card for over a month, I basically forgot it was there. The huge amount of storage lets you shoot and shoot, the only real fear is remembering to occasionally take the images off the camera to edit! Even shooting RAW, the huge amount of storage lets you capture thousands of images before you even touch the sides of the huge capacity.
One of the biggest tests of a card like this is shooting in burst mode. The write speed of 90 MB/s is very close to what the Extreme Pro's achieve and I certainly didn't notice any difference between using the two cards. On a recent car shoot, where I was capturing 'panning' shots, the little SD card sucked up everything I threw at it and it didn't miss a beat.
Even more impressive than photo eating capabilities though are its video storage ability. The huge 128gb would allow you to soak up 6 hours of 4K UHD footage, 6 hours! The challenge there is finding something interesting enough to shoot for 6 hours! I regularly swapped the card from my 5D MKIII to my Sony RX100V and even my Mavic Pro and not once did it bulk at whatever was thrown at it.
Overall, the performance was excellent and to think that these things can be thrown into a smartphone, used as external storage for laptops/tablets etc. is crazy, all in a (genuinely) tiny package. Better yet, the cards all come with the microSD adapter, making transferring data to MAC's/PC's unbelievably easy (even if you have to use a dongle!) in particular when using USB3. I was more than happy with the overall performance and never once hit an issue, top draw stuff!


Conclusion
The card performed extremely well. Considering this card is around £79.00, I think it offers amazingly good value for money. As a mass-storage card, it works a treat and really takes a lot of pressure off your workflow. For anyone focussing on high volume storage, I really can't think of a better option.
So how did it compare to the daddy? Well, in short, very well! The Sandisk would possibly edge the EVO Plus in out-and-out performance. The Samsung will certainly be more than capable for 95% of users' needs. In addition, Samsung is possibly one of the world's best producers of storage, so you certainly are in safe hands!
Random Rally fun and a little-known fact about me...

Earlier this week I got the chance to go to the DayInsure Welsh Rally preview day. As many of you will know, I am also an automotive photographer - you can see more HERE - so I often get invited to this kind of things. However, this one was particularly special as I always wanted to be a Rally Driver, but never could because my eyesight isn't good enough! In fact, I don't actually drive for that reason (I know, I know - car photographer that can't drive, what a joker!).
However, there was also another good reason why this was special to me, as I got to meet a childhood hero, Nicky Grist, who had played co-pilot to some of my all-time rally heroes (and incidentally, nearly ran me over some twenty years prior at the RAC Welsh Rally with a certain Mr Juha Kankkunen!). All-in-all, it was a great day out and I would love to go back for the actual rally itself, but here is a little highlights video of my day....
Read all about the day at Dayinsure Welsh Rally
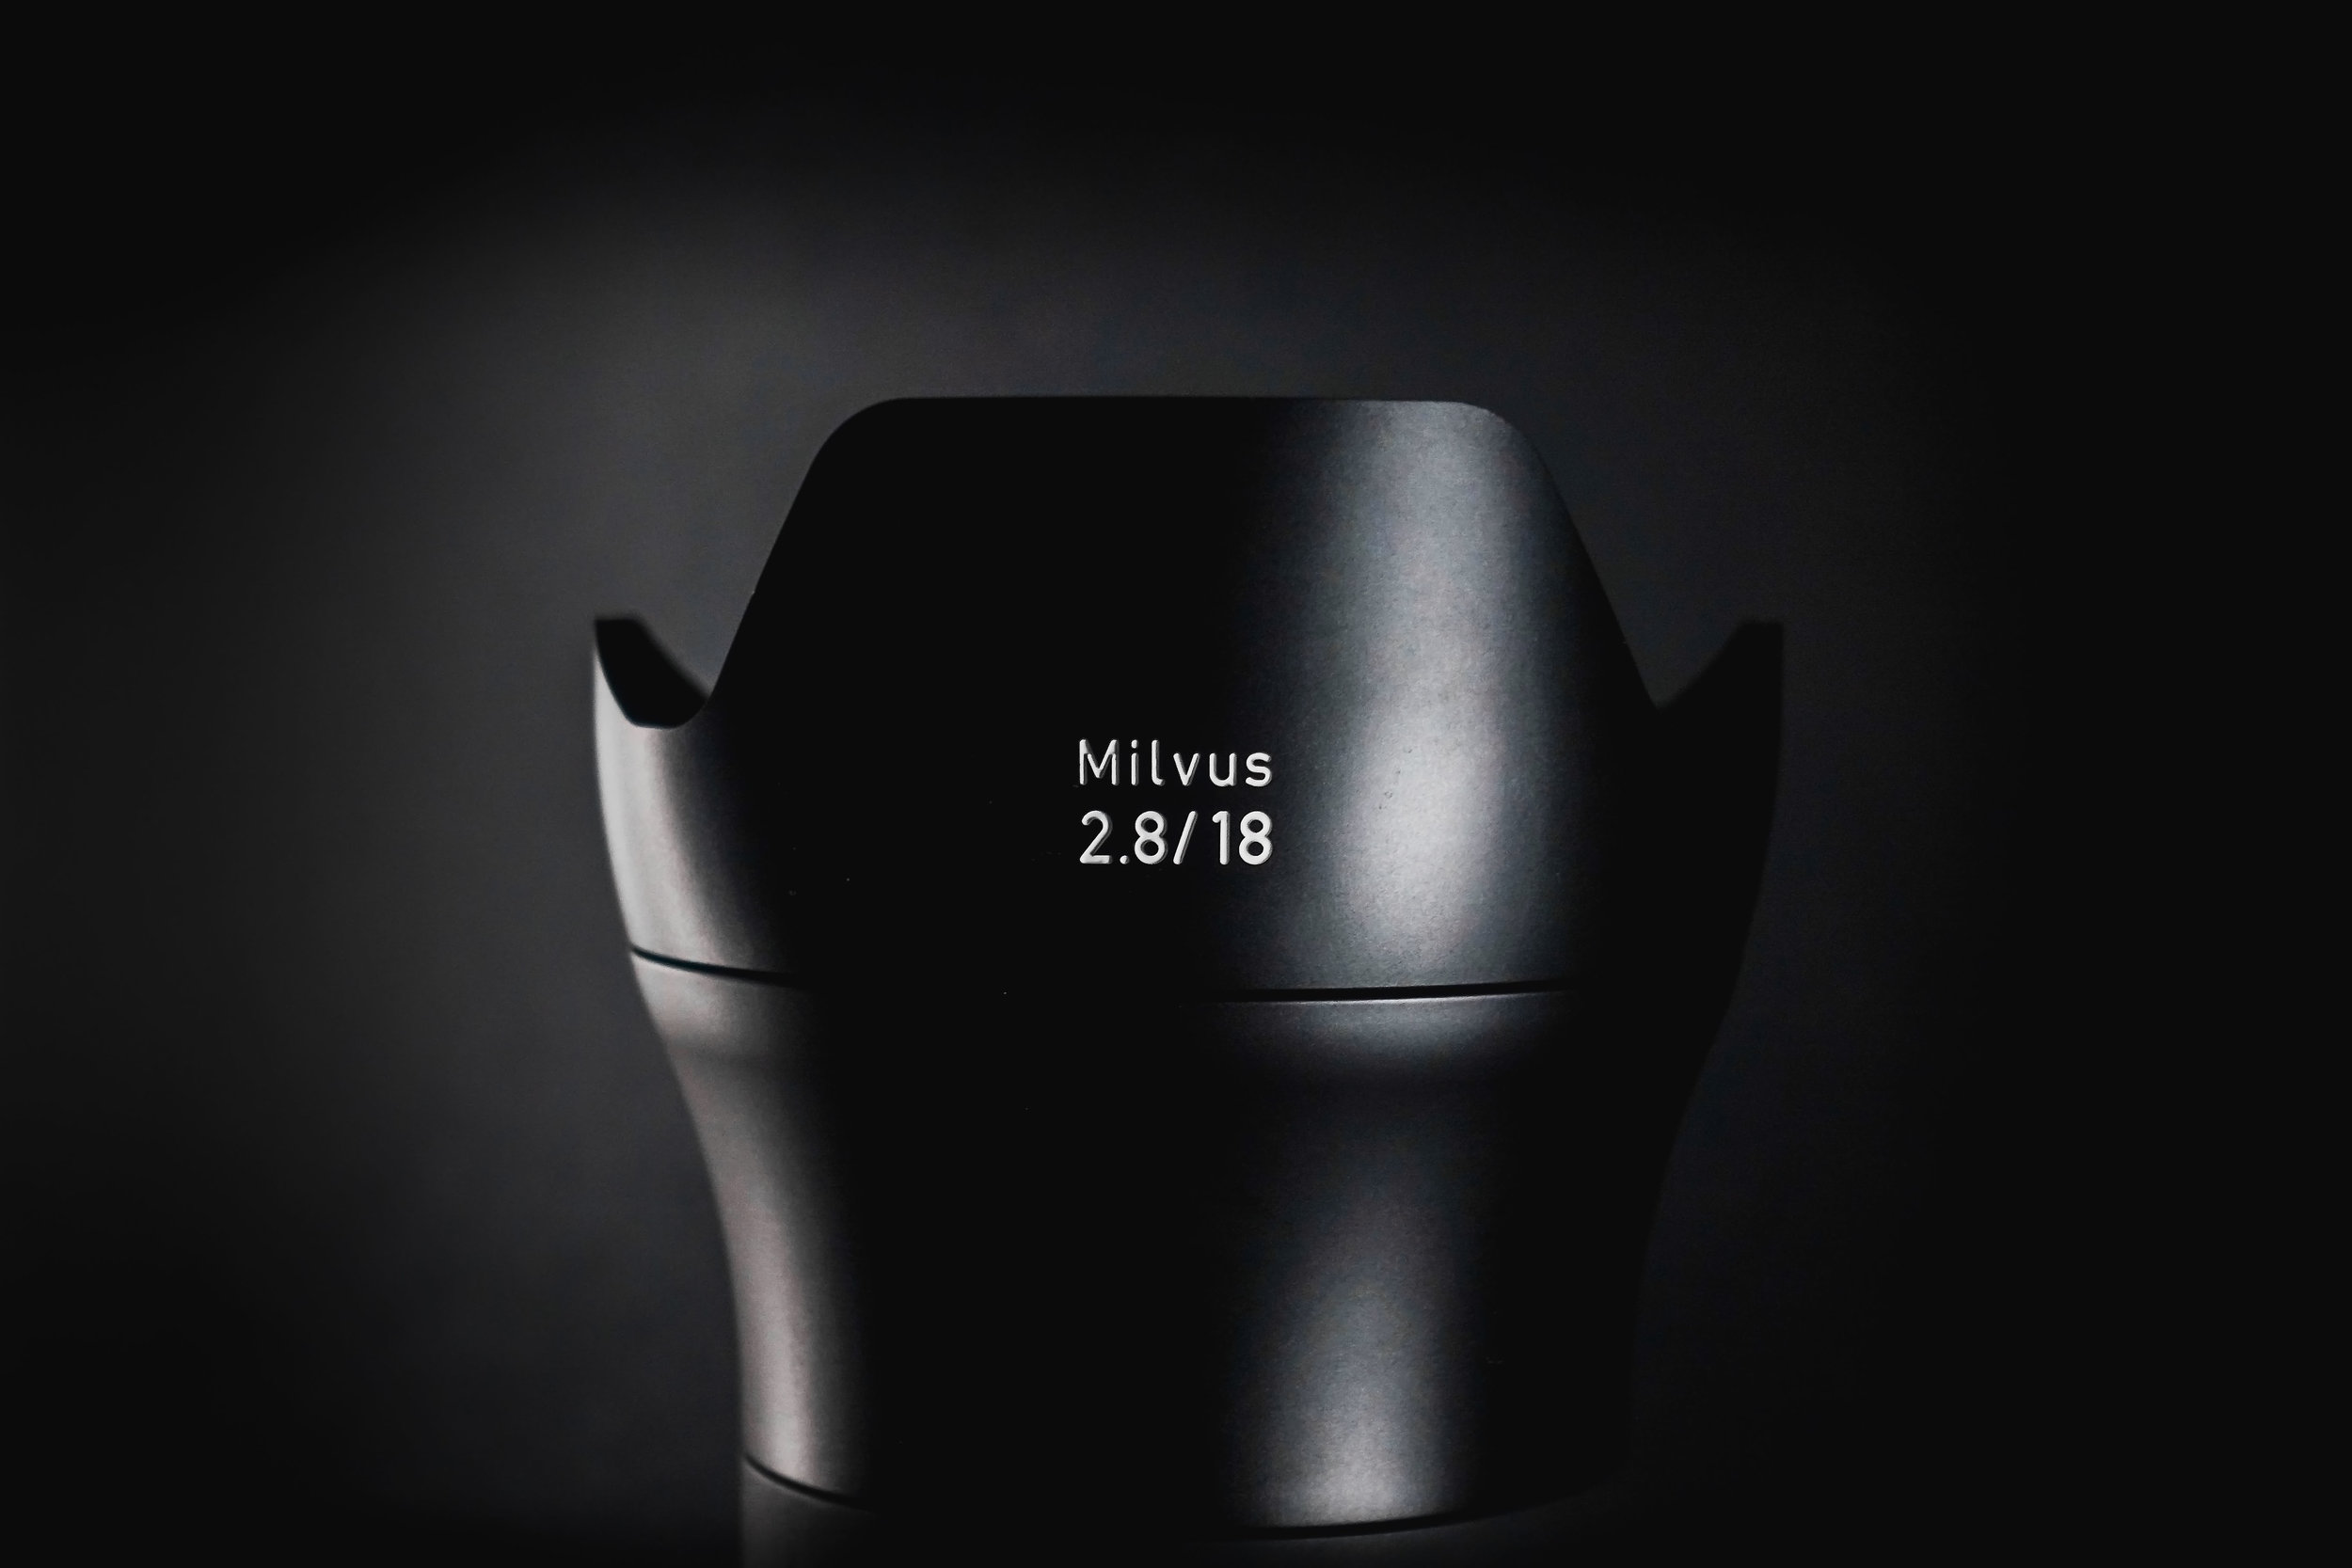
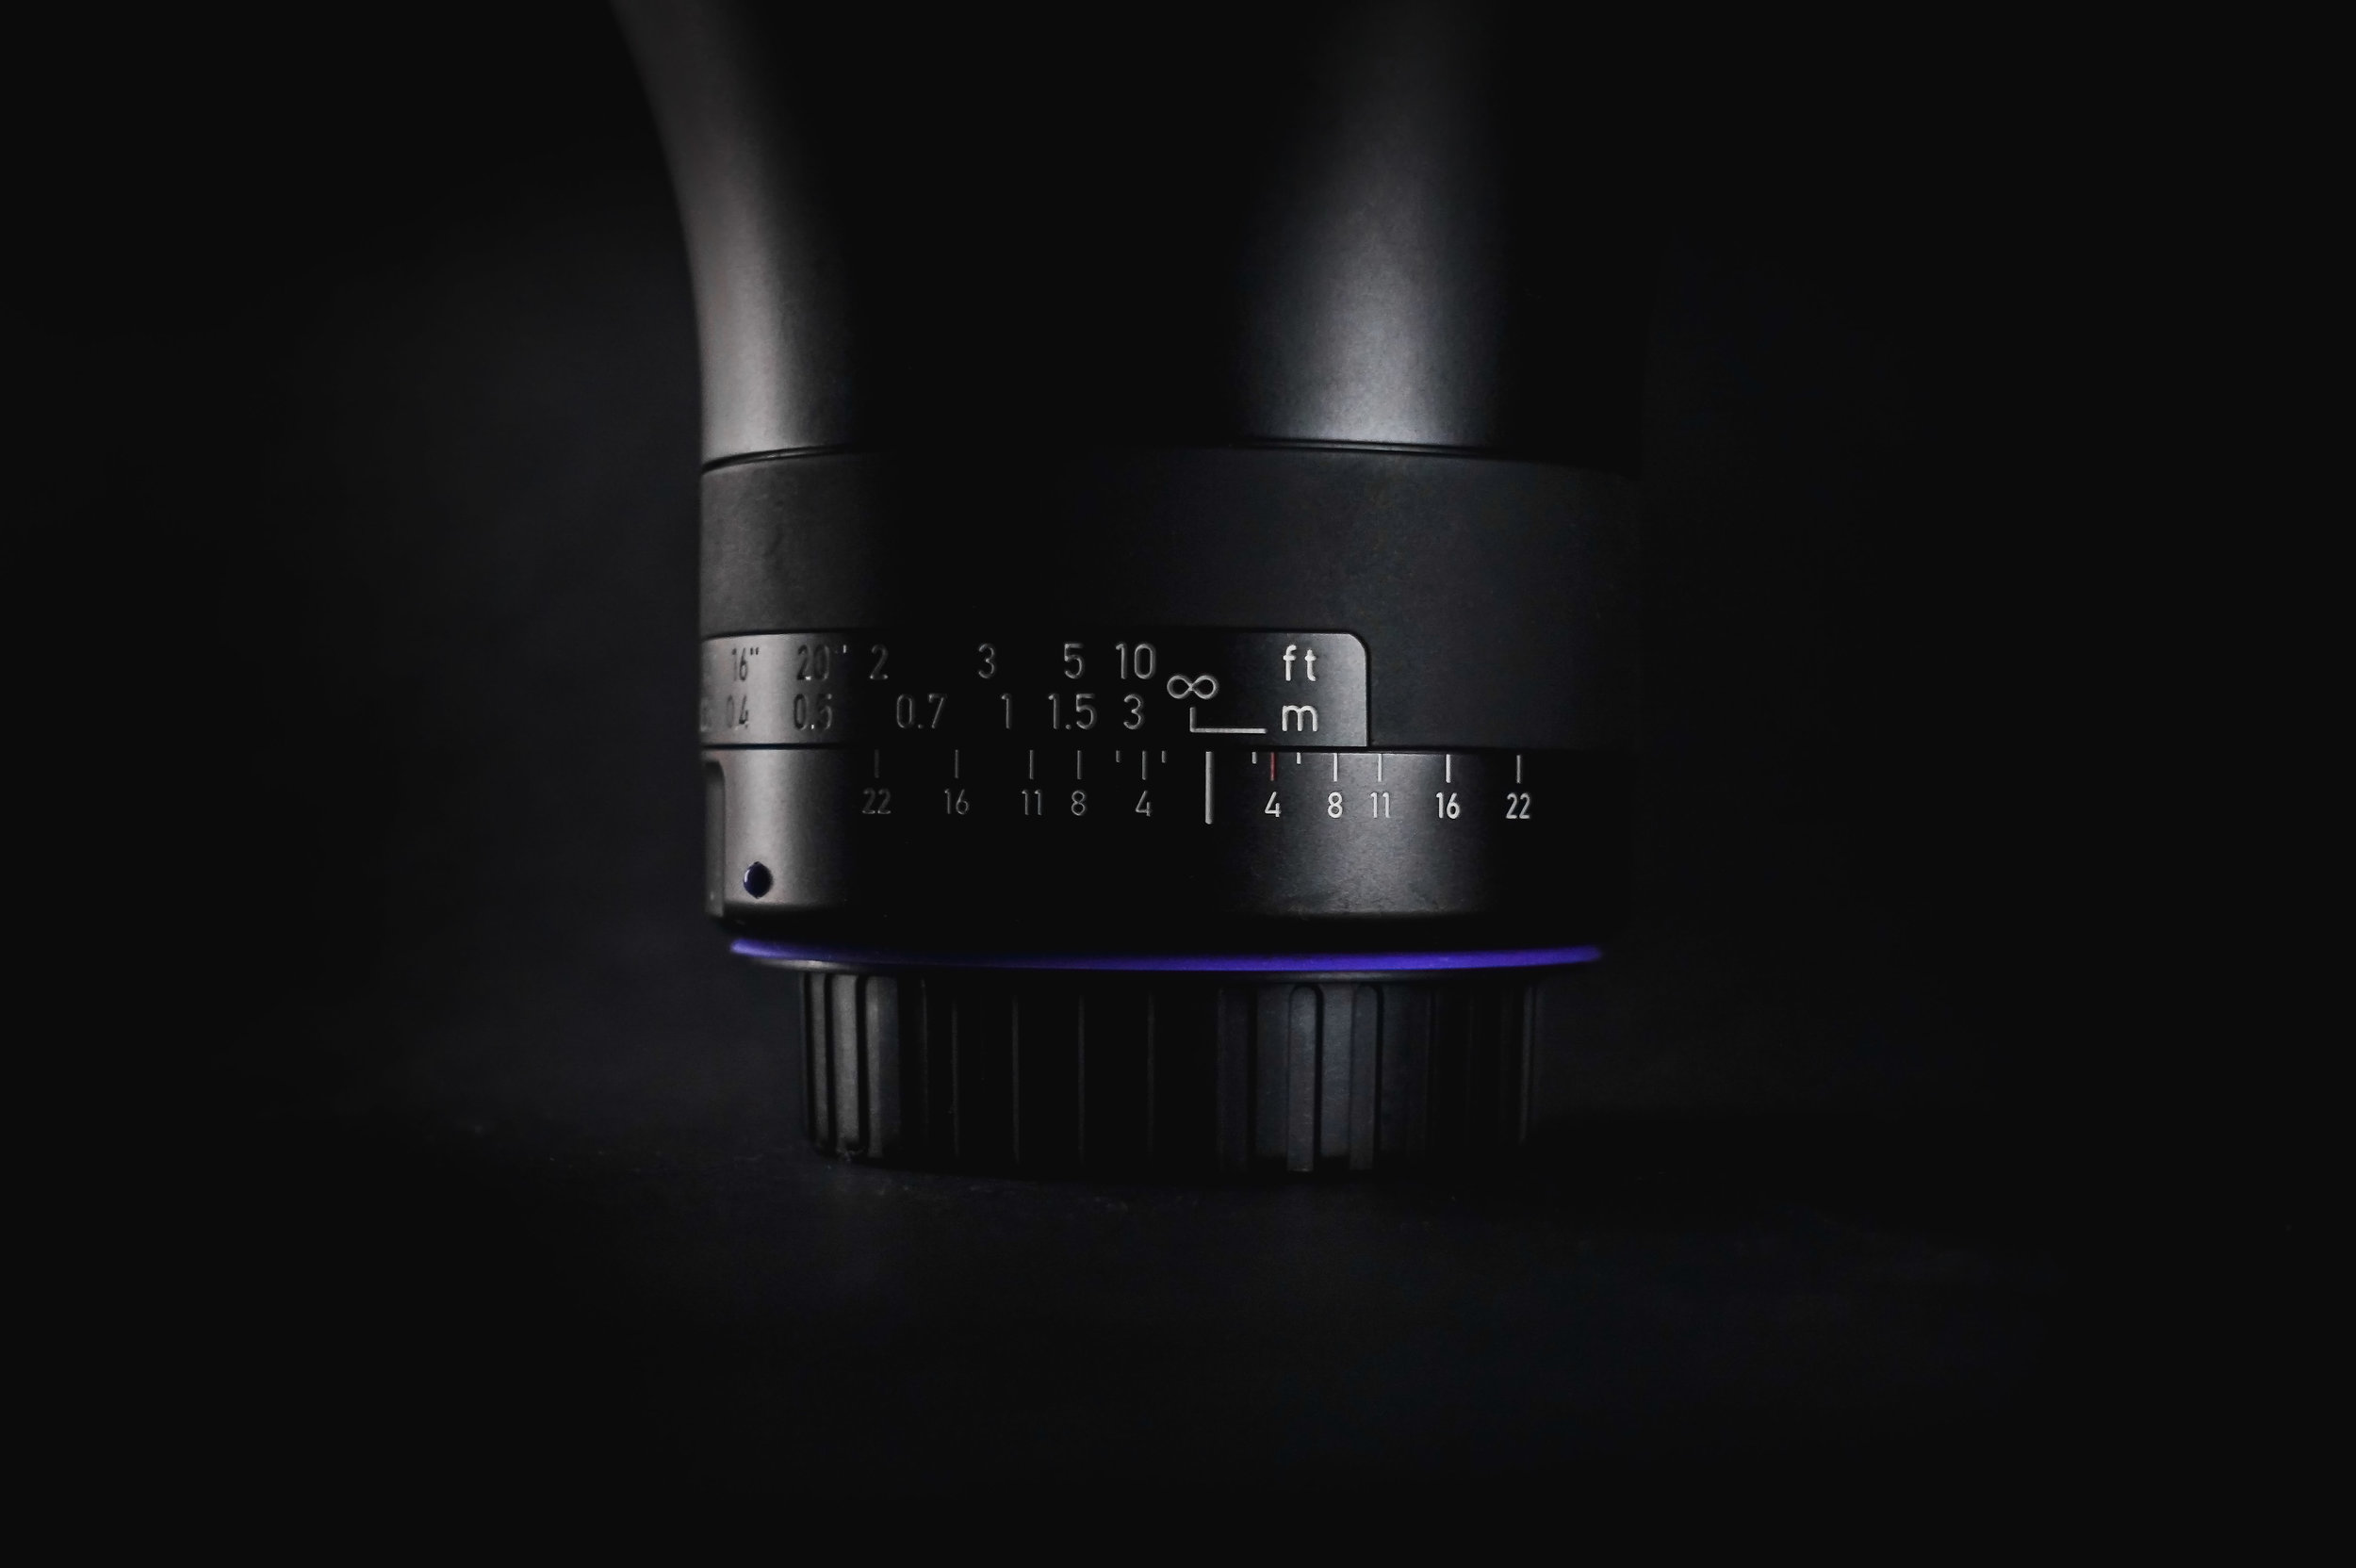
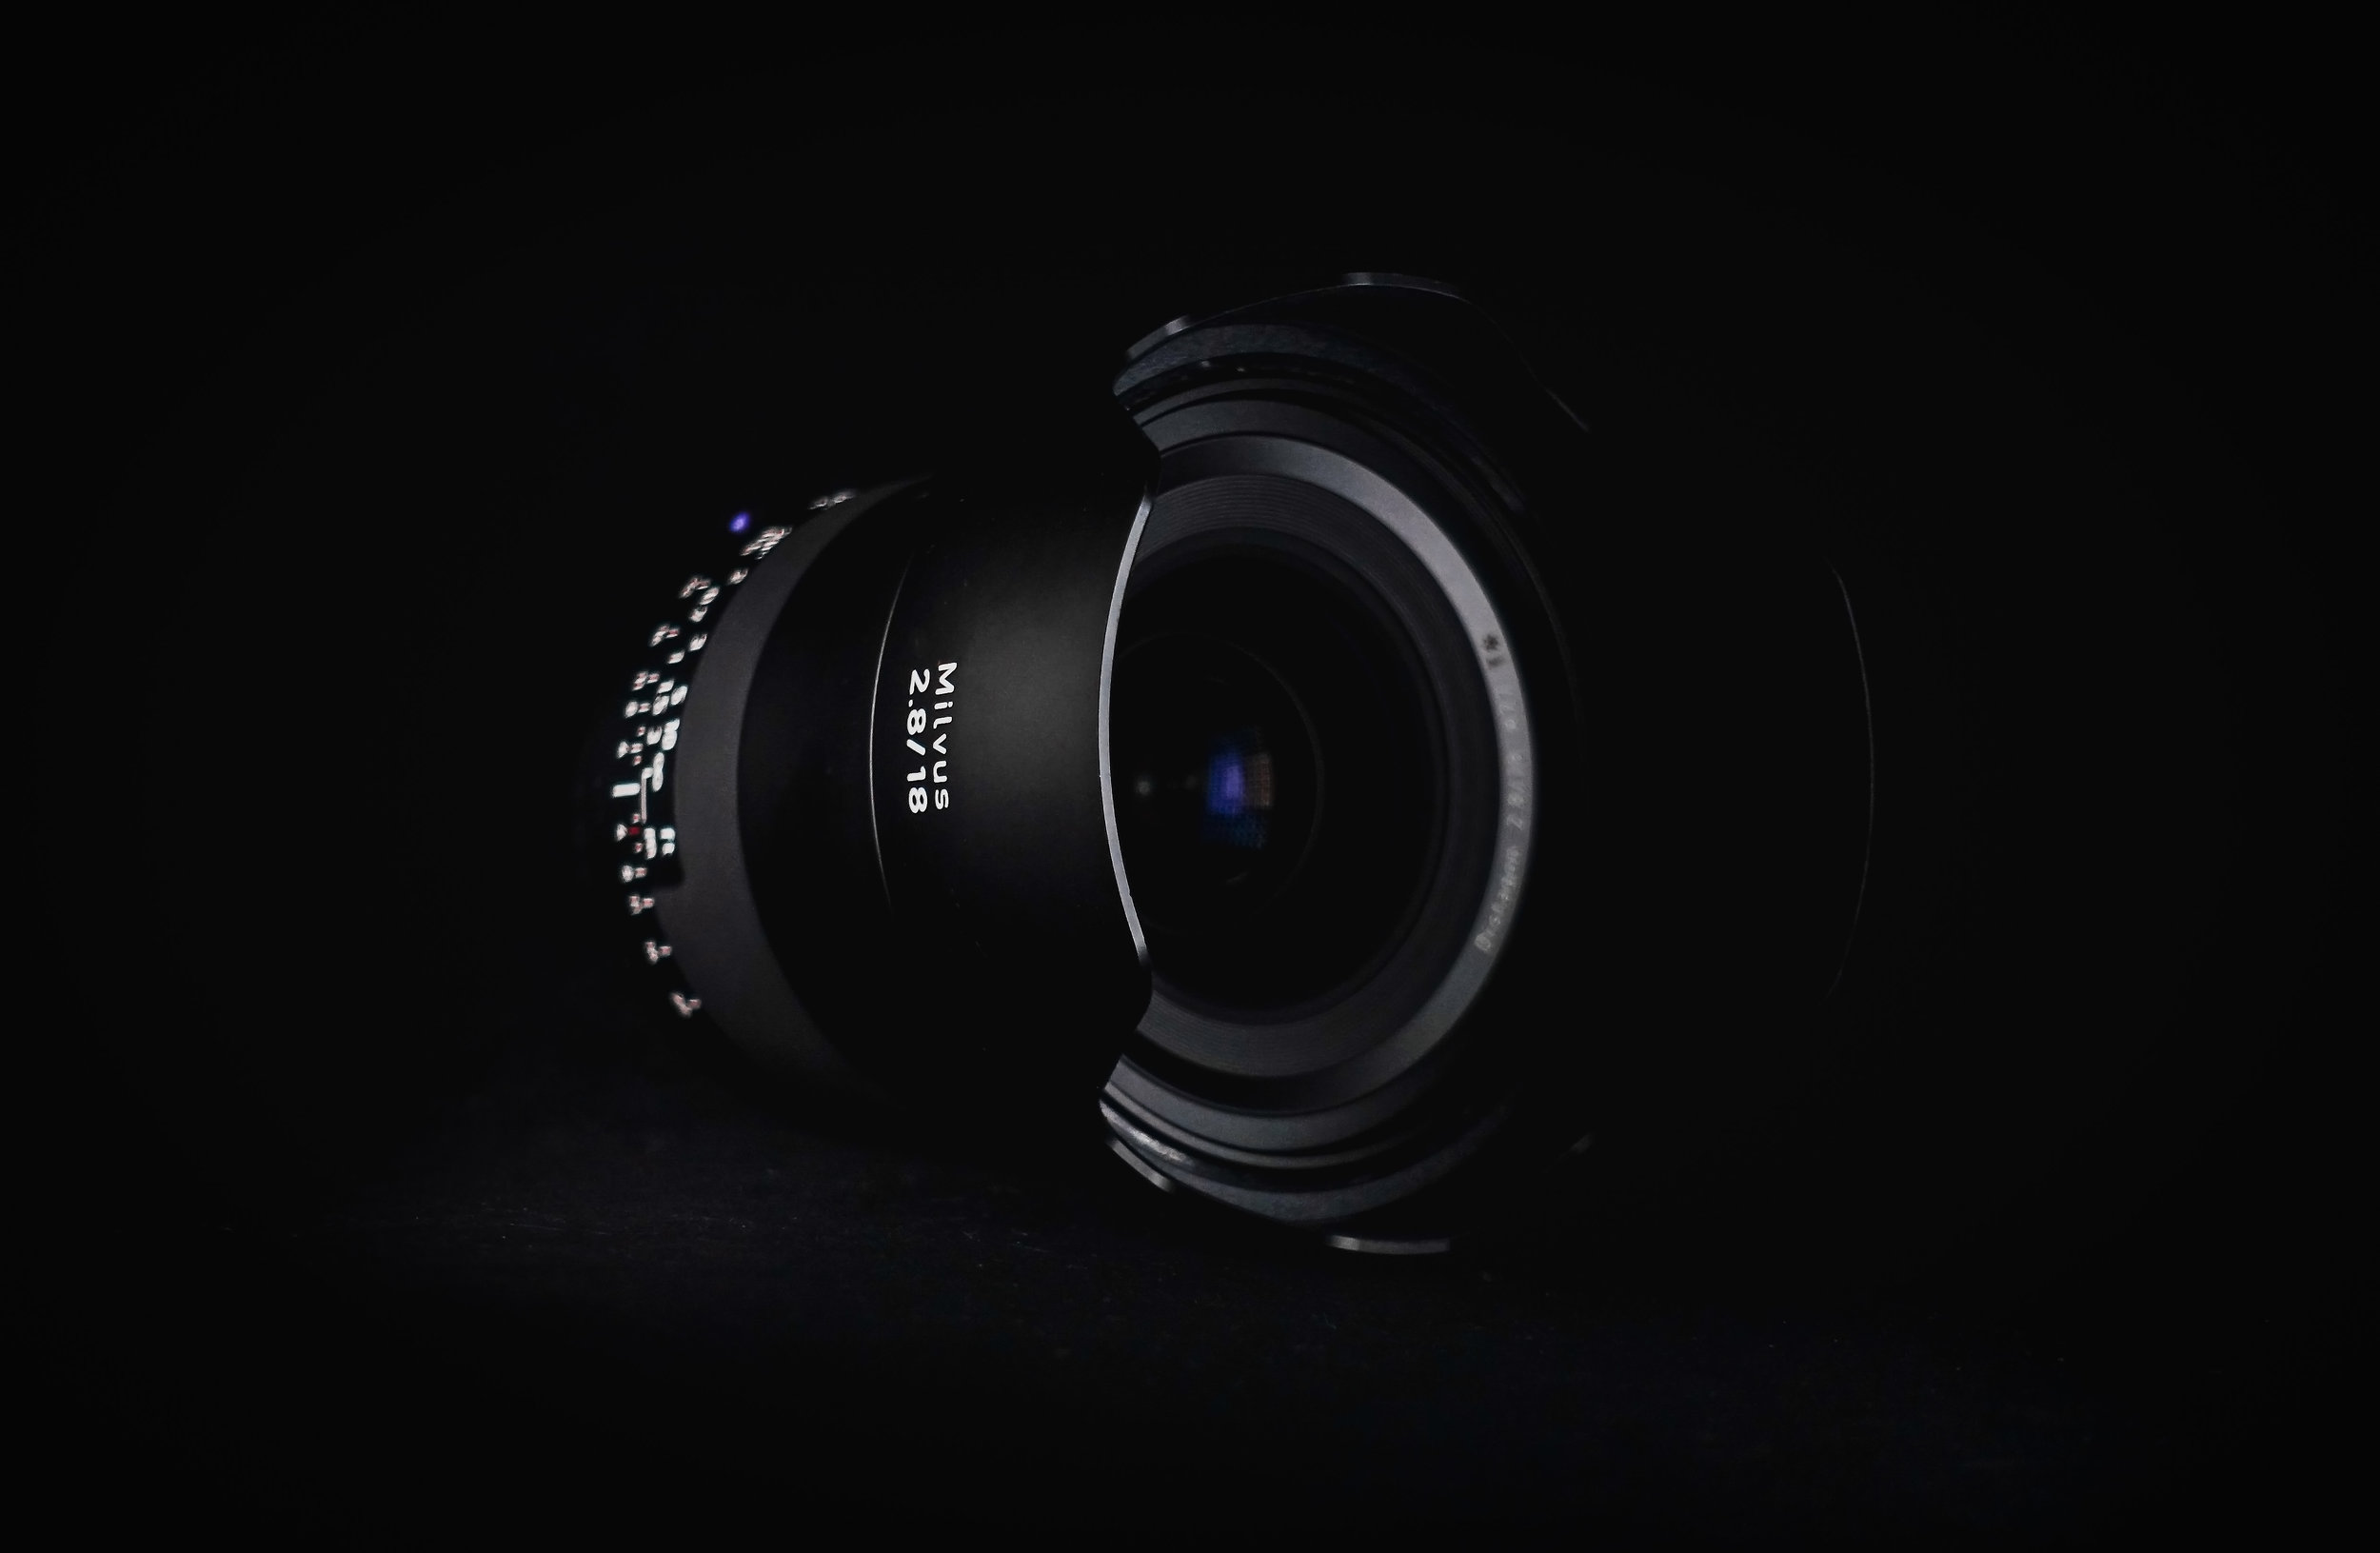
REVIEW: Zeiss 18mm f2.8 Milvus Lens
It's not often that you get to work with a really prestigious brand and they end up being super cool with you. Normally there are all sorts of hoops to jump through and lots of emails backwards and forwards, so when I got the opportunity to work with Zeiss, possibly the wordls best manufacturers of camera lenses, it was a big 'yes' from me.
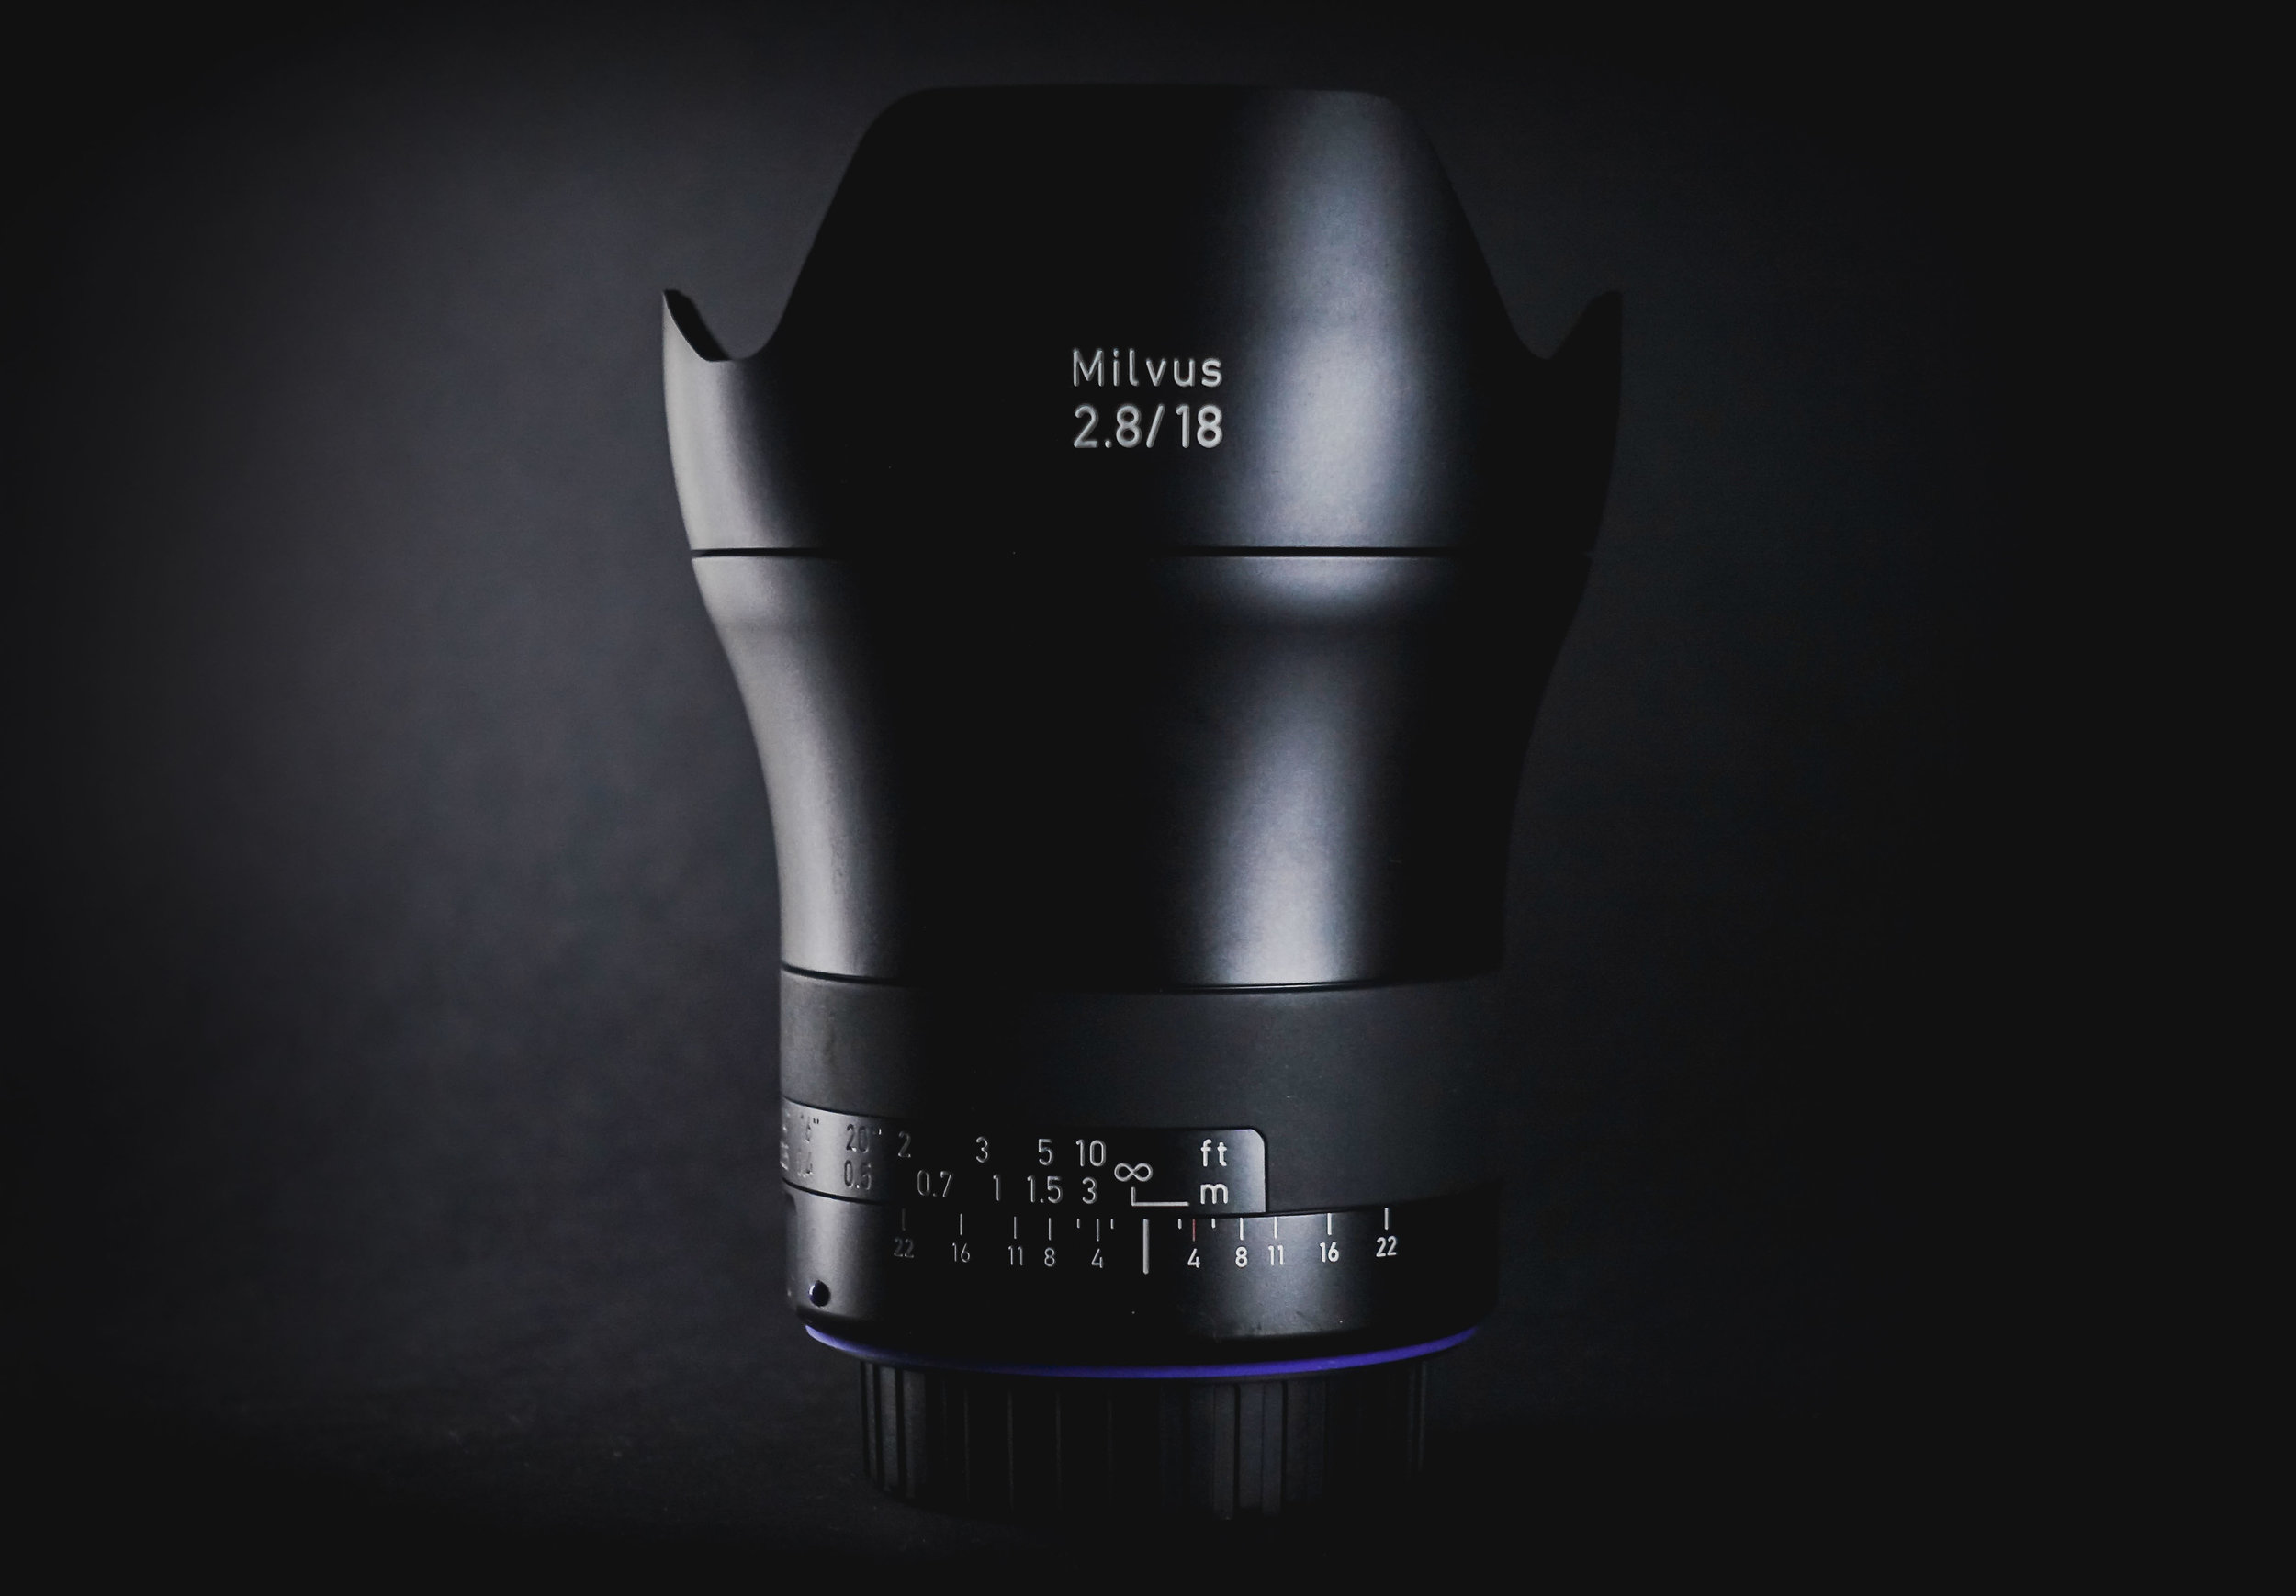
When the lens arrived, the first thing that struck me was the quality of the packaging. You are left in no doubt that you are dealing with a quality product. On first inspection of the lens itself, the metal body had a reassuring weight to it, though not too heavy, and the movement of the focus ring was like silk, so no concerns over build quality. This was further reinforced by the metal lens hood supplied with the lens. You wouldn't expect to have to fork out for a hood after spending so much on a lens, but seeing the time and effort gone into just the hood alone, let's you know that Zeiss aren't messing around.
I was using the Canon fit and couldn't wait to throw it on my 5D Mkiii and get out and play with it. Being a manual focus lens, I knew it would be a slightly different way of shooting than what I was use and it did indeed involve a little more patience and checking the images to ensure they were focused correctly. This was one of my main concerns about the lens but in truth, it actually allowed me to slow down and really take my time over the image, which made the whole process feel more like you were crafting an image, rather than the typical 'run and gun'. This was particularly pleasant as all too often we tend to rush images, without fully thinking them through. With that said, you can still throw the lens to 'infinity' and feel fairly comfortable that you will get a shot, for those more hurried moments.
My normal, go to lens is the Canon 24-105mm L - I love the versatility of it. However, it was clear that in almost every department, the 18mm Milvus was optically superior, as you would expect. It is always nice shooting with Prime lenses but the Milvus offered all-round incredible sharpness, barely any distortion and provide rich and vivid colours, making it ideal for landscapes. For shooting in the city, I was amazed at how it handled linear distortion and virtually no chromatic artefacts. Having the domed front element, it is easy to catch the light and create lens flare, but the provided hood does a great job of cutting that out. It does vignette a little, but I found that this actually was quite pleasing and could easily be removed in post if necessary.
At maximum aperture, f2.8, the lens is very sharp, only falling off very, very slightly at the corners. The bokeh produced was very pleasing though I would imagine most people will be shooting f5.6 upwards for landscape work. The lens is very bright and I found myself stopping down quite a bit, but I favoured the lens somewhere between f5.6-f8, where it was just exceptionally sharp. The 77mm thread on the front of the lens was also a hidden bonus as I already had an adapter for my LEE filter kit and throwing the two together was great fun. Shooting at 18mm means that it is easy to have a lot of negative space, be it sky or land, so using the filter to balance the exposure was a must in some situations but very simple with the Milvus.
So the quality is phenomenal, the output is exceptionally good, so what are the downsides? Well, the main sticking point for most people will, unfortunately, be the price. Coming in at £1500+, it's certainly not a budget option. With advancements being made by other manufacturers, it would be easy to rule out the Zeiss as simply too expensive. However, this is an amazing product. To use a car analogy, there are family saloons out there that will do 0-60 times as quick, if not quicker, than many 'supercars', but it is about how you use them and how they make you feel.
Which leads me on to the second sticking point. Being manual focus will undoubtedly put some people off. However, this is somewhat shortsighted. After a bit of practice, I barely noticed that it was a manual lens. Instead, I felt myself concentrating more on the image I was creating, rather than the lens itself. So should these points put you off? As long as you have deep enough pockets, then absolutely not, it is a truly great kens.
For more information, visit the Zeiss website at - www.zeiss.co.uk
Test images, shot by Jay Sidhu


IgersBirmingham - World Photo Day
I have said it before but the photographic community in Birmingham is amazing! Igersbirmingham have played a huge part in developing this community, so when they arranged for a 'Picnic in the Park' to celebrate World Photo Day, I was always going to attend.
However, rather than taking photos, I'd planned to do a short film about the IgersBirmingham community and what it means to individuals to be part of that community. instagram has no doubt altered the course of photography and not only made photography 'cool' but also accessible to the masses. However, one of the most impactful parts of Instagram is the communities that it has spawned.
All across the world, groups of 'Igers' meet up on a regular basis to take photos, explore amazing places and socialise. We are very fortunate to have one of the strongest communities in the UK and I am very proud to call many of it's members my friends and close friends at that!
To celebrate World Photo Day, there were a host of events including a portrait session hosted by Martin O'Callaghan (@OCUK), a nature trail by James Benwell (@JimPanda) and access to the roof of the local landmark, Fort Dunlop. It was exciting to try new styles of photography and one-minute shoot models using smoke grenades and then on to Wild Ponies playing in the heather, topped off by a rooftop view of our amazing city!
Special thanks go to Fraser & Beth from IgersBirmingham, Martin & Jim for their expertise and Sutton Park/Fort Dunlop for being amazing hosts. Thank you to everyone that attended and made the day special and to the wider community for doing our city proud! I'm sure we all look forward to seeing were IgersBirmingham and photography in the city go next!
Don't forget to check out the hashtags for the day - #igb_meet_picnicinthepark / #igb_mett_fortdunlop / #fortdunlop100
From Boring to Beautiful - Basic Photo Edit

Making your photos look more professional and interesting can be a challenge, in particular when it seems like some kind of photographers secret! I'm not one of those photographers who refuse to share tips and tricks and help others progress. So for anyone interested in how I edit my photos (and it's probably not how you'd think!) here is a little video showing my 'basic' edit. If you are interested in more tutorials, please subscribe to my channel as there are plenty more to come!
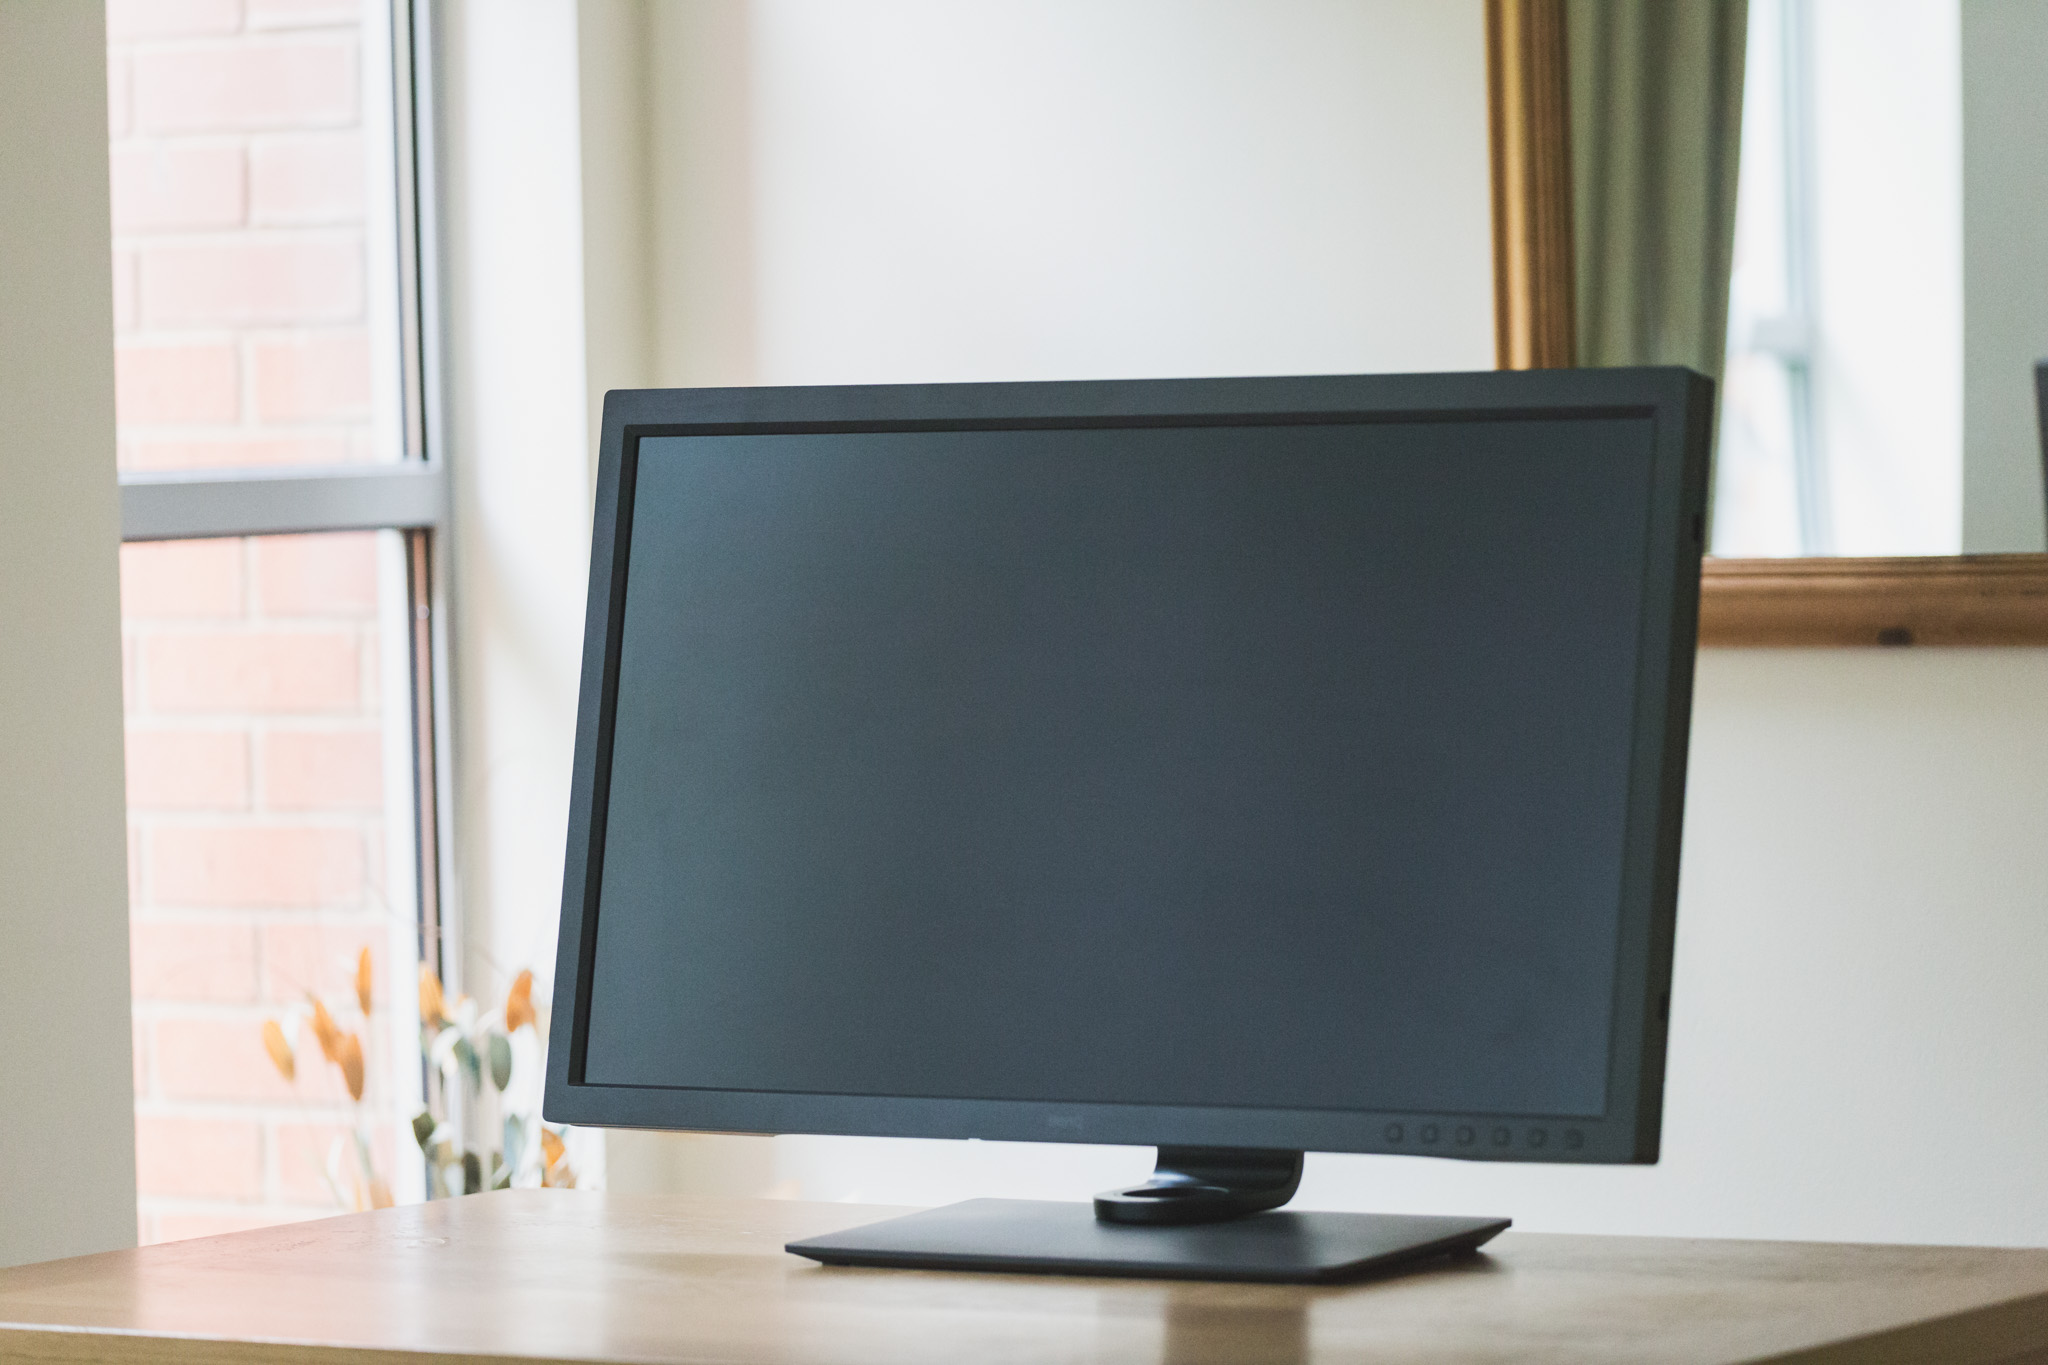
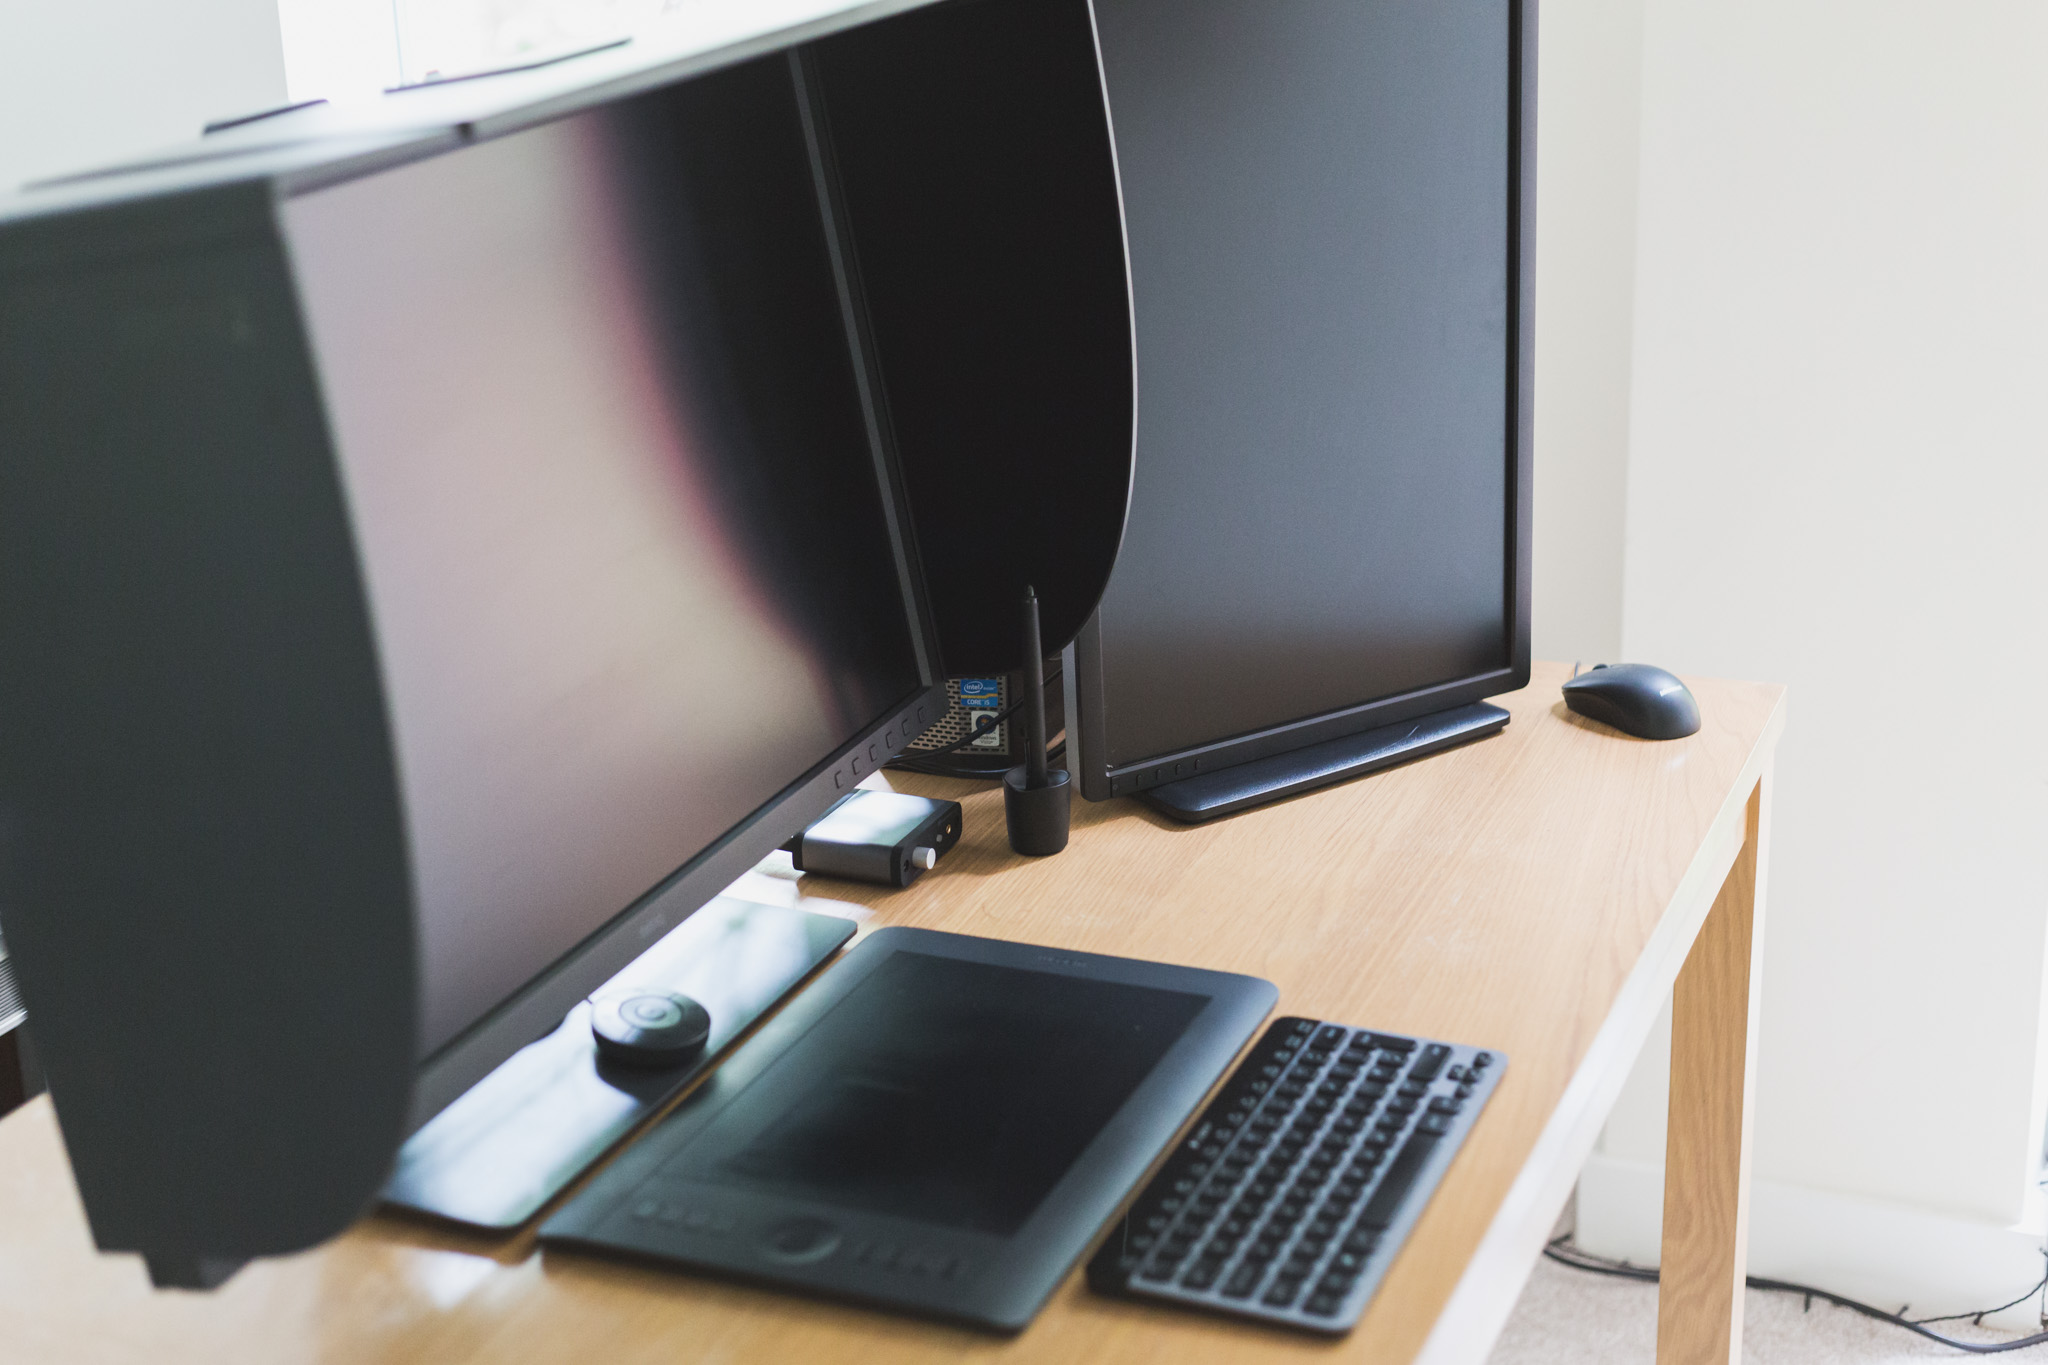
REVIEW: BenQ SW320 31.5" 4K IPS Monitor
I have been in the market for a new monitor for a little while now as my trusty Dell U2412M just didn’t seem to be up to scratch anymore. For all the calibrations and fiddling with settings, I was tired of printing my work and being disappointed with the results. I knew something was wrong.

So when I was approached by BenQ to review one of their new monitors aimed at Professional Photographers specifically, I jumped at the chance. I will go more into the technical details later, but the headlines are that this is a massive 31.5” monitor throwing out 4k Ultra HD, 10 bit, offering 99% AdobeRGB and 100% sRGB with a resolution of 3840x2160. The monitor comes with an incredibly useful remote for changing preferences and a shading hood and will set you back around £1300 – That’s a lot of money, but don’t be scared off just yet! It’s actually a bit of a bargain!
If you have been looking for a new monitor or if you take your photography (or any kind of creative work) seriously, then at some point you will have looked at the technical spec of monitors, got a headache and vowed never to do it again, or at least that is what I did. It can be baffling when you are trying to decipher your IPS’s from your sRGB’s and a wide colour gamut just sounds painful, so I will try to keep things as basic as possible. This is an impressively spec’d monitor aimed at professionals doing professional work, but as you will see, I actually think this is the best investment any amateur/hobbyist looking to ‘go pro’ could make.
What’s in the (massive) box
I knew as soon as I saw the huge box that the SW320 turned up in that this was going to be a serious piece of kit. On opening the neatly packed packaging, the first thing you find is a reassuring ‘Factory Calibration Report’ – BenQ clearly have nothing to hide! Looking at the ‘E-measurement’ report where anything under 5 is OK, anything under 2 is considered very good and seeing an average way, way below that, really whet my appetite for what this thing could do.

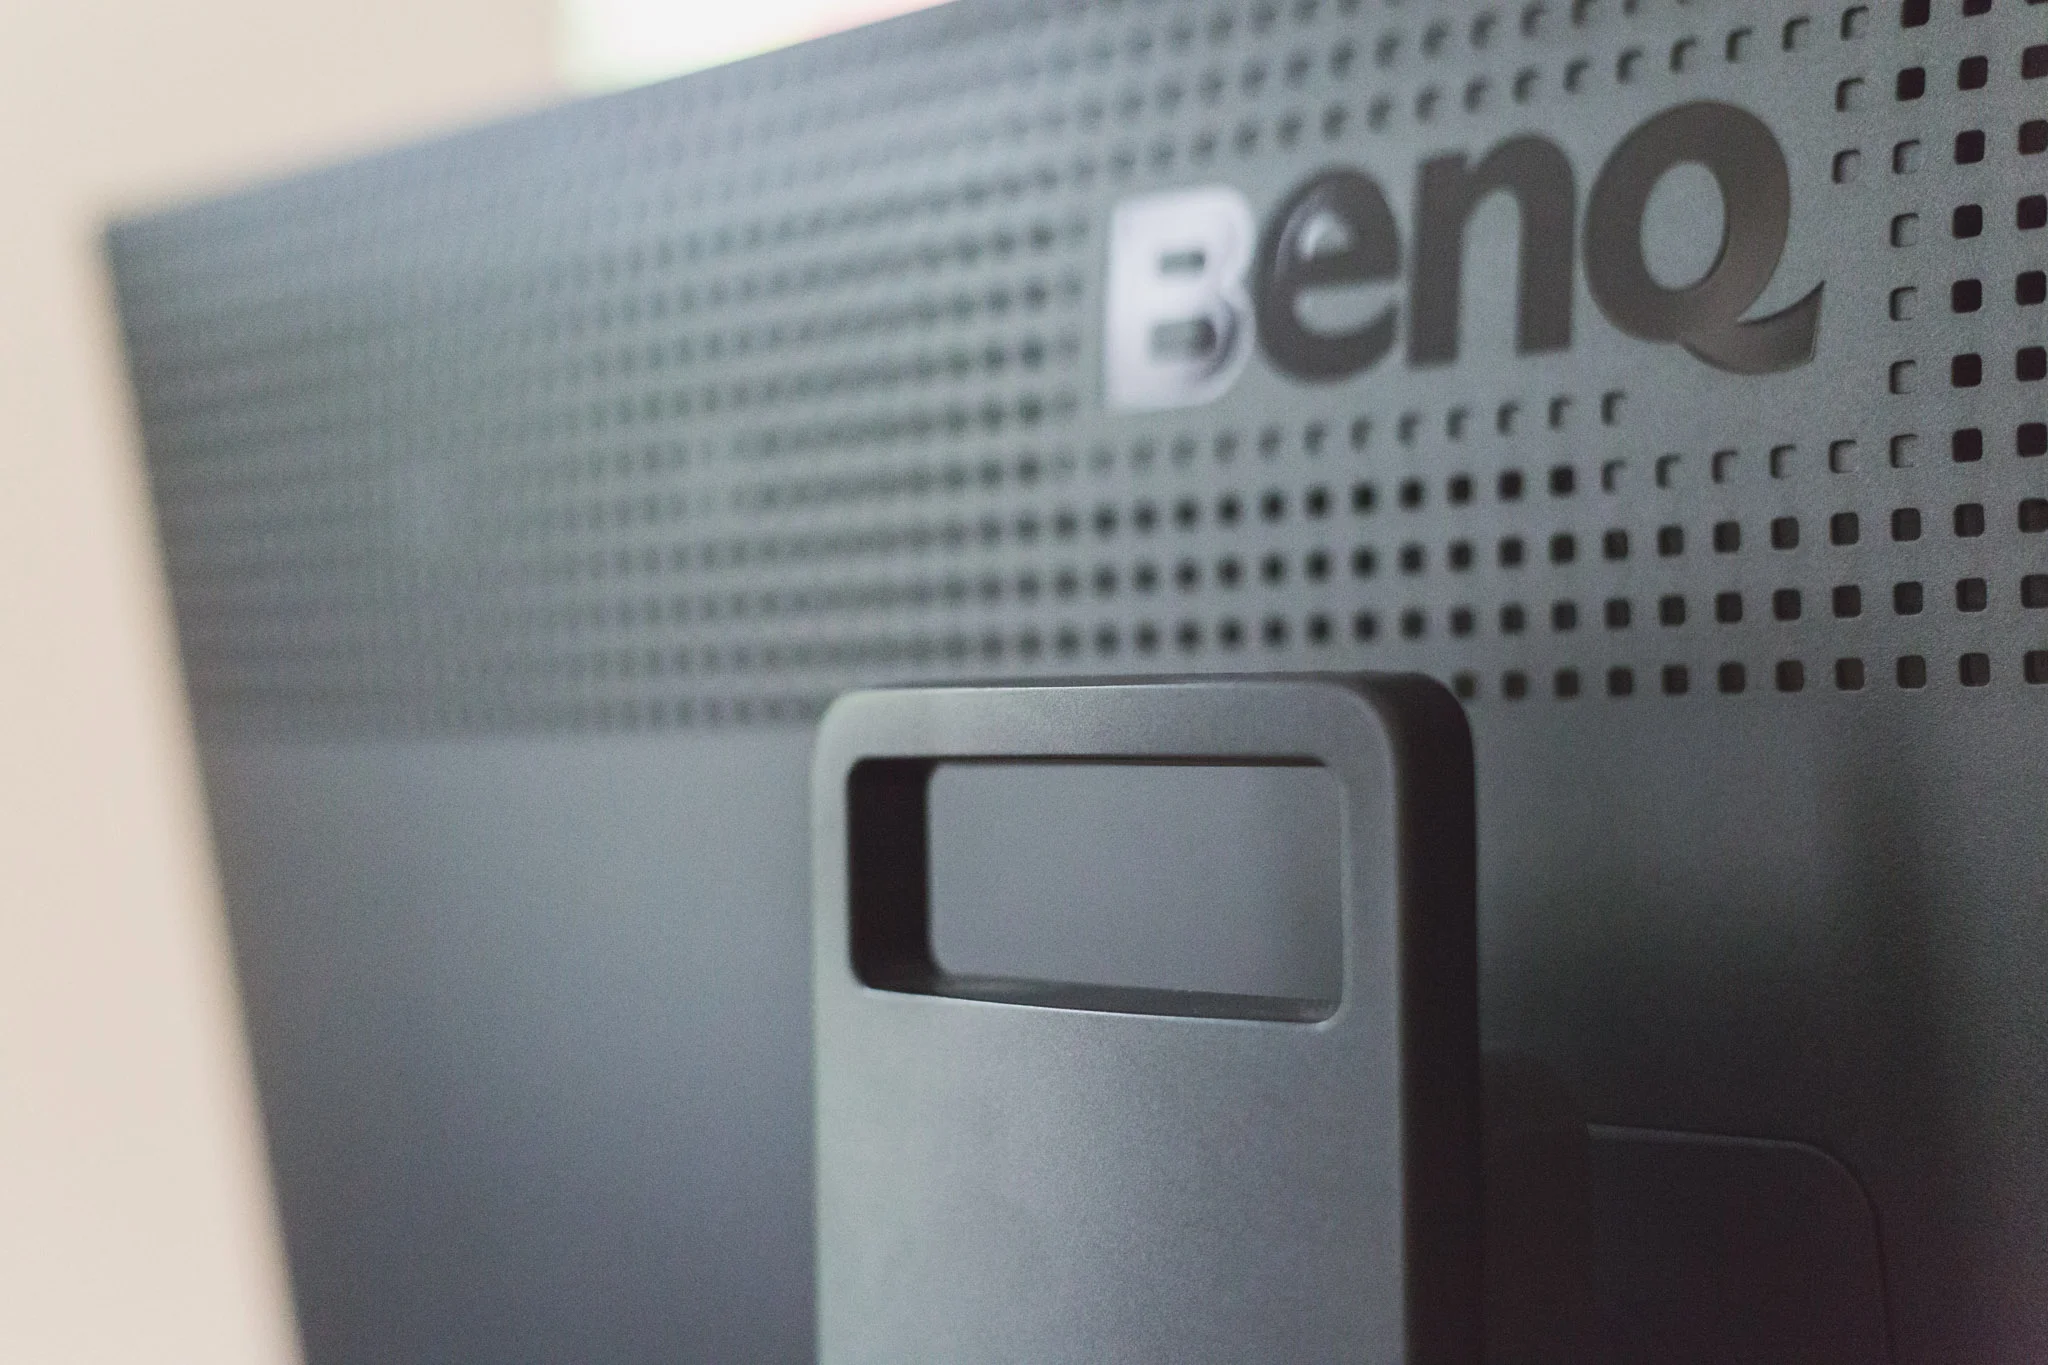


The monitor comes with a simple yet robust articulated stand that clipped together in seconds. At 18.7kg this thing is a bit of a beast, but it is a reassuring weight rather than a bloated feel. The design is simple and to the point, no need for fancy gimmicks here, it is all about the image. However, the real thing that strikes you when first pulling that massive 31.5” screen out of the box is the sheer scale, this thing is huge! If you are using a home office rather than a studio, it is a consideration. Having used it for a few weeks though, you soon get over this and learn that once you’ve had all that screen to use, you couldn’t live without it.
In the box also comes all of the necessary power supply, cabling and manuals that you would expect and BenQ really haven’t left anything to chance, giving you multiple options of linking this baby up to your mac or PC. Connectivity is never going to be an issue and switching between multiple inputs is a treat, but more on that later. The biggest bonus is that the SW320 comes with a hood, no going and shelling out even more money, BenQ have got you (literally) covered.
Who is the Monitor for?
The monitor is a 4k, hardware calibrated monitor that has been design with photographers in specifically in mind. The monitor is a huge 31.5" display and working with all of that resolution is an absolute treat. The screen is immersive, the sheer size pulls you into the image and when using the provided hood, you feel cocooned in the monitor and fully engaged in your work with minimal distraction. The massive 3840x2160 resolution allows you to comfortably view your images and work space and has an enormous dynamic range that really fives your images depth.
Being a 10 bit IPS monitor, colour representation is great and the bit depth and in-plane switching gives you real confidence when viewing colours and considering final output. Colours appear deep and rich without seeming artificial and being 100% sRGB and 99% Adobe RGB, which is phenomenal in a monitor in its class.


One of the main selling points is the 4k feature. The monitor is hardware calibrated but it also has benefits from BenQ's Palette Master Element system. All of this means that brightness and colour is uniform across the panel. The Palette Master Element software also allows for a lot of customisation with your system. However, the monitor is amazing out of the box and you will be blown away from the moment you switch it on.
The final piece for the physicality of the monitor is the shading hood, which comes with the monitor, which is another indication of how BenQ have really built this for photographers. You do not need to go out and buy an additional hood, they know that you need one so they provide one! The hood even has a cut out for you to drop a calibrator through to save you having to disassemble the hood every time you calibrate, clever thinking indeed.
One thing that I have never seen before with a monitor is BenQ's new 'Puck'. It is effectively a circular remote that sits beautifully in a recess under the monitor and can be picked up and used to switch between preset or customised colour spaces and functions. Out of the box, it is set to sRGB, Adobe RGB and a black & white function which turns the entire display true b&w. They can be set to your own pre-saved calibrations, which is just a a lifesaver! This wasn't something that I ever thought I needed, until I used it and now it's not something I could live without.
The monitor is not only a pleasure to use visually, but ergonomically as well. For a piece of hardware this size, it is very easy to move and adjust the monitor. The design is business-like but actually fairly pleasing. The base articulates well and allows you to turn the monitor into portrait viewing, which would be exceptional for tethering in a studio. For a 31.5" monitor, the bevel doesn't feel too heavy or intrusive, the buttons are large a good size and reassuring and the hood does an amazing job.
Specs: BenQ’s headline features are listed as:
· 99% Adobe RGB Colour Space With IPS technology
· 31.5 Inch 4K UHD Resolution – matt screen
· High Dynamic Range (HDR)
· 1000:1 native contrast ratio
· 350 cd/m2 brightness, 5ms response time (GTG)
· DisplayPort 1.4, and HDMI 2.0 inputs
· USB 3.0 hub, Headphone jack
· Landscape / Portrait orientation
· Monitor shading hood
· Hardware Calibration With Palette Master Element Software
· 3-year warranty
Quality
This may get a bit technical so if you are not after a full technical break down, rest assured that the quality is amazing for the price. Monitors are measured in 'Delta E Values'. As a rule of thumb, the lower the Delta e the better. Anything below 5 is classed as good and anything around 2 is very good. The SW320 comes straight from the factory at less than 2 so you really are dealing with a very high quality product.
I was quite frankly blown away by the image quality and can’t really think how much it could be improved upon. Unfortunately, I do not have a few thousand of pounds worth of EIZO monitor to compare it to, but I just don’t see how it could be significantly better. An additional surprise was the build quality. This thing is robust without being to overwhelming but also sturdy without being cumbersome to articulate – quite an achievement.
Video Work
Doing video work on this monitor was simply amazing. Apart from being a 4k monitor, the sheer size once again helps with managing your work-space. Being able to use a preview mode at nearly half of that whopping 4k and still have plenty of room for all of the other module was a brilliant thing.
However, I chose to leave my setup pretty standard as the ability to see all of the available tools, media, information virtually in full was just too useful. Viewing nearly an entire projects worth of media makes sequencing an absolute treat as you're not constantly trying to remember which clips you have available.
Very similar to photo editing, colour grading was also easy and accurate when using the SW320. Viewing the projects back at 4k was also a real bonus. Being able to see true output before publishing gives you the added confidence that you are happy with the final product.
Dual Display & Productivity
My set up is fairly complex as I am using a PC for my main photo editing station and a Macbook Pro for some photo editing and video production. With the ability to set different calibrations, switching between the two was as simple clicking one button to select the input and then click another on the Puck to set the calibration.
I set my old Dell monitor up as a second display for the PC so that I could always have an Chrome browser available for checking social feeds etc. However, I soon found that due to the massive amounts of room on the BenQ, a lot of the time, I spaced the panes out in such a way that I didn't really need the second screen. However, when using intensive programs such as Photoshop and Final Cut, it was nice to delegate some of the less important things to the second screen.
Being able to view multiple programs and in particular, leaving Chrome open to deal with all of the social media channels etc. meant that I found I was actually far more productive. Rather than working in Lightroom and wondering if I was missing any exciting news meant that I would constantly be flicking between the two. Whereas having it on the same screen left me far more in control and focused on the real tasks in-hand.
Calibration
One of the most important factors in the photographers workflow is understanding how an image will appear at output, whether that is social media, a website or a print. For that reason, a correctly calibrated monitor is essential. There is no worse feeling than getting an image back from a Lab only to find out it looks dull & flat when it had popped on screen.
There are two main ways to deal with calibrating a monitor, software and hardware. Software does a pretty good job at working out what a monitor 'is' doing and telling you what it 'should' be doing. However, there is one big thing that this can not take into account and that is environment.


Hardware calibration however, not only reads the output of the monitor and but many, will also 'read' the lighting conditions in the room and work out the best outputs for those conditions. This is achieved by a physical calibrator that is placed n the screen that then takes hundreds of readings based on colour, temperature, luminosity and many other complex calculations. Basically speaking, hardware calibration gathers far more information to base adjustments on and usually yields better results.
More complexly speaking, hardware calibration does not compress any colours like software calibration is prone to do and with a monitor like the SW320, which can output colour-spaces like sRGB at 100% and Adobe RGB at 99%, this means you will achieve much more accurate, richer and vibrant looking colours. All this means that with correct calibration, you will struggle to find a much more colour accurate monitor in this price range, if any.
Working with the monitor
Due to it's size, working with the monitor is a pleasure. Photo editing is exceptional and even with my large CR2 files from the Canon 5D Mkiii, they almost fill that 4k resolution. Zooming in to do intricate clipping and cloning is particularly easy and I have already seen an improvement in this area of my workflow.
Whether working with colours or toning in black & white, the monitor just feels hugely responsive and rewarding to use. It is no exaggeration to say that this monitor makes you feel really in control of the image and the final output and that is worth the money alone. Using older monitors, I have always had a nagging doubt in my mind that the image would fall short when viewed in higher resolutions. This monitor gives you huge amounts of confidence.

I have struggled to come across a draw back with the monitor as it has been a genuine treat to use. It's sheer size and very business like exterior mean that it won't be suited to every situation and as I have a home setup in my living room, it looks somewhat out of place. However, the monitor is so well focused on the need of photographers and those working in visual fields, that aesthetics are a small sacrifice for the rewarding performance.
Should you buy this Monitor?
In short, if your budget is between £800-£2000, then yes. I personally think it would be worth stretching your budget to get this as you are getting so much for your money - don't go into debt for it but if this is the kind of price range you are looking at, then it's certainly an investment.
If you have a higher budget, the SW320 represents good sense as in this end of the market, the diminishing returns means that the BenQ is very capable of competing with monitor two or three times the price without feeling like it's lacking.
The look, feel and thoughtful extras (such as providing a hood and that little hatch for the calibrator) all resonate the fact that this isn't a product that has been thrown together to achieve some headline stats. This product has been built with the end user in mind and geared heavily towards professionals working in visually orientated fields such as photography and videography.
Final Thoughts
The quality of the product is great and the output is sensational. With competitors products costing roughly two to three times the cost of the SW320 for similar specs, it's pretty difficult to look beyond it. In fact, with that huge 31.5", 4k display, it will be pretty difficult to look beyond it full stop. Would I buy one? Well I have and I am more than happy with my decision.
For more information, please visit the BenQ website HERE