


My Photo and Video Editing Desk Setup for 2026
Having a good desk setup is critical for Photographers and Videographers to produce their best work. It might not be as sexy as talking about the latest cameras or delving into vintage lenses because you want to create something organic! However, having a cluttered, poorly organised setup is not just bad for your creative process, but you could even be causing yourself long term health issues! With all of this in mind, I felt it was time to sort out my setup. Hopefully, it will also give you a few ideas of how you can change your own setup!
Having a good desk setup is critical for Photographers and Videographers to produce their best work. It might not be as sexy as talking about the latest cameras or delving into vintage lenses because you want to create something organic! However, having a cluttered, poorly organised setup is not just bad for your creative process, but you could even be causing yourself long term health issues! With all of this in mind, I felt it was time to sort out my setup. Hopefully, it will also give you a few ideas of how you can change your own setup!


I’ve always ensured that I have somewhere suitable for my editing process, but there were always little pain points that just annoyed me enough to make editing feel like a chore. Some of those were simple changes, like having a little more desk space. Others would require a bit more investment of time and (painfully) money!
❤️ PLEASE NOTE - No AI was used to make this article. I will try to add product links or alternatives where I can and they will be Amazon Affiliate links - you still pay the same price but I receive a very small commission. If you would like to support the blog, please consider making a small donation.

✏️ Best desk for photo & video editing (IKEA Karlby setup)
Like many, many other professionals, I have always turned to Ikea to solve my furniture problems. My previous desk was an Ikea table top and although it is perfectly fine for what I use it for, I found myself repeatedly having the same problem - it was just too big! Well more accurately, it was too deep and thanks to my poor eyesight (a story for another day!) I was constantly dragging my monitor forwards so that I could see it properly!
Also, I had always loved having my scanner off to one side to make sure there were less barriers to the scanning process - but it was always on a shaky stand! This is a massive ‘no no’ for scanning for a fairly obvious reason. The solution to all of this, another Ikea classic - the Karlby counter top! I went for the longest available size (I still had to trim a bit off though!), added my favourite square legs and a couple of additional legs to help with flex and I was away - a solid base to build from, literally!
💻 A POWERHOUSE Computer (Macbook Pro Desk Setup)
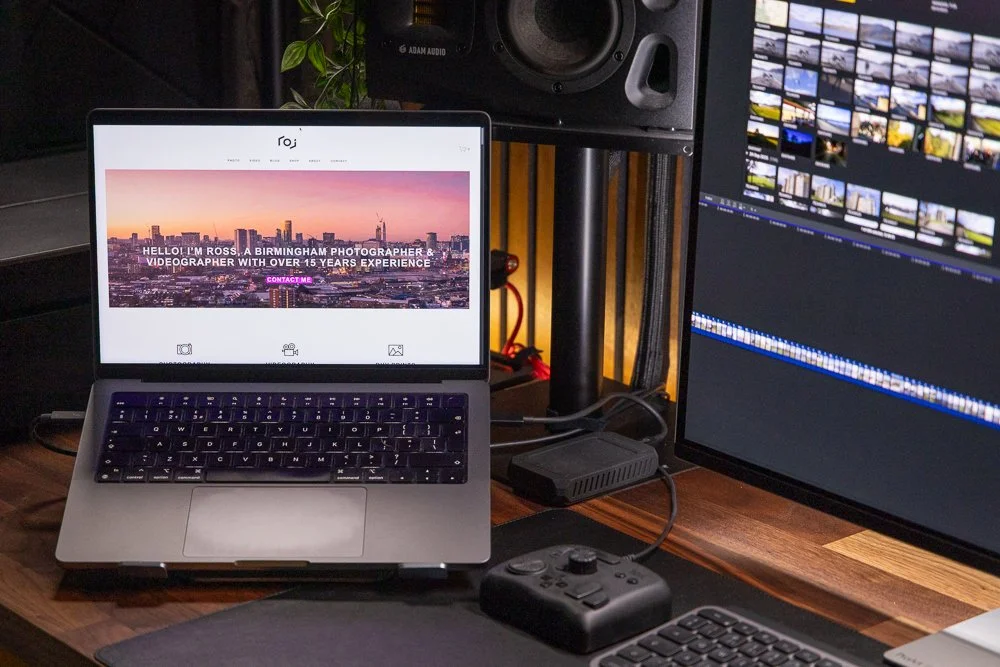
The heart of any editing setup is obviously the computer. For years, I have flitted between using a laptop or having a more permanent solution. In the past couple of years, I have ditched a PC and gone to a solely Mac setup. I recently retired my M1 Mac Mini and have since been using the Macbook Pro M2 Max - more than enough horsepower to handle my level of photo and video editing.
Why go purely laptop? Well I do travel for work and having the ability to edit on the go is a must! This might not be the same for everyone but being able to edit on the go is a non-negotiable for me. This does have one downside, the laptop takes up a bit of desk space. Yes, I could use it in clamshell mode for a cleaner setup but in honesty, I like having a second screen when I’m editing to dump slightly less crucial windows such as emails (or cough, ‘Spotify’, cough…). Talking of screens, let’s have a look at the monitor situation…

🖥️ Best 32-inch 4K OLED monitor for editing (Asus ProArt PA32UCDM)
This was one of the main reasons for rebuilding my setup. I have been using the BenQ SW320 which is a fantastic monitor but it was starting to feel it’s age. It had developed a weird green line across the screen which was distracting and despite regularly calibrating the monitor - I just never felt confident with the colours I was seeing on it. It was time to upgrade - up step the Asus Pro Art PA32UCDM!
At £1600, this was a massive investment but the big 32”, 4K, OLED monitor certainly had some impressive specs and piqued my interest enough to give the Credit Card a bit of a beating! Was it the right choice, well it looks nice… Do I have some buyer's remorse? A little… but I’m going to save that for the full review which you can expect in the next few weeks - if you can’t wait, it’s great but the factory calibration is questionable… Anyway, let’s have a look at audio (that sounds odd!).

🔊 Studio monitors + audio interface for video editing (Adam Audio + Focusrite)
One thing that does not sound odd is my audio setup - which in truth I'm pretty happy with! My studio monitors are the incredible Adam Audio A4V’s which provide fantastic sound quality. I have added the 7 inch Sub (discontinued and replaced with the Sub8) for a bit of extra low-end reach. If there is one weak point, it would arguably be the Topping DX3 Pro+ DAC - Not that it’s particularly bad quality but I always feel like it might not be the best for monitoring audio, adding its own distinct feel to the audio - but I could be over thinking that.
One new addition to the setup is on the input side - a FocusRite Scarlett Solo is now my chosen input method for recording voiceovers for YouTube videos and tutorials. Another area for concern is my budget condenser microphone - Would I like a Shure SM7B? Yes! Can I afford one? No! So this will be something to address in the new year…

📹 Other ESSENTIAL EDITING Peripherals…
Scattered across the desk are some other crucial devices that help my day-to-day workflow. However, I’m going to start under the desk, where I hide all of my secrets… well, storage and other devices. Starting with a big Sabrent Docking Station crammed with 24TB of SeaGate Ironwolf NAS disks. This acts as a project dumping ground and short term backup to my main NAS (hidden in another room!) a 36 TB QNAP NAS that operates as my long term storage - not the perfect setup but it works for me.
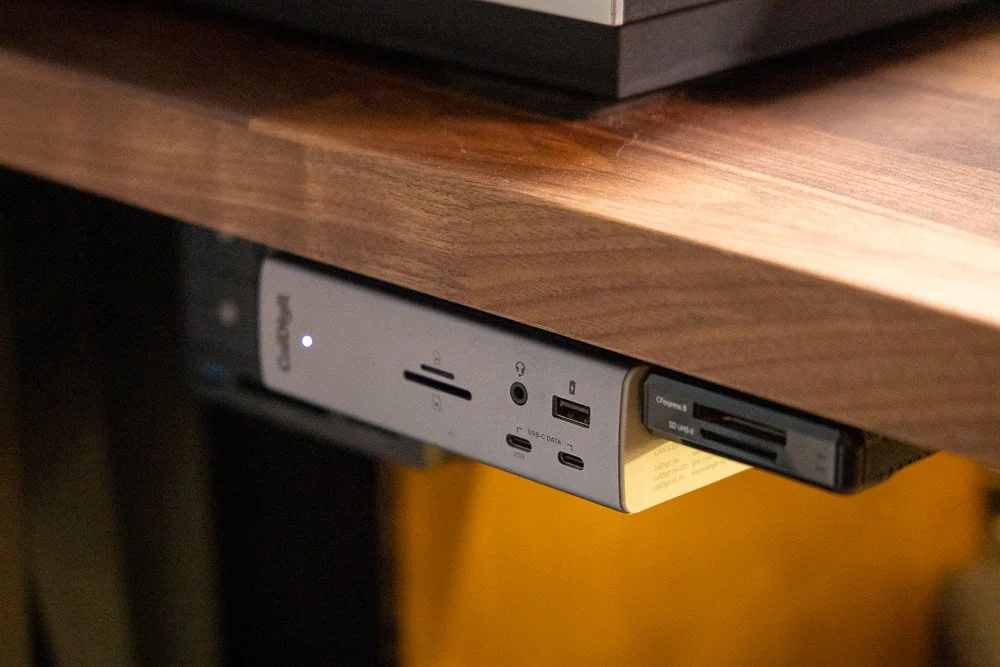
CalDigit TS4 is a must for these kind of setups
On the subject of storage, I use two ‘working’ drives that hold current projects that are live. The two drives are the incredible Oyen U34 Bolt and a custom built Acasis drive - these both have 4TB of incredibly fast storage that can travel with me if needed. Let me know in the comments below if you would like me to do a full run through of my data management system!
Also below the desk, along with power bricks, LED lights and other fire hazards is the excellent CalDigit TS4 Dock - This little beauty handles all of the inputs/outputs for audio/visual meaning I only need one cable plugged into the MacBook Pro to charge and operate all peripherals - a really neat way of working and reducing the hassle of connecting everything when you need to get to work quickly.

The Epson is an excellent scanner for film photographers
Back topside of the desk and I have my aforementioned film scanner, the Epson V850, An excellent flatbed scanner that handles all of my 35mm/medium format film needs and now, it sits on the solid desk to reduce any shake issues!
I want to give a special mention to the TourBox Lite - an excellent little controller that I have previously reviewed. This helps make editing photos and videos so much faster! The TourBox was provided to me for free to review but I can honestly say, I use it every single day and would have no concerns buying another, it really has made my life so much simpler - well, even easier now that I have upgraded the mouse as well!

The TourBox Lite really is one of my favourite editing tools
I use both Logitech keyboard and mouse - the keyboard is the Logitech MX Keys S and whereas it is an excellent keyboard with zero usability issues, I do wish I chose something a bit smaller. The mouse is the amazing MX 4 Master - I won’t go too far into this as I have recently reviewed it so check that out. Above the monitor you will find the BenQ ScreenBar and Elgato Key Light for, well, illuminating everything. Mixed with the cooler temperature bias lighting behind the desk, these all provide a really nice ambience that is perfect for long editing stints.
Things have changed a bit in the last five years!
I will also draw attention to my little iPad Mini 6 - which is more than useful to have around but this has now been pretty much converted into an Elgato StreamDeck by using Elgato’s StreamDeck Mobile. It’s actually much cheaper than buying one of their devices if you already have a compatible device lying around. It offers some amazing customisation and I use it to help launch and control software as well as some hardware accessories - again, I’ll probably create a separate post about this.
Simple things like a cutting pad can really protect your desk
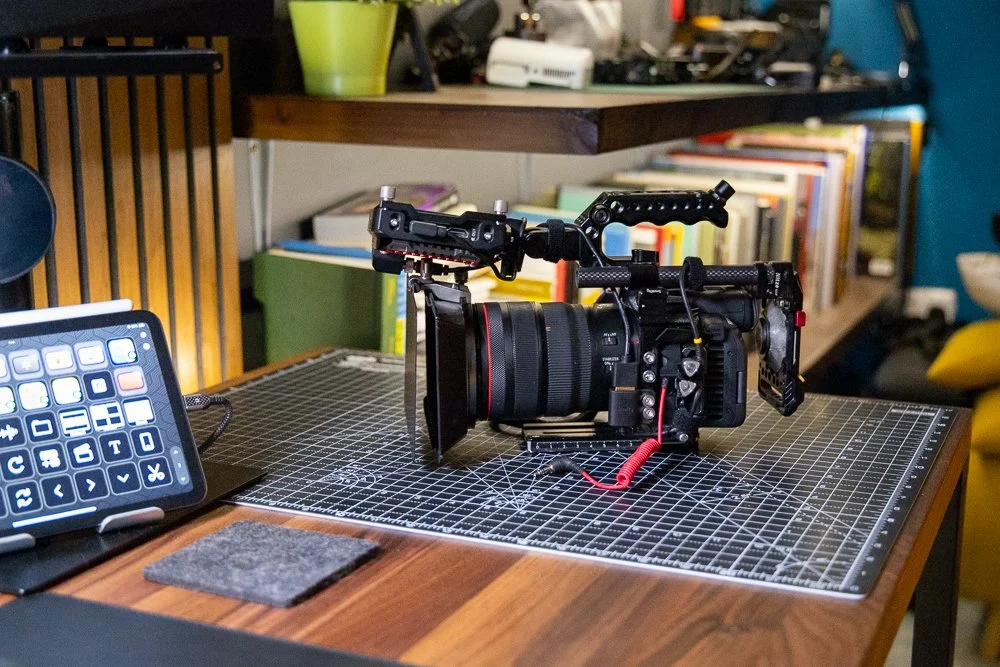
Finally, I have both a (fake) leather pad to protect the desktop and a rubber cutting pad as a space for assembling camera gear when I go out on shoots - this is a much better solution than sitting on the floor trying to put camera rigs together! I should mention the chair which is something basic from Amazon - it’s comfortable enough but again, I probably need a better solution (Herman Miller if you’re reading this, hit me up!).
🔴 Five Quick tips for YOUR editing space
Write down the ‘pain points’ the things that stop you from want to edit or that slow you down and address those first!
Make sure your space is comfortable including a suitable chair, desk and footpad if you need one! Doing your own DSE Assessment will help with poor working arrangements.
Don’t overlook lighting! Having well balanced bias lightning and avoiding reflections and glare on your screen are essential for the editing process.
Think about sound treatment. If you are working with video and audio is crucial, consider treating your room to ensure you can hear and isolate any audio problems.
Take your time - I’ve built my setup and adjusted it countless times over many years. Concentrate on making subtle changes rather than spending thousands on things that might not work for you!

✅ Final Thoughts
I fully appreciate that not everyone has the time, money or patience to build a desk setup like this - it’s all been a bit of a stretch to me! However, I cannot stress enough the importance of having a space that allows you to be creative, concentrate on the editing process and most importantly of all - remove all of those little annoyances that stop you from wanting to and enjoying the editing process!

I’m pretty happy with this setup, we’ll see how long it stays like this 🤣
Is this my final setup ever? Absolutely not, there are still plenty of changes to be made. What it does for now is allow me to go into 2026 with the ability to focus on producing the best work that I can - both for paying clients and you guys that read my blog and watch my YouTube videos - expect to see more of this setup over on my channel. What I want to know now, is what you would change about your own setup? Leave a comment below and tell me what is stopping you from producing your best work?
FAQS + MORE TIPS TO IMPROVE YOUR WORKSPACE
-
A “clean” setup starts with a desk that fits your workflow without forcing you to stack gear. For most editing setups, depth matters more than length:
Too deep = you end up dragging the monitor forward (and clutter creeps in).
Aim for enough depth to keep the monitor at a comfortable viewing distance, with space in front for keyboard/mouse and one “working zone” (not a dumping ground).
If you use a scanner/printer, plan a stable side zone so it’s not living on a wobbly stand.
-
The winning combo is: under-desk power + one main data cable + labelled runs.
Mount a power strip under the desk (not on the floor).
Use Velcro ties (not zip ties) so you can adjust later.
Add a cable tray/basket under the desk for bricks and excess cable.
Label both ends of key cables (tiny tags save hours later).
Try to route everything to one “exit point” so you don’t get spaghetti creeping across the desktop.
-
If “clean” is the priority, clamshell helps — but it’s not always the best workflow.
Clamshell = cleaner + more space (pair with a dock, external keyboard/mouse) and watch for overheating!
Laptop open = second screen for email, music, bins/timelines, etc.
A nice compromise: keep the laptop open but on a stand, so it uses vertical space instead of horizontal.
-
Prioritise:
Colour accuracy & calibration support (hardware calibration is a bonus)
Resolution (4K is a sweet spot for photo + video timelines)
Panel type + consistent viewing angles
Glare/reflections control in your room
Also: don’t assume factory calibration is perfect — it’s common to still need calibration to feel confident in colour.
-
The trick is separating “working drives” from “archive/backup”:
Keep 1–2 fast working drives accessible (active projects only).
Everything else goes under the desk (or off-desk entirely via NAS).
Use short cables and route them down immediately (no “drive snakes” across the desk).
A dock/enclosure under the desk can keep storage powerful and invisible.
-
A Thunderbolt/USB-C dock is usually the cleanest upgrade you can make:
Monitor, audio interface, card readers, drives, ethernet, etc. all plug into the dock
Your laptop connects via one cable for data + charging (depending on the dock/laptop)
It reduces clutter and makes packing up / reconnecting fast.
-
For a clean setup, most people prefer:
Wireless keyboard + mouse (fewer cables)
A slightly smaller keyboard if desk space is tight (full-size can dominate)
A mouse that’s comfortable for long sessions (ergonomics beats aesthetics)
If you edit a lot, consider a control device (dial/controller) to speed up workflow without adding visual chaos.
-
If you want clean and usable:
Use a monitor light bar for task lighting (no big desk lamps)
Add a key light if you record tutorials/meetings
Consider bias lighting behind the monitor to reduce eye strain and add a tidy “studio” feel
Also: position lights to avoid screen glare (glare is the enemy of colour work).
-
If you’re doing video, audio matters more than people think.
If you can, use nearfield monitors positioned symmetrically.
If the room is lively/echoey, even basic soft treatment (rugs, curtains, panels) helps you hear problems sooner.
If you can’t treat the room, good headphones + a consistent monitoring routine can still work.
A tidy desk helps here too — fewer reflective surfaces and random objects around the speakers can reduce weird reflections.
-
Monitor height and chair comfort usually give the fastest quality-of-life boost:
Top of screen roughly at eye level (reduce neck strain)
Chair that supports long sessions (and consider a footrest if needed)
Keep keyboard/mouse at a neutral wrist angle
If you’re in the UK, a quick DSE-style self-check is a good sanity test for posture and screen placement.
📸 Are you a photography/videography brand looking to showcase you products? Take a look at my Media Pack and Contact Me to discuss how we can collaborate on a sponsored review.
Posts you might also like…


About the Author - Ross Jukes is a professional Photographer and Videographer with over a decade of experience. Working in both Digital and Analogue formats, Ross has worked with international clients, had his worked published numerous times and exhibited his work extensively. With a passion for all things photographic, Ross combines his experience, enthusiasm and dedication to his art form to create engaging and educational content for the photographic community.
Disclaimer: All links to Amazon UK/US are affiliated links - you will still pay the same price but I will receive a small commission for providing the link. All information provided in this blog is intended either for educational or entertainment purposes and is accurate to the best knowledge of the author. However, further research/professional advice should be sought before making purchases/implementing any advice given and no responsibility is taken by the author or parties mentioned here within.