
REVIEW: Rogue FlashBender 2 Portable Lighting Kit

The absolute most fundamental part of Photography is light. Put incredibly simple, Photography is just capturing light. However, sometimes (well, all the most of the time) it doesn't want to play ball. It can be too dark, going in the wrong direction, not the right colour temperature. So what if we were able to manipulate the light we use and take back control? Well the Rogue FlashBender 2 Portable lighting Kit allows us to do exactly that, take back control of the light and get our desired look and feel for our images.
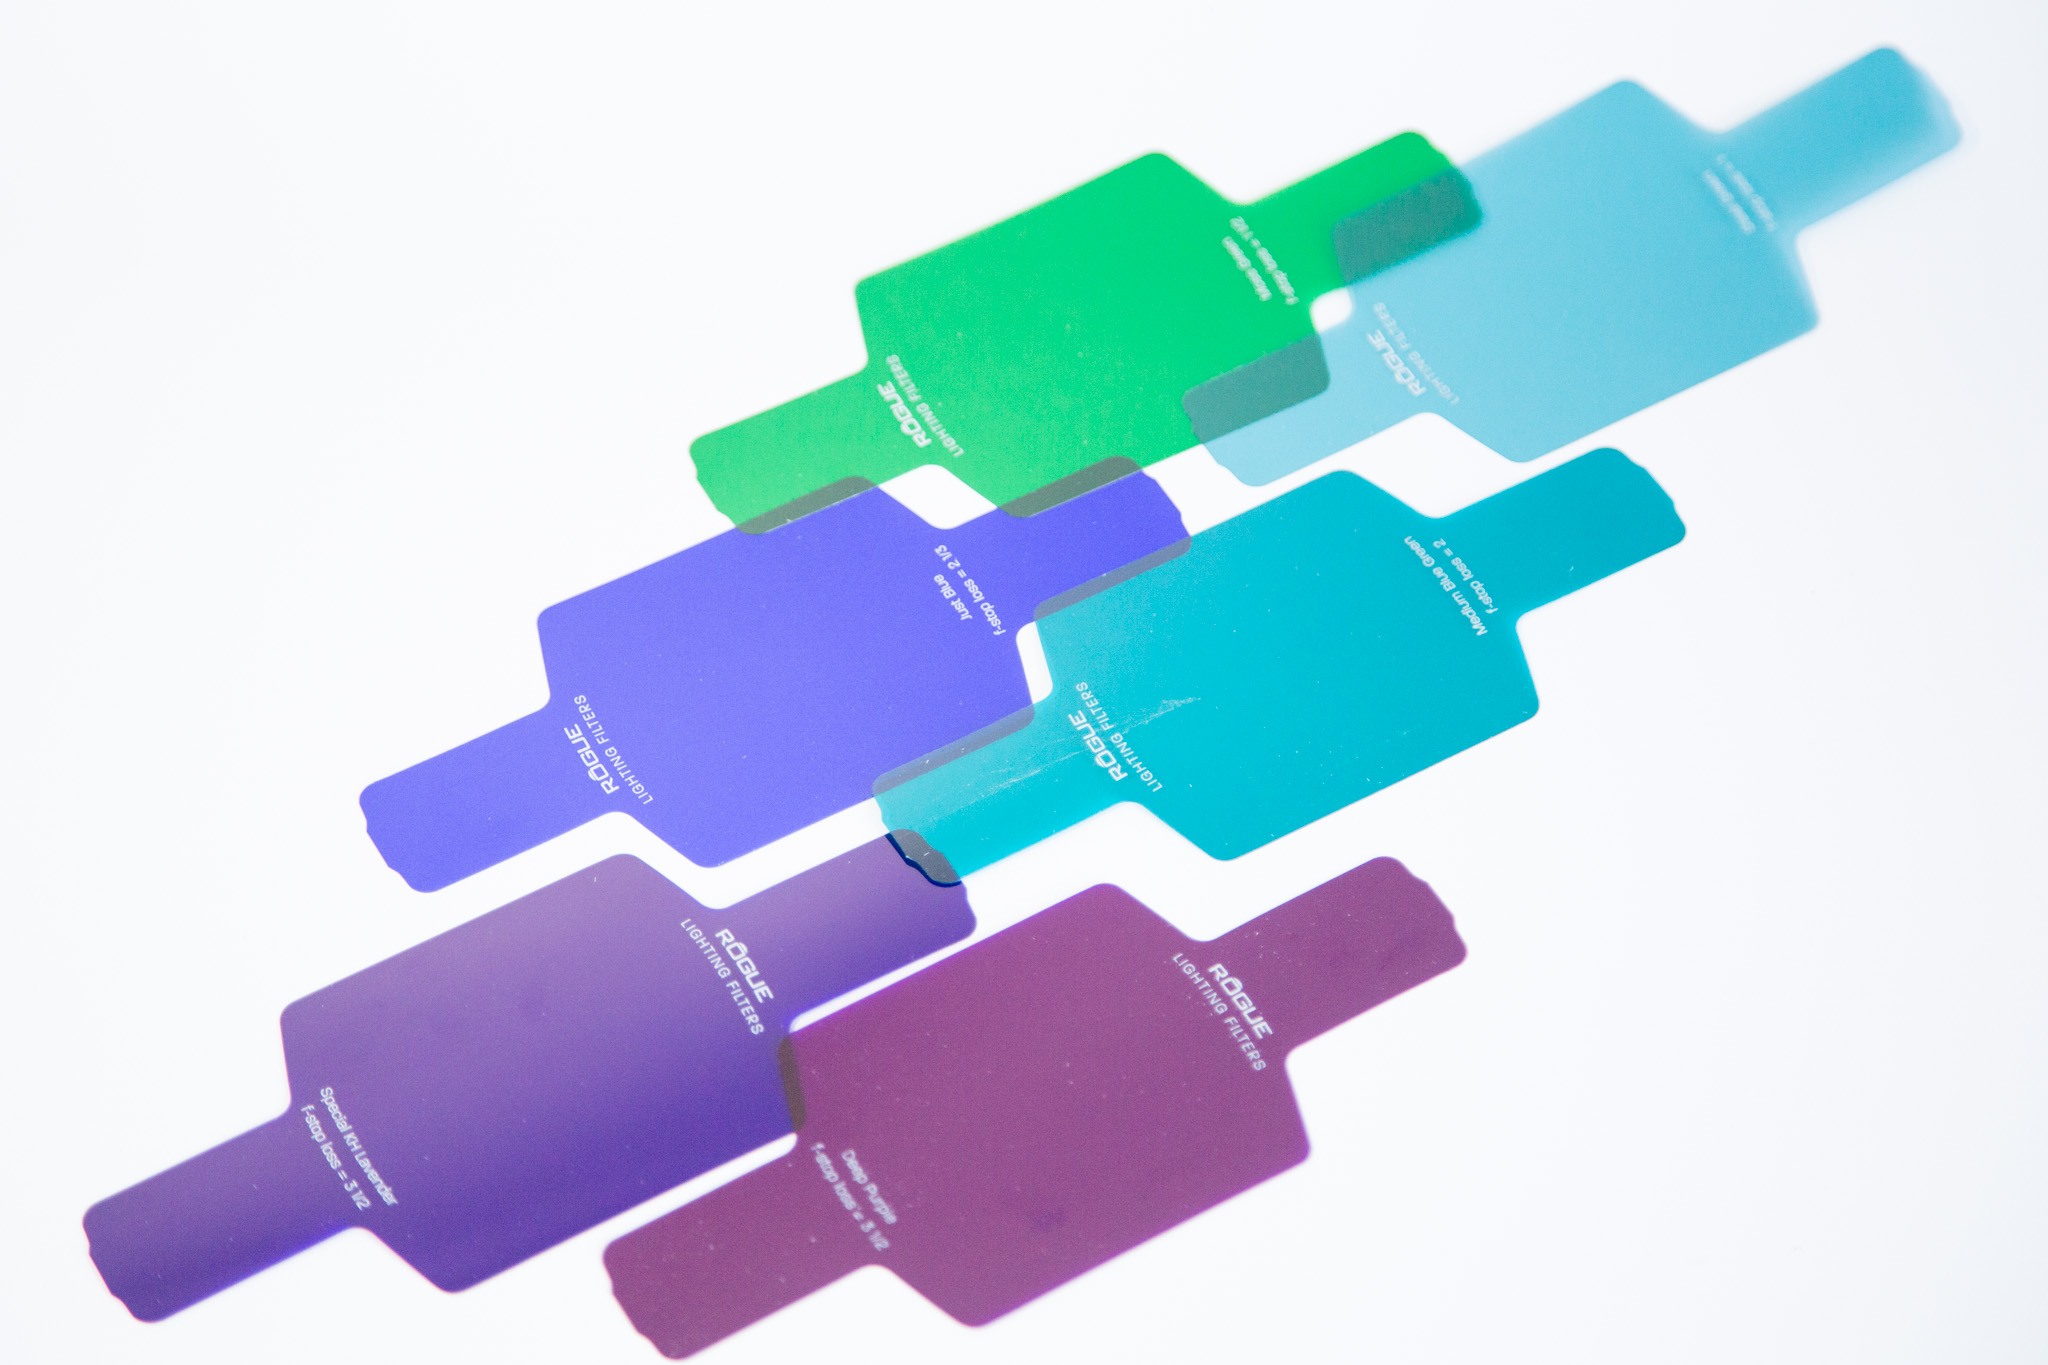
Now obviously, flash photography has been around for decades and pretty much as soon as flash was invented, people started to manipulate the flash by 'modifying' the light source either by using methods of partially obstructing the light or systems to alter the colour and feel of it. Fast forward many, many years and this kind of manipulation of light is common place and done by many of those working with flash. The FlashBender 2 kit builds on the popularity of it's predecessor (Read my review of the FlashBender 2 XL HERE)and goes a long way to empower flash photographers with an arsenal of new modifiers and notably, coloured gels - but more about those later.


The kit is designed for those using Speedlites - portable flash guns that are far quicker and easier to set up and use than large studio lights. Just like Speedlites, the FlashBender 2 kit is very simple to use and portable enough that you can practically carry it with you all of the time, adding very little weight to your portable setup. The kit consists of:
FlashBender Large Reflector
FlashBender Small Reflector
FlashBender 3-in-1 Grid
Large Diffusion Panel
Small Diffusion Panel
Rogue Grid Gels Combo Filter Kit (20 Colours)
Rogue Flash Gels Filter Kit (20 Colours)
Travel Bag.
As mention, the travel bag takes up very little room and if you are selective over what parts of the kit you take with you, you will barely notice any additional weight. The reflectors and diffusion panels all fold down so are easily transportable and the gels will slide nicely into a supplied filter pouch, to keep them safe. Rogue have really thought of everything with this kit and have conveniently supplied a few rubber attachment rings to secure the gels to the Speedlite or modifier and even provide some pretty comprehensive literature for advice on how to use the kit - definetly a bonus for those new to modifiying light sources.

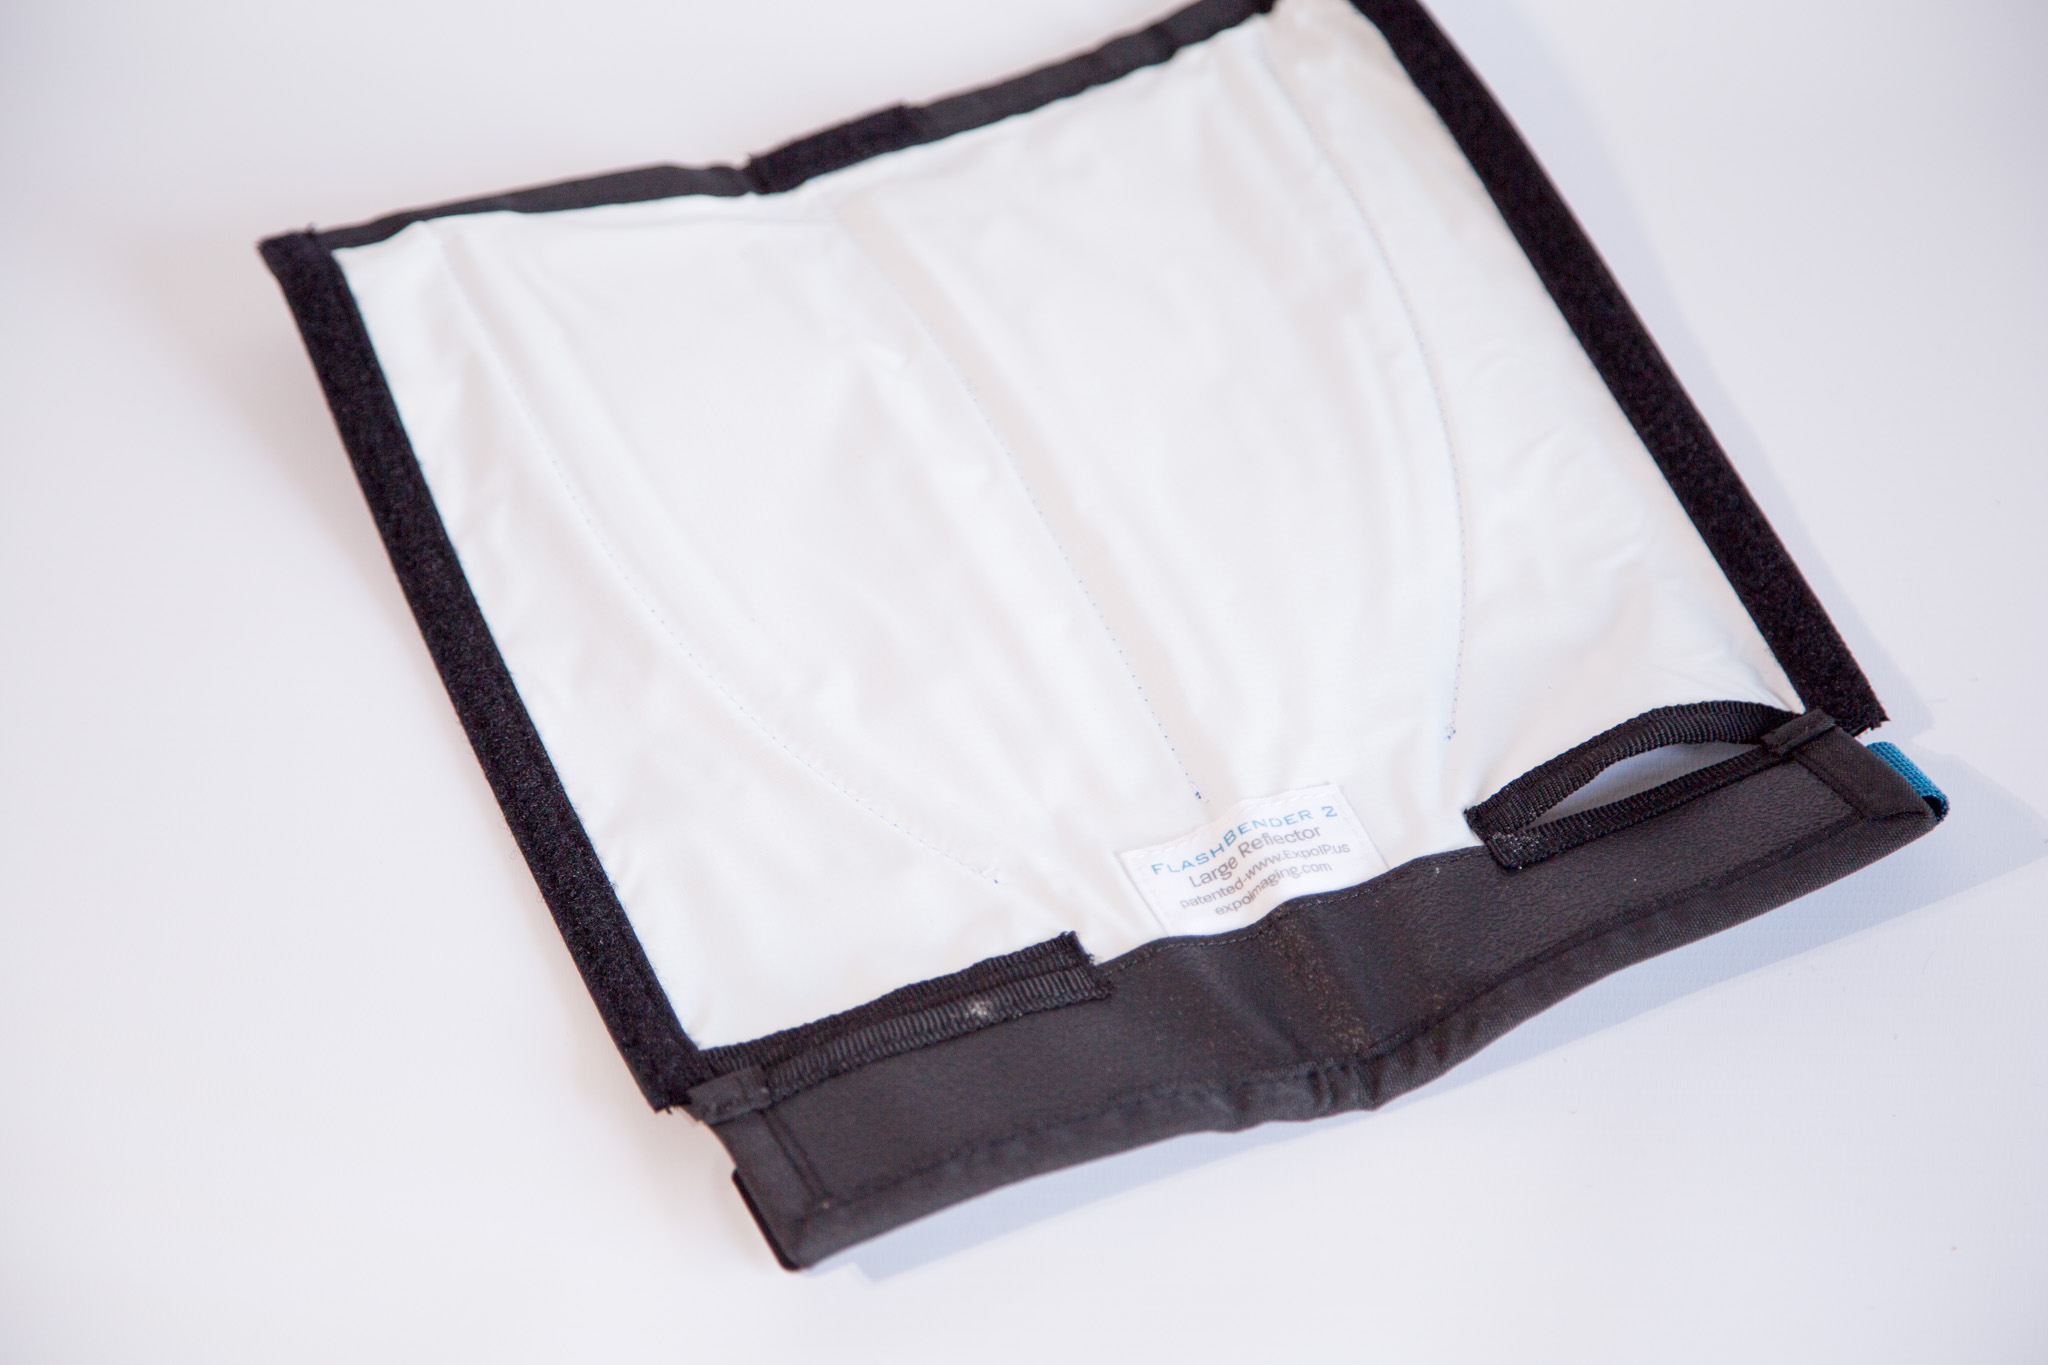


Using the modifiers couldn't be simpler. The modifiers attach by a belt that wraps around the light and secures via velcro. The high quality, yet ultra-lightweight materials mean you're never battling with additional weight and although the larger diffusion panel is a fair size, they are all easy to handle without feeling cumbersome. For those using off-camera flash, in windy conditions it is always advisable to weigh your light and stand down, but just be conscious that it may catch the wind slightly easier. The bendable inner poles allow you to manipulate the panel to direct the light as you desire. This is a particularly useful feature when attempting to isolate a subject from a background as the panel can effectively be used as a snoot to direct the light onto your subject. Before you know if, you'll be exploring the possibilities of directing light and adding a crucial new element to your photography.
Having a range of differing sized reflectors is also a bonus, as in certain situations, the smaller panels may be a better option. Bouncing the light also allows you to difuse the harshness of the light source and although many Speedlites allow you to alter the intensity of the light, being able to 'bounce' the light allows you to soften the effect of it, giving a much more pleasing look.


Using the Kit
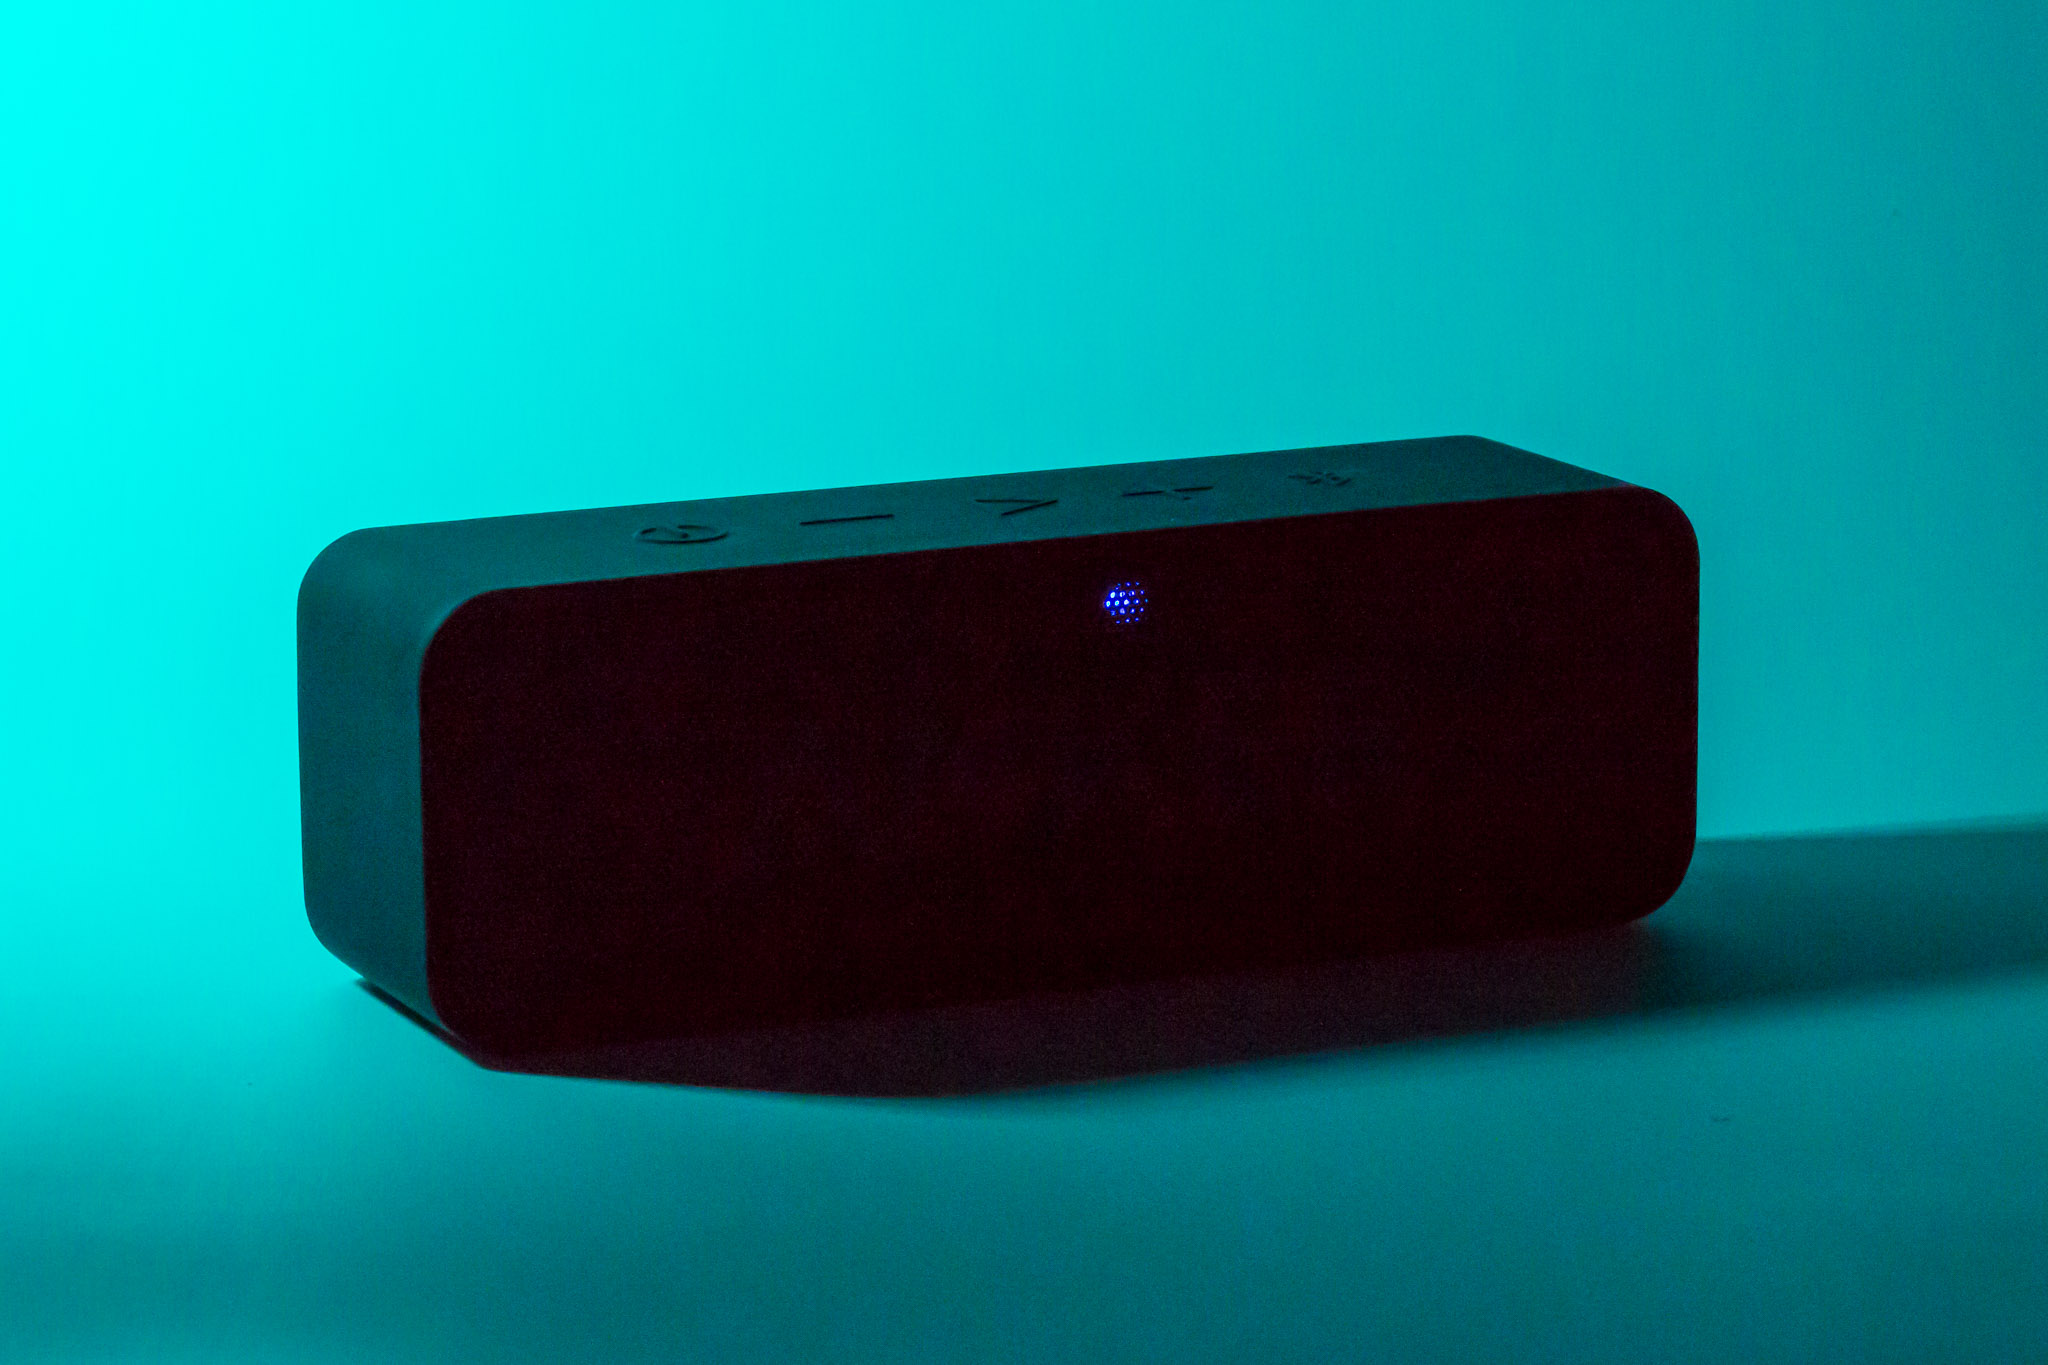
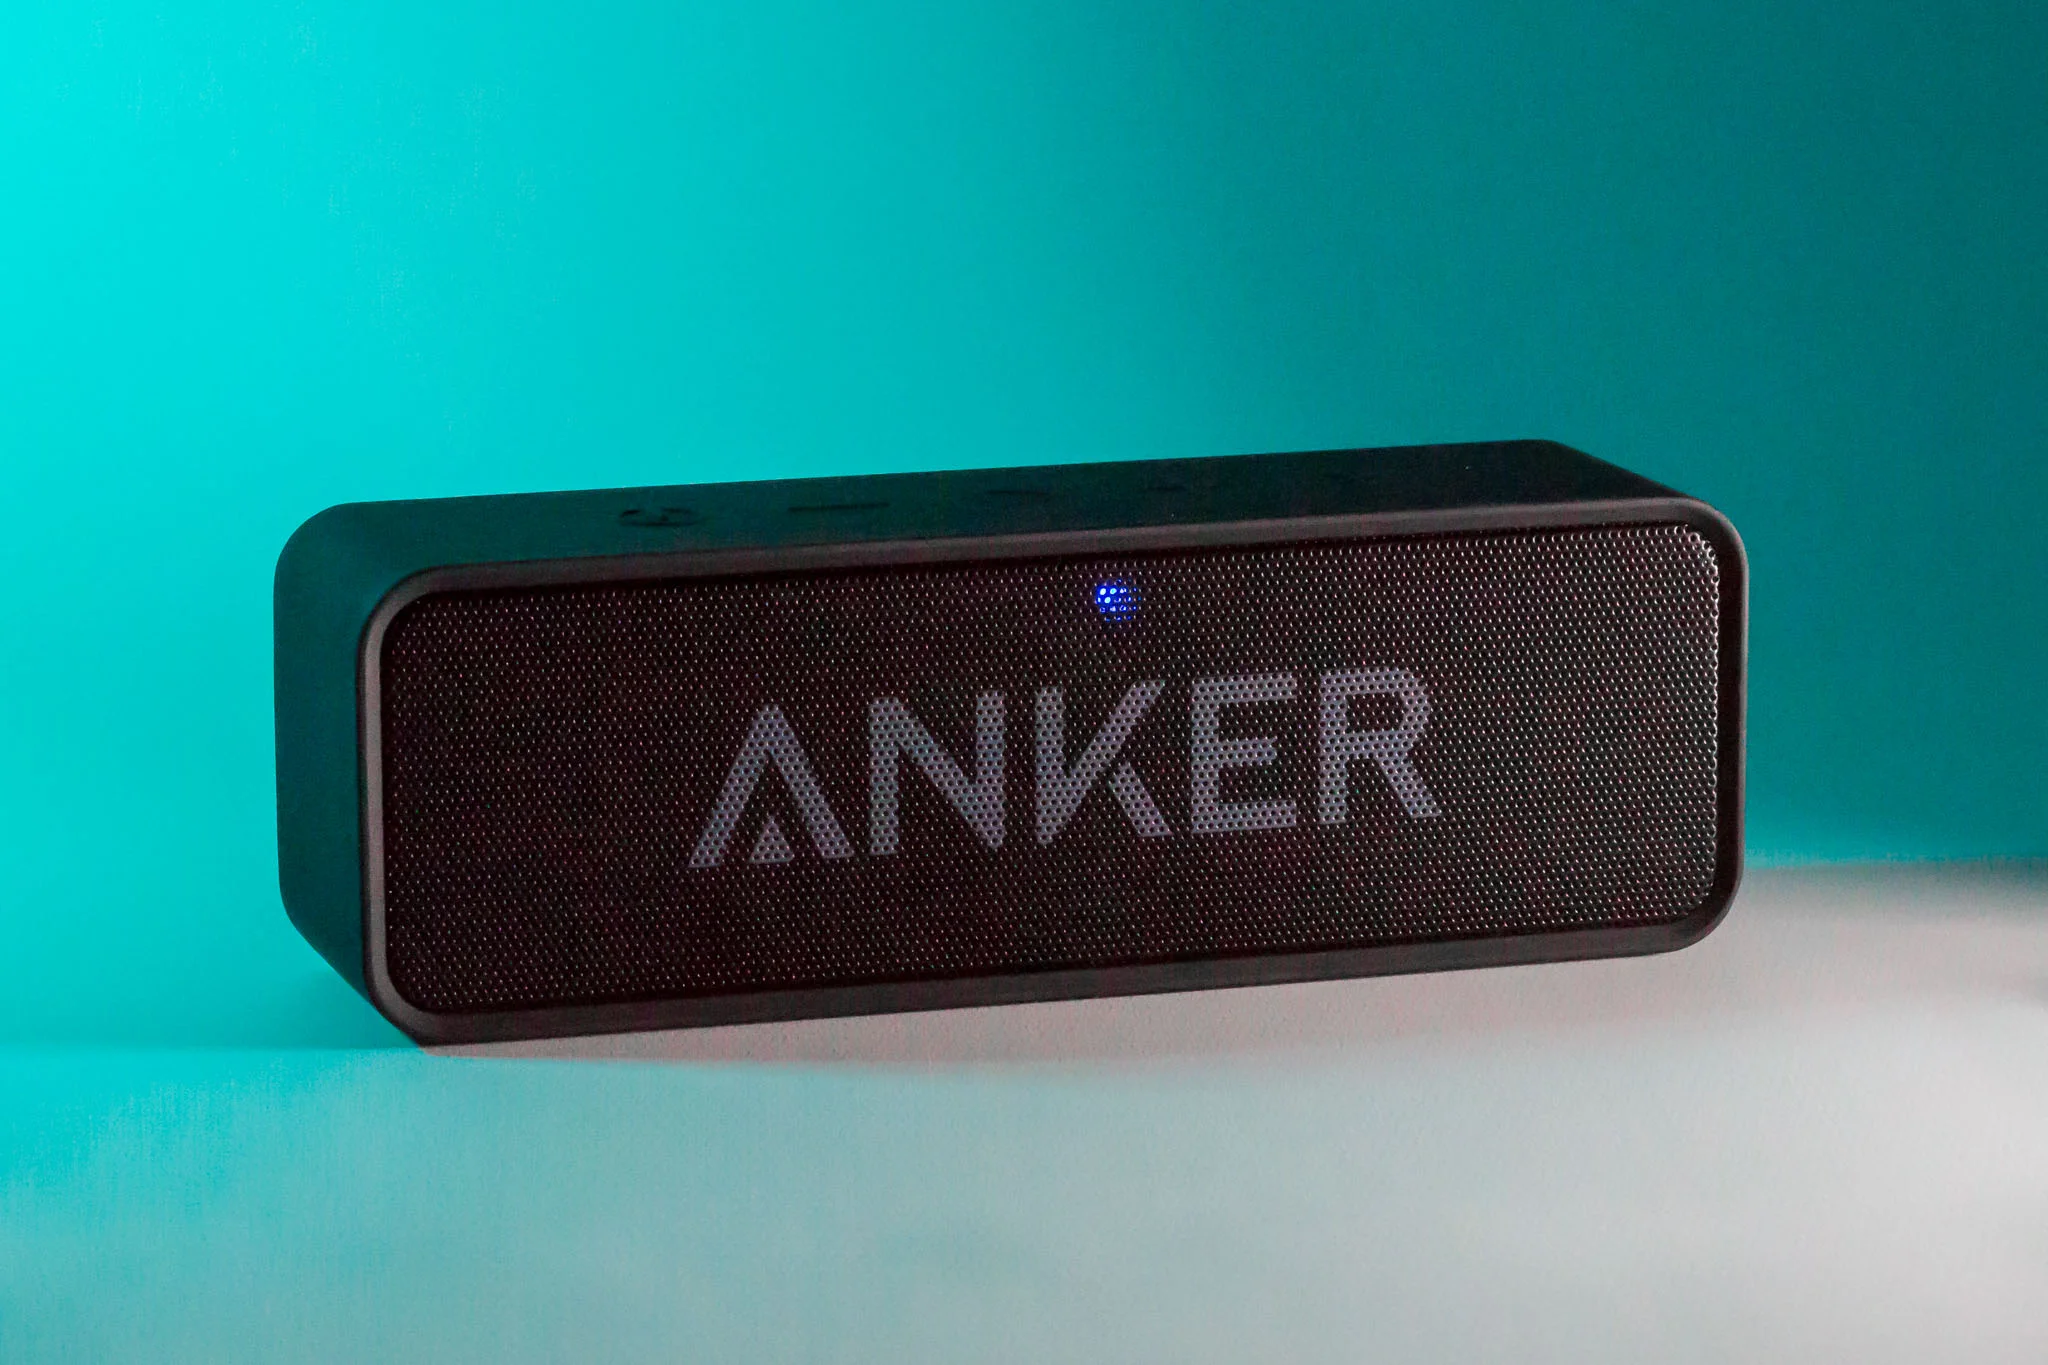
I decided I wanted to put the kit through it's paces and decided to do a very quick, improvised product shoot at a friends house. We grabbed his wireless speaker and and through a sheet of white paper up as a backdrop. We set a couple of lights up and set about seeing how interesting we could make the shots. We got a base exposure just using the lights and then broke out the gels. I was immediately impressed by how simple they were to attach to the lights and even though it's advisable to be careful with them, they don't feel like they are going to rip or tear while you are using them, which is reassuring.
It was great having a range of colours to use and I can certainly see the benefit of using gels to balance colour tempratures in certain situations. However, we wanted to experiment a little and found that the teal and purple gels gave a really interesting look. There is no doubt that with more time and a little patience, you could get some really astounding results. However, what most impressed me was the portability and the speed to set up the kit. It really is designed to be portable and could really help bring your creative side out.


Conclusion
At around £165, the kit is an investment but one that should cover all of your flash modification needs for many years to come. The build quality is excellent and the thought and care taken by Rogue to supply everything you could need to get you going is fantastic. The kit is an excellent addition to any photographers gear bag and for those looking to unleash their creative side and take back control of their lighting conditions, well you need look no further.
For more details and how to purchase, please click HERE (not affiliated).
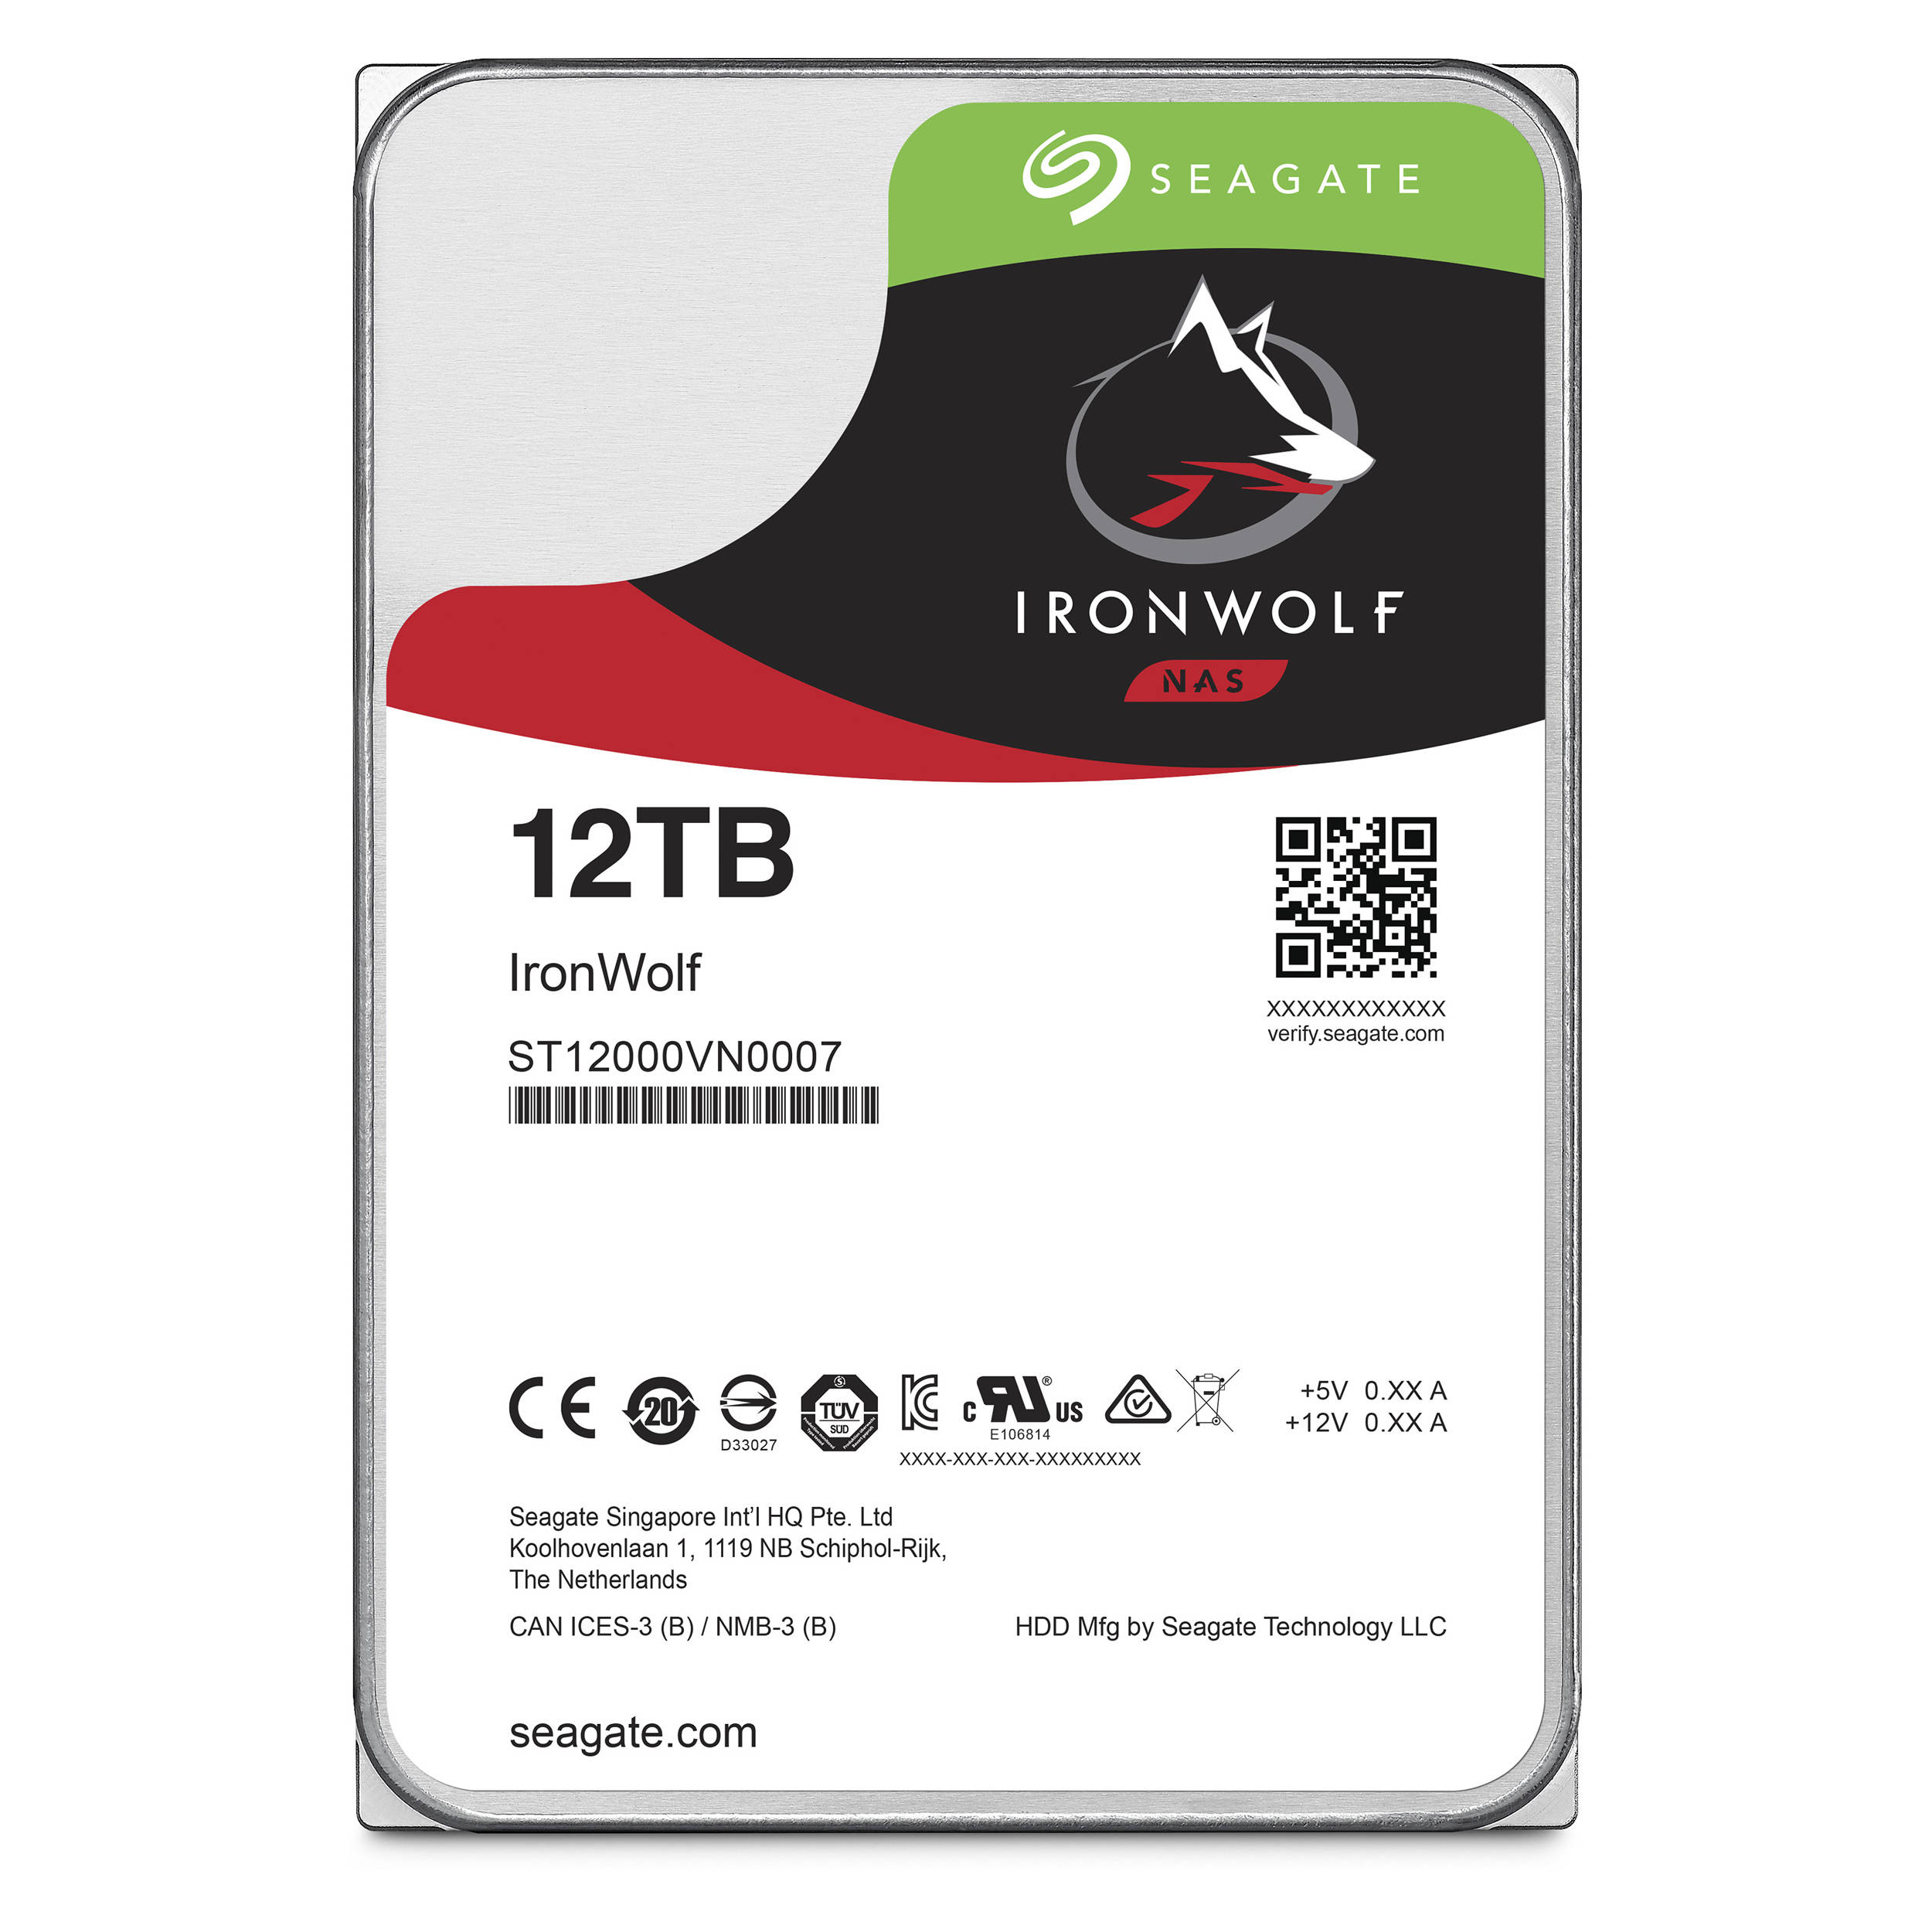
Choosing the right Hard Drives - Seagate Ironwolf 12tb NAS drives

As a photographer, there are parts of my setup that I could not tell you how they work, I just know (and most of the time ‘hope’ with all fingers & toes crossed!) that they do ‘just work’. Hard drives are very much in the ‘close my eyes and ‘hope’ they work category. However, when I setup my new ‘Network Attached Storage’ (NAS for short), I knew that I had to do a little more research as standard hard drives simply wouldn’t cut it.
So first things first, what is a NAS and what planet do they come from?? Very, very simply put, NAS is just a way of attempting to protect your data against loss from hard disk failure by copying data across multiple disks. The premise being that if one disk fails, the data is either ‘mirrored’ on another disk or by using some extremely complex computer wizardry, re-built by the other disks, restoring the data lost from the failed disk. The difference in how your data is protected depends on what ‘RAID’ setup you choose. RAID, or Redundant Array of Independent Disks as it’s catchily titled) can be a bit difficult to get your head around at first, so I’ll save the complex stuff for another blog post.
So why do you need different drives with NAS? The first and main difference is that in general, NAS requires higher capacity drives as you are essentially storing ‘all’ of your data and depending on your RAID setup, this will commonly require multiple drives. I chose the simplest option of RAID 1 - which means that data will be mirrored from one disk to another, meaning I would need two disks of equal capacity. However, before diving straight in and buying the largest drives you can find, it’s always worth doing a little prep work.
I started by looking at exactly ‘what’ I wanted to protect. I use two seperate computers, a Macbook Pro for the majority of my day-to-day work and a PC for bulkier editing and long-term storage. Fortunately, most NAS setups will allow you to store data from different platforms. Next I looked at the most important things that needed protecting. Well, quite simply it is my image library - which comprises of some 70,000 photos and you can throw around 50 video projects on top of that. Finally, there were some day-to-day documents relating to my business and a handful of ‘holiday snaps’ and things that I would like protecting. All of this data soon added up and I knew that I was looking at disks in the Terabytes!
The next thing to consider is the performance of the disks. With my NAS setup (which I will cover in an additional blog post) I knew that I wouldn’t be editing directly from the storage device. I would be saving new images to my MacBooks internal SSD - editing what I needed, exporting client photos to DropBox and then moving the completed projects to an ‘Archive’ - which in this case would be the NAS. This meant that I could reduce the files held on my ‘working’ computer and add an element of protection by storing the files (& Lightroom catalog) on the NAS. I also knew that I would need to access that data 24 hours a day - so the NAS would always be on - additional strain on the required hard drives.
Taking all this into account, I knew that I had to choose ‘NAS’ rated drives. These drives are design for much longer run times and have more protection against vibrations, reducing the risk of mechanical failure. As I did my research, I kept coming across Seagate, who certainly have a great reputation in this market and in particular, their ‘Ironwolf’ range of disks. Apart from having a really cool name, these disks also looked like they packed a decent punch, with excellent benchmarking results for both read & write performance and power management - which were all concerns I had about choosing the right disks.
The next big question was ‘what size disks?’ - when it comes to size, it’s a bit of a personal question and I always believe bigger is better. However, in this case, it was completely justified. I knew that I had around 6tb of essential data that I needed protecting. Considering that doing photo and video work, I will be adding around 2tb a year minimum, I needed to find disks large enough to give me a couple of years worth of storage before having to upgrade. My options were becoming slim and I kept coming across the same answer, ‘Ironwolf 12tb’ - it looked like we have a winner.

QNAP TS-453-B NAS
Fast forward a few months and the disks are in the NAS and I am very pleased to say, performing as desired. These are not cheap hard drives, in fact they are very expensive, but you are getting a lot of ‘bang for your buck’ I could have also plumped for more, smaller drives, but choosing RAID and disks is quite a personal choice and this felt like the best setup for me at the time.
In conclusion, I am really impressed by these disks. They are a huge capacity and in terms of performance, they haven’t missed a beat. They are speedy enough to get quick access to your data and run quietly and efficiently. As stated at the beginning, this really isn’t my area of expertise but what I can say is that I feel comfortable leaving the hardware to do the hard work and live safe in the knowledge that my data has an added layer of protection against mechanical failure.
Check back soon as I will be writing a new post about how I manage my data and my workflow from start to finish.
For more information about Seagate Drives, click HERE
REVIEW: BenQ SW271 - 27" IPS LED Monitor - 4K UltraHD

Professional and Amateur photographers alike are aware of the importance of accurate colours in your images. Whether it's print or on screen, the colours need to be exactly how we wish to portray them and the only way to achieve this is by starting with a good quality monitor. Fortunately, BenQ has been producing some outstanding monitors in recent years and giving the big boys a run for their money! So how would the SW271 stack up? Keep reading to find out...
The SW271 is a 27 inch, 16:9 (3840x2169 pixels), 4K UHD monitor packing some seriously high-end features, such as:
99% Adobe RGB Colour Space with IPS technology
27 Inch 4K UHS resolution
High Dynamic Range (HDR)
Hardware Calibration with Palette Master Element Software
USB-C™ for transmitting data and video signal with one cable
10 Bit colour depth (If using HDMI 2.0/DisplayPort & an appropriate GPU)
Hot key puck
Built in Colour Calibration
Shade Supplied

Build Quality, Size & Connectivity
As a user of the SW271's big brother, the SW320 - I'm well aware that for many rooms, the SW320 can be a bit 'too' bulky, it's certainly no shrinking violet. So I was pleased to see that the SW271 keeps BenQ's simple yet stylish design theme but with slimmer bezels and a more lightweight and maneuverable feel than it's hefty relative. The matte grey plastic feels good quality and the metal stand articulates well and feels lightweight to move, but reassuringly sturdy.
BenQ clearly put a lot of thought into their design and even though it may not have some of the gimmicks of other monitors such as flashy LED's, BenQ manage to make an attractively minimalist monitor without it looking boring. Furthermore, it feels like a quality product and worth the cost as even simple things like the quality of the buttons, with their satisfying 'click' when pressed, that remind you that this is not a cheap product.
The SW271 fills a very nice hole in the size range, meeting the ever important 4k demands with a beautifully clear screen that is more than capable of giving editing software such as Lightroom, Photoshop, and Final Cut some much-needed breathing space. The 27inch panel can easily be flipped into a vertical orientation and the need cable tidy aperture on the stand keeps everything where it needs to be.
Talking of cables, connectivity should not be an issue with the SW271 with two HDMI 2.0 ports, a DisplayPort input, two USB Gen1 Ports and a USB XXXXXXXXXXXXXXXX

Performance
So the big question, is how does it perform? Well straight out of the box, this thing is a beast. BenQ calibrates all of their high-end monitors in the factory and for added reassurance, you get a calibration report in the box, boasting some very impressive figures. The 4k UHD is clearly targetted at those who require attention to fine detail either when viewing and editing photos or video. The monitor certainly delivers on that front and clean and crisp with good contrast. The 27-inch size makes it a pleasure to work on and gives you plenty of space on the screen to make sure that editing tools are not eating into valuable display space.
Colour accuracy is superb and with hardware calibration, achieving accurate colours is a breeze. Moving between colour spaces (RGB, AdobeRGB, black & white, Rec. 709, DICOM, DCI-P3, or HDR10) is a doddle with the 'Hot Key Puck' (which is just one of BenQ's really well thought out features) or the really easily navagated menu system. The supplied shade and really usable connectivity show that BenQ understand the needs of photo and video editors.


Conclusion
Straight out of the box, the SW271 is clearly a high-end product, built with Photographers & Videographers clearly in mind. The build quality is excellent and feels like a reassuringly sturdy monitor, without being too 'heavy' looking thanks to the thin bezels and clean design. It is feature rich and added bonuses such as the supplied shade, SD Card reader and BenQ's clever 'Hot Key Puck' should not be overlooked. It also ships with all the necessary leads and cables to get you started, straight out of the box.
Most importantly though, it packs a punch, providing the kind of quality that I have come to expect from it's bigger (and pricier) brother, the SW320. The 4k is certainly welcome and can be a real benefit for photo editing but it really comes into its own when video editing. More importantly, the wide colour gamut and Hardware calibration go a long way in terms of giving you confidence in your colour reproduction (though it is still necessary to regularly calibrate your monitor/printer etc. to ensure accuracy). Details look great on this monitor and I never found any of the darker colours to look muddy and gives you confidence in your editing.
There is no getting away from the fact that the monitor cannot be classed as 'budget friendly'. However, compared to similarly specced monitors, it actually starts to look like a great option. The sheer size is great to work with and will definitely benefit those that need to focus on finer details. One minor downside is the lack of a powered USB-C that would be a nice touch. However, additions such as the Hot Key Puck and the supplied shade, show you that BenQ mean business and have put a lot of thought into their target market. All in all, it's a great monitor and should be on the consideration list for any Pro/Amateur togs & videographers out there.
For more information about the monitor and how to purchase (not affiliated) please click HERE
WATCH THE REVIEW BELOW:
Introduction to NAS & The QNAP TS-453-B

All Photographers and videographers should be taking how and where they store their data very seriously! By now, you will probably have heard of Network Attached Storage or NAS for short. In this video I will give you a quick introduction to NAS and an unboxing and look at the features of the QNAP TS-453 B - a high quality and feature rich unit which on this occasion had been filled with the Seagate Ironwolf drives.
Very soon I will be doing a video series of videos on RAID, Storage and workflow but for now, take a look around the QNAP in the video below:
Photographing Birmingham - Architecture & Street Workshop

Well, it seems like I've been away forever. The truth is, I've been really unwell for about a month and have been catching up on work. The good news is, I have loads of exciting events coming up and can't wait to start sharing them with you!
One event that I can share with you is an exciting collaboration with the amazing folk at Brumpic & The Culture Card. On June 9th, we will be hosting a very special 'Photographing Birmingham' workshop. The day is aimed at anybody looking to develop their photography skills and is open to all skill levels. Even those who have never really picked up a camera will gain a great deal from the day including learning about the main features of a camera, the 'rules' of photography and a special opportunity to learn how I edit my images.
The structure of the day will be as follows:
9.00-9.15 Meet (Coffin Works)
9.15-9.30 Ice breaker - what is everybody’s skill level? - This is an ideal opportunity to share your current skill level and what you would like to learn.
9.30-10.00 Talk by me - who I am and what I do - A brief introduction to who I am, my photography journey and how I went about learning about photography.
10.00-11.00 Understanding the basics - camera controls & composition etc. - Here we will get into the details of using a camera. It will include an overview of how a camera works, the main functions, an understanding of using auto features and then a discussion about manual features.
11.00-11.30 Shooting the city - what to look for & how to get the shot - As it says, this is where we will delve deeper into the theory and look at 'what' to look for when shooting 'street & architecture'.
11.30-1.00 Practical - go out and shoot - The exciting part, we will go out and explore a designated route and all attendees will have an opportunity to ask questions and seek guidance as we explore the city.
1.00-2.00 Lunch and discussion* - We will take the opportunity to have a break, eat lunch (provided) and have a discussion on what we have done so far.
2.00-3.00 Practical - more shooting - The exciting part, part 2! In this session, attendees will have more opportunity to shoot the streets with slightly more free reign, and we will discuss what type of photography you want to focus on and look at some useful techniques to take away.
3.00-4.00 Back to ‘base’ and a guided edit - At this point, we will head back to the Coffin Works for refreshments and a chance to walk through some guided edits. This is a unique opportunity to see how I edit my images and look at how I use Lightroom and Photoshop, as well as ask questions about my techniques.
4.00-4.30 Q&A and close - We will close with an opportunity to ask questions about all the things we have learnt and much more. Whether you want to know about the business of photography or simply how to sell your first prints, take the chance to glean some 'insider' knowledge.
The cost of the day is £80 to Culture Card holders and £100 to everybody else. Whereas this sounds expensive at first, this is actually a rare opportunity to spend a whole day learning about photography, getting useful tips on editing and to learn more about how you can improve your own photography.
For more details or to book your place, please visit - EventBrite
If you have any questions, feel free to get in touch.
Thanks to - Brumpic / Culture Card / Coffin Works
Beauty in the 'Beast'...

As the weather continues to cause havoc across the country, it's getting to that point where it stops being fun and starts getting serious. Sub-zero temperatures and treacherous conditions put those that are most vulnerable in real danger and make even simple journeys a nightmare. However, if there is anything that can be taken away from a terrible situation, it's that it makes the everyday scenes that we've all become accustomed to seem surreal.


This week, I have been wiped out by Flu! Not just any Flu, not even 'Man Flu', but some kind of 'I want to make every single cell in your body pay for it' Flu that even had Laura conceding that I might actually be ill. So as much as I would love to have been out with my camera, I've just not been able to.

That was until late Thursday night, where I had to run out for an emergency. I wrapped up as warm as I could, checked the weather "Feels like minus 12" took a brave pill (Lemsip) and head out. Now obviously, I was going to take my camera with me. Even in my sickly state, I wouldn't dare leave the house without it! I stumbled my way through town, grabbing quick images as I went.


The images that I did get were far from perfect. There is something about being laced with Flu in bitterly cold conditions that makes you forget the 'rule of thirds' or to check whether shots are even in focus. However, when I did check the images, I really liked the 'soft' feel to them and put this down as a 'happy little accident' as a great man used to say. The snow is certainly a nightmare and I genuinely feel for those vulnerable people that this kind of weather can really threaten. However, it's also nice to remember that even in the worst of it, you can still find little glimmers of beauty.


REVIEW: Rogue FlashBender 2 XL Pro Lighting System

Photography is quite a simple thing really. It all boils down to understanding and controlling light. Obviously, it can be quite difficult to control natural light, but when it comes to artificial or studio lighting, you can get really creative. This is where products like the Rogue FlashBender 2 XL Pro Lighting System become the photographers best friend!
The kit is basically a Speedlite modifier, but to call it 'basic' really does not do this product justice. The ingenious design allows you to carry a range of light modifying tools all in a stylish pouch that could fit comfortably in most photography bags, taking up about the same amount of space as a 200mm lens. The kit contains the reflector, softbox and strip grid that can be combined in multiple ways. The build quality is excellent and even after a few minutes of handling it, you know it's a quality product.
For those new to light modifiers, this kit allows you to modify and shape the light that comes out of your Speedlite. You can control the 'amount' of light emitted by the controls on the Speedlite or by using TTL (Through the Lens) but this does not allow you to control 'how' the light is dispersed. This is where the FlashBender comes in. The large reflector allows you to create a much large light source and softens the overall nature of the light, giving a more pleasing result. However, the reflector itself can be shaped (thanks to the internal metal ribs) into more of a cone shape or a cylindrical shape to allow you to focus the light on one spot.


The reflector itself attaches to your Speedlite via a belt that wraps around the top of your light and it's lightweight construction means that you will not be battling with weight. It is ideal for use with the Speedlite on a stand and even though the reflector is large, it never feels unruly and easy to manage. It's amazing portability makes it an ideal solution for location-based shoots where it may be impractical to use a traditional softbox. The portability was one of the main selling points for me as I found it ideal to just leave in my bag and grab whenever needed.

The kit also contains a very useful Softbox, which I found amazingly useful for product photography. Being able to diffuse the light makes a huge difference to the quality of images that you can produce. The FlashBender kit diffusion fabric gave a pleasing result and I even found myself getting quite experimental by using the fabric at a variety of distances from the light source to get different results. This is one of the real hidden beauties of this kit, the versatility of the products allows you to really experiment with your photography, knowing that you have complete control over the light.
Finally, the grid spot allows you to concentrate the light on a subject, whether it is diffused or not and is an ideal option for portrait photographers, looking to pick their subject out either in the studio or on location. The grid is flexible and folds down comfortably in the supplied pouch but is also incredibly quick to assemble, making use of the velcro system. It's great working in the knowledge that you have all the tools you may need to hand.

In conclusion, where it may be possible to get slightly better results with traditional softboxes etc. they are not always practical. This is where the FlashBender 2 XL Pro kit really comes into its own. I haven't seen another lighting modifier that can get such great results and be so portable. Having used a Godox head with a 95cm octagon and a C-stand for a while, I found myself reaching for a flashgun and the FlashBender kit more often than not purely because of the portability and knowing I could still get great results. At around £90, the kit is great value for money when you consider the world of options that it will open up for you!
Find out more at the Rogue website - HERE
12 Views of Birmingham that will never be the same!
Birmingham is changing. Whether you are a fan of the waves of new development happening across the city, one thing for sure is that it doesn't show any signs of slowing up. There is always huge disruption whenever another part of the city is, closed down, blocked off and peoples lives re-routed. However, the financial benefits and the growing positivity around Birmingham is a testament to the investment that is being made in the city.
However, one thing that will change are some of our favourite views. Many will improve, some will be questioned and all will never be the same again. In years to come, we will look back at many of these images and talk about 'how things use to be'. It's strange to think that by then, we will have grown acustomed to the 'new' views and undoubtedly be surround by even more new developements and growth in our amazing city.

1) Boulton, Watt & Murdoch
The 'Three Wise Men', the 'Golden Boys', the 'Carpet Salesmen' - Whatever you refer to the statue as it's no longer where you would expect to find it. The lads have been uprooted as part of the Centenary Square development. Even the backdrop will change as a new building is already in development on the very spot where these influential men once stood. I wonder if they would approve of the changes happening in the city?

2) Three Snowhill
You can see this development from pretty much anywhere in the city, it really does dominate the skyline. The huge commercial development (the biggest in Europe I believe!) is set to completely change the landscape of the heart of Birmingham's financial district and the area around Snowhill. The sheer scale of this building is the most impressive thing and is best viewed from Great Hampton Street.

3) Paradise Forum
Despite the ironic name, Paradise Forum always divided opinion. Many will miss the Brutalist architecture that dominated the area (myself included) and I'm sure many more would quite happily of bulldozed the place down themselves! Love it or hate it, the old has made way for the new and the modern glazed building are well and truly flying up. I'm sure we will all grow use to the new amenities but a huge piece of Birmingham's heritage has changed forever.
4) Centenary Square
Lying just beyond Paradise is Centenary Square and it has already it's £10m transformation. The area that was once home to the iconic 'Forward' statue and Cliff Richard's 'Flame of Hope' is now making way to a new 'urban' space that has received mixed views. One thing that will change is the layout of everyone's favourite Christmas Market, that will be adapted to fit around the all new Centenary Square.

5) HS2 - Curzon Gate
There is no way that I could leave this one off the list. Arguably the most important development in Birmingham in decades, the multi Billion Pound project will see a central hub dominating Curzon Street. The area pictured above has already started to change and will provide the vital link between the new HS2 station and the heart of the City Centre. This one will be huge and with phase two expected to be completed around 2032 - you can expect this one be around for a while!

6) Bradford Street and the view back to the city
Bradford Street provides one of the main links into the city, arriving just behind the Outdoor Markets. Major developments have already started popping up along the sides of the road and with a huge area (bottom right) earmarked for further projects, it won't be long before the view back to the city has changed forever.

7) - The whole of Digbeth
And whilst we're in the area, it's probably worth noting that with the arrival of HS2 and the on-going 'land grab', it's not hard to imagine that much of the historic area will fall under development. I can only hope that at least some of the old buildings and light industry are preserved to ensure that there is some nod to the past and the important part that Digbeth has played as an industrial and creative hub for the city.

8) The Iron Man
Another statue has grown legs and moved on (he genuinely has feet too!). Antony Gormley's famous statue has been moved to make way for the new Metro route and will be put into storage and cleaned up by Birmingham's Museum's Trust. The statue, with it's iconic rusty metal work will pop up somewhere new in the city, but for now at least, this is another view we will not see again in our city.

9) Victoria Square
Victoria Square has seen many changes over the decades. If you search for the 'old' pictures of Birmingham, it has been transformed from a grassy, park-like spot to a very 'urban' square that wouldn't look out of place in any major European City. Whether it's the brutal bulldozing of the old Library, the new Metro that will skirt around the edges of the Square or the filling in of the Floozy's fountain, Victoria Square is constantly evolving.

10) The view form the old Natwest Tower
OK, so the view itself might not change much but with the demolition of the old Natwest Tower on Colmore Row, the skyline of the area will be changed forever. The new development of '103 Colmore Row' will see a new, glass-clad 26 storey tower replace John Madin's iconic structure. The new tower will undoubtedly be impressive, but the views from the top will be the real gem!

11) The Wholesale Markets
Another icon of Birmingham will soon be cast to the history books with the demolition of the Wholesale Markets. The history of the markets can be tracked back over 800 years and it's most recent incarnation opened in 1974. The traders will now be relocated and the buildings demolished to make way for a substantial new development comprising of commercial and residential buildings and huge new park areas.

12) The City Skyline
With all of these changes, one thing that will definitely never stay the same is the city skyline! With many other new developments popping up around the city, Birmingham will continue to grow and change for many years to come!
And finally...
I am not a historian, nor am I an expert on regenaration or city plannig. However, I do like to think my images go some way towards documenting our changing city. Even though it will not be to everyione's liking, it is impressive to see the money being spent in our city which can only have a positive impact. Birmingham is a very special place and I think more people are starting to realise this. We may have lost some special views and iconic buildings, but it will certainly be exciting to look back on these images in years to come and see just how much Birmingham has changed!
REVIEW: VIDEO - Samsung Evo Plus Micro SD Card

I have been using this Micro SD card for a while now and have been really impressed. It literally is just a case of throwing it in your camera and living safely in the knowledge that it isn't going to fill up anytime soon! The write speeds are good enough that you're never going to worry too much about shooting in Burst mode etc. Great all-round card.
Learn more HERE
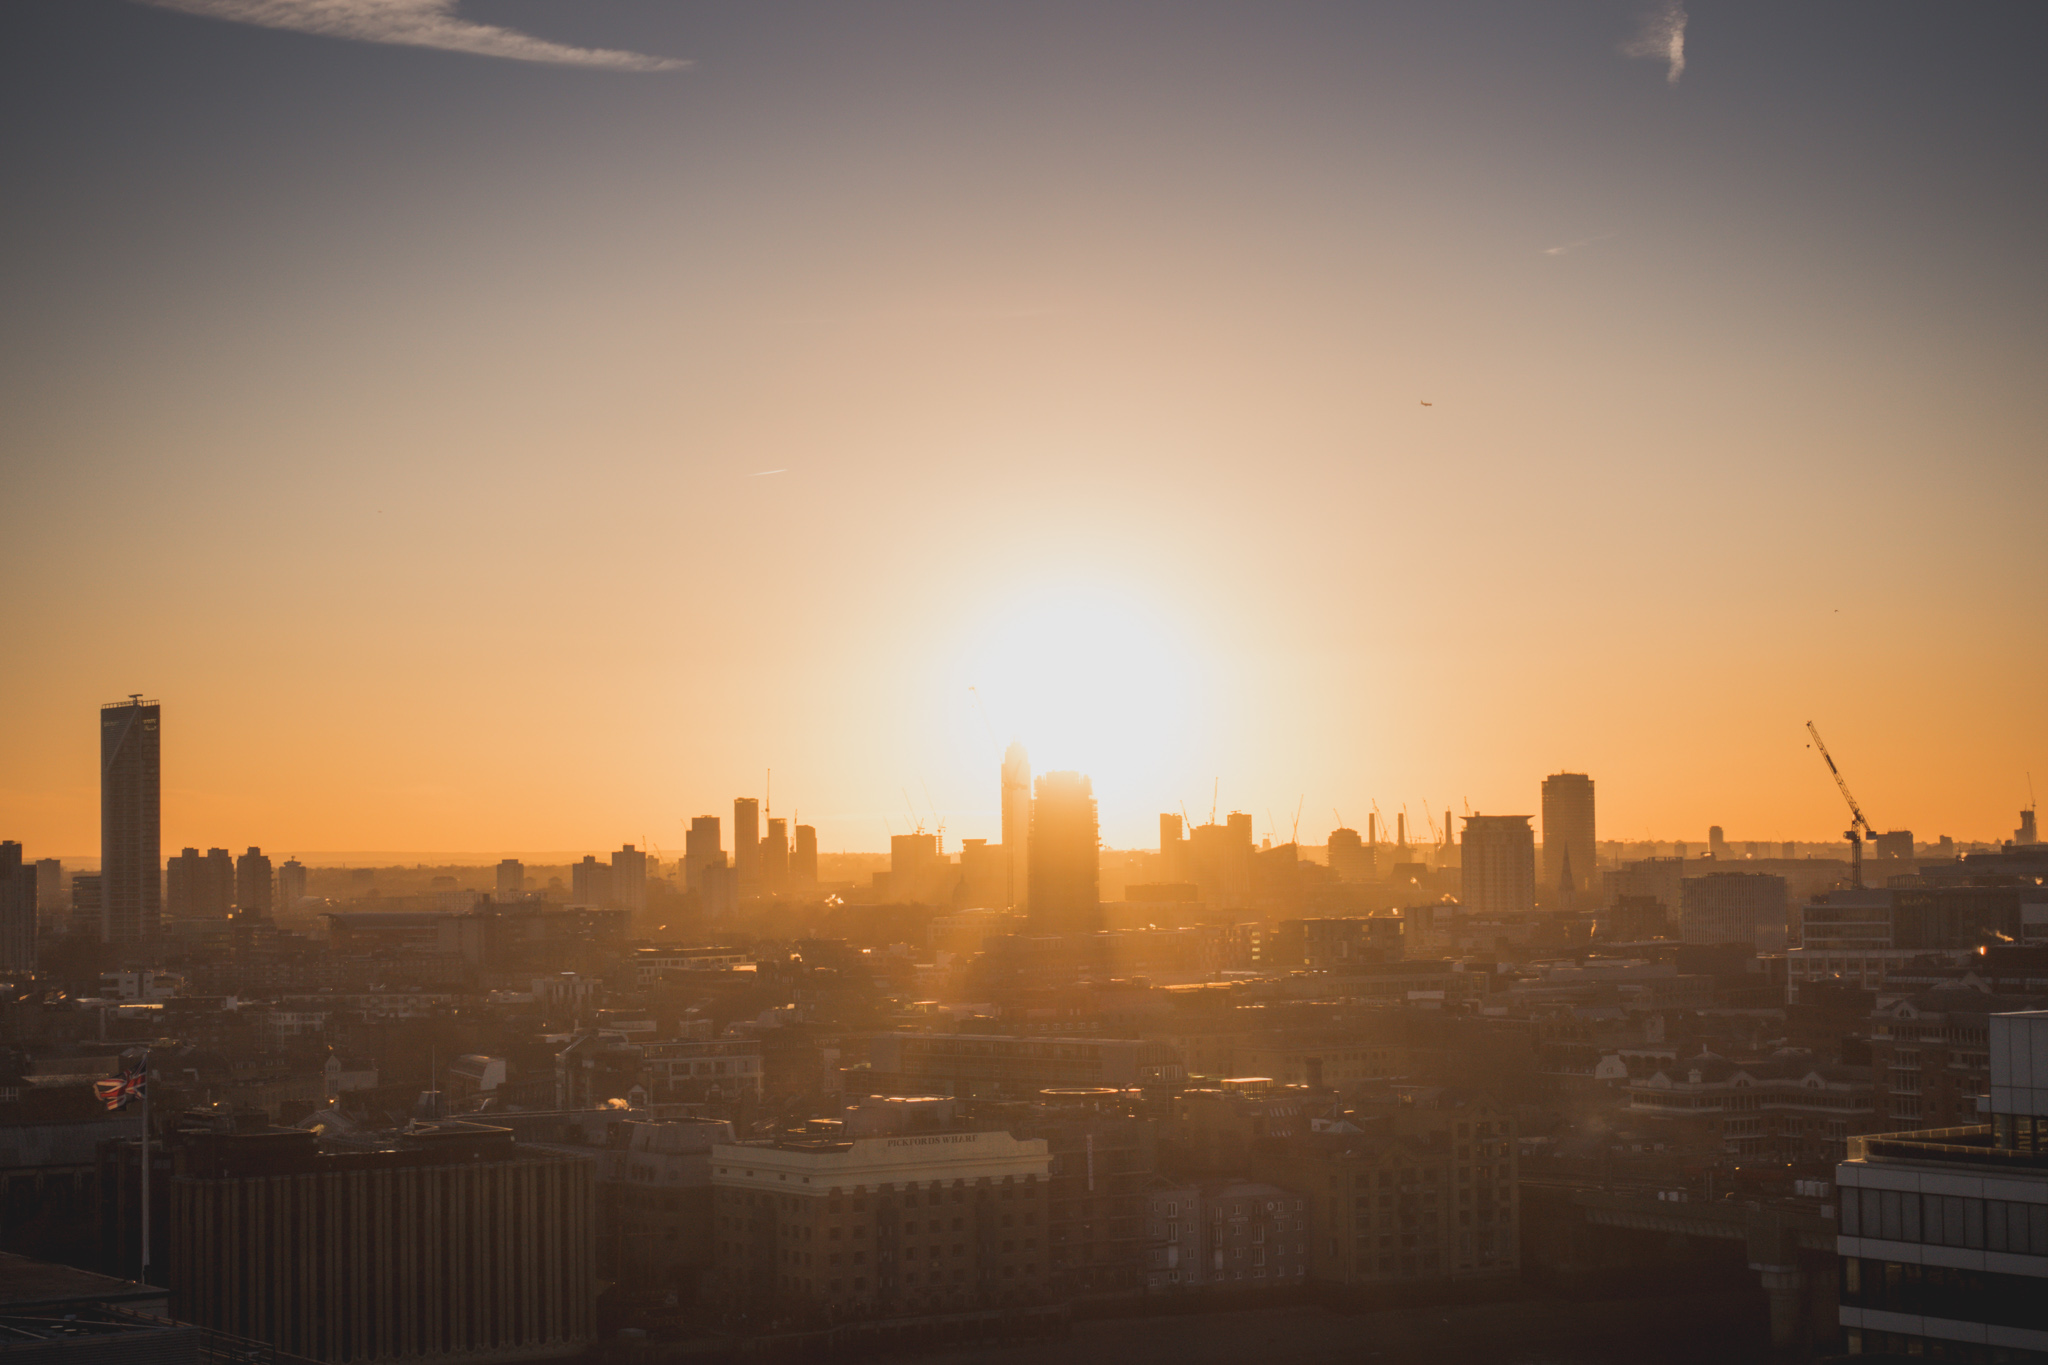
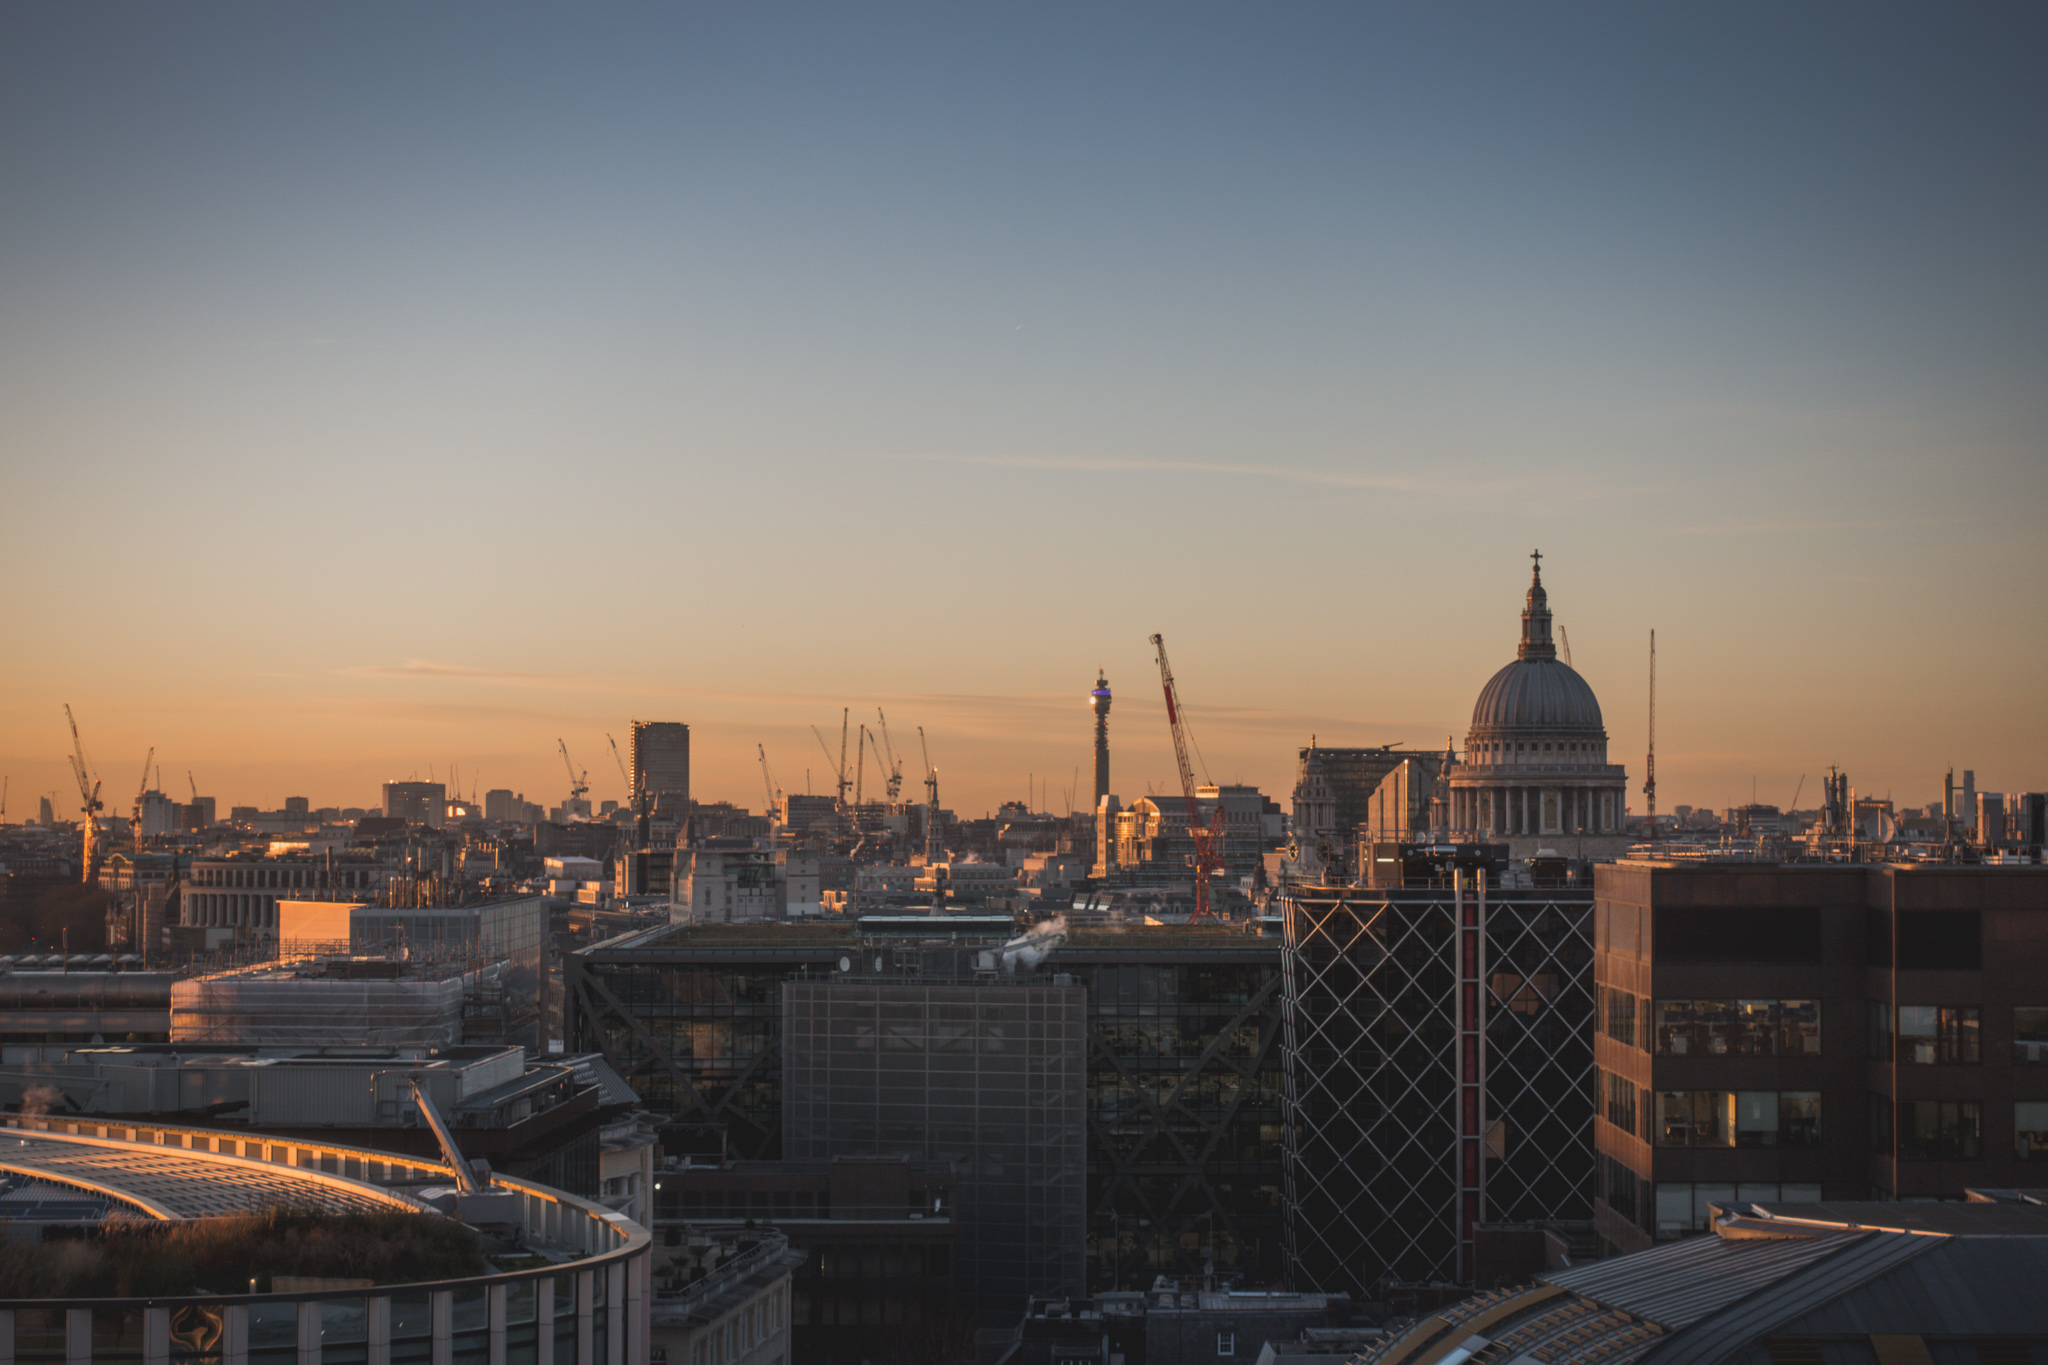
London - Photography in the Capital

You know the week between Christmas and New Year, the one where every day feels like a Sunday and they all may as well be because you have no idea what day it actually is! Well, every year I use that time to catch up on work, personal projects & the dreaded Tax Return! However, this year, I promised myself a day to myself, where I would go and take pictures just for the sheer enjoyment of it.


I wanted to get out of Birmingham. 2017 had been great for me but I started to feel like I had walked every square inch of my favourite city and wanted to get out to somewhere not so familiar. So I picked a day, booked a 5.15am train (yes, that's AM!) and with absolutely no plan, other than to take pictures/shoot video, I set off to the capital.
I know London well enough so had already decided to stay pretty central, maybe head over to Canary Wharf but basically, 'be a bit of a tourist'. When I got there, I was blessed with a great sunrise and pretty much didn't see a cloud in the sky all day, so I was already onto a winner. I strolled around for a few hours, hopping on & off the underground and surfacing in different spots, taking pictures and then heading back below ground.


As for London, I have always loved the place and very similar to Birmingham, I can't believe the rate of change down there. It was almost eerie how quiet it was in the morning, but it didn't take long to wake up! It was also nice just to be a bit of a tourist, and not be affraid to shoot the landmarks. However, I would strongly advise any visitors to go to the top of Monument, if you can handle the huge spiral staircase, the views are incredibly rewarding!
It was really enjoyable to shoot new scenes, explore new streets (that aren't New Street! Brummie jokes!) and shoot without any emphasis on what 'style' or 'content' I thought people would want to see. I was just doing it for the love of taking pictures. Oh, and also shooting video whilst I had the chance because, you know, that's something I do now as well.


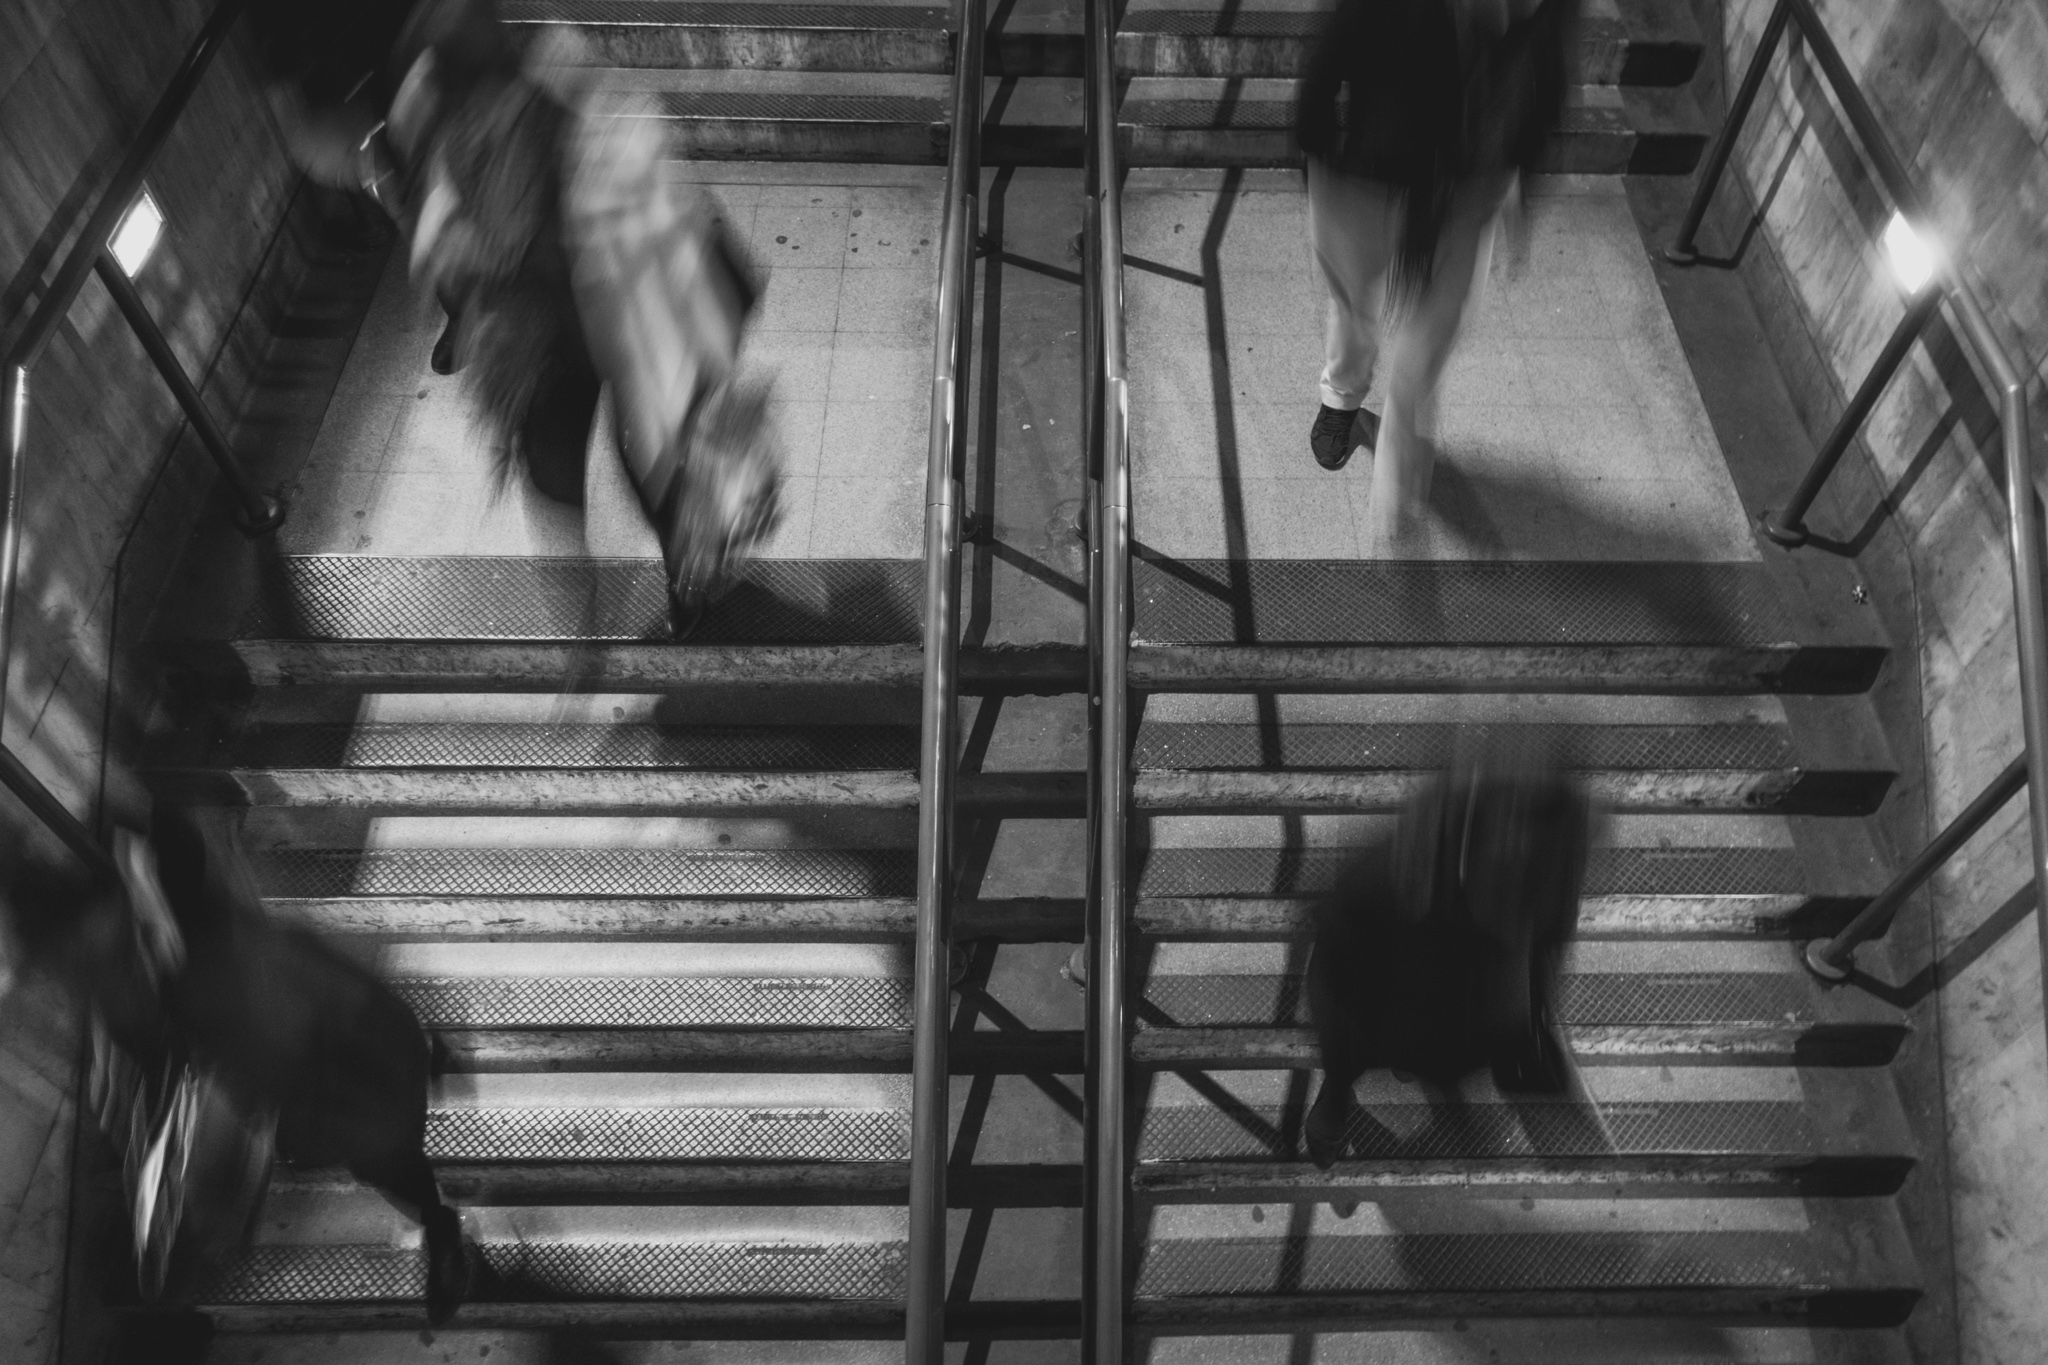
Whilst we're on the subject and for all you photographers out there, pretty much everything you see, photos and video, were all shot on the incredible little Sony RX100V, I rarely took the 'big camera' out of my bag and in many ways, wish I had only taken the little Sony. I absolutely love the images and footage I got, the slow-mo from the Sony is awesome and I love some of the images. In fact, the image shot through a window in Soho of the guy drinking is possibly one of my favourite images I have ever shot!

All-in-all, it was a hugely enjoyable day and I loved looking back through the video and putting together the short film. I think I will be doing more of this kind of thing in 2018 and strongly suggest to everyone that you take the occasional day out for yourself, to do something that you enjoy, you've earnt it!
Interested in Buying any of these images as prints? CLICK HERE or Contact Me.
WATCH THE VIDEO BELOW: